How to make a car radio from a tablet
Publication date: September 24, 2020.
Category: Automotive equipment. Owners of almost any car are always dissatisfied with the functionality of the built-in radio. This is not surprising, because most often it’s for show. In fact, standard devices can only please you with their ability to play MP3 files and the ability to listen to the radio. At the same time, the music is either quieter or worse, and sometimes the radio turns off completely.
To create a full-fledged multimedia center, listen to your favorite tracks, watch movies, use a rear view camera and navigator, you can install many modern devices. However, it is much cheaper to use a regular 3-4 generation tablet. You can install it yourself or have your car service staff do it.
Marussia B1
The Marussia supercar became the first Russian car with a fully virtual instrument panel.
A feature of the B1 and B2 models was the arrangement of three identical displays on the front panel. The one on the far left served as a dashboard. The other two could display navigation maps, a multimedia system menu, and a picture from the rear view camera. The updated Mazda CX-5 is one of the brightest new products of this season: it has grown from the class of compact SUVs and is clearly aiming to compete with Lexus crossovers.
For a test drive at the Mazda Independence showroom on Selskaya Bogorodskaya, we were provided with an all-wheel drive car with a 2.5 engine (194 hp) with Supreme equipment in bright red color. The price for such a car is just over 2 million rubles. The equipment itself involves rich equipment: in addition to the traditional options for classmates, there is dual-zone climate control, heated rear window and rear seats, cruise control, a large color screen above the instrument panel, a rear view camera, a start button, a heated steering wheel and mirrors — by and large, everything is the same as its more expensive competitors.
What surprised you most during the test drive? Firstly, complete silence in the cabin is at the level of premium class cars, and secondly, the style of handling road irregularities, which you would expect more from a business class sedan. That is, Mazda completely breaks the stereotype about its rigid suspension. The comfortable suspension is combined with a serious ground clearance of 200 mm. The optimal combination for Ufa roads.
Mazda's interior is solid and comfortable (Photo: Valery Shakhov)
The dynamics of the car are impressive, especially in “sport” mode. The car accelerates to 100 km/h in 9 seconds, the maximum declared speed is 195 km/h. It should be taken into account that the car is quite heavy, weighing more than 1.6 tons - this is due to the use of high-quality soundproofing materials. The six-speed gearbox in normal mode behaves traditionally for an automatic transmission - small “dips” of power in low gears are felt, although this is not the case in “sport” mode. Perhaps the fact is that the car adapts to a specific driving style, as they explained to us at the salon, and during the test drive it did not have time to do this. In general, the sports mode transforms the car - it is unlikely to be in demand in the city, but to get the pleasure of driving a “car” on the track is worth choosing a Mazda.
Car economics
The price for the updated Mazda CX-5 starts from 1,431 thousand rubles. For this price, a car with a 2.0 engine and a 6-speed manual transmission is available. Cars with all-wheel drive and automatic transmission start at 1,721 thousand rubles. The maximum configuration costs 2159.6 thousand rubles.
The model we tested consumes 7.2 liters of 95 gasoline per 100 km on the highway and 9.2 liters/100 km in the city (it felt like a test drive, but in practice the consumption is higher, but for now we’ll chalk this up to low mileage). Transport tax is 9,750 rubles per year.
The cost of the first 3 scheduled maintenance will be about 31,000 rubles.
If we're talking about our roads. We tested the Mazda in deep puddles and sticky mud. At some point, the car began to slip in a puddle with a loose bottom, and this is where all-wheel drive and 195 horsepower came in handy. The new Mazda CX-5 is capable of off-roading, but still this car is designed for city roads and city residents.
Getting “stuck” in the mud in a Mazda is difficult, but realistic (Photo: Valery Shakhov)
The new CX-5 is a story not only about handling, but also about the latest fashionable and useful features in the cabin. It now has an additional head-up screen - it projects the image directly onto the windshield. That is, the driver does not need to be constantly distracted by the dashboard - he can monitor the road situation and simultaneously control the on-board computer, which reduces the risk of getting into an accident. The windshield displays not only speed information, but also road signs along the way.
When parking in reverse, the trajectory, which is automatically displayed on the large screen above the instrument panel, is very helpful (Photo: Valery Shakhov)
The side mirrors are also pleasing - in addition to the fact that they have no “dead spots”, there is a sensor on the mirror that warns of a car approaching from the side and starts flashing as soon as you turn on the turn signal. An extremely useful safety feature in the city is the SCDS safe braking system - when braking hard, the hazard lights and lane departure warning systems turn on.
Another point is that lovers of good sound in the cabin can choose a Bose audio system with 10 speakers.
The editor’s personal impressions are that the car is optimal for a city, especially for one like Ufa, where there are snow piles and uneven roads. It has high ground clearance, a powerful engine, a very comfortable suspension, and convenient dimensions. At the same time, it is easy to control, literally crammed with driver assistance systems and gives the comfort of a premium-segment car. Mazda CX-5 is not the cheapest option in its class, but considering that its functionality is close to its higher-end relatives, the manufacturer’s pricing policy becomes understandable.
In the second generation of the Mazda CX 5 crossover, the interior has undergone significant changes. Mazda professionals paid great attention to its architecture, as well as the location of each element. This made it possible to create an interior that was even more comfortable and accessible.
The easiest way to use your tablet
To avoid the hassle of connecting a gadget instead of the factory radio, many simply install the device on top of it. On the market you can find a huge number of suction cup holders, which make it easy to make such “tuning”. All that remains is to connect the tablet to the cigarette lighter and enjoy the modern device.
However, the holders are unreliable, as the tablet can easily fall off and break if the car hits a bump. That's why many people decide to install it instead of a radio.
What problems may arise
Most machines are equipped with a digital CAN bus. Therefore, simply installing a tablet does not always work. You'll have to find a way to “make friends” with the gadget and the standard amplifier. The easiest option is to purchase a small AZ-FM adapter. It helps to “deceive” the standard system, which begins to see the tablet as a standard radio. But in this case the volume will not be enough. Then you will still have to install an additional “amplifier”. The easiest way is to use any old radio for this. It connects to AUX, then goes to AZ-FM and then to the stock amplifier. But this is too long a chain. In addition, the adapter is not so cheap, about 900-1000 rubles.
Then you can buy an additional amplifier at a radio store. It will certainly work, but the background will appear while listening to music.
Therefore, the easiest way is to disassemble the AZ-FM and resolder the resistance on it. But the background may remain. You can try to unsolder the wires from the tablet and take the mass to different places. But still, additional noise may remain, even if you connect directly to the battery. Then we buy a filter (for the car radio) and the noise disappears.
However, a tablet running on its own OS will not independently integrate with the car system. Therefore, you need to think about how to configure it.
Programming the tablet
First of all, you need to make sure that the planet turns on after ignition. To do this, you can use the useful microDroid utility. However, in some cars, the “music” should start a few seconds after the engine is turned on. Therefore, you can use the more sophisticated Tasker program (although the utility is paid, it will cost 100 rubles). It allows you to fine-tune the activation of the gadget.
You also need to think about organizing the media player. You can find a huge number of skins and choose the most convenient one for yourself. But, as a rule, car owners prefer Astro and Google Music utilities. The second option is more convenient, but many note that after the next update, the program was given a too light interface, which is why the playlist and navigation are much less visible on a sunny day.
Some people use everyone’s favorite WinAmp to create playlists and then upload the tracks to the tablet. However, in this case, problems may arise with determining the time of music playback and Russian-language song titles. By the way, the same problem often occurs with Google Music. In this case, you can use Multi File Translator or TagScanner or similar programs. They will automatically rename the tracks using the Latin alphabet.
Besides listening to music, other problems may arise. For example, you need to decide how:
- make it so that switching between the screen with the playlist and navigation is carried out in one touch;
- stretch the image to fill the entire screen without losing control buttons;
- control the music itself (pause, select the next track, etc.) without leaving the navigation mode.
In this case, two solutions will be optimal:
- Button Savior. This is a simulator of Android OS hardware buttons. The program has a clear interface, so you can easily customize it for yourself.
- Full!screen. This program will allow you to display the picture in full screen mode, without moving the system buttons. The space is filled in the most convenient way. In this case, you can program the buttons depending on the length of time you press them. At the same time, the program allows you to display not only the main keys (Menu, Back and Home), but also music playback controls.
Additionally, you can install utilities to monitor vehicle systems (for example, you can display diagnostics from ELM 327).
Aleksandr-99999 › Blog › Creating a universal dashboard from a tablet
The VENATOR universal instrument panel is a software and hardware system that allows you to duplicate the readings of a standard car dashboard and display them in graphical form on a CAR PC display running Windows (on a separate one, or as part of the frontend on the main one) or on various ANDROID devices . The data collection unit does not use CAN, K-line, OBD and similar protocols, which is fundamentally different from similar solutions. All standard sensors are connected directly to the unit. The block polls sensors with a period of 50 ms and transmits the data digitally to the visualization program. Independent polling of sensors allows you to significantly increase the polling frequency, as well as use the system on cars that do not have an ECU (carburetor, diesel, electric). The system consists of a Venator PSU data acquisition and processing unit, the Venator program and a display device (Windows computer or Android device)
Venator uses the Adobe AIR platform. This ensures high quality graphics and compatibility with Windows and Android platforms. There are also several design styles for active user interface elements and the ability to use custom backgrounds (skins). The processed data is transferred via COM over USB, Ethernet, Wi-Fi interfaces, and simultaneously, which makes it possible to run the program on several devices and receive data from one processing unit on them
Today the following functionality is available: 1. Speed indication 2. Indication of engine speed 3. Signals of the green and red zone of engine speed so-called. SHIFT (user set) 4. Total odometer (initial mileage set by user) 5. Daily resettable odometer (reset by button) 6. Service countdown meter (service mileage interval set by user) 7. Mains voltage indication (user calibrated) 8. Temperature display ICE (calibrated by the user) 9. Indication of remaining fuel (calibrated by the user) 10. Warning lamps 11. Clock 12. 5 skins 13. Day and night mode of each skin (switching when turning on the dimensions or by the light sensor) 14. 4 styles of arrows (selectable user)
Why even install an Android tablet instead of a car radio?
It's simple: the tablet has a greater range of functions compared to the built-in radio. And in general, standard radios, even in fairly expensive cars, are banal radios and MP3 file players that are installed just for show. The tablet allows you to turn your car into a mobile and full-fledged media center. In addition, even large modern 2 din radios have poor functionality and less convenience compared to a simple tablet. The latter can generally replace a TV, player, GPS navigator and even provide Internet access. True, for this you need to choose a model that supports third and fourth generation networks, but there are many of these on the market today.
The only possible drawback to installing a tablet radio is the procedure itself. If the owner irresponsibly installs a tablet in the car instead of a radio, then there is a chance that the tablet will simply burn or break. By the way, most often drivers break tablets, which simply fall out of their niche while driving through potholes or during rapid acceleration.
Customer reviews about Impression ImPad 6443
This car tablet mostly receives good reviews. Drivers choose the presented model for its high-quality display. The design of the tablet is simply wonderful. If you believe customer reviews, problems with the processor do not occur very often. In this case, it is used by the Qualcom series, and the maximum frequency is 230 Hz.
The model's matrix supports 2G. The operating system is Android type 3.0. The amount of RAM on the tablet of this series is 1.3 Hz. A slot for connecting a memory card is provided. Phone calls cannot be made from this model. 4G technology is not supported by this car tablet. The model is most often installed on the dashboard.
Two adapters are used to connect the device. The adapter is only suitable with a line connector. The audio output is standardly used with a PA series plug. The presented car tablet weighs only 645 g. The standard model kit includes a charger, as well as detailed instructions. This modification can be purchased in the store at a price of 33 thousand rubles.
Installation options
Frankly speaking, there are few options for installing a tablet in a car yourself instead of a radio. The device can either be installed in a special holder without touching the car radio, or you can remove the radio and insert a tablet in its place. The last option is complicated, but has its advantages.
If you use holders, then everything is simple. There are many different tripods on the market that are designed for different tablet models. All of them have special suction cups, with the help of which the tripod is attached to any point on the dashboard. The owner can only buy a suitable tripod and install his tablet in it. But it is worth considering that this method of fastening cannot be called reliable. Yes, this is the easiest option to connect the tablet to the radio in the car with your own hands, and many drivers resort to it. After all, the tablet can be easily installed on a tripod, and the charger can be connected to the cigarette lighter.
However, we will not consider this method. Let's focus on the optimal option: installing the tablet in the car instead of the radio, and not in parallel with it.
Tablet Dashboard app
We thank the Drive2 portal user Frud for the published version of the application and description of the application installation method:
After installation, the application will already work. In order to enable its autoloading, you must do the following:
After installation, you need to go to the Android settings, in the “Home Screen” section, select the VenatorLite2 dashboard application. A very important point! You cannot go to Android settings from the dashboard application to return to the standard Launcher. Before installing the application instead of Launcher, you need to make sure that the settings can be accessed from the status bar. Otherwise, returning the standard launcher will be problematic.
NOTE!
Before installing autoload, it is advisable to configure and debug the application.
After launching the application, you need to go to the settings (click on the gear icon at the top right). Here you need to specify the IP address and port (In our example, these values are: address 192.168.4.1 and port 3333).
All that remains is to connect and test. If everything was done correctly, then when you turn on the device and apply “plus” to the 4th pin of the Arduino, the dashboard will turn on.
And here is what the dashboard installed in the OCU looks like: We wish you success in the implementation of this project
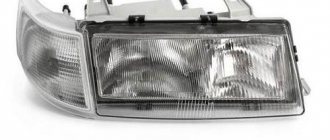
If in the morning, getting into your VW or AUDI car, you notice that the red LCD display of the on-board computer located at the bottom center on the dashboard displays information distorted by horizontal or vertical stripes, some of the pixels on the LCD display are blurry or simply do not work, the display only shows information to “cold” and when warming up it goes out and turns black - this means the display does not work, the dashboard needs to be repaired and the LCD display needs to be replaced.
The problem of a non-working or fading information display on German cars of the AUDI, VW, SKODA, SEAT, OPEL brands has been known for a long time. Sometimes the LCD screen of the on-board computer goes completely dark after an hour of running the car, and sometimes only a few lines of pixels fall out. If previously there was only one solution to such a problem - replacing the dashboard with a new one or a used one from a dismantling shop, now it is possible to repair and replace the LCD computer display located on the dashboard. If you decide to replace the dashboard with a used one from another car, you will have to rewrite all the keys, replace the transponders in the keys, adjust the mileage in the odometer and link the dashboard to the engine block. The cost of this work will be much more expensive than resoldering an LCD display.
If you want to change the panel to a used one. You will need to rewrite the keys, replace the transponders in them and adjust the mileage in the panel, and also connect the panel to the engine block. We do this work, but their cost is much more expensive than replacing the display.
The VW AUDI instrument display is half-shaped. The instrument panel, speedometer, odometers of new modern imported cars are literally crammed with various electronics, and if they fail, official dealers recommend replacing the instrument panel with a new one. Usually, a faulty dashboard can be found and fixed, saving significant money. There are various malfunctions of the instrument panel, speedometers, and odometers: due to time and shaking, cracks in the board traces, broken solder contacts, and burnt out board traces may appear. There are diseases to which the dashboards of cars of specific brands are susceptible: the backlight of the instrument cluster on the VAZ 2110 disappears, the speedometer or tachometer needle stops working, the information liquid crystal display on the instrument panel goes out after some time of operation. Non-functioning longitudinal and transverse lines of pixels on the information LCD display of the dashboard is a common problem in German cars of such brands as AUDI, VW, SKODA, SEAT, OPEL. On AUDI models A3, A6 and TT equipped with dashboards from the Italian concern Magnetti Marelli, which produces electronic devices for cars and motorcycles, problems regularly arise with the LCD display of the on-board computer not working. Blinking lights, fading instrument indicators, fading clock and odometer readings, twitching speedometer and tachometer needles are common malfunctions of Italian instrument panels. On the dashboard displays of the Italian company Jaeger Magnetti Marelli, a beveled cable is used.
For dashboards manufactured by VDO, it is possible to replace the LCD display of the on-board computer. During repairs, a new one is soldered in place of the old display. Displays with a direct loop are suitable for various models of cars of the German VAG group with a VDO dashboard. You can distinguish the panel by the back cover of the dashboard in black with the inscription VDO.
VDO displays with direct loop are used on the following vehicles: 1996-2003 Audi A3 (8L series) 1996-2005 Audi S3 (8L series) 1995-2001 Audi A4 (B5 series) 1995-2002 Audi S4 (B5 series) 1995-2001 Audi RS4 (B5 series) 1997-2004 Audi A6 (C5 and 4B series) 1997-2005 Audi S6 (C5 and 4B series) 1997-2005 Audi RS6 (C5 and 4B series) 1999-2005 Audi Allroad (C5 series) 1995-2005 Audi TT (S-Line and 1.8 T) They are also found on other cars: Volkswagen Passat B5 and B5 facelift (3B & 3BG) VDO, Volkswagen JETTA/BORA, Volkswagen T4 and T5, Volkswagen Golf 4, Volkswagen Polo, Volkswagen Sharan, Skoda Fabia, Octavia, Superb. Attention! LCD VDO display is not suitable for AUDI TT!
There are times when it is necessary to correct the odometer readings, wind up or increase the mileage on domestic and imported cars. We adjust the instrument panel readings using the OBD connector, removing the instrument panel, and disassembling the instrument panel if necessary. We repair dashboards, check odometer readings, and change mileage on most foreign and domestic cars. To activate some hidden functions, we update the dashboard software. So on Lada Granta and Lada Kalina 2 cars, after flashing the dashboard, additional readings of the engine coolant temperature, temperature outside the car, etc. appear on the on-board computer screen.
Call us and find out the cost of repairs, instrument panel flashing or mileage correction for your car. Our tel. in Kirov +7-922-900-70-60
,
The lenses of spy photographers included an updated Mercedes-Benz C-Class with a screen instead of the usual dial instrument panel. As a rule, new technologies are first tested on flagship models, and then they are offered for more affordable cars. Thus, LCD instrument panels until recently were installed exclusively on very expensive cars. And there is no doubt that this trend in the automotive industry will develop in the future.
Installation process
There are 2 ways to carry out the installation: without a third-party amplifier (in this case, the amplifier will be the radio) or with an amplifier. The second method is quite complicated, so we will focus on the first. What is needed for this?
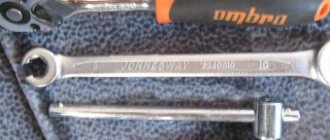
To install a tablet in a car instead of a radio, you will need:
- Regular soldering iron.
- Crosshead screwdriver.
- A small sheet of plastic measuring 30 x 30 cm.
- Electric drill.
- The tablet itself.
- 12 volt cigarette lighter plug.
- External car audio amplifier.
- Thick-walled wire with fuse.
- Audio wires for speakers.
- Mini RCA cable for tablet.
- Insulating tape.
- Epoxy resin.
- Rubber couplings for wires.
- Adapter for connecting speakers.
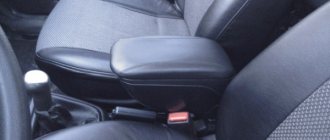
Installing a tablet in a VAZ 2114
The idea was born to install a tablet as a head unit.
A suitable copy was purchased, which underwent minor modifications (installation of a matrix with an iPad mini for a better picture, removal of control buttons, charging, otg-hop for connecting USB devices for connecting a flash drive and, in the future, screwing in a USB audio speaker). Jigsaw, soldering iron, putty, a lot of patience and away we go. I didn’t film the beginning of the process. Finishing layer of putty, primer.
Painting: “space” color
for varnish and polishing.
There is still work to be done on illuminating the stove control, as well as installing a start-stop button with a foreign car operating algorithm to turn on the tablet and amplifier with ACC mode. The next stage is finalizing the pillars, corners and door panels in the following posts.
Connection
Let's start with the fact that 2 devices are connected to the car: a tablet and an amplifier. The connection is made to the battery using a thick-walled cable. There must be a fuse on this cable, and it (the fuse) must be located next to the battery.
To connect a tablet in a car instead of a radio, you need to make a hole in the engine compartment through which a thick-walled cable will enter the cabin. A rubber sleeve is inserted into this hole to prevent the cable from fraying. When driving, the cable without a coupling will rub against the metal and this can damage it, leading to a short circuit.
Through this hole, the cable connected to the battery through a fuse enters the car interior, where it is connected to the amplifier. Typically, drivers install the amplifier under the seat, and the cable itself is laid under the floor mats.
There should be 2 cables from the amplifier to the adapter. It also comes with a pair of RCA cables that connect to the tablet.
The radio must be removed from its place. The extraction process depends on the car model, but usually there is nothing complicated about it.
Result
Mazda's new philosophy compares driving a car to riding a horse. When a certain harmony is achieved, and the car reacts to the driver’s command instantly, like a horse to the movements of the rider. Mazda CX 5 provides a convenient control interface where you can configure and adjust security, communication and navigation systems without being distracted from the road, even on rough terrain. This is a critical control component in today's high-tech automotive world that most of its classmates lack.
At a Mazda dealership, you will be offered innovative options and trim options for the car's interior.
Working with a footprint
Now you need to measure the hole where the radio was previously located. Based on the size, you need to cut a sheet of plastic. Its width and length should be approximately 1 cm greater than the measured dimensions. This sheet of plastic is secured with epoxy resin in place where the radio previously was. You need to secure it at 6 points.
A hole for cables is drilled in the middle of this plate. Then it is advisable to paint the surface of the plastic plate with a suitable color. You need to glue holders to the corners. They are glued with epoxy resin.
After this, the cables are connected to the tablet.
Sketch (firmware) for the Arduino Mega controller
You can download the finished sketch in a file using this link.
unsigned long micros_sp = 0, micros_th = 0; volatile int tz; volatile int sz; volatile int sp; //speedometer impulses volatile int th; //tachometer pulses int analogInput [15]; //array of analog values int digitalInput[29]; //array of digital values String resultString = ""; //string int i; //cycle counter //************************************************ ************************ void setup() for(i=0; i analogInput =0; > Serial.begin(115200); Serial2.begin (115200); //initialize the com port attachInterrupt(0, speedometr, RISING); //interrupt the speedometer on pulse edges attachInterrupt(1, tahometr, RISING); //interrupt the tachometer on pulse edges > //****** **************************************** ************ void loop()
Important Features
When installing a tablet with your own hands in a car instead of a radio, you need to consider some important points. First of all, pay attention to the weight and size of the tablet. A large and heavy device will not work, because it is more difficult to install, and when driving on a bad road, it may come off and fall out. Choose a compact and lightweight tablet.
Next are the buttons. It is desirable that the tablet has only one physical button. This will make using the device in the car easier.
Screen, standards support and other criteria for choosing a tablet
The tablet screen should be capacitive, not resistive. Resistive ones are more convenient when working with a stylus. Using a stylus in a car is inconvenient, so you have to press the buttons with your fingers. Also, capacitive screens have higher sensitivity. Needless to say, the tablet should support 3G, 4G and GPS. It is advisable to read reviews of tablets that work best with GPS, because technology support is not everything. Many unsuccessful models often lose contact with the satellite, causing the route to go astray. As for color, it is inappropriate to install a white tablet in a black interior. Although this is a matter of taste.
Before replacing the radio with a tablet, you need to install the Car Home Ultra program on it. This program will monitor various engine parameters, read errors from it and sound signals when unstable engine operation is observed.
Speaker wires must have a shield. Of course, they cost several times more than usual, but with them the driver is guaranteed to hear clear music without interference.
Tablet in the car for navigation and multimedia: about models, mounts and how to connect
By installing the tablet in your car, you can listen to music, answer calls and use GPS navigation. Read which one to choose and how to install it correctly.
Today, for many drivers, a car is no longer just a means of quickly moving from one point to another. Modern technologies make it possible to make the car more comfortable for long trips. If previously an indicator of a car’s sophistication was a CD radio and a navigator, now they are ready to be replaced by a tablet that combines the capabilities of a host of devices at once. Purchasing a tablet for a car for navigation and multimedia looks not only more profitable, but also practical than buying gadgets separately. However, reasonable questions arise: what tasks can a tablet perform, and most importantly, how to install it in a car?
Installing a tablet in Priora 2
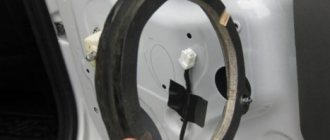
To complete the work, you will need a flat-head screwdriver, a durable utility knife, and a small amount of soundproofing or sealing material. The first step is to remove the on-board computer from the car's dashboard. To do this, you need to remove the panel visor, which is attached to it using clips (pry up the edge of the visor with a flat screwdriver and pull it towards you). Remove the BC from the case, disconnect the contact wires that are connected to it.
Prepare a tablet of the required size. We unscrew the mounting plate, turn it over and secure it so that the tablet can be installed on it (we first glue the places of contact between the device and the metal with some anti-vibration material). We place the device at the place of future installation, analyze the dimensions, as well as how much plastic of the top and side panels needs to be trimmed. Using a utility knife, cut the required amount of plastic. We connect the USB charging cable to the electronic device and connect it to the radio. We connect the audio output of the device to the AUX connector on the radio. We install the visor back. To do this, we lean it against the fastening points and tap its body in several places so that the latches are fixed and firmly hold the part in the grooves of the panel.
Here is a simple and very useful way to install a tablet in a Priora with your own hands.
How can a tablet be used in a car?
The most common reason for replacing standard multimedia in a vehicle with a tablet is a lack of driver functionality. We are already accustomed to having a smartphone in our pocket, which combines a dozen devices, from an FM receiver to a camera, so why not do something similar in a car?! Agree that often what is missing is just a radio that plays music from disappearing discs. It’s another thing to get a tablet computer with a large touch screen, through which you can enjoy music, watch a movie, and even play.