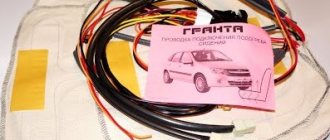
Connecting heated seats of Lada Priora
The “chip” with terminals must be connected to the block of heating buttons.
The black wire (“ground”) is attached to the car body. Alternatively, you can place it under the bolt in the area of the hand brake.
The white wire is responsible for the button illumination. connect it
to the cigarette lighter illumination.
The red wire is the supply wire (+12 V), stretches along the wiring harness under the driver’s seat and leads out to the mounting block.
After assembling the central tunnel, a block of buttons is installed in it instead of the factory plugs. Pass the wires between the tunnel and the floor, combine them with the wires of the chairs and fasten them with clamps. After this, you can install the chairs in their places. Installation
carried out in reverse order.
Installation of heating elements
Many people forget about the need to securely fix the elements responsible for heating the seats. As a result, over time they can shift, thereby disrupting the performance of the system.
To avoid such situations, experts advise sewing heating elements directly to the inside of the upholstery. Although today some car owners prefer another option, which uses double-sided tape. The elements are held on it quite reliably, and the tape is attached to the foam rubber itself.
Connection process
Regardless of the chosen fixation method, reverse assembly looks the same for all options. This is the most difficult stage, so strictly adhere to the specified sequence of operations.
- Pull the covering back onto the back, where the heating was already fixed.
- Using a mallet, the plugs are driven into place. We are talking about plugs for headrests.
- Next, the fabric is stretched. The front one is pushed through the hole, and the back one is straightened down.
- The fabric from the front is draped over the hooks and then stretched. Just watch the degree of tension so that the fabric does not tear.
- Now you can put the rear trim element on the hooks.
- The next step is to insert the wire into the front and tension the sheathing.
- If you plan to change the foam rubber, cut out the new elements in strict accordance with the dimensions of the old material.
- Pay attention to the areas where the spring contacts the body and seat ties. To avoid squeaks, use pieces from the washer tube, or simply wrap several layers of electrical tape.
- Heating for the lower part of a car seat is often mounted using double-sided tape or sewn to the trim on the inside. You can use plastic clamps or wire brackets, which will prevent the heating elements from moving from their installation locations. After this, the plastic fasteners are tightened.
- Connect the backrest and seat.
- A wire is pulled through the hole in the frame and the foam rubber, with which the heating will be connected to the on-board network.
- The wiring connection is carried out strictly according to the diagram. It is necessarily included with the set of heating elements, so you don’t have to look for anything additional.
- The standard location for installing heating on and off buttons is the area near the handbrake. Although you can place them as you wish.
- It’s not uncommon for car owners to take an alternative route, installing a standard heating system on top of the seats, after which they put car covers on top.
There is a modern and very simple solution - heated capes that can be put on in winter and removed during warm periods. Their disadvantage is that the wire runs freely, which can interfere with the driver. Plus the capes do not fit tightly to the chairs.
Option with capes
- How to connect heated rear window to VAZ 2106
Priora seat heating control unit
This product was chosen by 8 customers
It is installed in a standard place and serves to turn on/off the heated seats (driver’s and passenger’s). Has 3 seat heating modes.
Weight, kg: 0.1 Dimensions, cm: 7 x 7 x 4 Volume, m3: 0.00020
Installing heated rear seats
Good day, dear forum members and guests of the forum.
I just couldn’t get around to sharing with you the process of installing heated rear seats.
But without long introductions. The thing is convenient and useful.
I took a set for one seat without bells and whistles, a button only ON and OFF with an operation indicator and backlight (by the way, also orange), as well as an overheating relay and its own fuse. I installed the left rear one a long time ago, but I didn’t have time for the right half. Now I got to her. I decided to install the buttons on the center tunnel at the back, so that passengers could turn it on themselves, and I could reach out and check if it was turned off. Of course, you can install buttons on the doors, but that’s what you like.
So, we will need: a built-in seat heating kit (I took an Emelya), two-core wire (3 meters), round nose pliers, pliers, wire cutters, a soldering iron (or quick clips), a slotted and cross-head screwdriver, Torx wrenches, preferably a 20mm bit (but you can get by with a knife).
1. First, I ran the wires (I decided to connect them to the wires of the standard heating pad, since there is a powerful fuse there). First you need to remove the gearshift knob cover; on a manual transmission, simply pull it up, hooking it from below with your fingers:
Then we unscrew the 4 bolts at the back of the tunnel to remove the cover with the air deflectors (this is where the heating buttons will be installed):
The hole for the button can be made with a 20 mm crown, or if it is missing, carefully dig it out with a knife. You just can’t make a mistake with the size and position of the holes, otherwise the air duct will interfere with installation in the tunnel.
The top 2 are cross, the bottom are torx.
Bending the tunnel from below, we drag the wire to the back of the tunnel.
the output part of the wire for the button is now in place.
2. Now you need to run part of the wire to the heating elements. You need to extend the wire that comes with the kit. I took 3 meters with a reserve, so you need to look at the place.
I pulled the wire through the glove compartment (it needs to be removed, I didn’t take photos, I forgot. There are 8 bolts - a cross), then down along the rack, remove the sill trim and run the wire along the harness with the rest of the wires:
3. Bend the cover of the pillar between the doors from below and pull the wire through. You can use wire, it’s faster and more convenient.
We laid the wires, all that remains is to install and connect the heating itself.
4. Now it’s the seat’s turn. The seat can be easily removed; you need to lift it and remove the fastening from the loop by hand.
The backrest requires keys. But first we remove the rear backrest pad. It's on clips. We must start from the bottom and move up. When all the clips are unhooked, pull it down.
5. The backrest is supported by 3 bolts and one nut:
Unscrew the 2 bolts on the right:
And another bolt and nut on the left under the belt cover, which can simply be removed:
We remove the back and drag all this stuff home or into the garage.
Pliers and round nose pliers are useful for disconnecting the rings that secure the casing.
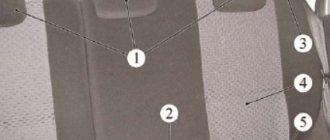
General view so you can see where the heating is:
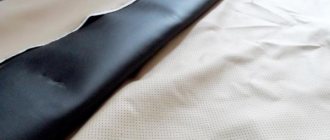
It is necessary to cut the heating element, carefully and as close as possible to the wire laid in it:
Something like that.
We bend the rings, they are strong and tight.
Remove the upholstery from the back of the seat.
There you need to bend 4 more rings:
Then we push the heating element into the resulting gap. Without gluing it with double-sided tape, it won’t go anywhere anyway.
Then we put everything back together. It is quite difficult to attach the rings back, but it is quite possible.
By analogy, we install heating in the back of the seat.
Assembling the seats. We connect the wires, power the system from the passenger heating button - plus the “orange” wire, minus the “black” one, which is a little thicker.
We check:
That's it, now I have heated rear seats as standard.
On the left it’s the same, only the seat back there is removed along with the seat belt and it’s not heavy enough, we connect it to the driver’s heating.
Product delivery options
Note! Below are the shipping methods available specifically for this product. Payment options may vary depending on the shipping method. Detailed information can be found on the “Delivery and Payment” page.
Parcel by Russian Post
Available payment methods:
- Cash on delivery (payment upon receipt)
- Using cards Sberbank, VTB, Post Bank, Tinkoff
- Yandex money
- QIWI
- ROBOKASSA
Shipping throughout Russia. Delivery time is from 5 to 12 days.
Parcel by Russian Post 1st class
Available payment methods:
- Cash on delivery (payment upon receipt)
- Using cards Sberbank, VTB, Post Bank, Tinkoff
- Yandex money
- QIWI
- ROBOKASSA
Shipping throughout Russia. Delivery time is from 2 to 5 days. More expensive than regular delivery by Russian Post, approximately 50%. Parcel weight up to 2.5 kg
Express Parcel EMS
Available payment methods:
- Cash on delivery (payment upon receipt)
- Using cards Sberbank, VTB, Post Bank, Tinkoff
- Yandex money
- QIWI
- ROBOKASSA
Shipping throughout Russia. Delivery time is from 3 to 7 days. More expensive than regular delivery by Russian Post, approximately 100%.
Transport companies
Available payment methods:
- Using cards Sberbank, VTB, Post Bank, Tinkoff
- Yandex money
- QIWI
- ROBOKASSA
Delivery is possible to any locality where there is a representative office of the transport company. Delivery time is from 2 to 10 days. Sending large parcels is approximately 50% more profitable than by Russian Post.
Convenient alternative: replacing the car seat
The most convenient - but also the most expensive - option for installing a seat heater in a car is to replace the entire seat with an analog one, but with a heating function.
Suitable car seats with heated seats can be purchased at a salvage yard. Depending on the time of year, a set of two seats will cost from 5 to 30, 60 thousand rubles or even more: baza.drom.ru
The following rule also applies here: if the seat is fitted with a side airbag, removal and installation must only be carried out by a specialist. The price is usually negotiable.
The option “Heated rear seats of a car” is no longer uncommon; it can be found in the list of equipment even for budget foreign cars. AvtoVAZ is constantly improving its LADA models, but the turn has not yet come to heating the rear sofa. Let's figure out how to equip your car with this useful function with your own hands.
Installation and connection of heated rear seats for all LADA cars (XRAY, Vesta, Largus, Granta, Kalina, Priora and Niva 4x4) is carried out in the same way. There are no fundamental differences. In this example, the modification process is shown on a Lada Priora car.
We make electric heating of seats on a VAZ 2170 on our own
VAZ 2170 The family of Russian cars Lada Priora
, produced by OJSC AvtoVAZ, despite its shortcomings, was able to win the trust of domestic motorists. Recently, the plant team has been making some progress in promoting advanced ideas into production. The latest models comply with European environmental and safety standards.
Luxury configurations of Lada Priora Coupe
include rain and light sensors, parking sensors, side airbags, heated mirrors.
Taking into account our climate, the manufacturer provided heated front seats in the Priora
and included it in the basic set of the luxury model. But what about those who don’t have such a useful option, but want to drive warm?
Connection
Rear seat heating connection diagram:
It is better to take contact “B” from a protected high-current circuit with a fuse. Contacts “A” and “C” can be found in the ERA-GLONASS lighting lamp, in the ISO radio or cigarette lighter connector. Before starting the connection, do not forget to disconnect the negative terminal of the battery.
Installation and connection of heated rear seats on a Lada Vesta on video in several episodes:
Let us remind you that we previously told you how to connect heated windows/mirrors to an additional alarm channel on Lada Vesta and XRAY, as well as how to turn on the heated windshield through a separate button.
Found an error? Select it and press Ctrl+Enter..
Greetings, dear Kulibins. I decided to share my invention. It may seem primitive to some, but everyone has their own worldview. So, we all know that cars of the domestic automobile industry do not pamper passengers in the rear seats with heated loin parts of the body, it was decided to eliminate this annoying oversight. This required: - Heated front seats kit from VAZ 2110 - Wires for switching - Self-adhesive pads for attaching wiring harnesses. — Cable ties — Lots of free time. First, we remove the seats and install heating on them. I won’t tell you how to remove the casing; there is a lot of material on the Internet. Once you've removed it, it would be useful to wash it.
Briefly about seat heating kits
The following heating elements are used in various sets:
- high resistivity wire;
- carbon fiber.
Seats for Lada Priora The latter material has become widespread nowadays due to its reliability and safety.
Products created on its basis are resistant to mechanical stress and can be easily adjusted to the required size using ordinary scissors. The use of electronic control units allows for smooth temperature adjustments. The kit usually consists of
:
- a set of heating plates;
- wiring harness with connectors;
- thermostats;
- fastening devices;
- templates
Heated seat covers
The so-called heated capes are a fairly simple and budget-friendly option for salvation in the cold season. The cape is attached to the seat using hooks or elastic bands, and power is supplied through the cigarette lighter socket.
The disadvantages of such heating are obvious. Firstly, when driving, the cape constantly fidgets and slides off the seat, and secondly, the wires around the cabin and the constantly busy cigarette lighter do not add convenience. And this product is no different in reliability. A season or two and the cover turns into a simple seat cover.
Method of installing standard heated seats on Priora
In addition to purchasing a standard set of heating plates, we will need additional materials
:
- fuse 15 A;
- relay 1119-3747210-10;
- ground terminals;
- corrugated tube with a diameter of 18 mm;
- Double-sided tape.
Now you can proceed directly to installation
:
- Move the seat forward and unscrew the 3 mounting bolts.
- Move the chair back and unscrew the 4 nuts from the clamps.
- Tilt the chair back and unscrew two more bolts in the middle and remove the seat.
- Remove the trim by bending the metal hooks on the back and the latches on the bottom.
- Bend back the casing and secure the heating elements.
- Lead the wire down under the seat, having previously put on the corrugated pipe, secure it with a clamp, and put on the trim.
- Disconnect the battery and make connections:
- black wire – attached under a bolt near the handbrake (“ground”);
- white – to the cigarette lighter illumination;
- red - stretch along the standard harness under the floor covering under the driver's seat and further along the left threshold to relay contact “87” in the electronic unit.
- Remove the tunnel lining and lay the main harness from the control unit to the armrest, having first put on the corrugated pipe.
- Install the purchased relay into the free slot K11 of the mounting block and make the connections:
- terminal “86” – connect to the body;
- terminal “85” - connect to the blue-black wire from the ignition switch;
- connect terminal “30” to the pink wire from pin “30” of K7.
- Install a fuse between relays K11 and K7.
- Check connections.
Heating elements for heating Priora seats
you need to glue it efficiently and carefully, because a common cause of breakdowns is the “moving out” of the heater.
Types of heating elements for car seats
There are a lot of options on the market for the Polo sedan: from the simplest with an easy connection diagram that can be installed in five minutes, to more complex systems that will take several hours to install.
The cheapest and most commonly used type of heating element in a heated seat system is an electrical filament, similar to those used in conventional incandescent lamps. Such devices are in great demand due to low prices, which in turn are caused by the low reliability of the thread - it tends to break at the most inopportune moment.
READ MORE: Replacing the standard speakers of a Volkswagen Polo sedan
It is much more practical to use a carbon fiber heating element. Due to the high strength of the material, the element is more resistant to damage and has a longer service life. Accordingly, devices based on carbon fiber are much more expensive than devices made from electronic thread.
Some electric heating systems distribute heat only to the seat itself, while others heat the surface of the entire chair, including the backrest. On some complexes you can adjust the heating intensity yourself, on others the temperature is maintained automatically.
In addition, heating elements can be placed either on the outer surface of the seat, or the device can be pushed inside under the cover.
The principle of operation of the device on the Polo sedan is no different from the standard method. On the central panel in the cabin there are two buttons with two pairs of small indicator lights - one for the driver's seat, the other for the passenger seat. When activated, current flows to the winding. The relay contacts generate power that circulates from the electrical heating to the winding. As soon as the ignition is turned off, the current ceases to be produced in the circuit - an open circuit occurs. For the function to work again, you must turn on the ignition and press the button.
The general scheme for connecting the option on top of the chair is much simpler than installing a heating element inside the body. You can use a cigarette lighter as a power source: the element is placed on the seat and connected to the connector.
But true connoisseurs of the aesthetics of a car’s interior space will likely be disappointed by this option: it is much more interesting to connect the device to the buttons on the panel. To do this, you need to use the fuse block: we stretch a couple of wires from it - plus and minus, strip them, attach them to the contacts of the device, connect them to the buttons and take advantage of the achievements of science and technology.
But the most “cultural” option is to install heating in the seat body. At the same time, it is much more complicated and requires more time than the first methods.
First, you need to decide what components are needed for the Polo sedan. Owners of basic configurations should first of all purchase an original seat heating unit. The code number is 6R0 959 772 A. A new VAG copy costs from 3,500 rubles, although you can buy a unit for 1,500 rubles. A button for the driver's seat with article number 6R0 963 563 A will cost 2,500 rubles, for the passenger seat - 6R0 963 564 B - 1,500 rubles. And this is the most unfortunate fact, since used parts are hard to find online. However, if you’re lucky, in private advertisements they will cost around 1000 rubles.
READ MORE: Engine tuning Volkswagen Polo sedan
In addition to standard electrical equipment, owners of basic modifications of the Polo sedan will have to acquire the heater itself, as well as various connectors and pins for wiring.
One of the most popular heater options on the market is the Emelya kit. The device is already designed for two seats. It has several operating modes: from intense to weak. Each of them has LED backlighting. There is an automatic shutdown function and short circuit protection. Heating goes not only to the seat, but also to the back. Heating elements can be easily mounted under the upholstery of the seats. The retail cost of the device is approximately 3,000 rubles.
Now a few words about wiring. To connect, you must purchase a connector housing with a contact lock. The original 6Q0 937 713 is inexpensive - about 40 rubles. Next, we collect pins - standard N90684505 (4 pieces are required) and small N10335807 (12 pieces). Both of them cost around 20 rubles/piece. You also need to collect cheap pins N90764701 for 12 rubles/piece. The original wire connectors 4D0 971 636 A and 4D0 971 636 B will cost a little more - almost 400 rubles each. each sample.
The pleasure is not cheap, but if you risk going to a dealership for installation, you will have to pay an astronomical amount of money, which will definitely cover the cost of doing it yourself a couple of times. Therefore, those who are confident in their abilities and have solid experience working with the electrical equipment of the Polo sedan can safely begin the procedure.
Main malfunctions of electric heaters VAZ 2170
If the chair is no longer warm, you should check the following components:
- seat heating fuse F15;
- ignition interlock fuse 20 A;
- relay;
- temperature switch;
- integrity of the heating wire.
The most common problem is that the thermal cable breaks down or burns out. Repairs may require removal of seats and upholstery. It is especially important to insulate the places of new connections well, otherwise new troubles cannot be avoided.