Why periodic headlight polishing is required
ATTENTION! A completely simple way to reduce fuel consumption has been found! Don't believe me? An auto mechanic with 15 years of experience also didn’t believe it until he tried it. And now he saves 35,000 rubles a year on gasoline!
Car headlights play an important role and at the same time are constantly exposed to mechanical stress from gravel, pebbles and other objects flying out from under the wheels of cars in front, as well as dirt, dust, the adhesion of midges and insects, and so on. All this over time leads to the fact that the light from glass or plastic headlights becomes not so bright and directional. In addition, the appearance of the car becomes less presentable and attractive. There is no way to avoid this and that is why regular and thorough cleaning and polishing of the headlights of any vehicles is required. This work can be done either independently or trusted to a master. Naturally, it is best to polish car headlights yourself - this will save not only money, but also your precious time.
Restoring headlight reflectors using vacuum coating
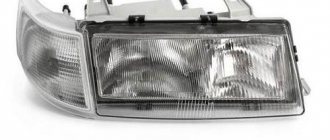
Headlight reflectors before and after pneumatic spraying
This method allows you to achieve, and it will not be inferior to the factory one. It consists of depositing metal particles in a vacuum chamber. A vacuum is needed to prevent the oxidation of microparticles of the metal evaporated by heating.
It is not always possible to create the necessary conditions for restoring a headlight reflector in a vacuum chamber.
The difficulty lies in creating a vacuum chamber equipped with an observation window to monitor the process. Craftsmen use glass containers for this purpose. In addition to the camera itself, you will also need a vacuum pump. No less difficult is how to ensure heating of the metal. The most acceptable, although unsafe, is to use a magnetron from a microwave oven (“microwave”) for this purpose. But those car enthusiasts who have managed to solve these problems are very pleased with the results - the coating of the headlight reflectors is almost as good as the original one from the very first attempts.
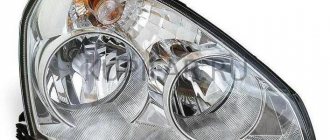
A headlight, like any part of a car, wears out over time, as evidenced by a less bright and blurry beam. A decrease in light quality can be caused by various reasons. One of them is the deterioration of the reflective properties of the reflector. We will talk about this and how to restore the headlight reflector yourself in this article.
What you need to know about car headlight cleaning technology
You can clean car headlights at home using goya paste or regular toothpaste, and some home craftsmen recommend using tooth powder for this. In addition, there are special polishing kits and polishes, which differ in their degree of abrasiveness.
It is quite possible to use all these products for all types of headlights (glass and plastic). The technology for polishing car headlights with your own hands using toothpaste is quite simple.
To do this you need to prepare:
- scotch;
- clean water;
- degreaser;
- a couple of towels;
- brush;
- pasta - it can be very diverse - the brand does not matter.
It’s good if you have a piece of felt or felt on hand. You can also use an electric drill and special attachments for it.
DIY headlight polishing process
The process of polishing headlights using toothpaste can be divided into several stages:
- Protect metal parts and rubber seals from exposure to abrasive agents;
- Preliminary cleaning of headlights from dust and dirt.
- Apply toothpaste to the surface and rub with a brush, felt or medium-hard towel. You need to do this with vigorous circular movements until the scratches are completely removed. If necessary, add toothpaste or goyim paste. By the way, it is more efficient to polish using an electric drill, which is equipped with special attachments. The speed should be maximum.
- Cleaning the polished surface of glass from dental residues.
The first stage of polishing glass headlights is to prepare the field of activity. To do this, you first need to carefully tape all metal surfaces and rubber seals with tape to prevent them from being damaged during polishing. Then clean the surface from dirt, grease, oils and other things. It is advisable to use a degreaser, soap solution or washing powder.
Technology for polishing headlights using toothpaste
After completing the preparatory work, you can proceed to the main process of polishing glass headlights. This is done in this way: the paste is applied either to the surface of the headlight itself or to a brush (felt or towel).
Polishing is carried out with very vigorous and fast circular movements. It is best to use special tools, such as an electric drill, hammer drill or grinder. To do this, they are equipped with special grinding wheels, onto which goi paste or regular toothpaste is applied; you can use a special polish based on diamond dust. When processing glass headlights, as well as plastic ones, it is important to prevent the surface from overheating.
Since this can lead to cracks or the plastic may “float” at high temperatures. To prevent this, you need to control the degree of heating of the glass surface; this is done by hand - the glass should not be very hot. Therefore, you need to take short breaks all the time.
If you have certain skills and use abrasive pastes with different abrasiveness ratings (from 400 to 1000), you can achieve a smooth change in the haze of the glass.
Features of polishing glass headlights
Polishing glass headlights is practically no different from plastic ones, except that all work must be carried out more carefully, especially since such work is much more expensive even at service stations. When working, it is recommended to use brushes of medium hardness. Glass headlights are polished until scratches disappear completely, and then polished with a clean (without toothpaste) towel or a special polishing wheel. The entire procedure can take from 30 minutes to several hours and depends on the following factors:
- scratch depth;
- the product used;
- polishing method (manual or automated);
- type of headlight (material from which it is made);
In some cases (if the scratch is quite deep), sandpaper is used to rough the surface, and only then proceed to polishing and grinding the glass. There are situations when, after the work has been carried out, the “cloudness” of the headlight does not disappear. In this case, it is necessary to completely disassemble the headlight and polish its internal surface, which is carried out in the same way as the external side.
Benefits of polishing car headlights yourself
In addition to the fact that polishing headlights with toothpaste, a do-it-yourself process that is quite simple and can be done by almost any car enthusiast, has a number of other advantages:
- The cost of polishing glass headlights at a service station is usually about 500-800 rubles, and in some cases it can be more. And if you do the work yourself, it will cost much less.
- Doesn't take much time.
- Most often it is done without the use of various devices and tools.
- Allows you to quickly polish the surface of headlights in almost any conditions (including right on the road).
Cons of polishing car headlights yourself
Polishing headlights with your own hands using toothpaste also has a number of disadvantages. The main one is that the effect of this operation is quite short-lived and must be repeated regularly. Secondly, if you are not careful when carrying out work, you can damage the glass headlight.
In general, polishing car headlights with your own toothpaste is the best way to quickly return them to their original appearance and improve their performance properties.
When using a car for a long time, the headlights become dirty just like any other part. Moreover, pollution can be not only external, remaining, for example, after an off-road trip, but also internal. If dust gets inside the headlight, there is a high probability that its housing is leaking. Perhaps, when installing new lamps, you did not glue the glass firmly enough. And sometimes this happens at the factory. Be that as it may, the optical device requires thorough cleaning from all sides, including the inside. Of course, the easiest way to do this is to completely disassemble the headlight. But if the headlight is initially one-piece, or you are afraid of damaging its insides, use our recommendations to wash and clean it without disassembling it.
Let's get started
So, let's look at how to clean the inside of a headlight without disassembling it. Let us immediately note that dismantling cannot be completely ruled out. The optics will still have to be removed from the car. This applies to all brands, including Lada Priora. How to clean the inside of a headlight without disassembling the housing itself? After removing it from the car, you should remove all existing light bulbs from it. This:
- Low beam headlight.
- Parking lights.
- High beam headlight.
- Turn signals (if integrated into the headlight).
First you need to unscrew the protective plastic cover. By removing these elements, small holes are formed. It is in them that we need to pour cosmetic water or other cleaning agent (for example, glass cleaner or distilled water mixed with dishwashing detergent). Next, using electrical tape (or any other adhesive tape), you need to seal all the holes. Please note that you should not fill the entire headlight with liquid. It is enough to fill about a quarter of the total volume.
This procedure applies to all cars; for example, this way you can clean the inside of a Mazda 3 headlight without disassembling it. After the holes are sealed, you need to thoroughly shake the headlight. After this operation, the liquid usually turns yellow.
The next step is to open the holes and drain the dirty water. Next, fill in the liquid again and seal the holes for the lamps. Thoroughly shake the headlight housing in the same way as in the previous case. If the liquid remains cloudy, it means there is a lot of dirt inside the headlight. To remove all deposits, you must repeat this operation again.
How many times should I drain and refill the fluid? There is no exact answer to this question - it all depends on how dirty the headlight is. Experts say that cleaning should be repeated until new water remains clean after shaking. If so, the headlight is completely clean. This should be done with the optics of any car, be it a Mercedes or Kalina. How to clean the inside of a headlight without disassembling it? At the next stage, we need to completely remove the existing liquid. It does not evaporate so easily, especially if work is carried out at sub-zero temperatures. Naturally, there is no point in waiting several days. Therefore, to speed up the process we will use a hairdryer.
Materials and tools
In order to clean your headlights as much as possible from dust, water droplets and dirt, both outside and inside, prepare the following set of tools:
- cleaning agent;
- toothpaste;
- a soft cloth made of microfiber or other fabric that does not leave fibers;
- household hair dryer.
- Screwdriver Set;
- insulating tape;
- adhesive tape;
- hard wire;
- two small magnets;
- fishing line;
- stationery knife and scissors.
It’s worth taking a closer look at the headlight cleaner. Not every liquid is suitable for these purposes, especially when cleaning lenses and reflectors from the inside. There is an opinion that alcohol or vodka removes dirt best. This is true. However, alcohol can corrode the coating on the reflector and ruin the optics forever.
. Therefore, you should not use heavy artillery. Distilled water with dishwashing detergent will clean the headlight a little more slowly, but no less efficiently. Some people use a regular glass cleaner for these purposes.
Another interesting method is to use cosmetic micellar water to remove makeup. It is sold in all cosmetics stores. You should not choose an expensive option; most importantly, make sure that the composition does not contain alcohol.
Method three - mirror film
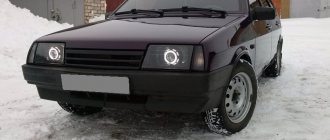
This method is similar to restoring the reflective coating of a headlight using metallic tape. The difference is that we use more professional material. This is a mirror film. The choice of films on the market is not small. Restoration can be carried out with any material. The most suitable products are considered to be Oracal products (number 351 or 352).
There is a big advantage to covering the reflector with a mirror film. The material is made on the basis of polyester, is flexible, and is not subject to wear and deformation for a long time. It easily sticks to any surface.
It also has excellent reflective properties. This means that after repair, the VAZ headlight will shine almost the same as a new one. The material will not come off for a long time. To restore the VAZ headlight in question in this way, it is necessary.
Car owners are often faced with the question of how to wash the inside of their car's headlights. Contamination of the internal surface is affected by operation in difficult conditions with dusty roads, frequent trips to nature and the use of low-quality lamps.
The aggressive components of most products can damage the surface of the headlight and the reflector. When choosing, it is important to pay attention to the composition, as you can purchase a low-quality product without a degreaser.
Distilled water does not leave streaks on the surface of transparent plastic and reflector, but is not able to wash away stagnant dust or haze from burning lamps.
An excellent detergent is regular toothpaste diluted in purified water. However, such a liquid requires careful rinsing, otherwise the plastic will become covered with a white coating.
How to wash internal headlight parts:
- soap composition;
- dishwashing liquid;
- shower gel.
Cosmetic micellar water to remove makeup will also help to wash the headlight from the inside. When choosing, you should pay attention to the absence of alcohol, which can easily wash off the coating and render the optics unusable.
How to clean the inside of a headlight without disassembling it
Cleaning your headlights will be much easier if you can remove the glass and take them apart piece by piece. Unfortunately, many modern car models are equipped with non-removable lenses. But even they require cleaning from time to time.
Over the years of operation, an impressive layer of dust and dirt accumulates on the optical elements. This negatively affects the quality of lighting: the headlights become dimmer and more diffuse.
Video: why you need to wash your headlights from the inside
Glass cleaning
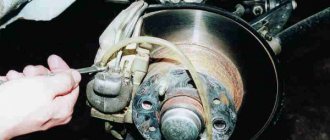
Even if you don’t want to completely disassemble the headlights, you still have to remove them from the car. This process will be different for different cars: in some cases you need to remove the radiator grille, in others you need to remove the bumper. Most likely, you yourself know how to properly remove headlights from your car, but if not, take a look at the owner’s manual.
- After you remove the headlight, you need to remove all the low and high beam lamps, turn signals, and dimensions from it.
- Pour a small amount of your chosen cleaning agent into the holes.
- Now you need to temporarily seal the holes with adhesive tape and shake it properly. Usually after these manipulations, the liquid acquires a dirty yellow color. This means that you didn’t start cleaning in vain.
- Open the holes and drain the water.
- Repeat steps 2 and 3 until the water runs clear.
- If you poured soapy water into the headlight, rinse it with clean distilled water at the end.
- Use a household hairdryer to dry the inside of the headlight. Do not set the temperature too high to avoid damaging the optics. You must get rid of all the small droplets.
- Make sure the inside of the headlight is completely dry and reinsert the bulbs.
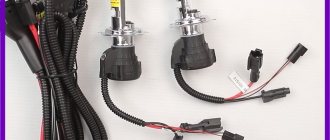
When working with halogen and xenon lamps, do not touch the bulb itself! Due to the high internal temperature, traces of oil from your fingers will remain on it, even if your hands are perfectly clean. This will significantly reduce its service life. Try to hold the lamps only by the base. If this is not possible, wear medical gloves.
There is another unusual way to clean glass from the inside. It is not suitable for serious stains, but it can help if you need to quickly remove a small stain.
You will need two small magnets, which you need to wrap in a soft cloth. Lightly moisten the fabric of one of the magnets in the cleaning agent, secure it to the fishing line and place it in the headlight housing through the hole for the lamp. Using the second magnet, control the internal one and clean the glass in the right places. When you are satisfied with the result, simply pull the line and remove the magnet from the housing.
Video: cleaning the headlight from the inside using magnets
Cleaning the reflector
The reflector inside the headlight collects the light from the lamp into a single beam. Constant exposure to a light source may cause it to become cloudy. If you notice that the light has become dimmer and more diffuse, the problem may be caused by the reflector.
To clean this part from the inside without completely disassembling the headlight, use the following method.
- Remove the car headlight.
- Remove the low and high beam lamps.
- Take a strong piece of wire about 15 cm long and wrap it halfway with electrical tape or tape.
- Place a soft, lint-free cloth over the electrical tape.
- Lightly dampen the cloth with glass cleaner.
- Bend the wire so that it can reach the reflector through the lamp hole.
- Use a cloth to gently clean the reflector. Do not make sudden movements or use force! If handled incorrectly, the protective layer on the part may peel off.
- If after finishing work there are still drops of moisture on the reflector, dry them with a regular hairdryer.
- Replace the lamps and install the headlight on the car
Never use alcohol to clean the reflector! Under its influence, the reflector will delaminate, and you will have to purchase a new optical system.
Removing the headlight
To clean the reflector, plastic and auxiliary parts from the inside, you will need to remove the headlights from the car.
To remove the optics, on some models you will need to remove the bumper. To do this you need:
- Turn out the wheels and remove the fender liner clips that are attached to the edge of the bumper.
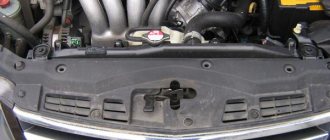
- Remove the radiator grille.
- Unscrew the screws and remove the clips that hold the bumper.
- Carefully remove the part without damaging the headlight glass or lens.
When dismantling the front bumper, you should pay attention to the corners, which shift when the fasteners are unscrewed and can damage the optics.
Dirt from the inside can only be removed with the headlight removed. After dismantling all unnecessary parts, just unscrew a few bolts and the optics can be easily removed.
The hole for the lamp can be removed directly from the car. To do this you need:
- Remove the protective boot.
- Bend the retaining tendrils and remove the lamp.
- Disconnect the block with wires and place the light element in a box or clean cloth.
When removing the lamp, avoid accidentally touching the bulb with sealant, glue or fingers. Any contamination of the part will significantly reduce the declared service life.
Cleaning the outside of the headlight
Many drivers, when washing their car themselves, forget to pay due attention to the headlights. However, their cleanliness is much more important than the cleanliness of a bumper or car door, because safety depends on the quality of lighting.
Video: cleaning headlights from dirt
From yellowness and plaque
Sometimes an unsightly yellow coating forms on the outside of the headlights. It not only spoils the appearance of the car, but also makes the headlights dim.
Today on the car cosmetics market there are a large number of products designed to combat this plaque. However, the most effective of them is already in your home - regular toothpaste. After all, if a product can remove plaque from teeth without corroding them, then it will cope with plastic just as well.
To clean a headlight with it, apply a small amount of paste to a towel or toothbrush, then buff the yellowed area in a circular motion. When finished, rinse the headlight and evaluate the result. If the plaque is very strong, repeat the procedure.
Video: how to clean plaque with toothpaste
From sealant, glue or varnish
After carelessly gluing the headlights, a small amount of sealant may remain on the plastic. It does not affect the operation of the device, but spoils the appearance of the car. To remove the sealant, it must first be softened.
But what exactly to soften it with is a big question. The fact is that different compounds are removed using different substances. Unfortunately, you are unlikely to know what type of sealant was used at the factory. In this case, you will have to try all these means one by one.
Very often, the remaining substances can be dissolved using ordinary vinegar. If vinegar doesn't work, try White Spirit. In some cases, treatment with gasoline, alcohol, oil and even very hot water helps.
If none of the products gives the desired effect, warm up the contaminated area with a regular hairdryer. When exposed to heat, the sealant will become a little softer, which means it will come off easier.
In some cases, the headlight can be cleaned using a special silicone sealant remover. You can buy it at almost any store that sells car cosmetics. However, this product is not universal and is suitable, as you might guess, specifically for silicone compounds.
Once you have managed to soften the sealant, take a straight screwdriver and wrap it in a cloth soaked in the softening compound. Clean the desired area centimeter by centimeter. Then wipe the headlight with a clean cloth and enjoy its appearance.
Video: how to remove sealant using sunflower oil
To remove excess glue or varnish from the headlight, use WD-40. It will most likely be able to solve your problem. Nail polish remover without acetone is also suitable for removing glue.
Don't use acetone if your headlights are made of plastic! It will corrode the outer layer, and only polishing the headlights in specialized salons can help you.
With skillful hands you can remove any dirt, even bitumen residues. The main thing is that when cleaning headlights with your own hands, inside and out, follow the basic rules: do not use alcohol for the reflector and acetone for plastic. If you have tried all the remedies and the contamination still remains, try taking the problem to a car repair shop. Experienced specialists will do all the work, and at the same time suggest an effective cleansing method that you can successfully use in the future on your own.
During the operation of the car, the headlights gradually become dirty not only from the outside, but also from the inside. At the same time, disassembling headlights is a rather complicated process. Therefore, many car owners are interested in whether they can be washed without disassembling them. Of course, this is quite possible, and further we will tell you how to cope with the task.
What can you use to clean the headlight reflector?
Car owners are often faced with the question of how to wash the inside of their car's headlights. Contamination of the internal surface is affected by operation in difficult conditions with dusty roads, frequent trips to nature and the use of low-quality lamps.
The aggressive components of most products can damage the surface of the headlight and the reflector. When choosing, it is important to pay attention to the composition, as you can purchase a low-quality product without a degreaser.
Distilled water does not leave streaks on the surface of transparent plastic and reflector, but is not able to wash away stagnant dust or haze from burning lamps.
An excellent detergent is regular toothpaste diluted in purified water. However, such a liquid requires careful rinsing, otherwise the plastic will become covered with a white coating.
How to wash internal headlight parts:
- soap composition;
- dishwashing liquid;
- shower gel.
Cosmetic micellar water to remove makeup will also help to wash the headlight from the inside. When choosing, you should pay attention to the absence of alcohol, which can easily wash off the coating and render the optics unusable.
Removing the headlight
To clean the reflector, plastic and auxiliary parts from the inside, you will need to remove the headlights from the car.
To remove the optics, on some models you will need to remove the bumper. To do this you need:
- Turn out the wheels and remove the fender liner clips that are attached to the edge of the bumper.
- Remove the radiator grille.
- Unscrew the screws and remove the clips that hold the bumper.
- Carefully remove the part without damaging the headlight glass or lens.
When dismantling the front bumper, you should pay attention to the corners, which shift when the fasteners are unscrewed and can damage the optics.
Dirt from the inside can only be removed with the headlight removed. After dismantling all unnecessary parts, just unscrew a few bolts and the optics can be easily removed.
The hole for the lamp can be removed directly from the car. To do this you need:
- Remove the protective boot.
- Bend the retaining tendrils and remove the lamp.
- Disconnect the block with wires and place the light element in a box or clean cloth.
When removing the lamp, avoid accidentally touching the bulb with sealant, glue or fingers. Any contamination of the part will significantly reduce the declared service life.
The process of removing dirt from the inside
Cleaning the inside of a headlight does not take much time, but it does require diligence and skill. Before starting work, you need to remove the lamps, unscrew the ignition unit and prepare the necessary tools. Immediately before the operation to remove dirt from the inside, we prepare cleansing baths.
Cleaning the reflector and plastic from the inside:
- Carefully pour liquid into the reflector through the lamp hole.
- Seal all holes with tape.
- Remove dirt with gentle shaking and circular movements.
- Drain the composition.
- Next, you need to pour a portion of fresh cleaning fluid into the headlights and continue shaking.
- Dust and minor contaminants will be removed from the surface of the reflector after 3-4 passes with water changes.
If plaque remains on the inside of the plastic, then you need to use the following method:
- Take two magnets.
- Tie a fishing line to one of them.
- Wrap the tools in a soft cloth.
- Place the magnet with fishing line into the headlight.
- Place the second tool on the front side of the plastic mask.
Once the magnets are firmly attached, you can begin cleaning the inside of the transparent mask using circular movements. This method helps get rid of more serious contaminants. To improve the effect, add a little cleaning compound inside the headlight.
The next step, after all operations from the inside of the optics, is to thoroughly rinse all parts with distilled water. This is an important and responsible moment in car care. A headlight that is poorly cleaned from the solution will fog up and become covered with a white film on the inside.
After complete rinsing, you need to thoroughly dry the optics. To do this you need to follow the steps:
- Wipe the headlight outside and inside with a clean cloth.
- Turn on the hair dryer and heat the optics evenly.
- If drops of water leak out, wipe them dry with a cloth.
- Check the optics for dryness using gentle shaking.
- If water appears, continue drying with a hairdryer.
- Leave the part alone for a couple of hours.
Installation of the removed parts is carried out in the reverse order.
When performing work, you should follow safety precautions and use gloves.
Source: https://rezina48.ru/drugoe/kak-pomyt-faru-iznutri-2.html