Preparatory work
Before starting to create a power buffer, it is necessary to carry out a number of preparatory measures.
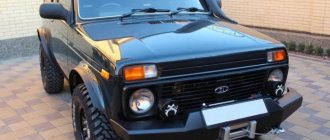
- Determine the objectives of the future product. The design of the power bumper also depends on the list of tasks. If you need to increase the strength of the standard body kit, then create an identical part from a more durable material. Well, if the vehicle will be used in harsh conditions (for example, hunting or fishing), then it will be necessary to acquire a more reliable body element. For example, the Niva can be equipped with a homemade kenguryatnik (it can act as a basis for installing attachments, for example, additional lighting devices or a winch).
- Create a drawing of the future product. This step will allow you to make a symmetrical kenguryatnik on the field with your own hands. Subsequently, when constructing the body element, it is necessary to follow the created drawing.
- Prepare the necessary tools and materials:
- The power bumper can be made from sheet metal, square or round steel pipes.
- To work, you will need a welding machine, a grinder and a grinder, a spray gun, a pipe bender, and a drill.
Creating a power kit requires basic skills in working with a welding machine, pipe bender, drill and grinder. If they are not there, then you should turn to professionals. Otherwise, the result of the work will be disastrous.
Front and rear bumper amplifier - compare
When we mentioned some manufacturers, we did not indicate that, unfortunately (or fortunately), they are a minority. It is not known what guided the engineers, but many (and especially novice) car enthusiasts, after several mini-accidents, understand the need to strengthen the fragile decorative panel. A few minor impacts are enough for the bumper itself to become cracked and in need of urgent repairs, and expensive optics require replacement. If the design of the car does not provide for an amplifier, but you think that it will not interfere with you, contact a service center where they will help you choose a part that matches your bumper.
Part for strengthening a fragile decorative panel
The rear amplifier has a slightly different role: providing protection for the “rear” of the car. That is, the creation of a kind of buffer zone from impact. Not only from the impact of another vehicle, but also from collisions with obstacles when reversing, to protect against damage to the body, luggage compartment and, of course, the things that are there. If we compare both amplifiers, the functions for which they are created will be exactly the same: protect the body and components from impacts, strengthen the bumper, and create a springing effect during collisions. The only difference is probably in the shape of the part itself, and in the holes for fastenings.
Rear Booster Shape
Disputes about whether a bumper amplifier is needed or not began from the period of its appearance. After all, in addition to the advantages, there are also significant disadvantages. Probably the most unpleasant moment that forces car owners to be careful and make a decision regarding the installation of an additional part is the behavior of the amplifier during a frontal collision. The fact is that in handicraft manufacturing, the metal structure is welded to the car body, and therefore during an impact it does not soften, but intensifies the negative impact. The resulting damage becomes truly catastrophic. To prevent this from happening, do not rush to introduce innovations if the characteristics of the vehicle do not provide for such an upgrade.
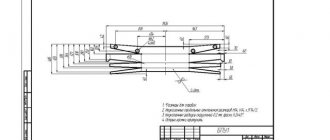
The nuances of creating a drawing
To make a bumper yourself, you will need to create the necessary drawings. You can obtain technical documentation in the following ways:
- Make the diagrams yourself. In this case, the body kit will have any shape.
- Order the creation of a drawing from professionals. The driver's imagination will not be limited by anything. You will need to correctly and clearly formulate the terms of the order.
- Download the necessary documentation from the Internet. One of the simplest and most economical ways to obtain a drawing. The disadvantage is the complete lack of uniqueness of the part.
After creating a drawing of the product, we begin to select the appropriate material.
Nuances of choosing material
When creating a power bumper for a field with your own hands, it is important to choose the right material. The components of the body element must strengthen the structure. The best option is stainless steel pipes. If such material is expensive or unavailable, then rolled steel pipe is used. Less durable elements include sheet metal. It is used both to create new body kits and to cover standard bumpers. Metal corners and a channel are used as consumables.
Body kits that are not made of stainless steel must be painted. After trips, such elements have to be repainted regularly. Otherwise, the body element will be subject to corrosion and destruction.
What positive effect can a bumper achieve: what are its disadvantages?
“Kenguryatnik” cannot be considered some kind of luxury, much less install the structure for the purpose of showing off or updating the design. That is, if a car owner really wants to protect his car from impact in an accident, then the power bumper must have the following characteristics:
- It is based on durable metal and reliable grilles.
- The frame must be reinforced.
- The connecting elements securely fix the structure to the car.
Unfortunately, few protective elements can satisfy such performance. Modern models most often provide the following design:
- base in the form of a chrome pipe;
- lack of durable metal grilles;
- fastenings are provided only in the lower part of the “kenguryatnik”.
Of course, such a design cannot be called reliable, therefore, in the event of a strong collision with a car or other obstacle, the so-called protection will simply be unscrewed from its mount, severely damaging the hood and radiator grille of the car. As a result, it is the power bumper of a modern design that can cause more damage to the car than the collision itself.
Well, the most important point regarding the installation of the “kenguryatnik” is safety for pedestrians. That is, having a power bumper in the car, the driver is capable of causing severe injuries to pedestrians, who can be run over in an emergency on the road. After all, in any case, damage to the car fades into the background if a person is injured during the incident.
It was these moments that became important for the ban on installing a “knuckle bar” on a car. But how things really stand regarding this issue and whether the driver is subject to a fine for having a protective bumper is worth finding out in more detail.
Making a bumper
It is necessary to cut out the components of the power body kit from metal. To do this, use a product mockup. Next, the bumper manufacturing process consists of connecting the created components. After welding the individual parts, a solid structure should be obtained. It is polished using a grinder. And if necessary, the resulting element is painted.
To prevent the material from burning through, you need to use sheets with a thickness of at least 4-5 millimeters, or pipes with a diameter of 50-60 millimeters.
In addition to the body kit, side trims are made from metal. They are cut out using a grinder, given the desired shape and connected to the buffer.
The basis of the frame is a rectangular steel pipe. The components of the body kit are attached to each other with a channel.
The created body element is tested for strength, seams and irregularities are sanded, polished and varnished. Only after this can the part be installed on the car.
The process of making a new body kit
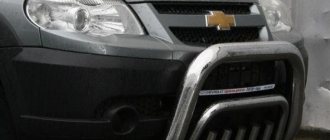
Below we describe the process of manufacturing the base for the winch on the Chevrolet Niva:
- It is necessary to disassemble the front part of the car and remove everything that may interfere with the production of a new body kit, but the main thing is not to overdo it.
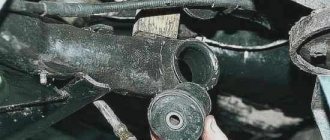
Step one: dismantled the “face” of the car - Next, it is necessary to strengthen the front side members, on which the new bumper will be mounted.
For this purpose, special inserts are made that repeat the shape of the lounge. Now we need to strengthen the front side members. - The next step will be the manufacture of side linings for the Chevrolet Niva side members, which are attached from the outside.
It is necessary to mark and drill mounting holes in them. Next, the manufacture of side linings is required. - After preparing all the elements, you can carry out the initial assembly by installing amplifiers and linings on the side members.
We install the inserts and screw on the outer covers. - Next, a cross member is made between the linings, which is secured by welding.
We make a cross member and weld it. - After this, you need to think about where to install the winch on the Chevrolet Niva.
To do this, it is recommended to have a traction mechanism available, from the base of which you will need to remove the template. We weld an additional mount for the winch. - After taking the dimensions, you need to weld the platform. To install and attach the winch to the finished base, you need to drill holes in it for fixing with M12 bolts.
We attach a new body kit to the car and install the winch in the designated place.
The manufacture of the base on which the winch will be installed is completed. All welds are removed from slag, and the entire structure is covered with anti-corrosion and primer. When the painted surface has dried, it is necessary to assemble everything for the further manufacture of the Chevrolet Niva bumper itself:
- First, you need to think about attaching the power body kit to the car frame. You can use a square channel that will be attached to pre-made amplifiers, taking into account the bending angle of the bumper.
- A pre-cut square pipe is welded to the finished fasteners. It is necessary to observe all the symmetry of this process, because if the size of the central and curved parts, as well as the bending angles, are different, the bumper will turn out to be beveled.
- Next, the same square pipe will be used to shape the new Chevrolet Niva bumper. All seams must be thoroughly welded, removed from slag and cleaned with a grinder.
- The guide jaws for the winch are installed, places for the hi-jack are cut out, and the installation location for the towing clamps is provided.
After the power bumper has been manufactured and installed, it is recommended to test it, since the entire structure may need to be strengthened.
Further work consists of covering the entire structure with anticorrosive, primer and then painting it. To do this, it is recommended to use high-quality powder paint, which, in turn, also protects the metal from corrosion.
Disadvantages of the Chevrolet Niva
Installing a new bumper on a Chevrolet Niva car is entirely your decision, just like making it yourself or buying it at a car store. The main thing in this matter is to determine your capabilities, namely, the ability to work with metal and welding. This is the main part of the work you do.
Higher education: Chita State University, Institute of Technological and Transport Systems, specialty - cars and automotive industry. Repair of passenger cars of domestic and foreign origin. Chassis repair,…
- Leonid says:
Something I don't understand, how is the bumper attached? For some reason, I got a bend on the frame.
In Moscow and Moscow Region - by our company’s own transport
Monday-Saturday from 10 to 21 o'clock. Sunday - we do not make deliveries.
Delivery rates within the Moscow Ring Road
- Price for standard orders (total volume does not exceed 1m3) – 500 rubles.
- Price for heavy and large-sized orders, including engines, gearboxes, one-piece body elements (total volume exceeds 1m3) – 1,000 rubles.
Delivery rates outside the Moscow Ring Road
- Price for standard orders (total volume does not exceed 1m3):
- from 0 to 5 km – 700 rub.
- from 5 to 15 km – 1500 rub.
- over 15 km – 1000 rub.+35 rub. for each subsequent kilometer.
- Price for heavy and large-sized orders, including engines, gearboxes, one-piece body elements (total volume exceeds 1m3):
- from 0 to 5 km - 1,300 rubles.
- from 5 to 15 km – 1600 rub.
- over 15 km – 1600 rub.+35 rub. for each subsequent kilometer.
To the regions of Russia - by transport company
The power bumper, or “bumper”, as it is popularly called, is an important attribute for almost all SUVs. Car owners know that its main purpose is to protect vehicles from numerous obstacles that may be encountered during movement.
However, in addition to this, the power bumper adds a lot of convenience when operating the car, thanks to the presence of a special design designed for simple installation of a car winch.
Also, the bumper of this design includes a device for lifting the car called a “rack and pinion jack,” which makes the necessary manipulations much easier and, most importantly, safer for the driver. Using a winch in this design is much easier than in the standard version, since the power bumper is equipped with special holes for reliable fixation. This type of design is good for everyone, but many are interested in one question: is it possible to carry out a legal installation at this time, and is there a fine for using a “knuckle bar” for a car?
What to pay attention to during installation
Installing a kenguryatnik on a field has the following nuances:
- In the process of designing the body kit, you need to provide for mounting the winch on the Chevrolet Niva, and also leave room for the high jack.
- It must be taken into account that the spars require strengthening. To strengthen the structure, metal plates are welded to them and coated with an anti-corrosion compound.
- To correctly install a homemade body element, you will need to identify the mounting locations for the standard bumper.
After completing work with the body kit, you need to register it and receive a special certificate for the kenguryatnik. The document will need to be presented when undergoing a technical inspection of the vehicle.
A guard or reinforced bumper on a Niva is a necessary accessory to ensure more effective safety of the driver and passengers, as well as protection of the vehicle’s lighting devices, radiator grille, fenders, hood and body. You can create an element yourself, and if you follow the technology for performing the work, the part will be in no way inferior to factory-made analogues.
Hi all! The Niva car is considered very popular in Russia and the CIS countries. Therefore, it is not surprising that a lot of attention is devoted to it; it often appears in topics of tuning and all kinds of modifications. This applies to both the Niva Chevrolet and Niva Urban. Decide for yourself which of these you like best. Although in this article the main emphasis will be on a car made by Chevrolet, since we will talk about the power bumper for the Niva.
Conscious car owners install this element literally as soon as they buy an SUV. It doesn't matter if it's new or used. This approach is explained by the fact that in its standard configuration a crossover cannot always withstand the conditions in which it is used. Power bumpers are mounted in front and behind the car, which protects it from damage, chips and other delights of extreme conditions. Accordingly, the power body kit comes in front and rear.
This is a popular car for off-road exploration and is actively used by hunters and fishermen. Therefore, the measure in the form of a power bumper looks logical and rational.
Let's dive into history
A car bumper is a detail that probably appeared since the self-propelled cart began to acquire the features of a full-fledged vehicle. The need for it arose for one simple reason: the still imperfect and fragile machines had not yet reached their perfection, and therefore often ran into various obstacles in the form of bollards, pillars and fences.
In order to somehow mitigate the damage from a collision, Ford designers decided to weld a U-shaped metal beam in front, protecting the engine and wheels from impacts. They implemented their idea in 1930, releasing a car with the Model A index. In subsequent years, Packard added its contribution to the development of bumpers by installing an ellipsoidal bumper with shock-absorbing properties on the car. After this, the triumphal march of this metal part began around the world.
Metal part with shock-absorbing properties
In the process of evolution, the bumper has changed and has now turned from a safety item into a decorative part. Meanwhile, the roads have not become safer and the obstacles have not decreased. In order not to spoil the appearance of cars with a “prehistoric” metal channel, and also not to offend the creative feelings of designers, the designers invented an additional beam, which became the successor to the main part.
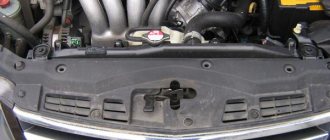
The bumper reinforcement is a metal part that is rigidly attached to the bottom of the hood under the main bumper. In this case, by hood we mean the front part of the body with the engine. The amplifier gives additional strength to the structure itself. In addition to this function, on some car models this part also serves as protection against mechanical damage to lighting fixtures.
Amplifier under the hood of a car
Despite the fact that some car enthusiasts do not like to spend money on various improvements and consider this part unnecessary, there are also many “craftsmen” who made it themselves for their cars. Be that as it may, some car manufacturers believe that such a device is necessary, and therefore make amplifiers for both the front and rear bumpers. But let’s try to figure out if there are any differences between them.
Letter of the law
Another controversial issue regarding power kits is the legality of their installation.
Just recently, car owners were shocked by the fact that in Russia the government banned the use
metal kenguryatniks. This is what beginners call literally everything that protrudes from the front of the car and is made of metal.
But remember that there is nothing in common between a bumper and a power bumper. These are different concepts with their own nuances. Regarding legislation, there is no clear law that would prohibit you from putting a body kit on your car. But if you want to make such a change to the design, you will have to take care of the corresponding entry in the PTS. It's not that difficult, don't worry.
How did the power bumper come about?
Even judging by the name (“kenguryatnik”), one can understand that the power bumper was invented in the places where kangaroos live, and these animals, as is known, live on the Australian continent. The first design was supposed to protect the car from wild animals that ran out from everywhere and, when frightened, could get under the wheels of vehicles.
Initially, the bumper was made of metal grilles and complemented the design with a reinforced frame. After the positive characteristics of the protective element were assessed, the power bumper began to be used on other continents, and the installation was carried out on any car - both a sedan and a cargo vehicle.
Design options
You should carefully consider what to choose and install on your car. Today, a wide range of power body kits are produced that can replace a standard fiberglass bumper that cannot withstand extreme loads. The choice of towbars for Niva is approached with the same care.
Car owners are offered to buy several design options that have their own characteristics. They can be roughly described as follows:
- classic devices with a platform for a winch;
- designs with additional space for a hi-jack;
- models with towing eye and roller holders;
- with stops for using a jack;
- with and without a kenguryatnik.
If you decide to install a power bumper on your Niva, be sure to consider a few points.
I would include the most significant installation nuances:
- Winch and the possibility of its installation. It will be indispensable if you get into a mud trap. The winch allows you to get out of a difficult situation without outside help;
- Hi-jack. An interesting device, also necessary for getting out of difficult road situations. The operating principle is similar to a jack that lifts wheels stuck in the mud;
- Additional optics. Its installation is not always mandatory, but sometimes it turns out to be useful. A prime example is fog lights;
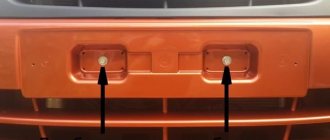
- Place for mounting a license plate.
I can’t say that self-assembly is preferable to buying a factory body kit. But creating reinforced bumpers with your own hands is not so easy. You will need certain skills, accurate drawings, free time and quality supplies.
Purchasing ready-made structures is usually more expensive, but they are ideal for the Chevy Niva, do not require lengthy and complex assembly activities and guarantee the reliability and attractive appearance of the SUV. In Moscow and any other city the assortment is extensive, and don’t forget about the opportunity to order a part via the Internet. The choice is yours.
Industrial designs
It is quite difficult to give unambiguous advice on whether a car needs amplifiers for the rear bumper or the front. This is a personal matter and depends on what the car owner considers to be safe. Probably, this option is just another requirement of automotive fashion. However, major automakers still make serial beams to increase the rigidity of a part that is only nominally called a bumper. For example, cars from Toyota
,
Renault
,
Ford
,
Nissan
.
Naturally, the fastening to the body was also calculated by the designers. In the event of an accident, the bumper, due to the amplifier, either “absorbs” the impact or is deformed, allowing minimal impact on the body and internal components.
Some automakers install front and rear bumper reinforcements through shock absorbers, which enhances the protective effect. If anyone has the idea of, for example, building something similar on their Zhiguli
30 years ago, think about how simply copying, despite good intentions, can cause harm. Any, even the smallest detail on a car is the fruit of the work of a large team of designers who carried out calculations and tests, and its presence in the package is a justified necessity, and not the whim of one or another owner.
Is it possible to repair this part? If the rear or front bumper amplifier is not too damaged (dent, slight deformation), then it can be repaired on the slipway. For more severe impacts, complete replacement is recommended. The fact is that strength in places where metal is deformed can no longer be expected: molecular bonds are broken and microcracks appear. The benefit from such an amplifier is minimal, in fact zero.
“Niva Chevrolet” is a practical domestic SUV for lovers of “forays” into nature. But those who like to drive through swampy areas and difficult places often complain that the Chevy's front bumper cannot withstand all the loads. After this, it must be repaired or replaced. That’s why lovers of such recreation try to install a power bumper, which can be purchased and installed in the cabin or made with your own hands. To do this we will need free time, skillful hands and a lot of patience.
Power bumper for car
When installing a power bumper, it is advisable to provide fastenings for additional equipment that will not be superfluous:
- winches;
- hi-jack;
- lighting.
You can buy a new body kit for Sheva Niva or make it yourself.
