How to install a tow bar on a Chevrolet Niva
Chevrolet Niva is the modern generation of the brand of the same name. Manufacturers radically changed its design, which made it more attractive.
Cars of this brand are especially popular due to their low price and optimal traction parameters. You can familiarize yourself with the features of this modification here.
Installing the tow bar
The installation algorithm for this part involves performing the following operations:
- All work must be performed in the inspection pit. Therefore, the car must be installed in this place in such a way as to gain access to the underbody from the rear.
- After this you need to find the mounting holes. Please note that they are already done initially at the factory and do not need to be drilled. Sometimes the holes are hidden under tape, which makes them difficult to find.
- To fix the towbar, you need to install special bolts in the holes, which are screwed to the frame using nuts. Initially, you should secure the crossbar. It is located inside the bumper and is screwed directly to the side member.
- At this stage, the longitudinal rail is installed. It is fixed to the rear transverse rail and front side members. The process is completed by attaching the removable ball using special bolted connections.
Connecting the socket
This part is also important because it supplies power directly to the trailer. The socket mounting algorithm consists of the following steps:
- Initially, you need to fix the socket on the towbar. For this purpose, it has special fasteners and space.
- Before connecting the wiring, the cable is placed in a heat-shrinkable tube or wrapped with electrical tape. After this, the wires need to be screwed to the towbar and then brought inside the cabin. For this, a special hole is used, which is located in the trunk on the left.
- The procedure is completed by connecting all cables. To do this, special circuits are used that allow you to correctly connect all the wiring, both to the ground of the car and to the outlet itself. It should be noted that classic cables are connected by color. So, yellow is supplied to the dimensions, red is responsible for the brakes, and black is for the ground.
As you can see, the process of installing a tow bar is not very complicated and only requires following the manufacturer's recommendations. If you use homemade structures, then they should be carefully adjusted to the mounting holes in order to obtain a reliable system.
Source: https://www.chevrolet-portal.ru/kak-postavit-farkop-na-nivu-shevrole/
How to install a tow bar on a Chevrolet Niva
Finally, in the case of a collapsible towbar, it is necessary to install the hook itself. Installing the socket Installation of the socket is carried out in the following order:
A huge selection of towbars for Chevrolet. We will deliver to your city! Order!
The tow bar allows you to transport small loads and serves as a kind of bumper protection. The cable can be placed in a heat-shrinkable tube or simply wrapped with electrical tape.
There are towbar mounting points on any Chevy, but when selling a model without a towbar, they are simply sealed with tape.
If you are looking for a budget model, this is definitely the Trailer!
One of the advantages is the price from RUB. But the price also corresponds, starting from rubles. The average option, which combines good technical performance, reliability and durability, is Leader Plus.
This manufacturer offers the maximum range of types of balls. The line includes a towbar for gas-cylinder equipment. When choosing a towbar for a Chevrolet Niva, it is worth knowing: Types of towbars Based on the method of fastening, towbars are divided into removable, non-removable and flanged.
Removable tow bars are suitable for those who rarely use a tow hitch.
What is a tow bar?
You can often find models with a removable ball on sale. They are a one-piece design.
Now the towbar on the Chevrolet Niva perfectly complements the car, guaranteeing safe operation on the road. The improved model of the machine made it possible to make the towbar not only a means of securing a trailer, but also an element of bottom protection.
The ease of use of the design is felt upon first use. The updated SUV will be able to handle any distance. Installing the socket Installation of the socket is carried out in the following order: The socket is fixed directly to the towbar.
There is a special place for her near the ball. Next, you need to take a drawing that will show the connection diagram. According to this diagram, the socket will be connected.
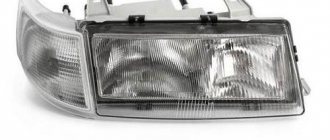
On the headlight connector we see different colors. The harness passes from below through the right loop for fastening the dimensions, after which it must be routed directly to the towbar.
What is a tow bar and what is it for?
In the area of the muffler, the wire may be exposed to high temperatures; to avoid overheating of the wiring from the rear overhang, we wrap the harness with insulating tape. Not a single car leaving the factory was equipped with it.
Which, you see, somewhat narrows the range of possibilities for the owner, since when going outdoors, and even during normal use, a trailer can be extremely useful, for example, for transporting a boat or other oversized cargo. But this problem can be easily and, most importantly, inexpensively solved. The most common type of towbar.
Wiring connection.
- The socket is installed in a special place next to the ball.
- After this, you should carefully read the connection diagram included in the kit.
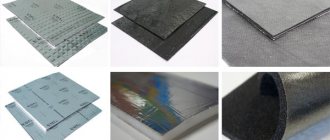
- To protect the cable from short circuits due to moisture, it is better to wrap it with electrical tape or put it in a heat-shrinkable tube.
- The wiring runs into the car through the trunk. A special hole is provided for this on the left side.
- It is necessary to install at least 4 fuses and proceed to connecting the wires.
- Yellow – connects to the side lights line, red – brake indication, blue – left turn indicator, black – ground
- The right turn signal is connected separately; for this we lay another cable.
- The colors of the wires included in the kit may not completely match the colors of the wires in the headlight, so you need to pay close attention to this when connecting.
This is the basic principle of installing a dismountable device on a Chevrolet Niva. The whole process will take no more than an hour, if you have the necessary tools and skills.
It is important to remember that before you go on a long trip with a loaded trailer, you should test drive a short distance after installation to check that the connections are working properly.
How to install a tow bar on a Chevrolet Niva
Category: Chevrolet
06.20.2018 · : to the entry How to install a towbar on a Chevrolet Niva disabled · Reading time: 4 min
Registration of the tow bar with the traffic police. Installing a tow bar. Tow bar 2020. TsLP ARIVA
Here, of course, we must pay tribute to AvtoVAZ.
We check the fastening of the towbar on a Chevrolet Niva connection. The speed with the trailer should not exceed ninety kilometers per hour. It is prohibited to tow a load weighing more than a kilogram. It is necessary to evenly distribute the load in the trailer. When undergoing a technical inspection, you should tighten the connecting thread. You should know that the towbars on cars can be either collapsible, and non-removable, but the installation principle is practically the same; installation takes no more than two hours. Now you need to connect the electronics responsible for the light elements of the trailer.
Then we screw the tow bar into the standard holes. Tow bar attachment. Tow bar attachment. So, we installed the towbar, let's get on with the wiring.
Very often, towbars failed due to play, due to which the structure simply broke due to the size and weight of trailers and tractors. Connecting the towbar socket on a Chevrolet Niva connecting the towbar socket on a Chevrolet Niva How to install a European towbar feature on American cars.
What types of towbars are there for the Niva, their cost? Towbars not only for the Chevrolet Niva, but also for any car in principle, differ in materials, vertical load on the hook, maximum curb weight of the trailer itself, density of materials and method of connecting the hook to the bracket. We attach the wiring to the structure of the product and lead it into the cabin through the hole in the luggage compartment.
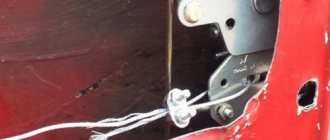
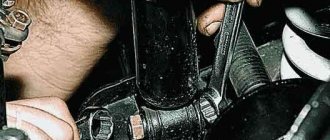
In the photo, the sealed areas are indicated by arrows. You need to tear off the adhesive tape, attach the towbar to the side members and the apron and tighten it with the mounting bolts supplied in the kit, having previously lubricated them with graphite lubricant.
That's it, the tow bar is in place! Now you need to install the outlet.
How to install a European tow bar on American cars
We attach the wiring to the structure of the product and lead it into the cabin through the hole in the luggage compartment on the left side. There is no need to drill holes since it is already there.
Special lugs are placed on the wire ends and crimped. Fuses are installed, of which there must be at least four.
THIS IS INTERESTING: Amg Mercedes what is it
NIVA CHEVROLET INSTALLATION OF AVTOS TOWCH
Source: https://kasko-lux.ru/chevrolet/kak-ustanovit-farkop-na-shevrole-niva.html
Installation nuances
Before installing the towbar on the Niva, a number of preparatory measures should be carried out:
- Place the car on an overpass, inspection hole, or raise the rear of the car using a jack.
- Disconnect the car.
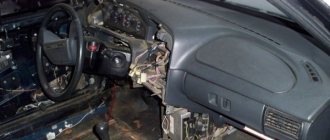
- Remove moldings, mudguards, and plastic covers from the car.
- Remove the wheels.
- Empty the trunk and remove the trim.
Many Niva models are equipped with standard places for attaching a tow bar.
After completing the preparation, proceed directly to the installation of the part:
- Using two bolts, a cross member is attached to the rod.
- A tow bar is placed under the bumper. It is important to consider that when installed correctly, the rear corner of the trailer hitch rests against the transverse beam of the car, but does not interfere with the operation of the vehicle components.
- Using two clamps, attach the cross member of the draft device to the bumper holder.
- The rear part of the towbar is pressed from below to the transverse spar, two holes with a diameter of 1.05 cm are drilled through it. From the interior side, the resulting holes are drilled to a diameter of 1.08 centimeters and a depth of 0.5 cm. Four bushings that come with the kit are installed in the resulting niches towbar.
- In the trunk area, two holes with a diameter of 1.25 centimeters are also drilled in the bumper holders. Further, by analogy, they expand to 1.8 centimeters, and bushings are inserted into them.
- Next, the socket box is mounted and the ball itself is installed directly.
How to install a towbar on a VAZ 2114 - Do-it-yourself car repair
Do not miss
- DIY Christmas garlands (25 photos)
- DIY Easter crafts
- DIY Halloween Crafts
- How to make toys from pompoms with your own hands: master class
- Applications in 5 minutes
- ORIGAMI from paper Cubes Transformers
- How to make a rose from foamiran with your own hands? Master Class
- Buy paper lace, decorative tape, order with delivery
- Exclusive flowers made of leather with your own hands, Cross
- 50 gift ideas for February 14th for a guy - a list of the best gifts for a young man
- How to sew a skirt with your own hands, Women's Questions
- From cardboard
- How to make a dream catcher with your own hands, Master class on
- DIY gift boxes: 25 best ideas
- DIY wedding invitations
- How to make holes and scuffs on jeans? Master class and video
- 101 DIY monkeys using different handicraft techniques: choose your symbol for 2020, Cross
- DIY rag doll
- Origami paper angel: master classes, videos, ideas
- How to decorate a room for February 14: garlands for Valentine's Day
- 5 DIY gift ideas for February 14th: give love to your loved ones!
- How to make a boat with your own hands
- Toys for the New Year
- DIY snake toy pattern master class, DIY toys
- How and what to make a dog for the New Year 2020 (40 photos)
- Craft flower
- How and from what to make a monkey with your own hands
- Origami dog
- Homemade plasticine - The most interesting things in blogs
- An original gift for a newborn - a sock bouquet
- Macrame for Beginners: Tips and Tricks
- How to pay alimony with financial assistance in 2020
- Jewelry etiquette: how to wear rings correctly
- How to properly care for your teeth, MEDPLUS, MEDPLUS
- What is the minimum insurance pension in Russia?
- Criminal liability for non-payment of alimony (Article
- Runic cooling, quarrels, lapel
- DIY pool vacuum cleaner, Construction portal
- Return of a gift certificate: consumer protection law
- Face cream with hyaluronic acid: properties, recipes, rating
- How to learn to swim underwater correctly
- Car hatches
- What is the difference between a lawyer and a legal consultant - features, responsibilities and examples
- What is the fine for non-payment of parking in Moscow?
- Replacing the pump (water pump) on a VAZ 2108, 2109
- Screen cabinet
- The amount of alimony in 2020, its change (decrease, increase), indexation
- Screw mechanical jack - choose a model for yourself
- Website about swimming: Butterfly and dolphin swimming techniques
- Kefir-cucumber diet for 5 and 7 days, menu, effectiveness, fasting days, contraindications
- Young technician, 2013 No. 02
- At what age do you legally enter kindergarten?
- The best masks for facial skin - 12 homemade recipes
- High-calorie diet - for dystrophies and athletes
- Child support after 18 years of age in 2020 for a student, student or disabled person
- Crafts for Easter from paper, besper, dough - Egg coasters, crafts, origami
- Reception of Roman law: stages, reasons, meaning
- Hydrogen sulfide water
- Fashionable skirts spring-summer 2020, photos, new items, trends
- Dollar inflation
- Carboxytherapy what is it, photos Before and After
- How much do Louboutins cost, Women's Questions
- SCO member countries
- Crankshaft position sensor
- Car cigarette lighter
- What is turbocharging, how does an engine with a turbine work, device
- Road accidents involving a pedestrian: statistics, causes, prevention
- Kate Moss diet: menu, recipes, secrets of slimness and beauty
- Fashionable jackets 2018-2019: women's jackets - photos of fashionable jackets, new items, styles, trends
- Fashionable shoes fall 2017
- Repair, diagram, device, as well as malfunctions of the brake system of the VAZ 2110
- Availability of information - what is it?
- Computer diagnostics of a car: diagnostics of a car engine in the GARAGE technical center, computer diagnostics of the engine of VAZ cars - Moscow (South-Western Administrative District): the price for computer diagnostics of a car is the lowest in Moscow
- Spring crafts for kindergarten
- What is WHO mode? Features of the introduction of the regime
- What subsidies can be received from the state: list, conditions, design features
- HOW TO MAKE THE SIMPLE POOL WITH YOUR OWN HANDS – PHOTO AND DRAWING, Do it yourself – How to make it yourself
- VW's micro-hybrid powertrain is comparable in efficiency to diesel
- Diet for Taurus women: menu, how to eat for Taurus according to the horoscope for weight loss
- All about Italian fur coats: review of models from Italy
- What is a demo version and what features does it have?
- Occult symbols
- I'm overdue for a driver's license replacement: how to restore it?
- Proper nutrition according to Ayurveda
- Wall in the form of shelves
- How to make plasticine at home with your own hands - quickly and easily!
- Is it possible to apply for alimony a second time: procedure and practice
- Tommy Hilfiger - clothing quality, reviews, fashion collections
- DIY Christmas garland
- Slotted and drilled brake discs
- Detox diet for 10 days - cleansing the body with a pleasant bonus in the form of weight loss
- Homemade masks for problem skin
- Balcony flower box holder: 8 original ideas
- Working as a bailiff: employee reviews
- Are minor children subject to property taxes?
- Service discipline in internal affairs bodies: procedure and concept
- Special assessment of working conditions: what is it? The purpose of a special assessment of working conditions
- Tinkoff Bank for legal entities: services, tariffs, reviews
- What are the types of inflatable pools for summer cottages: photos, characteristics, advantages, disadvantages
- Diet with green coffee: reviews from nutritionists
Chevrolet Captiva › Logbook › Electrical connection for towbar 7 or 13 contacts
When the need arises to transport a trailer, we are faced with the issue of installing a towbar and connecting an socket to connect the towbar’s electrics. If everything is more or less clear with the hardware, then questions arise with the electrical connection.
How to connect the towbar socket to the car's electrical system?
The socket can be connected in two ways:◾standard;
◾universal.
The use of the STANDARD method is only possible if the car has a socket for connecting the towbar electrics.
In such cases, you won’t need a trailer connection diagram at all, you just need to purchase an original set of wires (we plug one end into the socket intended for it, and the other end ends with a towbar socket, install the socket and that’s it) Very often, the pinout of the towbar socket (provided that standard equipment is used) is present in the machine's operating instructions. This is an ideal option as it does not require any changes to the vehicle's electrical system.
But this is a rather rare option.
As a rule, a UNIVERSAL connection method is used.
UNIVERSAL method 1: The car is not equipped with a modern electronic control unit. Thanks to this, electrical wires can be directly connected to existing electrical circuits. That is, the wires that come from the connector are connected to those connected to the rear lighting equipment.
UNIVERSAL method 2: The vehicle is equipped with a multiplex bus. The control unit tests the rear optics. When it determines that it is drawing more current (as a result of the connection to the trailer optics), the driver will receive an error message.
In such cases, a “matching block” should be used. The matching unit is connected to the standard electrical system of the vehicle, after which the unit itself transmits the corresponding signals to the trailer’s lighting equipment.
The car's control unit does not “see” this device, so problems with connecting the towbar no longer arise.
When connecting the towbar electrics, we learn that there are various socket options for connecting the towbar electrics.
The most common types of sockets have 7 and 13 contacts. On passenger trailers for transporting various goods and equipment, 7-pin devices are usually used, but on house trailers 13-pin sockets are used.
Essentially, the difference lies in the use of additional contacts necessary to activate the reversing lights and other electrical components of trailer houses (refrigerator, charging an additional battery, etc.)
Pinout of 7-pin socket - Europe (DIN / ISO 1724)1 Left turn signal2 +12V (optional) or Rear fog light3 Ground4 Right turn signal5 Right side marker and license plate light6 Brake lights
THIS IS INTERESTING: Adjusting the rear axle of the UAZ Patriot
7 Left marker
13-pin socket pinout - Europe (DIN / ISO 11446)1. Left turn (Yellow)2. Rear fog light (Blue)3. Ground for pins 1 to 8 (White)4. Right turn (Green)5. Left side of dimensions and license plate illumination (Brown)6.
Brake lights (Red)7. Right side of dimensions and license plate illumination (Black)8. Reverse (Pink)9. +12V from battery (Orange)10. +12V with ignition present (Grey)11. Ground for pin 10 (White-black)12.
Signal wire (usually spare) (White-blue)
13. Ground for pin 9
How to install a tow bar on a VAZ 2114
Source: https://avto-voshod.ru/ekspluatatsiya/kak-ustanovit-farkop-na-vaz-2114.html
Installing a tow bar on a Chevrolet Niva with your own hands
Type A towbar Of course, these are not all types of towbars installed on cars. We have listed only the most common ones. Next, we will describe the installation of a type A towbar, since it is most often used by car enthusiasts. The first thing you need to install a towbar is an inspection hole or overpass.
How to install a towbar
This condition is not mandatory, but having free access to the bottom of the vehicle can significantly simplify the entire process of installing the trailer hitch. If you don’t have an inspection hole in your garage, you can use the overpass, which is available in almost any garage cooperative. You need to tear off the adhesive tape, attach the towbar to the side members and the apron and tighten it with the mounting bolts supplied in the kit, having previously lubricated them with graphite lubricant.
That's it, the tow bar is in place! Now you need to install the outlet.
This will take much more time than installing a tow bar. The joining procedure is listed below.
Remember or better write down the order of connecting the wires by color. They are usually sealed with tape to prevent moisture and dirt from entering. If you have difficulties finding holes for fastenings, then you can use the towbar itself to search.
To do this, you need to take the device itself and attach it to the bottom, then use the holes in the brackets to look for holes in the car itself. Once you have found all the mounting holes, you can begin installation. In this case, you don’t even have to remove the car bumper itself.
Now, one by one, you need to secure the transverse rail of the device; it is attached under the rear bumper to the side member. Then you need to screw the tow bar brackets to the bottom of the car using bolts into the standard holes. Finally, in the case of a collapsible towbar, it is necessary to install the hook itself.
The socket is attached to the towbar itself; there is a regular place for it. Next, using the electrical diagram, we connect the wiring.
The cable itself can be wrapped with insulating tape or placed in a shrink-wrap. Now you need to attach the cable to the structure of the device, and then lead it into the car through the factory hole. After all this, you can connect the wires responsible for the side lights, brake light, ground and left turn signal to the rear left headlight; only the wire responsible for the right turn signal remains to be connected to the right headlight. Special lugs are placed on the wire ends and crimped.
Fuses are installed, of which there must be at least four.
Now you can connect the wires to the rear left headlight of the car. Each color of the cable is responsible for one or another type of light signal, therefore: You need to run one cable to the side of the right headlight and connect it to the right turn signal.
All colors listed correspond to the wiring from the outlet. In a headlight, the colors of the wires will be different, so you need to visually see which light signal is responsible for which wire.
Above in the drawing you can see a diagram that shows what each contact on the socket is responsible for.
At this stage, the installation is complete; after finishing the work, do not forget to lubricate the ball with graphite lubricant.
nivainstallation towbar chevrolet
Source: https://yastalamamoy.ru/chevrolet/%D1%83%D1%81%D1%82%D0%B0%D0%BD%D0%BE%D0%B2%D0%BA%D0%B0-% D1%84%D0%B0%D1%80%D0%BA%D0%BE%D0%BF%D0%B0-%D0%BD%D0%B0-%D1%88%D0%B5%D0%B2% D1%80%D0%BE%D0%BB%D0%B5-%D0%BD%D0%B8%D0%B2%D1%83-5.html
Content
- Installation of power elements
- Connecting an electrical outlet
- How to connect? Step-by-step instruction
Installing a towbar on a Chevrolet NIVA with your own hands is quite simple; even an inexperienced owner of this model can handle it. You will have to tinker a little more with the electrical connection, but there, in principle, there is nothing inaccessible or impossible. How to do everything correctly step by step will be discussed in our next article. We hope that the tips and recommendations below will help in this modernization of a well-known model.
Step-by-step installation of a towbar on a Chevrolet Niva with your own hands: video instructions
The basic package of the Chevrolet Niva does not include a towbar, but installing a towbar on this car with your own hands is simple, because there are holes specially designed for this in the body.
A towbar on a car is needed not only to attach a trailer, but also to protect the exhaust system and bumper from contact with the ground. Since such a car is used for trips to the country, to nature, such a device would be appropriate.
Do-it-yourself towbar installation
The towing device is sold in a complete set, which consists of the towbar itself, a socket, wires, a cap on the ball, special nuts and screws (3 pieces each), 6 bolts, 6 spring washers and 6 regular graphite lubricants.
The basic set has everything you need, so there is no need to buy anything additional.
Before installing the towbar, the vehicle should be positioned so that you have access to its lower part. Also make sure there is good lighting so you can see all the mounting holes. Next you need to do the following:
- clean the mounting area from dirt and remove the factory tape;
- all elements intended for fastening must be lubricated with graphite grease;
- Carefully insert the bolts into the pre-prepared holes and tighten the nuts tightly in order to secure the towbar well. First, a transverse rail is attached to the spar, and then a longitudinal one;
- Lastly, install the removable ball.
Connecting the towbar socket
When connecting the towbar socket, you need to know the wiring diagram of your car. Usually it has 7 contacts, 6 of which are in a circle and 1 in the middle. But please note that in imported trailers there are 9 such contacts, of which 2 more are designed to provide additional lighting and operation of household appliances. Before connecting the equipment, check that there are no burnt contacts anywhere and disconnect the car battery. Further:
- strip the insulation on the wiring of the rear headlight;
- Carefully solder one of the wires to the contact in the socket using the pinout diagram, then solder the next 6 contacts;
- carefully wrap the wire insertion points with insulating tape;
- return the headlamp to its place and connect the battery.
Once completed, check all of the vehicle's lights.
Several recommendations for using the device
When using the towbar, you must adhere to the following recommendations:
- when towing a trailer, do not exceed the recommended speed of 90 km/h;
- It is prohibited to tow cargo weighing more than 1300 kg;
- the load on the coupling ball cannot exceed 50 kg;
- the loads in the trailer must be evenly distributed, but the center of gravity must be above the axle if the trailer is single-axle, or between the axles if it is a two-axle trailer model;
- When carrying out a technical inspection, the connecting thread must be tightened.
Following these simple rules will extend the life of your trailer, so do not ignore them.
In conclusion, it should be noted that, despite the fact that towbars for a Chevrolet Niva can be different (collapsible, non-collapsible or semi-collapsible, under LPG), the principle of their installation is almost the same. Installing the tow bar will take you about two hours. The main thing when performing such work is to make all connections correctly and make sure that all components work well.
Source: https://car-avz.ru/glavnaya/mototsikly/16903-poshagovaya-ustanovka-farkopa-na-nivu-shevrole-svoimi-rukami-videoinstruktsiya
Towbar installation
The process of installing a purchased trailer hitch is quite simple and consists of two stages:
- Direct installation of power elements;
- Connecting a plug socket to the electrical wiring diagram of a Niva Chevrolet car.
Installation of power elements
- Place the car on a pit (overpass or lift);
- Clean the mounting points from dirt and dust;
- Tear off the factory tape covering the threaded holes;
- Apply the tow bar;
- Coat the bolts supplied with graphite lubricant;
- Tighten them, securely installing and fixing the towbar to the car body.
Advice! Experts advise treating the joints of the trailer hitch parts with the car body using an anti-corrosion coating.
Electrical connection
A more difficult stage of the work will be the integration of the electrical components of the towbar with the standard wiring. Because the cost of an error can be too high - from a short circuit and failure of electrical parts to ignition of wiring insulation.
To work, you will need a wiring diagram for the Niva Chevrolet, for example, from the factory instructions, as well as a pinout diagram for the plug socket.
Note! If you are going to use European trailers (camping campers, caravans), then they have 9-pin sockets. Two additional contacts are responsible for power supply to the trailer's household appliances.
The procedure for connecting the outlet will be as follows:
- Disconnect the battery;
- Remove the rear headlight;
- Determine the wire color you need from the electrical diagram;
- Strip the insulation;
- Screw and carefully solder the connecting wire using a soldering iron;
- Connect the free end to the desired contact of the plug socket;
- Repeat the operation for the remaining 6 contacts;
- Insulate the insertion point with electrical tape;
- Reinstall the headlight;