Cars admin26.02.2020
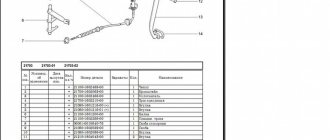
Part numbers are listed here (8 cells) and here (16 cells)
The work on replacing the clutch on K4M and K7M engines is no different.
To work, you will need a mandrel to center the clutch driven disc.
The mandrel from VAZ cars will fit. (Original - Emb. 1518 or Emb. 1780, or 67.7823-9702 L)
Removal
Place the car on a two-post lift, apply the parking brake, turn off the ignition, open the hood and disconnect the ground wire terminal from the battery.
Remove the gearbox (see here)
Note: When replacing the clutch, you do not have to completely remove the gearbox, but only move it away from the engine to the required distance. This work is shown here.
If present, install the flywheel retainer (flywheel retainer Mot. 582-01) to the engine cylinder block.
If not, then use a screwdriver or a spatula to keep the flywheel from turning and...
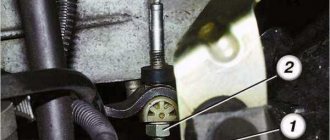
. Unscrew the six bolts 1, Figure 3-1, securing the clutch pressure plate to the flywheel and remove the pressure plate 2 and the driven clutch discs (replaceable head 13, extension, knob).
Loosen the bolts evenly: each bolt one turn of the wrench, moving from bolt to bolt along the diameter.
Remove the clutch pressure and driven discs from the flywheel, holding the driven disc.
Checking the clutch driven discs
Driven clutch discs for vehicles with K4M and K7M engines have different damper spring stiffnesses. To distinguish the clutch driven discs, marks are applied to the damper springs with paint, Figure 3-2.
Differences between clutch driven discs:
| Options | Engine K4M | Engine K7M |
| Outer diameter of the driven disk, mm | 200 | 200 |
| Driven disk thickness, mm | 7,5 | 7,6 |
| Number of splines | 26 | 26 |
| Spring Mark Color (Figure 3-2) | 1 - gray; 2 - green; 3 - blue-lilac | grey |
Inspect the driven clutch disc.
Figure 3-2 — Clutch driven disc marks on a car with a K4M engine: 1 — gray; 2 - green; 3 - blue-lilac
If there are cracks, dents, broken damper springs and cracks or delamination of the friction linings, the disc must be replaced.
Preparing for installation
Check the surface of the engine flywheel in contact with the clutch driven disc. There should be no scratches or signs of tarnish on the surface of the flywheel.
Check that the engine crankshaft main bearing is not seized.
Check the tightness of the engine and gearbox seals and replace if necessary.
Operations for removing and troubleshooting clutch parts Lada Largus
The work is shown using the example of a car with a K4M engine.
On a car with a K7M engine, the clutch is removed using completely similar techniques. 1. Remove the gearbox
If you are installing the old pressure plate, mark in any way (for example, with a marker) the relative positions of the disc housing and the flywheel in order to install the pressure plate in its original position (to maintain balance). Subsequent operations are shown with the engine removed for clarity.
2. While holding the flywheel from turning with a screwdriver (or spudger), remove the six bolts securing the clutch pressure plate housing to the flywheel. Loosen the bolts evenly: each bolt one turn of the wrench, moving from bolt to bolt along the diameter.
This is where the bolts securing the clutch housing to the engine flywheel are located.
3. Remove the clutch pressure and driven discs from the flywheel, holding the driven disc.
4. Inspect the clutch driven disc. Cracks on the parts of the driven disk are not allowed. Check the degree of wear of the friction linings. If the rivet heads are recessed by less than 0.2 mm, the surface of the friction linings is oily or the rivet joints are loose, then the driven disk must be replaced.
If the driven disc linings are oily, check the condition of the gearbox input shaft oil seal. It may need to be replaced.
5. Check the reliability of the damper springs in the driven disk hub sockets by trying to move them by hand in the hub sockets. If the springs move easily in their seats or are broken, replace the disc.
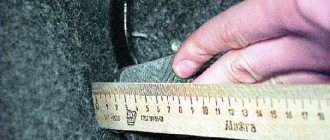
6. Check the axial runout of the driven disk if warping is detected during visual inspection.
If runout exceeds 0.5 mm, replace the disc. 7
Inspect the working friction surfaces of the flywheel and pressure plate, paying attention to the absence of deep marks, scuffs, nicks, obvious signs of wear and overheating. Replace defective components.
8. If the rivet connections A of the casing parts and the pressure plate are loosened, replace the pressure plate assembly. Using an external inspection, evaluate the condition of the diaphragm spring B of the pressure plate. Cracks on the diaphragm spring are not allowed. Places B of contact between the spring blades and the clutch release bearing must be in the same plane and have no obvious signs of wear (wear should not exceed 0.8 mm). Otherwise, replace the pressure plate assembly.
9. Inspect the connecting links A of the casing and disk. If the links are deformed or broken, replace the pressure plate assembly. Using an external inspection, evaluate the condition of the support rings B of the pressure spring. The rings should not have cracks or signs of wear. Otherwise, replace the pressure plate assembly.
10. Before installing the clutch, check that the driven disk moves easily along the splines of the transmission input shaft. If necessary, eliminate the causes of jamming or replace defective parts. 11. Apply refractory grease to the drive hub splines.
12. When installing the clutch, first install the driven disc using a mandrel...
Install the driven disk so that the protruding part of the disk hub (shown by the arrow) is directed towards the clutch housing diaphragm spring.
13 then install the clutch pressure plate housing on the three centering pins. After this, you can screw in the mounting bolts.
14. Screw in the bolts evenly, one turn of the key each, alternately moving from bolt to bolt along the diameter. The tightening torque of the bolts is 20 N*m.
15. Remove the mandrel.
16. Install the gearbox. 17. Remove air from the hydraulic clutch release system of a vehicle with a JH5 gearbox.
4500 rub.
The clutch on a car is used to temporarily disconnect the engine from the chassis to change gears and when starting to move. The clutch life depends very much on the driver’s driving style, and on average is 150-200 thousand km.
Replacing the Lada Largus clutch, along with a major engine overhaul, is considered one of the most complex and responsible car repair procedures. To replace the clutch, you need to disassemble a large number of units and components of the car, which in itself is a very difficult task.
Operations for removing the clutch bearing Lada Largus
1. Remove the gearbox if it was not removed to repair the clutch.2. Remove the two bolts securing the clutch release assembly...
3. ...and remove the cylinder assembly with the clutch release bearing from the clutch housing.
Test the new bearing before installation. It should rotate easily, without jamming or noise, and have no backlash.
Check the ease of movement of the bearing on the slave cylinder guide by pressing it in the axial direction. The bearing must move all the way without jamming and clearly return to its original position using a preload spring.4. Install the clutch release slave cylinder complete with bearing in the reverse order of removal. Tighten the bolts securing the working cylinder to the clutch housing to a torque of 7 N*m.5. Attach the pipeline to the slave cylinder adapter.6. Install the gearbox.7. Remove air from the hydraulic clutch release drive (see, “Bleeding the hydraulic clutch release drive of a vehicle with a JH5 gearbox”).
Your request has been accepted!
You will receive a notification when the product goes on sale to your contacts.
Removing and installing clutch discs of a Lada Largus with a JH3 gearbox
We remove clutch discs when they wear out and when replacing the rear crankshaft oil seal and flywheel, as well as when repairing the engine. The clutch discs can be removed without completely removing the gearbox, but only unscrew it and move it away, securing it at the same time. In the same article we will look at removing discs and clutch parts with the gearbox removed.
We prepare the car for repair. We install the car on a lift or inspection ditch. We disconnect the negative terminal of the battery and remove the gearbox, as indicated in the article - “Removing and installing the JH3 gearbox.” If the clutch basket will not be changed, then you need to mark the relative position of the flywheel and the basket in order to install the basket in place.
Using a socket 11, we sequentially unscrew the six bolts securing the clutch basket (Fig. 1). The bolts must first be tapped using a soft metal drift.
First unscrew each bolt one turn so as not to deform the basket body.
When unscrewing the last bolt, you need to hold the clutch basket (Fig. 2) so as not to drop the driven disc. You can insert a mandrel to center the disk for insurance. We take out the basket along with the disk.
We inspect and defect the flywheel for cracks and wear (Fig. 3)
We pay attention to the wear of the flywheel ring teeth. When installing, the driven disk must be oriented with its protruding part towards the drive disk, as shown in the figure (Fig. 4).
During installation, the driven disk must be oriented with its protruding part towards the drive disk, as shown in the figure (Fig. 4).
We orient the driven disk together with the basket using a centering mandrel (Fig. 5). We insert the mandrel into the input shaft bearing.
Holding the basket with one hand, attach six bolts securing the basket (Fig. 6).
Tighten the bolts crosswise with a torque of 20 Nm. When tightening, the bolts also need to be tightened evenly so as not to deform the basket body.
We remove the release bearing (Fig. 7) and check it for defects. Of course, based on experience, when the driven or drive disc wears out, the entire clutch assembly needs to be replaced.
Having removed the plug, we also inspect it for defects (Fig. 8).
We degrease the surface of the guide bushing and inspect the bushing (Fig. 9).
The bearing is a closed type and is not lubricated. The bushing should also not be lubricated, since the lubricant may subsequently get onto the clutch discs.
We install the parts in place and assemble them in reverse order.
Tightening torques for main clutch parts
Clutch housing mounting bolt and nut - 44 Nm
Bolt securing the clutch housing to the flywheel - 20 Nm
The fastening points for the gearbox are discussed in the article on removing the gearbox.
Lada Largus is positioned as a new type of heel. Therefore, it is not surprising that this car is especially popular among small entrepreneurs and small delivery drivers who actively use it for their business.
Features of the clutch of the Lada Largus car
Page 1 of 2
The clutch of the Lada Largus car is single-disc, dry type.
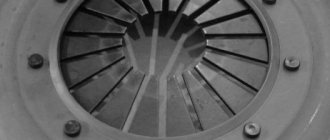
A pressure disk with a central diaphragm spring and a driven disk are installed, with friction linings attached with rivets.
The pressure plate is mounted in a stamped steel casing and is attached to the flywheel with six bolts (Figure 1).
This manual transmission vehicle has the same clutch. Only the drive differs depending on the gearbox model.
On a vehicle with a Jh4 gearbox, the clutch is controlled by a cable, while on a vehicle with a JR5 gearbox, the clutch is controlled using a hydraulic drive.
And on a car with a Jh4 gearbox, the release bearing moves along a guide sleeve with the help of a fork, and on a car with a JR5 gearbox, a hydraulic slave cylinder is installed directly on the gearbox clutch.
The driven disk (Fig. 2) is installed on the splines of the gearbox input shaft and is clamped by a diaphragm spring.
Release bearing 1 (Fig. 3), in box Jh4 is controlled by fork 2.
The release bearing is closed and does not require the addition of lubricant during operation.
The fork is inserted into the grooves of the release bearing clutch.
A rubber cover is installed on the fork shoulder.
The fork is controlled by a cable, which at one end is inserted into the fork and the other end is attached to the clutch pedal.
The throwout bearing in the JR5 transmission is combined with a slave cylinder, which is attached by two bolts to the clutch housing.
Release bearing in box JR5 in Figure 4.
The hydraulic clutch release drive for the JR5 gearbox consists of a master cylinder, which is installed in the engine compartment, and a slave cylinder.
The hydraulic drive is connected using a tube and hose. The master cylinder is connected to a reservoir that is shared between the brake and clutch systems.
autoruk.ru
All steps to replace the clutch cable
The lever itself that holds the weight is called a “fork.” Pull the weight out of the slot by pulling the cable in the direction “away from the fork” (Fig. 1).
Then they move on to the bracket: the rubber coupling is removed from the slot. This coupling ends the cable sheath (Fig. 2).
Inside the cabin
By slightly pulling the cable toward you, remove tip 1 from the pedal holder (Fig. 1). Then tip 2 must be pushed forward. And to do this, two petals are squeezed on it. You can even damage the part itself, which will not be a big deal.
The main thing is to squeeze the cable tip into the engine compartment. And then the cable assembly is replaced with a new one.
We're not talking about moving the seat back. You may also need to remove the casing under the pedal. It is held in place by pistons, which are snapped off with a screwdriver.
Eliminating clicks and squeaks in the clutch pedal
The clutch mechanism of the Lada Granta is equipped with a ratchet-type compensation mechanism that regulates the tension of the clutch cable.
Clicks when the pedal is pressed indicate that the clutch cable is incorrectly adjusted during installation, or its adjustment has become “lost” during operation or repair of the machine. It’s easy to eliminate clicks - just adjust the Grant’s clutch cable.
Once the distance between the extended cable guide and the clutch fork is set to within 27 mm, the clicking should stop.
- Creaks when pressing the clutch pedal occur in different places. It can creak:
- Therefore, it is necessary to establish the source of the squeak and act depending on the identified cause.
- ladaservice.info
plastic pedal bushing; clutch cable guide; clutch cable; gearbox input shaft. If the pedal bushing creaks, you should lubricate it, and if this does not help, replace it. The creaking of the clutch cable guide can be eliminated using a lubricant, for example, “Litol”. It must be applied to the contact point between the clutch fork and the plastic cable nut.
You should try to lubricate a squeaking clutch cable by pouring a little oil inside the braid. If this does not help, the cable should be replaced with a new one. If the squeak comes from the gearbox, this indicates a lack of lubricant on the input shaft along which the pressure bearing moves under the influence of the clutch fork.
The problem can be fixed without removing the gearbox. You need an aerosol can with graphite lubricant, equipped with a tube. To do this, you need to remove the engine protection (to get access from below) or dismantle the air filter (to allow access from above). Next, you need to remove the boot of the fork lever, insert a spray can into the hole and generously spray the shaft with graphite lubricant.
Clutch cable adjustment
More details about replacing and adjusting the entire clutch in the material: Replacing and adjusting the clutch on a Renault Logan with your own hands: articles, video.
There are always two parameters that are adjustable on any traction cable. But the Renault Logan clutch cable is designed in such a way that only parameter L2 is adjusted (see photo). Distance L1 is not adjustable and should be 86±5 mm.
So, take the key “10”, screw on nut 2 and press the pedal a couple of times. We check that the gap L2 is approximately 60 mm. If necessary, adjust the position of the nut.
According to the documentation, the fork travel should be 28-33 mm (for the K7J motor) or 30-35 mm (for other engines).
Control check: start the engine and engage reverse gear. If it engages easily, the clutch is set correctly. By the way, you can tighten the locknut at the last stage.
Basic clutch malfunctions
Incomplete clutch disengagement
In these cases, drivers say that the car is “driving.” In this case, the driven disk is not completely disconnected from the engine flywheel. As a result, the car moves away abruptly, and when changing gears the same thing happens, no matter how smoothly you press the clutch pedal.
Causes and solutions to the problem
- Lack of required pedal free play. This refers to the distance from its bottom to the floor. The data for each car brand is different, so you need to look for it in the appropriate sources and instructions.
- Incorrect adjustment of the CC shutdown drive. To solve this problem on cars with a mechanical clutch system (usually installed on front-wheel drive cars), it is enough to find the correct ratio of the two adjusting nuts. In a car with a hydraulic drive, adjust the stroke of the CC fork by adjusting the stroke of the working cylinder rod.
- Warping of the driven disk. If the mechanical runout exceeds 0.5 mm, the lining begins to warp and finds itself almost constantly pressed against the flywheel.
- Jamming of the driven disk hub (misalignment) on the splines of the gearbox input shaft. The problem can be solved by cleaning and lubricating them like LSC15. Typically, such a problem occurs on a car that has not been in use for a long time and has been parked in the open air. If the above steps do not help, you will have to replace the disk or input shaft.
The clutch is slipping
You press the gas, the engine roars, and the car (especially uphill) drives reluctantly and accelerates slowly. Another symptom: there is a burning smell in the cabin.
Reasons and methods of repair
- Incorrect clutch pedal free play adjustment.
- Contact of lubricant on the friction lining of the driven disk. This is typical for old cars, in which oil leaks out in “unknown” ways due to loose connections, bad seals, and when driving it splashes under the bottom, reaching the lining. As a result, we get a burning smell. To fix the problem, find the source of the lubricant leak and wipe the disc.
- Friction lining wear. There are two options: replace this element (which is what they did in Soviet times and the 90s) or buy a new driven disk, which is preferable, since riveting the lining correctly is not at all as easy as it seems: if done incorrectly, you will again have to dismantle the manual transmission and, in the end, still buy a new disk.
- Drive failure. Inspect the CC fork, cable (for vehicles with a mechanical system) and make sure the working cylinder is working (for vehicles with hydraulics). To do this, place the car on the inspection hole and ask an assistant to press the clutch pedal several times: From below you should see how the working cylinder rod pushes the fork.
- In vehicles with a hydraulic drive, the cause of clutch slip may lie in the master cylinder, where the compensation hole may be clogged. The device must be removed and washed.
Noise when pressing the clutch pedal
But if you let it go, the sounds disappear. Signs of a clutch malfunction lie in the nature of the noise, which can be different: from a not particularly annoying rustle to an intermittent grinding sound (either loud or quiet).
Causes and repairs
- Wear of the release bearing due to drying out of the lubricant or play in the cage. The part is not removable, it just needs to be replaced. Rapid wear of the release bearing is facilitated by frequent exposure to moisture, which may be associated with fording (if you have an SUV).
- Breakage, wear of the driven disc damper springs, “petals” (elastic plates) of the clutch basket. Only a change will help.
- Worn bearing (front) input shaft of the box. It will be necessary to replace the part with partial disassembly of the gearbox.
The pedal remains buried in the floor or squeaks
You can remove it back with the toe of your shoe. Here, problems with the clutch consist of jamming of the drive or wear of the release bearing. The master cylinder rod and pedal spring may also malfunction: this is due to prolonged downtime of the machine. If there is a squeak, inspect the axle bushing on which the pedal is attached. The problem can be corrected using lubricant - LITOL-24, etc.
Clutch disengages when pressed hard
And if you press the pedal smoothly and release it, the CC will not turn on. Such signs of clutch failure appear on hydraulically driven machines.
Causes
- Insufficient fluid level in the CC.
- Lack of tightness in the connections of pipes and hoses of the clutch system.
- Wear and damage to elements (usually cuffs) of the master cylinder or its mirror.
Jerking when the clutch operates
If there is nothing to do with the drive, you need to remove the basket with the disk and inspect them: perhaps the friction linings have worn out or the rivets securing them have become loose. In the latter case, just knock them out with a hammer.
"Soft" clutch pedal
Often, possible clutch malfunctions are associated with the presence of air in it. It does not allow the elements of the assembly to move quickly due to insufficient pressure created by the liquid. Turning on and off is difficult. The air must be removed from the system.
Bleeding the clutch
Prepare brake fluid, a tube with a diameter slightly larger than the bleeder fitting of the working cylinder of the unit, a small container, and tools. Progress of the procedure:
- Place the car on the inspection hole.
- Fill the clutch master cylinder reservoir with as much fluid as possible.
- Find the working cylinder and put an elastic tube on its bleeder fitting (it should be closed with a plastic cap), the other end of which is lowered into a container with brake fluid.
- Ask an assistant to depress the pedal 3-4 times and hold it near the floor.
- Unscrew the fitting: if you see air bubbles, wait until the liquid stops flowing out and tighten it.
- Repeat the operation until only clear liquid comes out of the tube.
Clutch adjustment on Lada (VAZ) Largus
After an unsuccessful or simply incorrect adjustment of the clutch pedal or pressure plate, you may find that the problems have only increased - third-party, clearly unnecessary sounds and noises appear. What happens to the Lada (VAZ) Largus unit itself at this time is unclear, and how the adjustment performed will affect its working life is also unclear.
Usually, experienced car owners adjust the clutch themselves, and they do this on a wide variety of foreign cars. However, this approach is not always successful, especially if the car is new or the owner has no experience.
It is possible to carry out this type of work with a qualified approach for a small amount in a car service center, where the work is performed by a master.
Causes and symptoms of failure
Unfortunately, intensive use has the most negative effect on the operation of the clutch. Its mechanism wears out under the influence of friction, and the speed of wear will also be affected by the quality of the road surface and your driving style. Driving on old, unrepaired roads with a lot of dust leads to greater contamination of components and mechanisms, to an increase in friction force and, accordingly, replacing the Lada Largus clutch will be required sooner than if you were driving, for example, on German autobahns.
The following symptoms will tell you that it is time to change the clutch:
- Incomplete engagement (“Lada Largus” is slipping) and clutch disengagement (“Lada Largus” is driving).
- Engaging the clutch causes noticeable vibration in the vehicle.
- The clutch pedal has become too hard to press or has even sunk to the floor.
- You began to change gears with difficulty.
- Increasing engine speed does not lead to a significant increase in vehicle speed. This is especially noticeable when moving uphill.
Clutch for Lada Largus 8V, mechanical drive
Clutch kit Lada Largus
Renault (Original)
INFO clarify
Clutch kit Lada Largus
Krafttech (Türkiye)
INFO
| vendor code | Name | 302052223R |
| 821071 | Clutch kit Lada Largus Valeo (France) INFO | |
| RNK2058 | Clutch kit Lada Largus Exedy (Japan) | W03200D |
| CK63068 | Clutch kit Lada Largus Fenox (Belarus) INFO | |
| MK9523 | Clutch kit Lada Largus Mecarm (Italy) INFO | |
| 620108000 | Clutch kit Lada Largus Luk (Germany) |
Change the release bearing on a Lada Largus car
- have holders and other tools for installation and dismantling
- be able to prepare a seat
- it is necessary to check the new bearing for play. You need to make sure that it rotates freely and does not jam. Installing a defective part is throwing money away
To eliminate any risks, it is easier to find a technician who has gained experience and has dealt with replacing a hydraulic or roller clutch bearing, including on a Lada (VAZ) Largus.
When replacing the release bearing in the clutch, it is necessary to partially disassemble the gearbox, which on a foreign car Lada Largus is carried out according to a certain technological scheme.
Selection of hydraulic drive for Lada Largus
If, when the pedal is pressed all the way, the clutch does not completely disengage, and characteristic sounds occur when reverse gear is engaged, this primarily indicates that air has entered the drive. In this case, it is necessary to pump the system hydraulics. If there is a fluid leak from one of the cylinders, it must be replaced.
If you need to replace an assembled spare part, you can pick it up on the website of our online store. You can buy a part or its components for the VAZ Lada Largus at an affordable price online. If you require further advice, please use the contact information provided on the website. Our managers will help you make the right decision.
Sign up for a technical center
We suggest you choose which method is appropriate for you - an electronic form (then you will be contacted after some time), or directly by telephone.
A preliminary agreement with the company is an undoubted convenience, because you yourself determine what time or day it will be convenient for you to arrive. You can make an appointment for the day of the call and for other days.
By the time you specify, the service station will provide a technician and a place in the work area. There will be a free lift and equipment available. In addition, you will be served out of turn.
Sources
- https://www.autosecret.net/kppsceplenie/1539-snjatiesceplenija
- https://largus-remont.ru/zamena_scepleniya_lada_largus/
- https://zamenit-sceplenie.ru/lada-vaz/lada-vaz-largus
We are preparing to replace the cable, removing all unnecessary
Of course, the car must be stopped before replacement. Next, remove the filter bellows (Fig. 1). On a 16-valve valve, the corrugation is held in place by a clamp, but it will also be easy to remove.
Then, if we talk about 16 valves, it is better to remove the "intake muffler". The plastic box, when there is no corrugation, can be immediately moved to the side (Fig. 3).
The box is the “muffler”.
The cable ends with a tip-rod on which a weight is attached. This detail was hidden from us by the corrugation.
We will unscrew the nuts:
- Take two “10” wrenches and unscrew nut 1, holding nut 2. If the thread is “sour,” clean it with a solvent;
- Unscrew nut 2, holding the pressed part of the tip with a “7” wrench.
Now the weight will be easy to pull out of the slot.
Know that replacing the clutch cable on a Renault Logan can be done without unscrewing anything. The cable is pulled towards itself, the lever with the slot is pushed back, etc.
Replacing the friction clutch
Repairing the Larugsa clutch, like any other car, does not make sense; all worn parts must be replaced. To work, you will need a standard set of tools, amplifiers, a hammer and a new set of spare parts. First, the car must be placed on a lift or its front part raised on jacks above the inspection hole. The front wheels and engine protection are removed. After unscrewing the screws, you need to remove the left shield under the bumper. This will give you access to the shield fasteners in the wheel arch, which must also be removed.
The gearbox oil is drained into a suitable container; to do this, first unscrew the plastic and then the metal plug. Do not remove the reservoir until maximum oil has been drained. Dismantle the brake caliper and put it aside along with the pads.
Removing the steering knuckle
Removal is carried out according to the following scheme:
- disconnect the ABS sensor;
- Using a 16 mm wrench, unscrew the nut on the tie rod screw, use a screwdriver to open the two sides of the knuckle, and press out the ball joint rod;
- on the steering end stud, unscrew the nut with a 16 mm wrench and press out the stud;
- Using two 18 mm wrenches, unscrew the fastening nuts that secure the fist to the stand. Now you can remove the steering knuckle, and also dismantle the CV joint from the gearbox (in this case, the rollers will probably fall out).
It is impossible to replace the clutch on a Largus without draining the oil, since the internal drive mechanisms (CV joints) cannot be unscrewed if there is lubricant in the gearbox.
Working in the engine compartment
First you need to disconnect the negative terminal of the battery and remove the cable. To do this, the counterweight is pulled forward, removed through the slot, after which the rubber coupling is removed through it. The engine harness holder is attached to the gearbox housing. To remove it, just loosen the fastener. Now you need to disconnect all the wire terminals:
- unscrew the two mounting screws and remove the terminal from the TDC sensor;
- Disable the reverse sensor at the gearbox;
- disconnect the speed sensor terminal;
- The oxygen concentration sensor (lambda probe) is also disconnected.
The breather hose needs to be loosened and moved away from the box, unscrew the two wires to ground. Next, find the gearshift knob rod, loosen the fastening and pull out the rod.
A mark is left on the fastening clamp using paint so that the rod can be placed correctly during installation.
https://youtube.com/watch?v=WFyYSC08Aiw
Removing the gearbox
It is impossible to replace the clutch on a Lada Largus without removing the gearbox. First you need to remove the subframe by unscrewing the three bolts securing it to the bumper. Then the rear support bracket is removed, the steering mounting bolts and the power steering mounting bolt on the left on the subframe are unscrewed. The exhaust pipe is disconnected from the exhaust manifold and removed from the rubber hangers. The subframe is attached to the body with 4 bolts - they need to be unscrewed. Additionally, you will have to remove the starter.
It remains to remove the two screws on top - they secure the gearbox to the engine - and the four bolts with which the clutch housing is attached to the oil sump. Suitable supports are first installed under the engine and gearbox. At the very end, the left engine mount bracket is dismantled, after which the nuts on the lower studs are unscrewed.
Replacing the mechanism
To remove the basket, perform the following operations:
- using an 11 mm wrench, unscrew 6 bolts that hold the basket, fixing it on the flywheel - one turn at a time, sequentially;
- holding the friction disc, remove the basket.
After replacing all worn elements, the assembly is assembled, and the steps are performed in the reverse order. For installation you will need to use heat-resistant grease and a centering mandrel.
Clutch adjustment
Ideally centering and balancing the friction clutch by doing the assembly yourself will be problematic, but possible. To adjust the tension with your own hands, you need to perform a number of actions:
- find the nuts for adjusting the clutch pedal (located under the power steering reservoir);
- unscrew the outer nut to the end of the stud;
- using the second nut, the travel of the clutch pedal is adjusted to the desired cable tension;
- After this, the external nut secures the fastener so that in the future it does not loosen and the cable does not fly off.
If the Largus clutch is adjusted correctly, first gear will engage easily. When the engine is running and the clutch pedal is fully depressed, there should be no crunching, crackling, spontaneous increase or decrease in speed.
Reviews about replacing the friction clutch yourself
Largus owners who changed the clutch themselves note the following:
- It is difficult to do the work yourself; it is better not to try without the skills, conditions, tools and knowledge.
- You can't do it without helpers. But even in this case, it may take all day to replace.
- As long as the clutch works and does not cause concern, there is no point in changing it.
Judging by the reviews, it is better to entrust clutch replacement to specialists, especially since the price of the issue is not so high. Conscientious craftsmen provide a guarantee for their work and bear financial responsibility for it. If you replace it yourself, all actions are performed at your own peril and risk.
If the following malfunctions occur, it is necessary to check the hydraulic clutch drive system for fluid leaks and remove air from the system:
– the appearance of free play of the clutch pedal;
– the clutch pedal is in the middle or depressed position;
– difficulty shifting gears.
Possible consequences of contamination entering the hydraulic clutch system
The hydraulic clutch drive is very sensitive to contamination. The entry of contaminants into the system can lead to the following consequences:
– inability to change gears;
– damage or complete failure of the hydraulic clutch;
– leaks from the hydraulic clutch drive.
To remove air from the hydraulic clutch drive, use the following equipment:
– installation for removing air from the hydraulic drive system through a brake fluid reservoir type OMA 883 f. "OMA" (Italy);
– a syringe for removing air through the fitting located on the clutch slave cylinder.
Hydraulic Clutch Bleeding Procedures
If parts of the hydraulic clutch are removed
Perform air removal operations using a device for removing air through the brake fluid reservoir or using a new syringe through the air removal fitting located on the clutch slave cylinder (brake fluid according to the current “Codifier of basic and auxiliary materials used in vehicle maintenance and repair” LADA" K 3100.25100.00018).
If the clutch hydraulic parts are not removed
Perform air bleeding operations with a syringe only by injecting brake fluid through the air bleeding fitting on the clutch slave cylinder.
Place the vehicle on a two-post lift, apply the parking brake and turn off the ignition.
Remove the engine crankcase protection (see here)
Bleeding procedure if there are no hydraulic drive parts removed
Bleeding using a hydraulic drive system bleeder
Secure the clutch pedal in the up position using a strap attached to the steering wheel to ensure hydraulic integrity during the bleeding operation.
Connect the installation for removing air from the hydraulic drive system to the brake fluid reservoir (installation for removing air from the hydraulic drive system type OMA 883 f. "OMA", Italy).
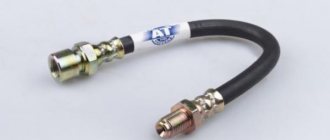
Remove plug 1, Figure 8-1, from the air bleeder fitting on clutch slave cylinder 4.
Connect the transparent tube to the air removal fitting, lowering the other end into an empty vessel located above the air removal fitting (transparent process tube, process vessel).
Press the lock 2 and pull out the pipeline 3 one click to open the air bleed hole.
1 – plug for air removal; 2 – clamp; 3 – pipeline connecting the main and working cylinders of the clutch drive; 4 – clutch slave cylinder; 5 – gearbox
Open the system between the bleeder unit and the brake fluid reservoir.
Wait until the brake fluid flows out without bubbles.
Relieve pressure in the clutch hydraulic drive by turning off the air bleeder.
Press the lock and install the pipeline into the working cylinder until it clicks.
Disconnect the transparent tube from the air bleed fitting and install the plug on the fitting.
Replacing the clutch basket (pressure plate)
- preliminary determination of the need to change the basket
- using professional tools specially designed for this purpose
- compliance with the sequence of events
This part of the mechanism is important, since it is where all the clutch parts are located. So that the unit can operate without violating the principle of operation, the pressure plate should be changed only by a qualified technician and where they have real practice in changing the clutch basket.
It is common practice in car service centers to replace the basket assembly. This type of work is considered the most acceptable and high-quality, since it becomes possible to change the casing. Accordingly, the result will be of higher quality.
Features of replacing the Lada Largus clutch
Lada Largus is equipped with two types of manual gearboxes. On the 5-seater passenger version with an 8-valve engine, a JH3 gearbox with a cable drive is used. The remaining modifications are equipped with a JP5 gearbox with a hydraulic clutch drive.
Gearboxes differ only in the drive principle. The entire mechanical part is completely identical. Accordingly, JH3 is equipped with a conventional release bearing, and JP5 is equipped with a bearing combined with a hydraulic cylinder.
When repairing a clutch, we strongly recommend replacing the entire set of parts: the release bearing, the clutch basket with the pressure plate and leaf spring, the driven disc with friction linings and damper springs. Our technicians will definitely check the condition of the pressure fork. If it is worn out, it is also better to replace it.
After dismantling the gearbox, we make sure to inspect the crankcase. If there are signs of oil leakage from the oil seals of the gearbox input shaft or crankshaft, they must be replaced. They cost pennies compared to the cost of dismantling and installing the gearbox.
Experienced technicians at our technical center specialize in replacing Lada Largus clutches. The work is carried out in full compliance with the manufacturer's standards. It takes about 4 hours of working time. You can wait this time in a comfortable rest room or go about your business. All work will be performed professionally, efficiently and on time.
see also
Comments 21
This is just a restored clutch - which is what the article number says...
Good evening. I have a Largus 7 seater. 8kl. Renault engine. I also bought myself a clutch in advance. Tomorrow I will look at what I bought.
driven disk (with ferodo) if it was in the box, what is written on it or on the disk itself? Sloppy drilling of ferodo, and the rivets look like they are made of steel.
Posted a photo of the box. And the box itself has already been disposed of.
I assume that the disc is fake: 1. On the box it says made in Russia, and the barcode 327 is French; 2. The original has 6 damper springs, the one you bought has 4. 3. The original disc is not painted, but everything on this one is painted. 4. In the original, the rivets are different (tubular with a hole) 5. The rivets in the original are recessed by about 1 mm. from the ferodo working surface - on yours they are practically on the same surface. If it is also ferrous metal, then there will be a farewell to the flywheel - there will be trouble.
The disk with 6 springs was in a box with another basket. There are no comments about the rest. Already worth it. We'll see how life shows.
Wouldn't it be easier to look at the wine?
Fuck the prices, the Mercedes are resting on the sidelines.
But this is a repair with parts, filters and oils.
Well, this is understandable, but now let’s calculate how much the same repair will cost, for example, in Kalina. I’m looking at the prices of spare parts for Largus and my hair is moving (one steering knuckle costs about 10,000 rubles (as an example)). It looks like there is a VAZ label, but spare parts are expensive as for a foreigner.
Read more: Guap St. Petersburg reviews
there is only a label from the vase
But there was no point in purchasing this line if everything was imported. Everyone produces spare parts for Logan and China and Turkey and Romania and France and Taiwan, etc., but not us, those who produce it.
You probably don’t know, but AvtoVAZ owns almost nothing there anymore. Since April 2020, Alliance Rostec Auto BV owns 99% of AvtoVAZ shares. In the joint venture itself, Rostec has 25%, Renault has 75%
Yes, I know, but it’s a shame. I bought it with the expectation of inexpensive service, I thought maybe they would gradually start producing spare parts at a normal price, but along the way I was wrong. But recently I saw a video about the repair of Vesta and realized that they were less lucky, it’s generally tough there.
there is only a label from the vase
So in a box with the inscription AvtoVAZ, spare parts are more expensive than in a box with the inscription Renault
Well, this is understandable, but now let’s calculate how much the same repair will cost, for example, in Kalina. I’m looking at the prices of spare parts for Largus and my hair is moving (one steering knuckle costs about 10,000 rubles (as an example)). It looks like there is a VAZ label, but spare parts are expensive as for a foreigner.
Removing the gearbox on a Kalina and on a Renault-Largus are completely different processes! On a Kalina, the gearbox can be unfastened like two fingers, but here the entire subframe with the front suspension and steering wheel will have to be dismantled. Removing and installing the subframe doesn’t cost 3 kopecks!
By the way, they all have a hydraulic release
A friend has a Largus with 5 seats and released a little earlier the usual clutch and the regular release that comes with the clutch.
depends on the type of gearbox that is on the Largus. With 8 valve engines, the gearbox with a conventional release gear, with 16 valves - hydraulics! This concerns Renault internal combustion engines, what are these Shit-ass people pushing at AvtoVAZ now, I don’t even want to listen. If you want to ruin a good car, collect him at AvtoVAZ!
By the way, they all have a hydraulic release
Google thinks differently)))))
Clutch on/off unit:
The clutch in the JH3 gearbox is engaged/disengaged using a clutch with a bearing, which is moved by a special fork along a guide sleeve. In this case, the latter is connected by a cable to the clutch pedal.
In the JR5 gearbox, the process of engaging/disengaging the clutch is carried out by a working hydraulic cylinder combined with the clutch release bearing. The working cylinder is connected to the main hydraulic cylinder by a separate pipeline. The clutch pedal acts on the master cylinder rod.
The speed selection in the JH3 gearbox is controlled by a rigid rod, while in the JR5 it is controlled by two flexible cables.
The type of specific gearbox installed on the LADA Largus engine is indicated on a special plate located on the lower part of the crankcase. The plate contains the following information:
Signs of a bad clutch
It's not every day that a clutch breaks. It happens that you don’t immediately realize that the clutch on Largus is failing. This can be easily understood by the following signs:
- When you press the clutch pedal or in the neutral position of the gearshift knob and release the pedal, you hear an extraneous noise - grinding, squeaking, howling or rattling
- Some gears are difficult to engage or do not engage at all
- The clutch does not completely disengage when the pedal is pressed, the clutch moves
- The clutch slips and does not fully engage when the pedal is released and the gear is engaged
If the clutch engages at the very beginning or end of the pedal travel, then the clutch pedal free play may need to be adjusted. Our master can do this. He will also inspect the clutch and be sure to let you know if it needs to be replaced.
Most often, the release bearing disappears due to poor lubrication. It happens that the petals of the diaphragm spring weaken and sag, or critical wear forms at the point of their contact with the bearing. Over time, the damper springs or friction linings of the driven disc may become loose.
If the friction linings on the disc are worn out, cracks or delaminations are visible on them, then the disc must be replaced.
Clutch drive Lada Largus
LADA LARGUS cars can be equipped with a cable or hydraulic clutch drive, depending on the configuration. There is no gap between the clutch release bearing and the pressure spring petals. Cars equipped with the JH3 gearbox are equipped with a cable clutch, and the JR5 gearbox is equipped with a hydraulic clutch.
CABLE CLUTCH (for JH3 gearbox)
The clutch cable drive does not have an automatic clearance compensation mechanism. Single-disc, dry, with a central diaphragm spring. The mechanism is located in an aluminum crankcase, structurally integrated with the gearbox and attached to the engine cylinder block.
1 — clutch pedal; 2 — clutch cable; 3 — clutch release fork; 4 — clutch release bearing
1 – clutch release bearing with clutch assembly; 2 – clutch release fork; 3 – pressure plate with casing assembly (“clutch basket”); 4 – driven disk
Clutch basket (pressure plate assembly): 1 – clutch cover; 2 – pressure disk; 3 – diaphragm spring; 4 – connecting plates
The clutch housing is connected by six bolts to the engine flywheel. Replacement of the “basket” is necessary when there is ring wear on the diaphragm spring blades to a depth of more than 0.8 mm, as well as in the case of a decrease in the effort on the pedal when disengaging the clutch (and, accordingly, an increase in the working stroke), which indicates large wear on the surface of the pressure plate or “ settlement" of the diaphragm spring.
Driven clutch disc: 1 – friction lining rivet; 2 – friction linings; 3 – spring plate; 4 – support finger; 5 – disk hub; 6 – damper spring; 7 – damper plate
The driven disk with a spring torsional vibration damper is installed on the splines of the gearbox input shaft between the flywheel and the pressure plate. Outer diameter 200 mm, thickness – 7.6 mm. The driven disk is replaced if its axial runout in the area of the friction linings is more than 0.5 mm, oiling, cracking, scuffing or uneven wear of the linings, loosening of the rivet joints, and also if the rivet heads are recessed from the surface of the linings by less than 0.2 mm.
Clutch cable: 1 – front cable tip; 2 – front end of the cable sheath; 3 – rear cable end; 4 – rear end of the cable sheath; 5 – cable; 6 – rubber support sleeve
The front end of the cable is fixed in the clutch release fork, and the rear end is in the clutch pedal holder. The front tip is threaded and is used to adjust the clutch release drive.
Clutch drive parts : 1 – clutch housing; 2 – clutch release bearing guide sleeve; 3 – clutch release bearing with clutch assembly; 4 – clutch release fork; 5 – dirt-proof cover
HYDRAULIC CLUTCH (for JR5 gearbox)
The clutch release drive is hydraulic. The force in it from the clutch pedal to the clutch release bearing is transmitted through the working fluid. The hydraulic drive consists of the clutch master and slave cylinders connected by a pipeline. The working fluid is poured into a reservoir, which is installed on the master cylinder and is used to power the brake system and the clutch release drive.
1 — clutch pedal; 2 — clutch master cylinder; 3 - pipeline connecting the main and slave cylinders of the clutch drive; 4 — clutch slave cylinder; 5 — supply pipeline of the clutch master cylinder; 6 — hydraulic brake reservoir
1 – clutch housing; 2 – clutch release bearing; 3 – clutch release working cylinder; 4 – pressure disk with casing assembly (“basket”); 5 – driven disk
“Basket” and driven disc of the clutch: 1 – casing; 2 – pressure disk; 3 – diaphragm spring; 4 – friction linings; 5 – damper springs; 6 – driven disk hub; 7 – damper
Elastic plates. The casing contains a diaphragm spring, which is stamped from sheet spring steel. When free, the spring has the shape of a truncated cone with radial slots extending from the inner edge of the spring. The spring slots form eighteen petals, which are elastic release levers. Due to the elasticity of the levers, the diaphragm spring creates more uniform pressure on the clutch pressure plate, which contributes to smoother engagement and disengagement of the clutch.
Arrangement of the wavy spring plate . The driven disk with a spring-loaded torsional vibration damper is mounted on the splines of the gearbox input shaft between the engine flywheel and the pressure plate. The torsional vibration damper dampens vibrations arising from dynamic loads in the transmission and uneven engine operation.
Idle damper . A disc hub is installed between the damper plates. Damper springs are installed in the grooves of the hub and damper plates. The damper plates are connected by support pins. In the disk hub, opposite the support posts, there are cutouts that allow the hub to rotate within certain limits relative to the damper plates, while compressing the damper springs. This allows you to reduce dynamic loads in the transmission when starting the car and changing gears.
Clutch release bearing: 1 – bearing; 2 – working cylinder; 3 – fluid supply tube to the working cylinder
Parts of the working cylinder and clutch release bearing: 1 – clutch release bearing; 2 – protective cover; 3 – working cylinder; 4 – clamp; 5 – fluid supply tube to the working cylinder
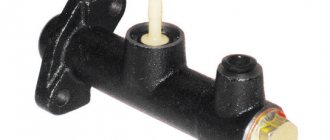
Clutch master cylinder: 1 – fitting for connecting the hydraulic drive tube; 2 – main cylinder body; 3 – fitting for connecting the liquid supply hose from the tank; 4 – pusher; 5 – pusher tip
Clutch hydraulic bleeder fitting: 1 – fluid supply tube to the working cylinder; 2 – bleeding fitting; 3 – clamp; 4 – clutch hydraulic tube
To pump the hydraulic clutch drive, there is a fitting on the plastic tube for supplying fluid to the working cylinder, closed with a rubber cap.