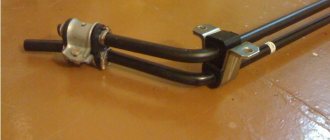
The principle of operation of the rear struts differs little from car to car. The station wagon leaves the machine with a two-pipe hydraulic design that absorbs shock loads due to oil resistance to the cylinder piston. From the outside, these elements look like a pump, only instead of air there is a viscous liquid.
In what case is it necessary to replace the rear struts of a Lada Priora?
Factory elements can withstand a mileage of 70-80 thousand km, and after that they need replacement. This is what the factory model says, but in reality no one will change the struts until they wear out. You can also replace shock absorbers if it is necessary to change the characteristics of the suspension.
It is very easy to determine for yourself how good the racks are. The first reason to pay attention to the performance of these elements is to cause an oil leak from the cylinder. In addition, the malfunction has its own sound - a dull knock in the area of the rear arches, which, in principle, also occurs due to oil leakage due to depressurization.
To confirm your assumptions, rock your sedan. If one of the back sides sagged under pressure and froze, everything is fine.
Rocking is a direct signal that the shock absorber is broken, and the inertial movement of the body part occurs due to the spring.
Brief summary
As you can see, replacing the rear struts on a Priora is not particularly difficult. The main thing is to make the right choice and purchase shock absorbers that will last for many years, as well as diagnose them in a timely manner and prevent critical malfunctions.
The principle of operation of the rear struts differs little from car to car. The station wagon leaves the machine with a two-pipe hydraulic design that absorbs shock loads due to oil resistance to the cylinder piston. From the outside, these elements look like a pump, only instead of air there is a viscous liquid.
How to lower the Priora correctly
There are several ways to lower the landing position on the Priora. Each of them is worth dwelling on in more detail.
Air suspension
Air suspension is considered one of the best, but at the same time expensive, ways to lower a car. The driver can raise or lower the car body as necessary. In addition to the high cost of such equipment, the work must be carried out by specialists who understand the electronics and chassis of the car. Therefore, most Prior owners prefer less expensive methods of undervaluation.
The Priora can be lowered using an air suspension kit, but this option is quite expensive
Suspension with adjustable ground clearance
The Priora can be equipped with a special adjustable suspension kit. Height adjustment is carried out by means of struts, and springs with a selected lowering (-50, -70, -90) are compressed or stretched. Thus, the car can be raised for the winter and lowered for the summer. The springs that come with the kit are highly reliable and are designed to constantly change in length. The set in question consists of the following elements:
- front and rear springs;
- screw-adjustable struts and shock absorbers;
- front upper supports;
- spring cups;
- bumpers.
Adjustable suspension kit consists of shock absorbers, springs, mounts, cups and bump stops
The procedure for implementing such a kit comes down to replacing the standard suspension elements with new ones:
- Remove the rear shock absorbers along with the springs.
- We install an adjustable shock-absorbing element.
- We adjust the suspension height with special nuts, choosing the desired lowering.
- Similarly, we change the front struts and make adjustments.
Lowered suspension
This method of lowering the suspension is less expensive than the previous one. It involves purchasing a set of shock absorbers and lowered springs (-30, -50, -70 and more.). The disadvantage of this kit is the impossibility of adjusting the ground clearance. However, you can install such a suspension yourself. To replace you will need the following kit:
- Demfi -50 racks;
- springs Techno Ressor -50;
- supports Sevi Expert.
To lower the suspension you will need a set of struts, springs and supports from one or another manufacturer
You will also need to prepare the following tools:
- wrenches 13, 17 and 19 mm;
- 17 and 19 mm socket heads;
- breakdown;
- hammer;
- pliers;
- ratchet handle and knob;
- penetrating lubricant;
- spring ties.
Replacement of suspension elements is carried out as follows:
- Apply penetrating lubricant to the threaded connections of the front struts.
- Using sockets 17 and 19, unscrew the fastening of the struts to the steering knuckle.
- Unscrew the ball pin nut and unscrew it.
- Using a hammer and a pry bar or puller, press the ball pin.
- Unscrew the upper support of the rack.
- Remove the stand assembly.
- We install springs and support bearings on new struts.
- By analogy, we change the rear pillars, unscrewing the upper and lower fastenings and installing new elements.
- We reassemble in reverse order.
Video: replacing the front struts on a Priora
Low profile tires
One of the options for lowering the suspension of the Lada Priora is to install low-profile tires. The standard tire size for the car in question has the following parameters:
- 175/70 R13 82T;
- 175/65 R14 82Н;
- 185/60 R14 82Н;
- 185/65 R14 86H;
- 185/55 R15 82H.
Low profile rubber also allows for a lower stance
When lowering the seating position by installing low-profile tires, a small deviation from the standard dimensions should be maintained. Otherwise, the vehicle's performance may deteriorate, which will negatively affect not only driving performance, but also the wear of suspension elements.
Filed the springs
One of the most budget-friendly ways to lower the suspension is to shorten the springs by cutting off a certain number of turns. To carry out such an upgrade you will not need to buy anything. It is enough to arm yourself with a grinder. The procedure consists of dismantling the shock absorbers and springs, followed by the removal of 1.5–3 turns. You can cut off more, the car will become lower, but the suspension will practically not work
Therefore, such experiments should be carried out with caution.
When shortening springs with a grinder, remove 1.5–3 turns
Rear suspension shock absorber and spring - removal and installation
It is convenient to carry out the work in an inspection ditch.
The work is shown on a car with a hatchback body. On a station wagon, the work is performed in the same way. On a sedan car, access to the upper shock absorber mount is through the luggage compartment. Replace shock absorbers and springs in pairs.
To complete the work you will need:
— inspection ditch or overpass;
— a device for disassembling suspension struts.
We carry out the work with an assistant.
Removal
1. Prepare the car for work and hang the rear of the car on stands.
If there is no inspection ditch or overpass, remove the rear wheel of the car from the side of the shock absorber being replaced.
2. Remove the luggage compartment shelf.
3. Fold down the back seat.
4. In the luggage compartment, use a Phillips screwdriver to remove the four screws securing the upholstery.
5. Use a screwdriver to pry off the trim of the seat back lock.
6. Using a 19 mm wrench, unscrew the lock and remove it.
7. Using a Phillips screwdriver, unscrew the screw securing the luggage compartment lining.
8. Bend down the luggage compartment upholstery.
9. Use a Phillips screwdriver to unscrew the top screw securing the cladding.
10. Using a Phillips screwdriver, unscrew the two lower screws securing the cladding.
11. Move down the luggage compartment lining.
12. Using a 13 mm socket wrench, unscrew the two nuts securing the seat back clamp bracket.13. Remove the clamp bracket.
14. Using a slotted screwdriver, remove the plug.
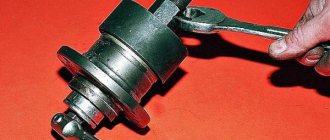
15. While holding the shock absorber rod from turning with a 6 mm wrench, unscrew its nut with a 17 mm wrench.
16. Use a magnet to remove the spring washer and the upper support washer from the shock absorber rod.
17. Remove the upper rod mounting pad from the shock absorber rod.
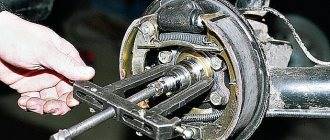
18. Using two 19 mm wrenches, unscrew the nut of the bolt securing the lower end of the shock absorber to the rear axle beam and remove the bolt.
19. Move the lower end of the shock absorber towards the rear of the car and remove the shock absorber.
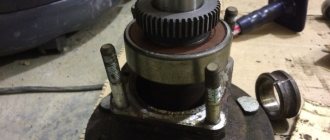
20. Remove the spring and its gasket from the shock absorber, and also, if necessary, remove the lower cushion and spacer from the shock absorber rod.
Features of replacing racks
At the beginning of the two thousandth there was a stage of restyling, which took the car along reformist paths. Now the racks have become more reliable, and the power unit is more powerful. But nevertheless, professionals propose to improve the restyled version by replacing the struts, since then its performance will be significantly improved. Although over time, replacement of parts is necessary in any case.
Before you decide to replace parts, you should be 100% sure of this. You can check the working condition of the racks in a very simple, old-fashioned way. You'll have to rock the corner of the car a little. Now count the number of free jumps. If one, then the system is normal. If there is more than one, then urgent replacement of the racks is required, since the old ones can no longer cope with the task assigned to them.
Removing the shock absorber and spring of a Lada Priora car
We remove the shock absorber for replacement when it loses its working properties, as well as when replacing a spring or failed rubber pads for attaching the shock absorber or compression stroke buffer.
To ensure that the performance characteristics of the left and right shock absorbers do not differ, both shock absorbers should be replaced. It is also necessary to replace the springs in pairs. Removal is shown on the left shock absorber, the right shock absorber is removed in the same way. Inside the car, we recline the back of the rear seat and move the carpet away from the socket of the upper shock absorber mounting to the body.
Using a 17mm z-shaped wrench, unscrew the nut of the upper shock absorber mounting, holding the shock absorber rod from turning with a special wrench with a 6 mm wide slot. Remove the spring washer from the shock absorber rod...
...a support washer and an upper rubber pad.
From the bottom of the car, using a 19mm wrench, unscrew the nut of the bolt of the lower shock absorber mounting to the beam arm bracket, holding the bolt from turning with a spanner of the same size. We hang out the back of the car.
We take out the bolt (if there is difficulty, knock out the bolt with a soft metal drift). We remove the shock absorber from the eye of the lever bracket...
...and remove the shock absorber along with the spring. The spring gasket usually sticks to the body, from where it must be removed and ensure that there are no deformations or tears.
Remove the spring gasket.
Remove the spring from the shock absorber.
Remove the spacer sleeve with the lower cushion from the shock absorber rod... ...the cover with the cup and the compression stroke buffer. If there is damage to the cushions, cover or buffer, replace them with new ones. We assemble and install the shock absorber and spring in the reverse order.
For ease of assembly, we recommend attaching the gasket to the spring with adhesive tape or insulating tape. In this case, the end of the spring coil should rest against the protrusion of the gasket.
When installing the shock absorber rod cup, the flange of the 1st cup should fit into the recess 2 of the boot.
We put the compression stroke buffer on the shock absorber rod so that the buffer grooves are located at the bottom.
The end of the lower coil of the spring should rest against the protrusion of the lower shock absorber support cup.
Rear shock absorbers on Priora
The rear wheels of the Lada Priora factory also come with non-separable shock absorbers. Their characteristics are similar to the front ones. As many drivers note, these shock absorbers are very soft and do not hold the road well at high speeds.
| vendor code | Rod diameter, mm | Case diameter, mm |
| 21702915004 | 11 | 46 |
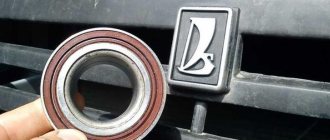
Analogs of Priora front shock absorbers
Replacements for shock absorbers on the rear wheels of Priors are slightly less popular than those on the front wheels. Often, many drivers install analogues on the front wheels, and leave original spare parts on the rear wheels. Nevertheless, the most popular analogues of rear shock absorbers are presented below.
| Manufacturer | vendor code | price, rub. |
| SS20 | SS20144 | 5200 (set, 2 pcs.) |
| Fenox | A12288C3 | 1200 |
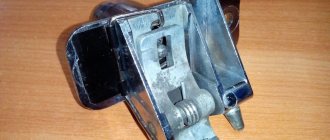
| Kraft | KT 073542 | 1200 |
Kraft KT 073542
Which shock absorber struts for Priora are better? For moderate driving, and at a low price, it is better to take the original SAAZ. Also, shock absorbers from the Russian company SS20 deserve special attention. They produce high-quality and technologically advanced products at a relatively low price. The range is represented by several lines of shock absorbers (differing in level of rigidity). But the most popular for the VAZ 2170 is the “Comfort” series. They are a little stiffer than the factory ones, which is especially noticeable at speeds up to 50 km/h. But after this mark they perfectly reveal their full potential on uneven roads. When entering the pit, the sound is practically inaudible, and most of the vibrational energy is absorbed.