What are the requirements for daytime running lights on the Priora VAZ 2170?
Almost all European-made cars are equipped with external lighting devices (DRL) for better visibility during daylight hours. However, not all domestic models have this option. Some motorists believe that they can get by with side lights, but their brightness is clearly not enough to indicate the car while driving. Thus, car owners will have to worry about light tuning of their vehicle.
DRL standards
According to technical standards, daytime running lights on the Lada Priora provide a glow angle of 30°, of which ten degrees are above the horizontal line, and 20° below. The light from DRL headlights should be visible from a distance of 150-200 m even in sunny weather, with a light spot area of at least 40 cm².
Some car enthusiasts, after installing DRLs, test the visibility of the car from 5 meters, and often in the dark, forgetting the true purpose of such lighting. The efficiency of the flashlights must be determined on a sunny day from a distance of 150-180 meters. Their functions do not include lighting the route - only indicating the presence of a vehicle on the road.
Functional tasks of DRL and GOST standards
Non-standard daytime running lights on Priora must be operated in a certain mode:
- The DRL switches on and off automatically simultaneously with the ignition key being moved to a certain position.
- The DRL should be turned off automatically after the headlights are turned on, with the exception of its immediate activation to signal other road users.
- It is necessary to provide the ability to turn off and activate the running lights using a separate control unit.
The order of placement of car daytime lighting elements is regulated by GOST 41.48-2004 standards:
- The outer edges of the optical device must be no further than 400 mm from the corresponding overall width of the vehicle.
- The distance between the inner edges of the lighting fixtures should be no more than 600 mm; this parameter can be reduced provided that the vehicle width is less than 1,300 mm.
- The height of the DRL is set no lower than 250 mm and no higher than 1,500 mm from the level of the road surface.
The installation of additional lighting system devices is individual in each case and depends on many factors. However, you should always comply with the requirements outlined above.
Other solutions for daytime lights on the Lada Priora
According to traffic regulations, the installation of additional equipment is not required, and instead of DRLs, you can use low beams, side lights or connected Priora fog lights. However, such solutions in practice are not the most effective for increasing vehicle visibility.
Disadvantages of neglecting special running lights:
- The side lights, which have a power of 5 W, are clearly visible in the dark. During the day they become almost completely discolored and are almost invisible.
- The low beam headlights make it possible to clearly identify the car on the road; it becomes truly distinguishable. But this option, when driving frequently with the headlights on during the daytime, leads to their rapid wear and excessive fuel consumption. It is necessary to ensure the simultaneous consumption of electricity for the dashboard and side lights. More than 0.4 liters of gasoline are required to travel 100 km in a Lada Priora car.
- It is not recommended to use high beam headlights as daytime running lights, both for the reasons stated for low beam and because of the risk of dazzling the drivers of cars moving opposite.
- Fog lights do not provide a good range of light and vehicle visibility is insufficient.
Fog lights can replace running lights in Lada Priora
What kind of daytime running lights can be installed on the Lada Priora: popular solutions
There are no standard places for the location of DRL on the VAZ 2170, but it is possible to install them instead of fog lights. The technology is simple and won’t take much time, but there are a few more options to consider:
Beacon DRL-UNE
This device is suitable for organizing daytime running lights on a Lada Priora car, and there is also a function for duplicating turns. The device is equipped with electronic overvoltage protection. White LEDs are used as a light source, which demonstrate the following characteristics:
- The glow temperature range is 6,000-6,500 K.
- Luminous flux is 5-6 lm for one LED.
- Power – 0.02 W per chip.
Requirements according to the regulations
The luminous intensity of daytime running lights depends on the beam angle of the LEDs with the lenses installed. Diodes without optics shine 120 degrees, that is, in all directions. Therefore, focusing the light is required, as in a flashlight. Therefore, the requirements indicate the luminous intensity in Candelas, not lumens. To measure the light intensity, place a lux meter in front of the DRL at a distance of 1 meter. The lux meter must be positioned strictly along the optical axis of the light source. Thus, the Luxes will turn into Candelas, by which the effectiveness of work can be assessed.
Required characteristics:
- each DRL should have 500-700 lumens;
- power from 6 Watt;
- shine at an angle of 35 degrees.
Simply put, if the power is below 6 watts, then it is junk, not DRL.
Requirements according to GOST:
- luminous intensity 400-800 candelas;
- glow angle 25 degrees vertical;
- angle 55 horizontally;
- The luminous area of each is at least 40 square centimeters.
An alternative method of organizing DRL
Practical motorists have found a solution - the use of the DRL-30 electronic relay, which allows you to adjust the power of the high beam lamps and use them as daytime running lights during daylight hours on the Lada Priora VAZ 2170. The relay is mounted instead of the standard high beam microrelay.
This tuning allows you to use only 30% of the power compared to using low beam, which reduces the load on the generator and reduces fuel consumption. All lighting equipment operates as normal, the high beams blink as expected. To perform the replacement procedure, remove the dashboard and connect the wires according to the diagram.
I always liked the aggressive look of the new Priors, where the headlight lamps burn not near the wings, but closer to the radiator grille.
Later I found out that it was DRLs (
daytime running lights
). They work from the ignition and are installed in new headlights. There is not much point in buying new headlights because of the bulbs!
Later I began to notice recordings on D2
about
DRL-30
.
Relay with 3 wires. Connects instead of the high beam relay. After connecting, with the ignition on and the handbrake ( handbrake
)
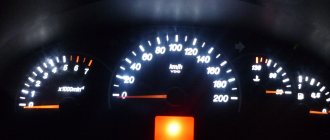
, the high beam lamps light up at 30% power
, and the high beam icon on the instrument panel
lights up
dimmer than usual.
When the lights are turned on, the DRLs
go out.
Convenient - no need to twist anything.
When you turn on the light with the knob (
controller
) of the MCU (
light control module
), sometimes you forget to turn it off or on,
which can lead to battery discharge in the first case, and a fine in the second.
Consumes less voltage, easier on the generator.
Can
You can also drive with
fog lights
, leaving them on always (
only a non-standard button with a lock will do
), but changing the bulbs
is more difficult
than with the high beams.
Can
connect the near one to the ignition and short circuit to the raised handbrake, but
this is not
what I wanted.
Has gained
on the market for 650 rubles.
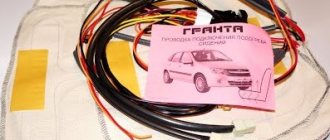
Contents:
relay with 3 wires, 3 terminals, instructions.
How to make DRLs on a Priora with your own hands from high beam headlights using a relay?
the DRL-30 electronic makes it possible to turn on the high-beam lamps at only 30% of their full power. This is enough to use them as running lights. They turn on when the ignition is on, the lights are off and the handbrake is released. The relay is installed in place of the standard microprocessor device and connected using the following technology:
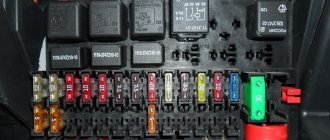
- Disconnect the ground terminal from the battery.
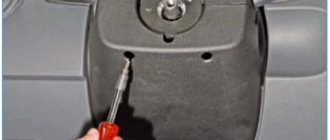
- Open the cover of the relay block, remove the high beam relay K7 and install DRL 30 in its place.
- Unscrew the screws securing the instrument panel frame and remove the instrument cluster by pressing the latch.
- Route the relay wires under the panel so that the ends are level with the instrument connector.
- Connect the wires using connecting elements according to the diagram.
- Connect the connector and ground terminal of the battery.
After completing the work, you should check the operation of the electronic relay in the following sequence:
- Turn on the ignition and put the car on the handbrake - the lamps should not light up.
- Release the handbrake lever - the indication and high-beam lamps should light up at full intensity (30%).
- Blink the high beams - the lamps should light up at full power, and then return to 30%.
- Turn on the headlights - the lights should go out.
- Turn on the high beams - the lamps should be on 100%.
- Turn off the ignition - the lamps should go out.
If the lights burn at full power immediately after connecting the ground, you need to swap terminals 30 and 87 in the mounting block.
Upgrading standard lights using an electronic relay eliminates the unnecessary hassle of installing additional lamps. In addition, the load on the generator is reduced and the operational life of the lighting devices is extended. If necessary, you can easily return to the stock connection.
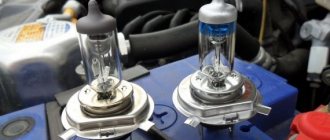
What standard lamps are used in Priora headlights?
The Priora headlight unit is equipped with:
- low beam lamp;
- high beam/running light lamp;
- turn signal lamp;
- side light lamp.
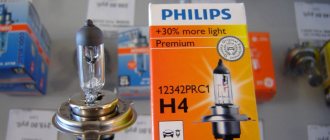
Designations
- Low beam, for example, is marked 55H7, where 55 is the power in Watts, and H7 is the designation of the base;
- The main beam is designated 55N15;
- turn signal – 21PY21W;
- side light – 5W5W.
The lamps are in the headlights in a single unit, and the headlight unit is not always replaced - only the bulbs are changed. And not in vain - the factory headlight produces a cloudy light. Prior owners try to install the best lamps so that the headlights shine longer.
Do-it-yourself Prior running lights
Electronic relay DRL-30 for LADA KALINA and LADA PRIORA cars. The electronic relay DRL-30 is designed to control the power of high beam headlights, which allows them to be used as daytime running lights. The relay is installed instead of the standard high beam relay in LADA KALINA, LADA PRIORA and other cars that use similar relays. The use of high beam headlights turned on at 30% power as daytime running lights, compared to low beam and fog lights, can significantly reduce the power consumed from the generator, which means increasing the life of the generator and reducing fuel consumption. Also, smooth switching on of lamps helps protect them from premature burnout.
SPECIFICATIONS.
Supply voltage, V 10. 15 Max. total lamp power, W 150 Ignition time, s 1.0. 1.2 Dimensions, mm 30*20*15
COMPLETENESS
Relay DXO-30, pcs. 1 Connector, pcs. 3 Manual, pcs. 1 Packaging, pcs. 1
Electronic relay DRL-30. Appearance.
DEVICE AND PRINCIPLE OF OPERATION The relay is a microprocessor device. The microprocessor monitors the state of the control signals and, based on this, controls the power of the lamps in the high beam headlights. The relay is made in the size of a standard relay and has three additional wires for connection to the instrument cluster wiring harness. This is necessary to implement the correct operating algorithm for daytime running lights. The relay operation algorithm is presented in Table 1
Relay operation algorithm.
When the ignition is turned off, the relay turns off completely and does not consume current. Daytime running lights turn on only when the ignition is on, the handbrake is released and the side lights are off. In other cases, the high beam works normally. The relay is installed instead of the standard high beam relay, and additional wires are connected according to the diagram in Figure 2.ъ
Figure 2. Electronic relay DRL-30. Connection diagram.
INSTALLATION PROCEDURE To install the relay in the car you will need a Phillips screwdriver and pliers. 1. Disconnect the MASS terminal from the battery. 2. Open the cover of the mounting block and remove the high beam relay K7. 3. Install the DRL-30 relay in the vacant space. 4. Remove the instrument cluster. To do this, unscrew the screws holding the decorative frame of the combination and remove this frame, unscrew the two screws holding the instrument cluster, and carefully remove it from the instrument panel to gain access to the connector. By pressing the latch, disconnect the connector from the combination. 5. Route additional relay wires under the panel so that the ends are near the instrument cluster connector. 6. Find wire combinations of the corresponding colors in the harness and, using connectors, connect additional relay wires to them according to the diagram. 7 . Connect the harness connector to the instrument cluster. Connect the MASS terminal to the battery (the ignition is turned off, the parking lights and lights are off, the handbrake lever is raised - the lamps must be off).
Test the relay operation:
1) lift the handbrake lever and turn on the ignition - the lamps should be off. 2) lower the lever - the high beam lamps and the high beam indicator lamp on the instrument cluster should light up at 30% power. 3) blink your high beams - the lamps should light up at full power and then return to 30%. 4) turn on the side lights - the lamps should go out. 5) turn on the high beam headlights - the lamps should turn on at full power. 6) turn off the ignition - the lamps should go out.
ATTENTION!
If the headlights turn on at full power immediately after connecting GROUND, it is necessary to swap terminals 30 and 87 in the mounting block. 8. Reassemble everything in the reverse order of disassembly.
POSSIBLE MALFUNCTIONS AND WAYS TO ELIMINATE THEM
ATTENTION!
The lamp power is reduced during DRL operation due to pulse control. As a result, the headlight bulbs may produce a low sound. Also, in electronic instrument clusters, the high beam indicator lamp may periodically turn on and off. These cases are not a malfunction.
Layout of the restyled version
In the Priora, little has changed after restyling - small details invisible to the eye, the center console, the dashboard. The headlights have also changed - they have become quite a bit larger. The principle of their design has remained virtually unchanged, except that there is now one plug at the back to isolate the contacts.
The design of the headlamp unit has become more complex: now in place of the usual high beam lamp there is a light consumable, combined with daytime running lights, which switches between operating modes. PTF fog light bulb, everything is also mounted depending on the configuration.
Option #3
Another affordable way to make daytime running lights with your own hands. An aluminum profile of rectangular or square cross-section is required. Holes for the “eagle's eye” are drilled in it, in the amount of 5-7 pieces. Then the “eagle’s eye” is placed in profile, the wires are routed in any suitable direction. The void can be filled with sealant, and the body can be painted in any color. The main drawback, the low reliability of the “eagle eye”, quickly fails. But it can be eliminated by going through them. Using additional thermal paste, the contact of the LED with the bolt housing is improved. The lens is placed hermetically on a transparent sealant for complete protection from moisture and salt.
How to change the low beam light bulb on a Priora
First of all, it is necessary to remove the battery, otherwise access to the headlight will be limited. And even if you stick your hand inside, working under the hood will be uncomfortable. The process of replacing a light bulb is described in several steps:
- Remove the rubber cover, the outermost one (it is located closest to the front fender of the car). At the same time, try to be careful with fastening the headlight housing;
- Disconnect the block with contacts from the lamp itself;
- We press the latch and remove it from engagement with the hooks carefully and without sudden movements;
- We take out a 55H7 light bulb;
- We do everything in reverse order with the new lamp.
It is recommended to do the entire mechanism according to the clockwise principle - first remove the old light bulbs from both sides, and then install new ones. Lamps used at the factory do not perform very well, even in terms of durability, and may require repairs a couple of months after purchase.
Installing daytime running lights
Since two thousand and ten, daytime running lights have become a mandatory attribute of vehicle movement on the roads of the Russian Federation. This was correctly introduced due to the insufficient quality of lighting in winter in many regions of the country. Moreover, the further north the region, the more acute this problem was.
What are the requirements for daytime running lights?
The main problem with daytime running lights is that at the moment it is not possible to designate them as a single lighting device for all. For this reason, according to the legislation of the Russian Federation, the following can be used as running vehicle lights:
1. Car headlights, which are responsible for low beam and turn on while the vehicle is moving. 2. Car headlights, which are responsible for high beam and turn on when the voltage is low. 3. Special lighting devices, which are manufactured on the basis of special state standards. It is worth noting that it allows for the independent production of daytime running light emitters, the main thing is that they comply with the established state standard. 4. Front turn signal lights, which must be on at all times.
If you are planning to independently install daytime running lights, then first you need to familiarize yourself with the norms and requirements that apply to such lighting devices by the state standard, which is prescribed in the law of two thousand and ten:
1. The daytime running lights of the vehicle must be located on the front of the vehicle. The height above the ground of these lighting fixtures should be from twenty-five to one hundred and fifty centimeters. 2. Between the structures responsible for daytime running lights, the distance must be at least sixty centimeters. At the same time, the distance from the daytime running light structure to the edge of the car body should be no more than forty centimeters. 3. The area of the lighting fixture of daytime running lights should be in the range from twenty-five to two hundred square centimeters. 4. The total luminous intensity of two daytime running lights should be in the range from four hundred to eight hundred cd.
Video. DIY DRL installation
It is worth remembering that side lights cannot be used as daytime running lights, since they do not have sufficient luminous intensity.
Do-it-yourself installation of daytime running lights
To begin with, I would like to note that almost all modern foreign-made cars have daytime running lights installed at the factory. Among domestic manufacturers, only Lada Granta can boast of this illuminator. If you do not meet these criteria, then the material presented below will be interesting and useful to you.
There is no need to come up with anything new to install daytime running lighting systems. You can buy everything you need in almost any car store. The only thing worth noting is that you should not save money and buy little-known Chinese brands, since such kits may not meet state standards established in the Russian Federation.
Video. How to connect a DX with your own hands
Let us recall that in the previous article we looked at how to install an air intake on the hood with your own hands and what tools are needed for this.
Don’t rush to purchase the necessary equipment and install it right away; first, read the following:
1. First, carefully study the documentation of state standards regarding the procedures for installing light alarms and lighting devices. 2. Without fail, when purchasing a set of daytime running lights, you need to take into account the geometric shape of the holes for them on the car’s bumper. 3. Carefully select the size of the light block. It has a direct connection to the place where the daytime running lights will be installed. 4. It is imperative to take into account the total brightness of all installed light diodes in each illuminator. This parameter is very important, since some manufacturers neglect certain points of state standards, which ultimately leads to the fact that daytime running lights do not comply with them.
If we take into account everything described above, then when undergoing an annual technical inspection of the car, no problems will arise with this unit.
Replacing Priora high beam lamps
It all starts again with removing the battery - you can’t do without it now. The high beam lamp is located a little deeper and is not easy to get to. The sequence of actions when replacing a high beam lamp is as follows:
- We disconnect the rubber cover (it is larger than the one designed to protect the low beam lamp);
- Disconnect the block with wires;
- Unclench the spring clamp and disengage it from the reflector hooks. We release the light bulb.
- We remove the lamp socket from the headlight unit.
Replacing lamps in Priora taillights
Replacing the rear light bulbs is complicated by the fact that the combination unit inside supports the operation of the parking lights and brake signal. But it all starts just as simply, when replacing the bulbs in the rear headlights of the Priors, as well as the front ones:
- Remove part of the upholstery opposite the headlights;
- Unscrew the screws that support the protective housing of the rear light. In Kalina, there were nuts in place of the screws, and unscrewing them was even more fun - they fell into a huge gap and were lost in the car body forever;
- Turn the brake light and clearance holders counterclockwise. Do not remove the socket, take it out together with the light bulb;
- It is easy to press down the lamp, turn it clockwise and remove it from the socket with a slight movement (it will almost fall out on its own);
- Carry out the operation in reverse order.
All you have to do is remember about the combination headlight - remember where each lamp was located, so that you don’t confuse anything during installation. With the rest of the light bulbs, everything is different - in addition to the ground (black wire), wires from the ECU are connected to them. Thus, the “foglights” correspond to the red wire color, the turn signal indicator – blue, the green light is assigned to the reverse lamp.
Installation of daytime running lights and Hella modular optics in PTF Priora in Lada Priora
Installation of daytime running lights in Lada Priora
I recently bought MAYAK DRL-UNC daytime running lights. I will install it according to GOST for DRL. I didn’t take expensive ones on principle - it’s very expensive to pay 3500-4000 rubles for LED lights, when the cost of DRLs is much less
The MAYAK DRL-UNC navigation lights have three wires. Red plus, black minus and yellow for the turn signal. That is, these running lights also work as an additional turn signal, of course, it’s cool, but how practical this solution is from the point of view of practicality is not clear to me. I decided to just connect the DRLs so that they would just shine without any turn signals. I decided to connect like this. + I led the positive wire into the cabin into the control unit and simply stuck the wire into the place where the windshield wiper fuse F11 (20) is located - The negative black wire was also sent to the control unit and just as simply stuck into the place where the left side light fuse F14 (5) is inserted ). The result of such a connection. You turn the ignition key and the DRLs light up. When you start the car, it lights up the same way. When you turn off the car and take the key out of the ignition, the DRLs go off. When the car is running, the DRLs are on, you turn on the DRLs, turn them off, switch to low beam, the DRLs are also turned off. You turn off the low beam, and the DRL lights automatically light up. In general, I found this connection to be more effective.
Here is my DRL connection via a 5 pin relay. I bought a universal 5-pin relay at the store and also bought 3-meter corrugations measuring 6.5. The relay itself also needs a mother with wires. The connection began by taking a small 10cm wire and winding it together with the negative of the black DRL wire. After that, from the block of wires that was on the relay, I found the number 85 and connected the wire that comes from block 85 to the black minus of the DRL, in the place where there was already a connection, and wrapped it with electrical tape. It turned out that a 10cm long wire was left dangling. We will have to attach its end to the body, that is, this is the ground.
Next, I took the positive wire of the DRL; mine is red and connected it to number 88 (for some relays this is number 87a)
Then it was necessary to find a plus that would turn on when the ignition key was turned. I found this very plus on the ignition coils.
This red wire (it is a plus) is exactly what is needed to turn on the DRL after turning the key to the ON position. The electrical tape that is wrapped around the wiring harness will have to be removed. The red wire will have to be carefully cut so that an additional wire can be connected into the cut, which will go from the connection point on the relay to the number 30. Next you need a positive wire from the dimensions. And again you will have to remove the electrical tape from the wiring harness that is attached to the left headlight to get to the side light wire. The wire we need is yellow (plus dimensions), we will have to cut it again in order to connect an additional wire to the section of this wire - we send it to the number 86.
It is advisable, again, to put all the wires into the corrugation. Scheme
The result of the entire connection. Turn the ignition to ON - the DRL lights up. Turn the ignition off to the OFF position – the DRLs turn off. With the engine running and the DRLs on, turn the light switch to side lights, the DRLs turn off, turn the switch to low beam headlights, the DRLs are also turned off. Turn off the low beam headlights and side lights, the DRL turns on.
The optics of the Priora are still all right, the near one is 3-minus. And the PTFs are simply terrible. No matter how I tried to adjust them, no matter what bulbs I put in there, the light was not pleasing. I didn’t want to install xenon diffusers, because there is no recoil, and it also blinds oncoming traffic. It was decided to install lens modules from the famous German company “Hella” instead of PTF.
We have: 1. Module D 50mm Low beam (DE, H7) Manufacturer number: 1BL 009 071-007
6000 rub. per pair Compact module with a small diameter, excellent light characteristics and uniform illumination of the roadway, eye-catching, modern design, greater freedom in choosing design, while maintaining legal safety requirements, light weight due to the use of aluminum and magnesium alloys 2. Xenon kit H7 1100r 3. Tools, fasteners, time, patience
The module is whitish, paint it black
COMPANY STICKERS, SIDE VIEW
We free up access to the PTF and dismantle the old fog lights. We take the PTF frame and, using parts from a children's construction set, make fasteners for the modules.
GO EASIER WITH THE BOTTOM
SIDE VIEW, MODULE IN THE FRAME IS SECURELY ATTACHED
FOR XENON BULB BULB SHARPEN THE TERMINALS TO INSERT THEM INTO THE STANDARD PTF CONNECTOR
We put the frames with the modules in place, securely fasten the ignition units and the xenon wiring. We are not installing wing protection yet.
FROM DIFFERENT SIDES
FROM DIFFERENT SIDES
We admire the result and wait for darkness to adjust the light
THE MODULES AND LED LIGHTING IN THE HEADLIGHTS GLOW
BETTER VIEW THAN HELLA'S STAND
SMALL MODULE, BIG LIGHT
We put the protection back. We are happy with the work done and most importantly the result. Now low beam is just an addition to PTF. There is a small problem left, I need to buy a pencil and tint the rim of the module, otherwise I didn’t finish painting it much, it’s narrow there, I was afraid to paint over the glass. Because These are lenses, so there can be no talk of any blinding of oncoming traffic, everything is set up well, the left one is lowered a little, the right module is shifted a little to the right to the side of the road.
Maybe someone will say about the expensive price, but I will say that the quality of light is safety, so it’s not worth saving.
Tuning headlights and xenon on Lada Priora. DRL connection
Before purchasing these headlights, I wanted to install lenses in the reflector. But I accidentally found headlights on a Priora for these tunings, and they’re also
Dorestyling
The life of the owners of pre-restyling cars was darkened by the fact that, in addition to the reduced service life, even then it was darkened by the fact that when replacing some light bulbs it was necessary to remove the socket along with the bulb - this, for example, happened when the owner wanted to replace a side light bulb. Owning a Priora became increasingly expensive; rarely did anyone think about buying another headlight - developed by other companies. Installing light bulbs from foreign manufacturers solved the problem of poor lighting well and for a long time.
Turn
The turn signal signal is located the highest (in relation to the hood), and to remove it you don’t even have to wrap your hand under the hood.
- Remove three screws and a self-tapping screw from the plastic cover, pry it up with a flat-head screwdriver and remove it;
- Turn the cartridge strictly counterclockwise;
- Remove the cartridge;
- It is easy to press down on the lamp and rotate it counterclockwise until it begins to fall out of the socket.
When choosing a turn signal PY21W (Voltage 21 W), you should be careful - a lamp with a similar marking - P21W - will not have orange, but colorless glass, and will not be suitable as a turn signal.
Difficulties with replacement
The most convenient thing is to replace the turn indicators. In other cases, you have to twist very tightly and stand in this uncomfortable position for a couple of minutes until the job is done. This is not very convenient, because the light bulb is a consumable, but the engineers could make sure that replacing it was as easy as the plastic steering wheel insert on the “ten”.
Another inconvenience is that you have to remove the battery. Nobody argues that it is better to turn off everything before starting work. But the battery is removed for reasons of rationality - the battery takes up a lot of space and interferes with working with your hands while you stand in an awkward position.
Why the headlights don't light up - reasons
The most common reason for headlights not working is a burnt out light bulb. Its service life is indicated in hours on the packaging. For a low beam bulb, this limit can be 400 hours of operation. The second extremely possible reason could be a wiring malfunction due to water leakage, or the wire simply frayed. This problem is already more serious, because you will have to fuss with it much longer than with a regular replacement of consumables.
Often, car enthusiasts are too lazy to change light bulbs, driving out onto the road in “one-eyed” cars. This is very unsafe - it is recommended that immediately after a malfunction is noticed, you go for a spare part to replace a new lamp.
Compliance with GOST is mandatory
Front lights Priora
The concept of daytime running lights appeared relatively recently. They help you see the car better while driving during the day, since sometimes there is poor visibility even during daylight hours. On many new European-made cars, daytime running lights are immediately built into the headlights. On other cars, installing DRLs yourself is quite simple. Using daytime running lights has a number of advantages. They help save gasoline; installing DRLs allows you to not turn on additional low beams or fog lights.
According to the GOST current in our country, two DRLs can be installed on the Priora. They must be white. There are certain rules governing their location.
Index
Meaning
They must be installed on the front of the vehicle and point forward.
The daytime running lights turn on and off automatically. They should be turned on simultaneously with starting the engine, and turned off when the main headlights are turned on. It must be possible to disable this feature without using special tools.