Dimensions do not work on VAZ 2114
According to these Rules of the Road, on any moving vehicle, including the VAZ-2114, the headlights must be turned on, along with which the side lights must also be turned on.
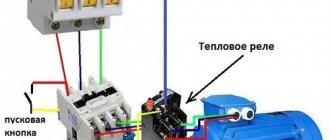
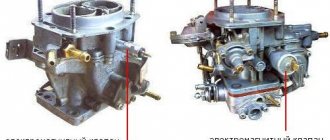
In addition, they must be turned on when the car is stopped or parked on the road in the dark and in conditions of insufficient visibility. Therefore, they must always be in good working order. The electrical circuit of the side lights of the VAZ-2114 is not so complicated and, if desired, any self-respecting driver will be able to find a malfunction associated with the failure of its operation. To do this, you need to know that terminal No. 1 of the side light switch is always supplied with positive voltage from the battery, bypassing the ignition switch. If the side light switch key is in the on position, then electric current flows to two fuses F10 (7.5A) and F11 (7.5A), which respectively protect the electrical circuits of the left (F10) and right (F11) side lights. The further path of the current lies to relay K4 (lamp health monitoring relay), and then to the front and rear side lamps.
When only one of the side light bulbs does not light, then we check whether it has burnt out. If it burns out, then we replace it with a new one of similar power, but if it is intact, then we will have to look at the condition of the contacts of the cartridge in which it is inserted. In the rear lights, due to moisture getting into them, oxidation is possible, both of the tracks and the pads through which voltage is transmitted to the terminals of the side light lamp.
Another reason why the headlight lamp does not light up may be the lack of voltage at the corresponding terminals of the rear light blocks or headlight blocks. Then, using a tester, you will have to ring the corresponding wires:
- The right front marker does not light up (check the yellow wire from terminal No. 4 of the headlight to terminal No. 8, block X6 of the mounting block);
- The right rear light does not light up (check the yellow wire from the right rear light block to terminal No. 9, block X9 of the mounting block);
- the left front marker does not light up (check the yellow-black wire from terminal No. 4 of the headlight to terminal No. 10, block X6 of the mounting block);
- the left rear light does not light up (check the yellow-black wire from the right rear light block to terminal No. 17, block X9 of the mounting block);
If both lamps on the right or left side of the car stop working, then troubleshooting should begin by checking the corresponding fuses located in the mounting block under the hood of the VAZ-2114 car, since the simultaneous burnout of two dimensional lamps at once is unlikely. The blowing of fuse F10 is very easy to determine, since it will lead to the cessation of combustion of the backlight lamps of the instrument switches. Also, the reason for turning off the side lamps may be the failure of relay K4.
3 comments
When you press the brake pedal, the rear turn signals turn on. When you turn on the turn signals, the rear lights begin to switch and shine like garlands?
When connecting to the board in the chip (connector), the wires were not connected correctly. And the chip itself is apparently not original, but was attached by someone illiterately, despite the diagrams. You have the wire that is responsible for the turns - in place of the dimensions. It is easy to treat. You need to transfer the wires from the wiring to the chip. You need to find the ground on the rear stopper board (there is a green stripe on the board that runs under each light bulb socket); see which wire is connected through the chip and connect to the black wire from the rear wiring. Then we take the wire on the chip below and connect it in the following sequence: 1 wire in the chip with black (ground), 2 - blue (turn signal), 3 - red (stopak), 4 - yellow (marker)
On the right side, the dimensions do not light up, the fuses are intact, and the light bulbs are intact. Could it be K4?
Brake lights don't work: reasons, what to do and how to fix the problem
Lighting devices are extremely important on cars, and this applies not only to headlights, but also to signal lights. Turn indicators, side lights, brake lights - all this helps surrounding drivers to better distinguish the outlines of the car and predict the driver’s maneuvers. When the brake lights on a car do not work, this can lead not only to a collision, but also to a fine if the malfunction is noticed by the traffic police. It is better to fix this problem immediately after it occurs; moreover, most often the reasons why the brake lights do not light up are quite trivial, and the malfunction can be easily fixed without contacting a service center.
Why don't the brake lights light up?
Almost any problem with electronics in a car can be solved in the same way. You need to look for the problem either in the device itself, which is faulty, or in the power supply system to it. The situation is similar with the main reasons for the breakdown of brake lights. If they do not light up, it may be due to one (or several) of the following reasons:
- Problem with the brake light fuse: its oxidation or failure;
- Problem with the brake light activation mechanism when pressing the brake pedal;
- Oxidized contacts in the socket for installing the brake light lamp;
- Damage to electrical wiring.
Malfunction of the lamp(s) installed in the brake light;
As you can see, among the problems listed above, only one can cause serious problems for the driver if he wants to repair the brake lights himself, and we are talking about wear and tear on the electrical wiring.
Modern cars are equipped with dozens of electronic devices, and a worn, torn or improperly clamped wiring harness can cause your brake lights to turn off. If none of the troubleshooting steps below resolve the problem, it is most likely a wiring issue.
In such a situation, you will need to find a detailed plan for the car's electrical wiring and check with a tester for the presence of voltage in the sections, and after finding the problem, solder or replace the wires.
But don’t rush to get a tester, most often the brake lights don’t light up due to much more mundane faults, the elimination of which will be discussed below.
Problem with fuse for brake lights
In a car's electrical circuit, a malfunction often occurs due to fuses that may fail. There are several ways to check fuses in a car, including visually or using a multimeter. In this case, there is one “household” method for diagnosing the brake light fuse.
You can make sure that the brake lights are not on due to a failed fuse. To do this, just start the car and press the horn. If the sound is heard, then the fuse is good and the brake light malfunction is due to another reason. If there is no sound, you need to determine from the fuse block diagram which one is responsible for the brake lights and horn, and then replace it.
Please note: This verification method is not suitable for all car models. On some cars, different fuses are responsible for the brake lights and horn, and if one of them fails, the other will continue to work properly.
Brake light switch malfunction
When the driver presses the brake pedal, the force is transmitted to a mechanism commonly called the “frog” or limit switch, which is also the brake light switch. When you press it, the brake lights come on; therefore, if for some reason it stops working, the brake lights will not turn on.
In total, there are 2 main reasons why the limit switch fails:
- Oxidation of contacts;
- Formation of carbon deposits and corrosion.
As you can see, the faults are quite similar, and they are eliminated in the same way - by cleaning the “frog” or replacing it.
To remove the brake light switch you will need to remove the pedals. Then it can be easily found under the brake pedal, and the limit switch can be removed by simply turning it counterclockwise by 90 degrees. When the “frog” is dismantled, disconnect the wires from it and try to close them “manually”. If as a result of these manipulations the brake light comes on, it means that the brake light switch needs to be replaced or repaired.
If you decide to tinker with the limit switch, repairing it is quite simple. It is enough to understand the device, clean all contacts with alcohol-based liquid and then lubricate them with electrically conductive lubricant. After this, the “frog” can be assembled, installed and tested.
Important: Please note that if your car's brake lights are constantly on, there is a high probability that the problem is also related to the limit switch. The method for troubleshooting in this situation is no different from the option given above.
( 447 votes, 4.61 out of 5) Loading...
Source: https://okeydrive.ru/ne-goryat-stop-signaly-prichiny/
Dimensions of VAZ 2114
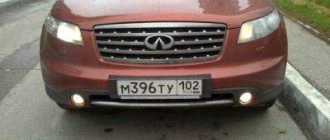
The side light signals on second-generation Samaras, which include the VAZ 2114, are located in accordance with the regulations in front and behind the car, two lights on each side of the car, closer to the edge, next to the turn signals.
- The front side lights are white, the rear lights are red. The front ones are located in the headlight block, the rear ones are located in the taillight block.
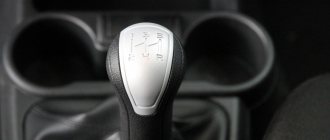
- The side lights are turned on and off by pressing the “side light switch” key, which is installed in the exterior lighting switch block. The keys are located in the central part of the instrument panel above the on-board computer display. When the side lights are turned on and the side light bulbs come on, a green indicator lamp lights up on the button.
- There is a side light fuse installed in the side light circuit. It is located in the mounting block located in the engine compartment under the hood. There are two fuses, one for each side of the side lights. Fuse F10 is located in the circuit of the left side dimensions, it also controls the operation of the warning lamp on the instrument panel, fuse F11 is the right side dimensions.
Why don't the lights light up?
Malfunctions that occur in the operation of side lights worry every motorist because it makes it difficult to use the car at night. After all, the traffic rules clearly state the requirements when stopping the car and turning off the ignition at night to indicate the car with illuminated side lights. Failures in the side light circuit can manifest themselves in different ways.
- One of the side light bulbs does not light up. The most likely cause is a burned out light bulb. Less common problems with poor contact are oxidation or poor connection. And very rarely - a breakdown in the wiring to the contact group of this light bulb. Although rare, this also happens. If the light bulb burns out, it needs to be replaced. To do this you need:
a) when replacing the marker lamp in the front headlight:
- turn off all exterior lights and open the hood
— unscrew the screws securing the plastic casing on the headlight with inoperative headlights
— having pulled out the socket with the burnt-out light bulb, remove it and replace it with a working one, without needing to disconnect the block with wires
- install the cartridge and casing in place
Front side lights
b) when replacing the side light bulb in the rear light unit:
- turn off the lights and open the trunk
— remove the decorative upholstery and pull out the block with wires from the contact group
- squeeze the side clamps and pull out the contact panel for the rear light with the non-working bulb
- remove the burnt out lamp by pressing it and turning it counterclockwise
- install a new lighting fixture and install the panel in the reverse order
Rear marker lights of VAZ 2114
- The side lights button does not turn on (the indicator lamp on the button does not light up). The reason is mainly due to oxidized contacts, which must be cleaned and washed with alcohol by removing the key block from the socket. Fuse F10 may fail, but then the sidebar lamps on the left side should not light up. On a VAZ 2114, an oversized fuse does not blow out very often, especially since wide plastic fuses with good contacts are currently installed in the mounting block.
- Blinking when the lights are on or dim lights. The main reason for such manifestations is the oxidation of contacts in the chain. First of all, you need to check and clean the contact group in the mounting block in the fuse circuit. The same is possible in contact groups of specific side light lamps. Do not forget that the machine is operated in conditions of high humidity and oxidation is a normal physical phenomenon that must be taken into account.
- The headlight fuse is constantly on. The reason must be sought in the mounting block. Possibly bad contacts in the fuse contact group.
The reason for the constant blowing of the insert (fuse) may be a short circuit in the general vehicle circuit. In this case, you should definitely contact an auto electrician, because the consequences can be very serious, including fire.
Brake lights don't come on completely
If the brake lights on the car stop lighting completely, then you should look for a break in the wires, in the limit switch or a faulty fuse. The search for a breakdown should begin with the fuse box. On its cover there is usually a table showing which circuit is protected by which fuse link. If it is missing or the information in it is unreadable, you can use the owner's manual for the vehicle.
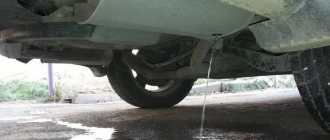
If the required fuse has blown, it cannot be replaced until the cause is determined. This usually happens when there is a short circuit or the insulation of the wires is damaged and they touch the housing. A similar effect is observed when water gets into electrical connections. In this case, it is necessary to dry the area where moisture has entered. To speed up the process, you can use a hair dryer (being careful not to melt the wire insulation or sheathing elements). Then you need to remove the fuse from the holder and test the circuit after it with a multimeter.
Often the wires fray at the point where they pass from the body to the trunk lid. Typically, the casing must be removed to detect cable damage. Therefore, in the absence of proper experience, it is better to entrust this work to a service center. If damage is found, the insulation coating must be restored. To do this, you can use ordinary insulating tape.
If the fuse is OK, you can assume the limit switch is faulty. It is located in the pedal assembly. It is necessary to inspect the condition of the switch and test it with a multimeter while the brake pedal is pressed. The multimeter should show a resistance of less than 1 ohm. If it is large or the switch has mechanical damage, it must be replaced. Due to the complexity of such an operation, it is better to entrust it to experienced car service workers.
If both the fuse and the limit switch are not damaged, this indicates a broken wire. To find such a fault, you will also need to open the casing. If you lack experience, it is better to entrust these actions to a car service.
If a wire break is detected, it is necessary to strip the insulating layer from the wire, make a connection and insulate the joint. A break in a section of wire is repaired by soldering. To insulate the connection, you can put on heat shrink tubing and heat it until it is fixed to the wire. If the terminal breaks, it is removed from the plastic case and replaced with a new one, crimping the stripped end of the wire into it, then inserted back.
Dimensions do not light up on VAZ 2114
Dear car owners! The other day I encountered, at first glance, a simple, but for me not obvious problem: the lights on a VAZ 2114 do not light up. The problem bothers me regularly, a year ago the lights and feet stopped lighting up, I cleaned the contacts and ground, it seemed to help for a while. Then it worsens again! Today only the turn lights are on, that's all. Where could the cause of this unpleasant problem for me be hidden?
Hello! I myself recently dealt with side lights, I had to do a lot of work, but in the end I solved my problem. I'll help you too. First check the lamps, perhaps they are simply burnt out, which is why the side lights do not work (corny, but it happens so often!). Another possibility: the fuse has blown. It needs to be replaced if this is exactly what happened. You need to climb into the mounting block and find F10 there. When it burns out, both side lights do not light up, as well as the license plate lights.
Nothing complicated, I hope you can figure it out. Go ahead. We check the contacts. They could have oxidized, which is why the dimensions do not work. We carry out a visual inspection of all the pads, take them out and put them back in. This is exactly how I solved my problem. I cleaned the contacts and everything was fine. If cleaning does not help, then we check the button itself. It may not work, unscrew it and look. Has the wire fallen off? So it doesn't work!
The most serious reason is a short circuit. But even here you can cope on your own. We take a regular light bulb and connect two wires to it: plus and minus. Next, we take out the fuse and connect the wires from the lamp in place of its contacts. If it starts to burn, it means there is definitely a short circuit somewhere. The only way to find the short circuit is to turn off everything connected to the fuse in order.
Where does it short out most often?
I will try to make your task a little easier in finding the location of the short circuit, if, of course, this is appropriate in your case. But, if all the methods described above did not bring a positive result, then this is the only option left. The wires that go to the license plate lights, as well as to the trunk roof, most often fray and short out there. This wiring needs to be treated with electrical tape, and nothing else.
Another problem area is the wiring on the back of the fender under the carpet. There, too, you need to look at everything carefully, and, if necessary, wrap it with electrical tape. Yes, there are cases when both light bulbs burn out, but drivers refuse to believe it, checking everything but the lights themselves. Start with them. That's all, good luck!
Causes of malfunctioning rear lights
Troubleshooting a situation with non-working side lights is the primary task of the car owner, as this not only creates a dangerous situation on the road, but also, in the end, is fraught with a fine from the traffic police.
To find out why the dimensions of the VAZ 2114 do not light up, you need to focus on three main factors:
- Burnt out lamp.
- Loose contact of the power wire.
- Broken wiring leading to the gauge.
The first case is the most common, and the problem is solved by simply replacing the light bulb, fortunately, they are sold everywhere and cost little money.
You can confirm the second reason without disassembling the device by simply tapping on the size: the moment you press it to the contact, the lamp will light up, and vice versa, it will go out in the free position. If disassembling the device did not reveal any oxidation with carbon deposits, a burnt-out lamp or a loose terminal, but the rear marker of the VAZ 2114 still does not light up, we can talk about faulty wiring.
Replacing a broken light bulb
To repair the rear lights of a VAZ 2114, you need to follow a number of simple recommendations:
- turn off the vehicle's power supply;
- open the trunk, remove the decorative trim;
- Squeeze the latches and remove the contact panel of the entire flashlight;
- press down the faulty lamp and turn it counterclockwise to remove it.
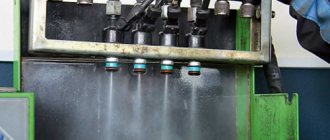
Next, it is advisable to “ring” the lamp with a tester to make sure that it was its malfunction that was the cause of the problem, after which it should be replaced with a new analogue, and you can begin assembling the lamp in the reverse order.
Some Lada owners, faced with the fact that the dimensions on their VAZ 2114 do not work, do not bother and change the entire headlamp assembly - especially since they are not so expensive. This can be considered a convenient solution, since such a replacement eliminates for some time the possibility of failure of other lamps in the flashlight, in addition to the marker lamp.
In some situations, the breakdown of the dimensions does not represent a complete non-functionality of the lights, but simply a weaker glow, which indicates a problem with the supply of current to the contacts. To fix the problem, it is enough to clean the entire contact group in the control unit under the hood, and if that doesn’t help, you will have to check each group leading to the rear light separately.
Replacing lamps
In order to replace a burnt out lamp, press out the plastic latches and remove the board with the light bulbs attached to it.
Unsnap the latches and pull the cover with the board towards you
We connect wires to it to check the functionality of each lamp. To do this, we place an assistant in the cabin, who sequentially turns on the turn, presses the brake pedal, and engages reverse gear. This way a burnt out lamp is detected.
Lamp location
To remove it, grab the flask, press and turn it counterclockwise.
Next, perform all the specified steps in reverse order and install the rear light in its original place. However, the reason why a particular light bulb does not light up is not always due to a faulty light bulb. Next, let's look at the possible options.
To replace the lamp in the additional brake light, you need to find a special technological hole in the trunk lid, remove the socket through it and remove the lamp from it.
We move the insulation and see the lamp, take it by the bulb and pull it back and up
Additional Tips
Sometimes VAZ 2114 owners are faced with the opposite situation, when the rear lights themselves work, but the indicator on the power button does not: this is almost always a sign of a faulty wiring in the interior panel. You can deal with the problem by removing the entire key block and thoroughly wiping its contacts.
In general, the side lights on this VAZ model should not often fail, since the contact pads for their fuses were specially increased in width in order to ensure a tight connection.
In addition, experts advise that in frequent breakdowns of dimensions there is a malfunction in the mounting block itself or its electrical circuit. Such a problem must be eliminated as soon as possible to eliminate the risk of a wiring fire.
Finally, you should pay attention to the tightness of the entire rear light unit and prevent moisture from getting inside, which can easily cause the lamp contacts to sour.
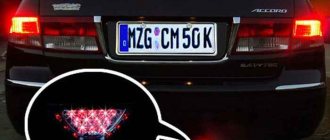
Characteristics of the additional brake light
We won’t talk about the purpose of this device, and it’s clear why an additional LED stop is needed. We suggest that you first familiarize yourself with the principle of operation and malfunctions.
Principle of operation
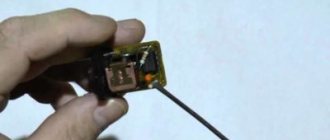
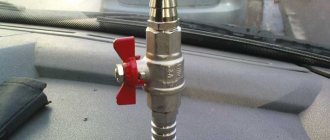
The brake light is installed on the rear of the vehicle, essentially acting as a fog light. Depending on the device, the stops may be illuminated when reverse gear, turning lights, and warning lights are activated. This optical element is based on a microboard, as well as a sensor designed to transmit a command for the driver to press the brake pedal. Using resistor elements, the operating mode of the stops is controlled. The system can also be supplemented with a transistor and stabilizer.
The design may use a special regulator to slow down the optics - such sensors consist of a controller as well as a G-sensor. In this case, the principle of operation is to increase the blinking frequency of the flashlight with a decrease in vehicle speed. When the driver presses the brake, the sensor is triggered, and the lighting sources in the foot begin to blink in a pulsed mode. Then the diodes continue to burn without interruption. As practice shows, this mode makes it possible to most effectively attract the attention of other motorists and, accordingly, increase the safety of driving.
Previously, sensors for such devices were mounted in the brake line itself, but this scheme was practically ineffective, since the regulators often failed due to short circuits. Therefore, over time, sensors began to be placed under the brake pedal. In this case we are talking exclusively about passenger cars.
Photo gallery “Different feet”
Typical malfunctions and their causes
If the additional brake light does not light up, this may be due to the following faults:
- Poor contact of the device with the car's electrical network. It is also worth looking for the reason in the electrical power circuit itself; there is a possibility that the wire laid in the corrugation between the trunk lid and the body has been damaged.
- The LEDs have burned out. Such a malfunction is less likely because the diodes usually do not burn out all at once.
- Another malfunction that can occur is that when the parking lights are activated, the stop lights are constantly on, regardless of whether low or high beam lighting is turned on. In this case, the malfunction most likely consists of a short circuit of the stop contacts with the side lights electrical circuit. Or there is no grounding on the dimensions.
- It may also happen that the brake lights begin to burn continuously when the ignition is turned off, and when the stop lights are turned on, the side lights are also activated. In this case, the malfunction may be a short circuit of the lamps to ground or poor contact of the negative terminal with the car body (the author of the video is Max and Co.).