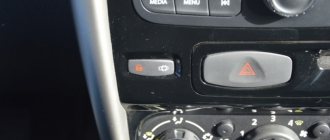
Checking the radiator fan
The internal combustion engine installed on the machine operates in difficult high-temperature conditions. The increase in temperature is caused by the placement of combustion chambers in the cylinders of the block and the spread of generated heat throughout all engine parts, as well as from friction of the pistons in the cylinders and various bearings (rolling and sliding) during reciprocating movement and rotation of parts.
Why is the radiator fan not working?
An uncontrolled increase in temperature leads to the destruction of rubbing parts and complete jamming of the engine. To avoid such troubles, the engine has a cooling system, the purpose of which follows from its name.
The following types of cooling can be used on internal combustion engines: air (open type); liquid (closed type); combined (air-liquid). The purpose and operation of fans of all types of cooling are approximately the same. They differ in the rotation drive and operation control. Based on the rotation drives, there are: mechanical, electric, electromagnetic and hydraulic fan rotation drives.
Mechanical fan rotation drives include V-belt drives and those receiving rotation from a timing belt. The disadvantages of these drives include: their constant operation (with the engine running), and, accordingly, power take-off and excessive fuel consumption; low efficiency of temperature control due to the inability to regulate the fan speed or ensure its shutdown; a large load on the coolant pump, leading to its rapid failure.
Hydraulic, electric and electromagnetic drives do not have the disadvantages listed above. These drives are controlled automatically, maintain a given engine temperature, reduce dynamic loads on the blades, and reduce noise when the vehicle is moving. The disadvantages of these drives include: the complexity of the design, the high cost of the units and repairs in general.
There can be many failures in the operation of mechanically driven fans. Let's look at the more typical ones:
— the tension of the fan drive belt(s) has weakened due to poor adjustment or belt tension;
— belt slipping due to lubricants getting on it;
— weakening of the belt(s) due to loosening of the generator mounting nuts or tension roller;
— jamming of the coolant pump shaft bearing (destruction of the bearing due to lack of lubrication, increased static load on the bearing due to overtension of the fan drive belt...);
— delamination of the drive belt;
- broken drive belt.
WARNING! Before diagnosing electrically driven fans, you must disconnect the negative terminal of the battery. If an electrically driven fan does not start working, then during diagnosis, first of all, it is necessary to exclude mechanical damage to the fan and destruction of the fan shaft bearing.
When checking the electrical part of the fan drive, it is necessary to ensure the integrity of the fan fuses, check the integrity and appropriate length of the motor brushes, and also ensure the integrity of the electrical wiring; Check the serviceability of the commutator and motor windings. A malfunction may occur due to a malfunction of the temperature sensor, relay or loose contacts in the connectors, as well as the electronic control unit. Another reason for the fan not turning on may be a thermostat failure. The reasons why fans with a hydraulic drive do not start working can be the same as those with a mechanical drive, plus a failure of the fluid coupling.
How to check a radiator fan yourself.
Checking a mechanically driven radiator cooling fan is not very difficult. During the operation of the car, it is necessary to monitor the coolant temperature gauge, preventing it from overheating (especially boiling). In order to ensure reliable operation of the fan, it is necessary to carry out a visual inspection and make sure that the belts are intact (no breakage, delamination), and that the belts are not oiled.
Check the tension of the fan drive belts, and if they are loose, make sure that the generator (tension roller) is securely fastened and that the belts are not pulled out. Check that there is no jamming when the fan rotates (check with the belts removed), that it is jammed, and that there is no play in the coolant pump bearings.
Checking the functionality of an electrically driven fan requires basic electrical skills. The check must begin by analyzing the readings of the coolant temperature gauge. If an increase in temperature is detected, its cause must be determined. WARNING! Before diagnosing electrically driven fans, you must disconnect the negative terminal of the battery.
After making sure that there are problems with the fan operation, begin troubleshooting. First of all, check the operation of the mechanical part, that is, there is no visible damage, make sure that the fan rotates freely, without jamming, and also check the functionality of the thermostat. After this, start checking the electrical part. First of all, it is necessary to check the integrity of the fuses. If the fuse(s) are blown, look for where the short circuit occurred. If all fuses are intact, check the functionality of the fan motor(s).
The operation of the electric motor can be checked by emergency switching on the fan; to do this, you need to disconnect the terminals from the temperature sensor and start the engine - the fan should work. A more reliable test of the electric motor can be done by connecting the battery directly to the engine. If the electric motor does not work, check the serviceability of the electric brushes, the integrity of the winding, and the serviceability of the commutator. If the electric motor is running, check the fan relay for serviceability.
To do this, you need to remove the block from the fan relay. Having activated the emergency switching on of the fans, we remove the relays from the socket one by one, and by turning off the fans we determine their functionality. We check the serviceability of the negative and positive wires, their integrity, the absence of insulation melting, exposed wires, and the reliability of the contacts in the connectors.
Check for the presence of negative voltage coming from the ECU to the fan relay. If faulty parts are identified, they are replaced, as well as further checking of the serviceability of the electrical wiring in order to prevent repeated failure of the fans.
What you need to check the radiator fan.
No special equipment is required to test a mechanically driven radiator fan. The integrity and serviceability of the fan drive, as well as the fan drive itself, is determined by a careful inspection using the tool that comes with the machine. To carry out repairs, appropriate spare parts are required.
To check an electrically driven fan, in addition to a car tool, you must have an indicator (to check the serviceability of the electrical wiring), a tester (to check the serviceability of the electrical wiring, as well as measure the voltage and resistance of parts). This work does not require high qualifications, but it does require quite a lot of time to detect a malfunction (the less experience, the more time is required), as well as strict adherence to safety measures.
Subscribe to our feeds on Facebook, Vkontakte and Instagram: all the most interesting automotive events in one place.
Was this article helpful?
auto.today
The best cooling fan switch manufacturers
The sensor for turning on a fan working to cool the power plant consists, as a rule, of a copper housing and a sensitive thermoelement that responds to an increase or decrease in the temperature of the cooling liquid. The timely switching on of the fan depends on the quality of these materials and the reliability of the design.
FAE
Description. Extensive production experience, as well as modern equipment, determine the high quality of products.
Its quality is confirmed by certificates of compliance with international standards ISO TS 16949:2009, ISO 14001:2004, ISO 9001.
FAE's partners are such reputable manufacturers in the automotive world as Nissan, Mercedes-Benz, Suzuki, Skoda.
Operating temperature. Products have different parameters. For example, the 37820 sensor switches on and off in the temperature ranges 95-85/102-92 °C. The FAE 36250 sensor operates at an opening temperature of 100°C and turns off the fan at T=95°C. Model 38170 has the following characteristics: Opening temperature = 90°C, closing temperature = 79°C.
Pros of FAE
- Good, branded packaging.
- Affordable price.
- Economical energy consumption.
- Minimum number of fakes on the market.
- Reliability in operation.
Cons of FAE
- Ineffective aluminum O-ring.
Hella
A similar product is sold to secondary market consumers.
Description. For example, the popular model Hella 6ZT 007 802-021 has compact dimensions: 95x50x45 mm and low weight: 50 g (packaged). It is equipped with a three-pin connector. Threaded connection size: 22x1.5 mm (wrench size 29). The product works with a double thermal switch and is connected to the vehicle's 12 V on-board network.
Operating temperature. Sensor operating range: 85-102°C.
Pros of Hella
- Convenient connector for connection.
- Excellent packaging design.
- Great working resource.
- Adaptation to the harsh climatic conditions of our country.
Cons of Hella
- Increased cost of products.
WAHLER
Description. Automakers Ford, Mitsubishi, Volkswagen install sensors as original parts on their cars. Almost all WAHLER products are sold through the conveyors of car factories - about 90%.
The high quality of the German company's products is confirmed by certificates QS 9000, VDA 6.1, DIN EN ISO 9001.
Let's look at the three-pole model WAHLER 601795 as an example of its characteristics. The part has a standard threaded connection size: 22x1.5 mm. Sensor weight: 50 g. The fan switch sensor is installed directly on the radiator.
Operating temperature. Fan switch-on temperature: 95, 102°C, switch-off temperature: 84, 91°C.
Pros of WAHLER
- Stable work.
- Excellent presentation.
- Long service life.
- Work in a wide temperature range.
Cons
- Inconvenient installation: you need a 29 key.
- There are many fakes of this German brand.
How to check the cooling fan on a VAZ-2114: photos and videos
Overheating of the engine threatens with serious consequences: the piston will jam, the block gasket will break, which will lead to a major overhaul of the power unit. Therefore, the cooling fan is an important element that protects the power unit from extreme heating.
Causes of malfunction on the VAZ-2114
The engine cooling fan may not start under the following circumstances:
- Fan motor malfunction.
The problem is resolved by replacing it with a working one; Replacing the fan motor - The fuse has blown.
Needs to be replaced with a new one; Changing the fuse - The fan relay is not working.
What is not working is replaced by a new, working one; Changing the fan relay - Open circuit in the power supply.
If a break is detected in the line, you need to restore the wire or replace it; Checking for an open circuit - Poor contact. The connections are cleaned, traces of oxidation must be removed;
- Temperature sensor failure.
The non-working one is replaced with a new one. Changing the coolant temperature sensor
Video about replacing the fan switch sensor
Checking the functionality of the cooling fan motor
The easiest way to check the operation of the fan is to put two straight wires on it: minus and plus.
The plus is taken from the battery, the minus from the car body. If it doesn’t work when the circuit is closed, then that’s where the problem lies. When starting the blades, we look for the problem elsewhere.
Cooling fan operation diagram
Basically, when a non-working fan is detected, several reasons are identified:
- The electric motor is burnt out, there is a break in the winding;
- Wear of carbon brushes;
- The bearing has jammed or fallen apart.
If in the last two cases the problem is solved with little effort, so to speak, the first involves replacing the electric motor.
Important! When installing wires, the main power supply to the electric motor must be disconnected.
Procedure for checking
The operation of the fan on the VAZ-2114 is connected through 2 fuses. One of them is also responsible for the sound signal. You can check it by pressing the horn. If there is no sound, replace it with a whole one. It is located in the mounting block, it is 20 ampere, marked F5.
Check and, if necessary, change fuses
The second one is located under the dashboard, on the passenger side. Under the casing there are 3 relays with a fuse for each. The middle pair is responsible for the operation of the cooling fan. Replace the blown element with a new one (the fuse can be “ringed” with a multimeter or limited to a visual inspection. To check the functionality of the relay, you will need an ohmmeter). When checking their condition, at the same time make sure that the contacts are in normal condition, and if oxide is detected, clean them.
Important! If you find a blown fuse, you should not limit yourself to replacing it with a new one. It is imperative to find the cause of the break, since in the near future the new one will burn out again.
Checking the fan switch sensor
If the cause is not found, the next step should be to check the functionality of the fan switch sensor. It's not difficult to do this. Disconnect it and turn on the ignition, while paying attention to the fan. The rotation of the blades indicates that the cause of the problem is in the sensor.
Checking the cooling system fan switch sensor
Due to the fact that very often the sensor starts to malfunction, sending erroneous signals, it is recommended to check it in another way. To do this, you will need a container with antifreeze or antifreeze, a thermometer and a multi-mert. Wires from the measuring device are connected to the sensor terminals, the threaded part of the sensor is immersed in the liquid. Heat the contents of the container to the temperature at which the fan operates (on a VAZ 2114 - 92 degrees). When the contacts close, the multimert will sound a sound signal. This means the sensor is working, if this does not happen, you can safely throw it away and buy a new one.
Healthy! Before installation, it is advisable to check the functionality of the purchased sensor in the same way.
Video about checking the cooling fan switch sensor
Final check
Having eliminated the problem, start the car engine. The fan motor should start after about 5 minutes of idling. If this does not happen, and the temperature has reached the desired level, diagnose the faults again.
Video about the reasons why the cooling fan on the VAZ-2114 does not turn on
carfrance.ru
How to check electric motor bearings?
After inspecting the device, you can begin to check it, and this should be done starting with the engine bearings.
Very often, electric motor malfunctions occur due to their breakdown. They are needed to ensure that the rotor moves smoothly and freely in the stator. Bearings are located at both ends of the rotor in special niches. The most commonly used types of bearings for electric motors are:
Some need to be equipped with grease fittings , and some are already lubricated during production.
Bearings should be checked as follows:
- Place the engine on a hard surface and place one hand on its top;
- turn the rotor with your second hand;
- try to hear scratching sounds, friction and uneven movement - all this indicates a malfunction of the device. A working rotor moves calmly and evenly;
- we check the longitudinal play of the rotor; to do this, it needs to be pushed by the axis from the stator. A maximum play of 3 mm is allowed, but no more.
If there are problems with the bearings, the electric motor runs noisily, they themselves overheat, which can lead to failure of the device.
Radiator cooling fan sensor: how to check the response temperature yourself
The radiator cooling fan is one of the key elements that saves the engine from possible overheating. It should turn on when the coolant is too hot and not cool enough as it passes through the radiator. For example, this situation occurs when the engine is idling or the vehicle is moving at low speed, especially at high ambient temperatures.
The sensor is responsible for turning the cooling fan on/off. It should trigger at high temperatures, activating the fan. If this does not happen, the sensor will need to be replaced. In this article, we will look at how to determine that the radiator cooling fan sensor has failed.
Contents: 1. How the radiator cooling fan sensor works 2. Where is the radiator cooling fan sensor located 3. How to check the radiator cooling fan sensor
To understand how to test a sensor, you must first understand its operating principle. The design of the radiator cooling fan sensor is very simple, but it is somewhat different on carburetor and injection engines.
In a carburetor, it has two contacts and a bimetallic plate. When the bimetallic plate is heated to a temperature determined during the production of the sensor, the contacts close and current begins to flow through them to the fan, turning it into operation. On the injector, the sensor activation system is almost the same, except that the command to turn on is sent by the engine control unit, analyzing the need to activate the fan based on information coming from several other sensors.
Sensors on carburetor engines operate when a certain temperature is reached, and the driver can look at the markings on the device body to determine in what temperature range the sensor will operate. Typically, such sensors are activated at temperatures between 92 and 97 degrees Celsius. If the driver is concerned about possible engine overheating, he can find a sensor on sale that operates at a lower temperature and install it. On injection engines, the sensor response temperature is stitched into the “brains” of the car control unit.
Where is the radiator cooling fan sensor located?
Manufacturers determine the location for installing the fan sensor, depending on the design features of the engine. Most often it is placed at the bottom of the radiator, but sometimes it is more expedient to place the sensor near the thermostat and cylinder block.
How to check the radiator cooling fan sensor
We recommend reading: Radiator cooling fan does not work or does not turn off: what to do
Methods for diagnosing the sensors in question will differ, depending on which engine they are installed on and how they are turned on:
- On the carburetor. To check the radiator cooling fan sensor on a carburetor engine, you must turn off the car. Next, find the sensor in the engine compartment and remove the wires from it that go to the connector. After this, we start the engine and bridge the connectors from which the wires were removed. If the fan turns on, you can diagnose a sensor failure. Please note: In a situation where the sensor fails on the road, in order to avoid engine overheating, you can bridge the sensor contacts in a similar way. It is important to insulate them so that they do not touch the housing and cause a short circuit.
- On the injector. In an injection engine, you can carry out computer diagnostics of the sensor. A number of modern cars have a separate diagnostic error indicating that the cooling fan sensor is faulty. If such an error has been identified, you can diagnose the sensor on the car as follows. You need to disconnect the connector from the sensor and wait a few seconds. The control unit will detect that the sensor is no longer connected and will start the fan.
The options with complete sensor failure are discussed above. In this case, situations are possible when it partially fails, for example, it operates at the wrong temperature. This can also be checked in the following way:
- Take a tester, a thermometer for measuring water temperature, a container for heating water, water and the sensor itself;
- Next, pour water into the container and set it to warm up;
- Place the sensor to be diagnosed in water so that its contacts are on top;
- Monitor the water temperature with a thermometer, while holding the probes of the tester (included in the resistance measurement mode - Ohm) on the sensor contacts;
- Until the water is heated, the sensor resistance will tend to infinity. At a certain heating temperature, the sensor should operate and the resistance will decrease significantly. It is necessary to determine at what water temperature this occurs.
Depending on the results obtained, you can make a decision about the serviceability or malfunction of the sensor. If it operates at a temperature lower than stated, then such a sensor has some problems, but it can prevent the engine from overheating by turning on the fan in advance. It is much more dangerous if the sensor operates at a temperature higher than stated, in which case it will need to be replaced.
(89 votes, average: 4.80 out of 5)
OkeyDrive.ru
How to check the winding of an electric motor?
The next stage of testing is to check the motor winding for a short circuit to its housing.
Most often, a household motor will not work with a closed winding, because the fuse will blow or the protection system will trip. The latter is typical for ungrounded devices designed for a voltage of 380 volts. An ohmmeter is used to check resistance. You can use it to check the motor winding in this way:
- set the ohmmeter to resistance measurement mode;
- we connect the probes to the required sockets (usually to the common “Ohm” socket);
- select the scale with the highest multiplier (for example, R*1000, etc.);
- set the arrow to zero, and the probes should touch each other;
- we find a screw for grounding the electric motor (most often it has a hex head and is painted green). Instead of a screw, any metal part of the case can be used, on which the paint can be scraped off for better contact with the metal;
- We press the ohmmeter probe to this place, and press the second probe in turn to each electrical contact of the engine;
- Ideally, the meter needle should deviate slightly from the highest resistance reading.
Checking the condition of the cooling system fans and their activation circuits, replacing fans
Checking the condition of the cooling system fans and their activation circuits, replacing fans
| Try not to touch the impeller blades with your hands, tools or clothing. To avoid personal injury or equipment damage, do not run the engine with a faulty fan. Do not attempt to repair broken impeller blades - replace the entire impeller! |
EXAMINATION
Checking the Fan Control Module
|
VAZ 2110 injector cooling fan does not work
An engine operating at extreme temperatures will require expensive repairs or replacement. How to organize uninterrupted engine cooling? Why does the VAZ 2110 injector cooling fan not work?
A 10-minute reading will provide answers to these and many other questions. The article is based on the generalized experience of professional mechanics and auto electricians. Clear, proven tips will help you find and troubleshoot problems and avoid unwanted breakdowns.
Why the cooling fan does not work on Kalina
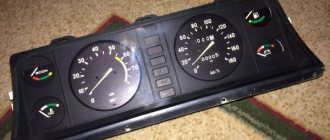
The radiator fan is used to force cool the engine radiator when it overheats. When the car is in motion, the radiator is cooled by oncoming air flow.
At low speeds, or when the car is just standing still, the radiator is not able to cool the liquid on its own, so when it reaches a certain temperature (101-105 degrees), the sensor is triggered, thereby transmitting the corresponding signal to the controller.
The latter analyzes the received information and turns on the fan.
The fan itself is a structure consisting of a casing (housing) with a built-in electric motor with an impeller. The fan is attached to the inside of the cooling radiator.
Cooling fan malfunctions
The reasons for the fan not working can be:
- faulty temperature sensor;
- failure of the fan relay or fuse;
- broken wiring or lack of contact in the connectors;
- faulty fan motor.
How to find the reason
Start checking with the electric motor. To do this, disconnect the electrical wires from it and connect it directly to the battery, observing the polarity. If the fan does not turn on, that is the problem. If it works, you need to look for another reason.
Check all contacts on the connectors, and then the relay and fuse. They are located in an additional mounting block, which is located to the right of the instrument panel near the lower heater air duct.
The fuse (50 A) can be checked with a tester; it is better to take a relay that is known to be working and install it in the appropriate socket. If the problem is not solved, move on.
Checking the temperature sensor. To do this, warm up the engine to operating temperature, turn it off and disconnect the sensor. It is located on top of the thermostat housing. When the sensor is disabled, the controller must independently start the fan to operate continuously.
Start the engine and wait for the fan to turn on. If the coolant temperature has reached a critical value and the fan does not turn on, you need to look for a break in the electrical wiring.
Do I need to change the fan?
If you have determined that the problem is in the fan itself, or rather in its electric motor, you can try to repair it. Most often, it stops working due to failure of the brushes, or due to problems with the rotor bearings. Less often the collector becomes unusable or a break occurs in the winding.
If the fan cannot be repaired, it must be replaced.
Under no circumstances should you drive a car with a non-functioning fan. Overheating of the engine will inevitably lead to the destruction of the rubber hoses of the cooling system, gaskets, and also threatens the failure of parts of the piston group.
The price of a cooling fan and the cost of replacing it
Prices for a cooling fan for the Lada Kalina (electric motor with impeller) vary between 1500-2500 rubles. Replacing this unit at a service station will cost 300-400 rubles.
When buying a new fan, pay attention to its manufacturer and catalog number. This part may have the following numbers:
- 1118-1308008;
- 1118-1300025;
- 21230-1300025-00;
- 2123-1300025 (with two engines for Kalina 2123);
- MOD285 (BM brand);
- BMMOD285 (Pilenga brand).
Replacing the cooling fan Lada Kalina
To replace the cooling fan, it is not necessary to go to a service station. You can do this without much difficulty on your own.
Required tools:
- head with ratchet or socket wrench 10;
- spanner or open-end wrench 8;
- screwdriver with Phillips bit;
- pliers.
Work order
- Place the car on a level surface.
- Raise the hood, disconnect the ground wire from the battery.
- Using a 10mm wrench, unscrew the two air filter mounting bolts.
- Disconnect the mass air flow sensor connector by pressing the latch.
- Disconnect the purge valve connector located on the air filter housing.
- Using a screwdriver, unscrew the bolt of the air duct fixation clamp and remove the corrugation.
- Unscrew the 4 screws securing the air filter cover.
- Remove the cover and remove the filter element.
- Using a size 8 wrench, unscrew the nut securing the air intake and remove it.
- Using a size 10 wrench, unscrew the two nuts securing the fan casing on the right in the direction of travel of the car, and then with a size 8 wrench, unscrew the two nuts on the left.
- Disconnect the fan power connector.
- Carefully, so as not to damage the radiator fins, remove the fan along with the housing.
- Using a 10mm wrench, unscrew the 3 bolts securing the electric motor and remove it from the housing.
- Install a new electric motor with impeller in its place.
- Screw the casing assembly with the fan to the radiator.
- Connect its connector.
- Carry out the rest of the installation work in reverse order.
Conclusion
After replacing the cooling fan, check its functionality. Start the engine and warm it up until the fan turns on. This may take 3 to 5 minutes.
When the fan turns on, do not turn off the engine immediately, wait until the fan turns off.
mylada.net
Which fan switch sensor should I buy?
The following factors should be taken into account:
1. Correspondence of sensor connection connectors and wiring.
2. The temperature mode for turning the fan on/off must correspond to the mode of the purchased part.
3. The technical characteristics of the current and voltage of the sensor must match the parameters of this section of the electrical circuit.
4. Correspondence between the dimensions of the threaded connection of the sensor and the socket in the car in terms of diameter, length, thread pitch.
5. When purchasing, preference should be given to original products. This guarantees the quality of the sensor. However, the disadvantage of such parts is their high cost. Analog products released under license have an affordable price.
Other reasons for a fan not working
If your electric cooling fan stops turning on, do not rush to blame the sensor. Before replacing the fan switch sensor on a VAZ 2106 or another model, check the remaining points. This:
- Fan malfunction. One of the reasons may be the failure of the system itself. The cost of replacing it, of course, is more expensive than the sensor, but anything can happen.
- The operation of the fan cannot always be checked by closing the two contacts of the fan sensor. Because the circuit may be broken.
- The most reliable way to check the operation of the fan is by connecting its contacts directly to the battery, using two long wires. If the fan does not work, it should be replaced.
The fan does not turn on
There may be several reasons for this:
- Fuse. In the mounting block, fuse F7, rated 20 amperes, may be faulty - it is responsible for powering the electric fan and sound signal circuits;
- Thermostat. The liquid circulates only in a small circle, the radiator and sensor do not heat up, and accordingly, the fan does not turn on. You can check by simply probing the pipes; those connecting to the radiator should begin to warm up after opening the thermostat;
- Sensor. For a VAZ 2110 with a carburetor, the contacts are closed for testing; if the device malfunctions, the electric fan will turn on. The connector of the injection motor must be disconnected; with the remaining elements working, the ECU will detect a break in the circuit and issue a constant alarm signal to the relay, which will forcibly turn on the electric motor for cooling;
- Cooling system fan relay for VAZ 2110 injection engines. The sensor is turned off and the power contacts on the relay located in the additional fuse box are closed. If everything works, then we check the control winding: on one contact there is always a positive from the main relay, connecting the second to the body, we try to hear the operation click. But it’s better to simply replace the relay for testing, temporarily, with a known good one;
- Electric motor. During testing, the connector is disconnected; to force the impeller to turn on, voltage is supplied directly from the battery.
If all the elements are working properly, then you need to look for a break in the wires, “ringing” them one by one. Poor contact of the relay and sensor connection wire terminals with the car body is also possible. The worst case scenario would be an ECU failure, in which case the signal from “leg” 46 usually “floats” and does not reach the values of 12 volts (off) and 0 (on).
There may be several reasons why a fan may not turn on, and below we will look at the main ones.
To drive the fan, a DC electric motor with excitation from permanent magnets ME-272 or similar is installed. Technical data of the electric fan and fan switch sensor:
- Rated rotation speed of the electric motor shaft with impeller, 2500 – 2800 rpm.
- Electric motor current consumption, 14 A
- Sensor contact closure temperature, 82±2 degrees.
- Sensor contact opening temperature, 87±2 degrees.
The cooling system fan may not turn on due to:
- electric drive malfunctions;
- blown fuse;
- faulty thermostat;
- a failed thermal sensor for turning on the cooler;
- faulty VO relay;
- broken electrical wiring;
- faulty expansion tank plug.
The BO fuse is located in the mounting block of the car's engine compartment and is designated F7 (20 A). The test is carried out using a car tester turned on in probe mode.
- In a car with a carburetor engine, you need to check the sensor - turn on the ignition and short-circuit the two wires going to the sensor. The fan should turn on. If this does not happen, the problem is definitely not with the sensor.
- For injection cars, it is necessary to warm up the engine to operating temperature and disconnect the sensor connector, disconnecting it from the vehicle’s on-board network. In this case, the controller must start the fan in emergency mode. The electronic unit perceives this as a failure in the cooling system and forces the fan drive to operate in constant mode. If the drive starts, the sensor is faulty.
And it is located in the additional mounting block of the center console. On the lower left side of the front passenger side there is a plastic cover covering the console. To open it, you need to unscrew four screws. There are three relays under the cover. The leftmost one is responsible for turning on the cooling fan.
The fan runs constantly
Structurally, the radiator fan consists of:
- frame (frame);
- drive (electric motor);
- impellers.
An electric motor with an impeller on a shaft is installed inside a rectangular metal frame, with which it is attached to the back of the radiator. When voltage (12 V) is applied to the contacts of the drive, it begins to work, rotating the blades and creating a directed stream of air, which, in fact, cools the antifreeze or antifreeze.
This is a rarer defect and occurs in the following cases:
- The sensor contacts do not open, the “Check Engine” lamp is on, for carburetor VAZ 2110, when the connector is disconnected, the fan turns off;
- The wires to the device are broken (only at the injector);
- The relay is stuck in the closed state.
To eliminate the malfunction, it is necessary to replace the failed element.
- The sensor contacts do not open, the “Check Engine” lamp is on, for carburetor VAZ 2110, when the connector is disconnected, the fan turns off;
- The wires to the device are broken (only at the injector); The relay is stuck in the closed state.
- To eliminate the malfunction, it is necessary to replace the failed element.
Procedure. Step-by-step instruction
If after completing the next step the problem goes away, further checks are stopped.
- Open the hood.
- Wait for the engine to cool down.
- Perform an initial visual inspection: integrity of the hoses, reliability of the clamps, absence of leaks or cracks.
- Make sure that the expander cover elements are in good condition. Remove scale, rust, clear holes, wipe, assemble. The absence of noticeable damage to parts gives hope that the product will work.
The valve design is elementary. The cover contains a spring. Functionally, it is designed to regulate the pressure in the cooling circuit. A hot engine increases it, a cold engine decreases it.
Compressing at a value of 1.1 atmospheres, the spring relieves excess pressure and prevents the destruction of hoses and the tank. As the motor cools, it creates a vacuum effect. The tank will begin to flatten. The valve equalizes the pressure.
The lid screws tightly on the thread, eliminating distortions. There should be a gap between it and the body. An overtightened valve will not work. It is difficult to test the device's operation in road conditions. You can check by replacing it with a known good one.
Inspect the electrical wiring elements to ensure a reliable connection
Possible factors for damage to electrical circuits:
- vibration;
- oxidation;
- burning;
- breakage, fraying of electrical wires;
- insulation aging, short circuit.
Switch the tester to resistance measurement mode. Remove it with special tweezers and ring the fuse link F7 located in the mounting block.
Fuse box diagram
Attention! It is important to find out and eliminate the cause of burnout.
Replace the burnt-out element with a serviceable one with a rating of 20A. Inspect and clean the nest. Insert fuse.
It was not possible to find out the reason, the protection triggered again - look for a short circuit.
Disconnect the fan plug. Use a tester to measure the circuit of the electric motor windings. Zero resistance or a break indicate the need to replace the radiator blower electric drive.
Interturn short circuits that cause multiple replacements of fuse links cannot be measured with the device.
Sensor check
Start the car. Pull out the coolant temperature sensor connector. The fan starts working - the sensor needs to be replaced. Secure the disconnected wire. Drive to a nearby service station.
Relay test
There is a hatch on the floor at the front passenger's feet.
Below it is a built-in panel with three relays of the same type:
- fan installation;
- fuel pump;
- ignition (main thing).
By replacing each other, try to start the airflow. The VAZ 2110 fan does not work - go to the next step.
Where is the VAZ 2110 cooling fan relay located?
If you are wondering where the fan relay is located on a VAZ 2110, then this photo below will answer your question and you can easily find where the cooling fan relay is located on a VAZ 2110.
VAZ 2110 fan relay
Check the electric motor
Winding measurements did not reveal a malfunction. Apply voltage briefly from the battery using additional insulated conductors. The operation of the fan indicates a malfunction of the controller, which does not output a signal to the relay.
- The only correct solution is to turn on the airflow directly and urgently visit a service station.
- Prevention of breakdowns of the cooling system of the VAZ 2110 injector 16 valves.
- Periodically inspect the components of the cooling system.
- Monitor the cooling temperature on the device, listen to the operation of the fan.
- Maintain coolant level. Replace after 2 years or 30,000 km.
- Use the solution to remove rust and scale.
- Signs of a change in the properties of the coolant are a change in color, an increase in fluidity.
- Check the density with a hydrometer.
- Do not mix coolants.
- Every twelve months, rinse the expansion tank cap with water and check it on a stand with a pressure gauge.
- Avoid contact of aggressive liquids with electrical wiring and electric motor windings.