Replacing valve stem seals
Oil removable caps on Niva are parts of the gas distribution mechanism of a car engine, the task of which is to prevent lubricant from entering the combustion chamber. Made of metal and special rubber, these elements fit tightly to the valves, but over time they wear out and break down. Their rubber part becomes less elastic and may separate from the base. Oil begins to pass through, and the consumption of lubricants by the engine increases. This means that it is necessary to replace the oil of the Niva removable caps - a complex process, but it can be done on your own if you familiarize yourself with the stages of the work and prepare the appropriate tools.
How to identify a malfunction
Engine oil entering the engine combustion chamber causes blue smoke to appear, especially when using engine braking. There may be several reasons:
- Worn oil scraper or compression rings
- The oil seals have failed
The first reason is less common and is caused by the use of a non-standard brand of gasoline or oil, violation of engine operating conditions, or the approaching period of major repairs. The second reason, the most common, and easy to fix with your own hands, is what we will consider
Set of tools
To replace the caps you will need the following tool:
- A set of open-end wrenches or a set of heads
- Screwdriver Set
- Special desiccant
- Tin rod (8 mm)
- Inertia puller
- Hammer
- Torque wrench
- Mandrel for installing new caps
- Tweezers or fine-nosed pliers
- Rags
Instructions for replacing valve stem seals on a VAZ 2107 (Video)
To replace the valve stem seals of a VAZ 2107 you will need:
Preparatory work
It is advisable to carry out the work in a garage - this will help to avoid dust getting on the timing parts during assembly. It is also necessary to secure the machine with the handbrake and turn on neutral speed so that you can turn the crankshaft during operation.
Replacing valve stem seals on a VAZ 2107 begins with disassembling part of the gas distribution mechanism and removing the old caps. To do this, you must perform the following operations:
Note: after removing the spark plugs, check their condition and replace if necessary.
Tip: to prevent the camshaft from turning, you must engage the first gearbox speed.
Advice: so as not to have to re-adjust the position of the chain on the sprocket teeth, you need to tie the chain to the sprocket with wire and place it on the cylinder block.
To remove the valve stem seals, perform the following operations on each of the intake and exhaust valves:
Note: replacement of VAZ 2107 valves is also carried out using a desiccant. But before the operation, it is necessary to remove the engine head to ensure that the valves can be removed and installed.
When installing new caps, it is advisable to use a special bushing that fits onto the valve stem to avoid damage to the working edge. For the same purpose, the inner surface of the valve stem seal is lubricated with engine oil before installation.
The procedure for installing the oil seals on the valve guide and springs is as follows:
Next you should assemble and adjust the engine timing belt:
Replacing valve stem seals on a VAZ 2107 is quite feasible at home. The most important operation is setting the gap between the camshaft cams and the rocker arms (rockers) of the valves. The operation requires a micrometer or probe. If the gap is too large, the camshaft will knock loudly on the rocker arm while the engine is running, and the valve will not open fully, which will impair engine performance and can lead to burnt out exhaust valves. If there is no clearance, the valve will not close completely. A slightly open valve will worsen engine compression and burn out over time. Therefore, when replacing VAZ 2107 valves or valve stem seals, after removing/installing the camshaft, it is necessary to adjust the clearances. But this is a topic for a separate article.
How to replace gas distribution valve seals VAZ-21214
We change oil seals or simply valve seals during engine overhauls, as well as when repairing the cylinder head.
The oil seals also need to be replaced when the engine overheats; in this case, the elasticity of the oil seals is lost.
A sign of replacing valve seals is increased oil consumption and increased exhaust smoke.
Using a spark plug wrench, remove the spark plugs from the cylinder head.
Remove the cylinder head cover (see “Replacing the cylinder head cover gasket”).
Rotate the crankshaft until the mark on its pulley coincides with the mark on the camshaft drive cover.
We remove the camshaft housing and valve drive levers (see “Removing the camshaft and valve drive levers of VAZ-21214”).
In this position of the crankshaft (the pistons of the 1st and 4th cylinders are at TDC), we change the oil seals of the valves of the 1st and 4th cylinders.
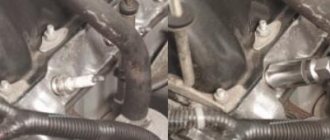
Through the spark plug hole we insert between the piston bottom and the valve plate (on which we change the cap) a soft metal rod with a diameter of about 8 mm.
We install the valve depressurizer.
We rest the desiccant bearing against the valve plate, and place the hook lever behind the nut screwed onto the stud securing the camshaft bearing housing.
Compress the valve spring with a compressor
...and remove the crackers with tongs (or tweezers).
We loosen the springs.
Remove the valve plate
Remove the outer and inner springs
...as well as the upper and lower spring support washers
Using pliers, remove the oil cap from the valve guide.
If there are no pliers, use two screwdrivers to pry up the oil cap and remove it.
We perform the operation carefully so as not to damage the fragile guide sleeve.
After lubricating the working edge of the new oil seal with engine oil, carefully place it on the valve stem.
Using a high “12” head or mandrel, press the cap onto the valve guide sleeve
We assemble the valve mechanism in the reverse order.
Remove the rod from the spark plug hole.
After replacing the valve caps of the 1st and 4th cylinders, rotate the crankshaft 180° (supporting the camshaft drive chain so as not to pinch it) and change the valve caps of the 2nd and 3rd cylinders.
We assemble the gas distribution mechanism in the reverse order.
Replacing valve stem seals for Niva Chevrolet, choosing the best & |
Replacing valve seals
After this, install the valve elements back and proceed to the next stage - removing the rod and installing the crackers in place by lightly hitting the end of the rod with a hammer.
Popular articles from the section: They, in turn, should be carefully pulled out with tongs.
We remove the valve levers and arrange all the parts in the sequence of their dismantling, so as not to mix them up during installation. The puller shown has a mandrel on the other end for pressing on the caps. Indirect signs are increased oil consumption in the absence of external leaks and oily spark plug electrodes.
We lubricate the inner surface of the new cap with engine oil and, using the same device, press it onto the valve stem into its seat.
Replace the remaining caps in the same way. We carry out assembly in reverse order.
Indirect signs are increased oil consumption in the absence of external leaks and oily spark plug electrodes. You can replace the valve stem seals without removing the cylinder head from the engine.
Tools:
You will need the same tools as when replacing the head gasket and receiver, as well as pliers, a device for compressing valve springs, an oil seal remover, if possible, round pliers or tweezers for removing valve cotters, a mandrel for pressing oil seals, a hammer and a tin rod solder with a diameter of about 8 mm to support the valve.
Similarly, replace the oil seals of the exhaust valve of the 1st cylinder and both valves of the 4th cylinder.
Holding the sprocket together with the chain, turn the crankshaft half a turn and replace the valve stem seals of the 2nd and 3rd cylinders. After replacing all the caps, turn the crankshaft another half turn and install all the previously removed timing parts.
Tighten the camshaft bearing housing nuts in sequence.
Part 1. Series Father Niva Chevrolet NIVA Chevrolet 4+4 + new on the channel
Install the cylinder head cover and all removed components and parts in the reverse order of removal. The article is missing: The support plate is also removed.
We engage the oil seal with a collet clamp. With a light tap, it comes off the valve. Most mechanics insert a tin rod into the spark plug hole.
This keeps the valve in the closed position. But there is a more convenient way. Using light blows of the striker on the mandrel, press the cap until it stops.
Remove the guide sleeve from the valve stem, replace the inner spring support washer, springs and valve cotters in the reverse order of removal. Similarly, replace the oil seals of the exhaust valve of the 1st cylinder and both valves of the 4th cylinder.
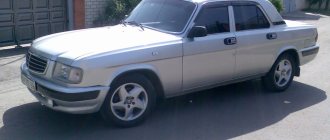
Replacing oil seals for VAZ 2121 and Niva 2131
A characteristic sign of failure of oil seals on a VAZ 2121 and Niva 2131 is the appearance of bluish exhaust smoke under engine load, that is, with a sharp increase in speed. And as they wear out more, blue exhaust can be observed even at middle and lower engine speeds. This property is due to the fact that oil began to enter the combustion chambers through the caps, which in turn, when burned, forms a characteristic bluish-gray exhaust smoke. The tightness of the valve stem is ensured by the cap. They fail either due to temporary wear or due to a manufacturing defect.
To carry out repair work you will need: a tin rod, a standard set of tools, a device for loosening valves. If you have everything you need, follow these steps:
Using a special spark plug wrench, unscrew all the spark plugs, having first removed the caps of the high voltage wires.
Then you need to remove the cylinder head cover, see Replacing the cylinder head cover gasket.
Now you need to set the piston of the first and fourth cylinders to the top dead center position. To do this, use a special wrench for the crankshaft pulley nut, turn it in the direction of rotation and align the marks located on the camshaft drive sprocket with the mark on the camshaft bearing housing.
Now you need to remove the camshaft bearing housing itself and proceed to replacing the caps.
Install a flexible tin rod into the spark plug hole of the cylinder, the valve of which will now become dry. The rod is necessary to prevent the valve from falling into the cylinder after the retainers and springs are removed.
Install a device for compressing the valve springs according to their design.
We compress the springs and use tweezers to remove two crackers. Then we carefully open the device and loosen the tension of the springs, remove it, and then remove the outer and inner springs.
Next, remove the spring support cups from the valve stem.
To remove the cap from the stem, you need to use pliers with narrow jaws, with which we grab it and carefully pull it off the stem.
If you don’t have pliers, the cap can be removed using two small flat-head screwdrivers, which we use to pry it off by the protrusions on both sides.
Before installing new ones, lubricate it with engine oil and press it into place using a mandrel of suitable diameter.
At this point, the repair work to replace the valve stem seals on the VAZ 2121 and Niva 2131 has been completed. The subsequent installation of the removed parts is carried out in the reverse order.
My account
The KV installation allows you to service cylinders 1 and 4, since the highest dead center of the corresponding pistons is fixed in this position. We will be very grateful for your comments on the video clip “Replacing oil seals on a Niva Chevrolet video”; registration is not required for this. We also ask you to let us know if you have any problems playing the video.
KEFIR60 everything that was commented on is correct - they don’t repair it here, this is probably the last repair, and it’s not long-term
Tags: analysis, Samara, Skoda
- Related Posts
- Motorcycle Honda CBF Hornet technical specifications, reviews, photos, videos
- Valve seals • TOYOTA Club Belarus
- Buy Chevrolet from an official dealer in Russia. Selling Chevrolet cars at a car dealership
« Previous entry