Bi-xenon on VAZ 2109 and LED headlights on VAZ 2109 - installation tips
How to install bi-xenon on a VAZ 2109 and other elements of tuned optics
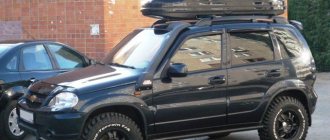
Almost none of the owners are happy with the appearance of VAZ cars, such as “nines”, so many decide to install tuned spare parts on a VAZ 2109, with the help of which you can radically transform the exterior of this car. First of all, the optics on these cars require improvements; tuning the headlights on the VAZ 2109 can be installed with both LED and bi-xenon ones.
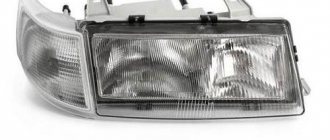
If you decide to install bi-xenon on a VAZ 2109, then first of all you will have to check how the switching of high and low beam is organized on the car. It is worth emphasizing that the bi-xenon on a VAZ 2109 car can be installed in the main light only with an H4 base, since the headlight in this car has glass with a diffuser and is not intended for installing lenses in it. That is why if a car owner wants to make such a tuning for VAZ 2109 headlights, he will have to completely change the glass to transparent glass without a lens or grind it. Well, as for the choice of ignition blocks, taking into account the spaciousness of the engine compartment, you can get by with ordinary blocks, that is, installing thin slim blocks is not at all necessary. When installing bi-xenon on a VAZ 2109 car, you need to take into account an important feature: to output the power pigtails, you will have to drill a 20-25 mm hole in the plastic headlight cover. It is necessary to fix a rubber ring in the resulting hole; it will prevent moisture from entering (this ring comes with the wire). The lamp with the ignition unit must be installed according to the diagram suggested in the instructions; it is very difficult to make a mistake at this stage, since there are marks on the connectors. The blocks are then connected to the car's power supply, with other wires attached to the common wire to which the conventional headlights were connected. Next, you can put back the protective lamp cover and put the headlight in place. As for the ballast or ignition unit, it should be attached in the most convenient place, limiting the ingress of moisture and water. Do not place ballast close to parts that heat up during driving or near moving elements. This is basically the whole process of installing bi-xenon on a VAZ 2109.
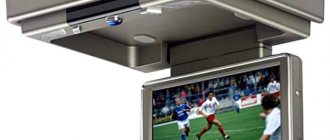
Spare parts for tuning the VAZ 2109 can be very different, but if we are talking specifically about optics, then LED headlights on the VAZ 2109 have become an alternative to bi-xenon. These light sources have many advantages, for example, if they are used in brake lights, then during emergency braking LED lamps give the driver of a rear vehicle extra time for emergency braking or maneuvering, thanks to the fact that the LED lights up instantly in 70 nanoseconds, compared with 0.3 seconds for an incandescent lamp. As we can see, such light sources can be very useful.
In the process of replacing incandescent lamps with LED headlights on a VAZ 2109 car, the on-board control system will begin to signal the breakage of the filaments in the brake lights and parking lights due to low current in these circuits. To put the system in order and at the same time maintain its ability to monitor the health of the lamps, it will be necessary to make some modifications to the lamp control relay. It is preferable to entrust such work to specialists.
what kind of bi-xenon to put on a vaz 2108
The desire to install xenon lights on your car is often blocked by the fear of losing the warranty. I want to reassure you - if you purchase equipment that meets quality standards and norms, official car dealers simply will not
idle speed sensor vaz 2109 injector
which truck tractor is better to buy
The desire to install xenon lights on your car is often blocked by the fear of losing the warranty. I want to reassure you - if you purchase equipment that meets quality standards and norms, official car dealers simply will not be able to legally prove the fact of damage from the replacement.
setting up the carburetor VAZ 2106
It is only important to be wary of “pseudoxenon” from the Chinese market. The term “xenon” usually means HID (High Intensity Discharge lighting), namely lighting devices that generate high-intensity discharge light
DIY time relay
Since the superiority of xenon over conventional halogen lamps was proven, numerous fakes have begun to appear.
When purchasing, immediately pay attention to the presence of a ballast block, without which real xenon light “will not work.” Before choosing a xenon kit, you need to determine the type of switching from low beam to high beam (more precisely, the method of organizing it on your car).
These can be separate lamps, or one double H4 lamp. If you do not follow this, when installing xenon, you will lose high beam. To maintain both types of lighting, it is necessary to install the so-called bi-xenon (remember that xenon lamps shine much brighter than usual, maybe high-range ones are not needed?)
replacing the radiator of the VAZ 2109 stove
The guys from the auto center will be happy to install the xenon, but if you want to save money, you can easily do it yourself.
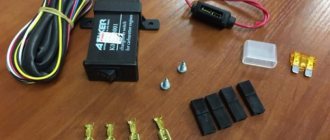
The installation process itself is not complicated and is suitable for any car with H-type halogen headlights. Although the lighting kit does not need to be rewired, I still recommend doing so, since the voltage drop on the standard wiring reaches three volts(!). An approximate set of xenon illuminators includes:
— two xenon lamps;
— two ignition blocks and special brackets for their fastening;
— wiring and fuses for 20 amps;
— operating and installation instructions.
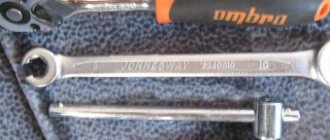
To install xenon yourself, you will need an hour of time and ordinary tools, such as a screwdriver and drill.
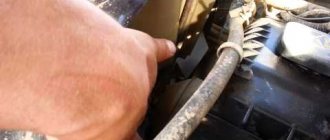
1. Remove the headlights from the car, and then the lamp protection panel (if you install bi-xenon, remove both). Now we drill a hole for the wires
start stop button
In this hole you need to fix a rubber moisture-proof ring (it is attached to the wires).
2. Install xenon lamps (instead of regular ones).
3. Next, look at the diagram in the instructions (they may differ slightly in different configurations) and securely connect the ignition unit to the lamp. There should be marks on the connectors, so it's difficult to make a mistake. We connect the black wires to the “common” wire, and the signal wires to the car’s power circuit.
4
coolant temperature sensor VAZ 2114
Now we install the lamp protective panel in place, and then the entire headlight.
5. Install the ballast (ignition unit) in a place convenient for you and screw it tightly. Ballast is the most important part that generates a high-voltage discharge for the lamp. When choosing the installation location, pay special attention: no water or even moisture should get into the unit (I recommend putting a condom on the ballast, no joke), and also place it away from very hot and moving engine parts.
That's all. Xenon installed and ready to go
replacing the idle speed sensor VAZ 2114
BUT!
Its precise adjustment is necessary so as not to blind pedestrians and oncoming drivers, because this creates emergency situations.
In case of sale or other need, installing halogen lights back is a trivial matter (the main thing is not to throw them away 
who bought a car customs cleared for a disabled person
air filter for stove 099
the car jerks while driving what is the reason
Similar articles:
Useful tips → Secret letters in your car
Useful tips → How to protect your car and property from theft?
Useful tips → Winter driving rules
Helpful tips → How to properly drive over a speed bump
Useful tips → How to get out of a skid correctly
Bi-xenon on VAZ 2109: do-it-yourself installation
VAZ 2109 with bi-xenon
Bi-xenon on the VAZ 2109 can be installed on your own, without any special problems. Bi-xenon in the VAZ 2109 has been very popular lately and many car owners want to install this particular type of lighting. In this article we will learn how to install bi-xenon yourself and what are its advantages.
What is the difference
Bixenon VAZ 2109
Having become widespread, headlights with xenon bulbs, or gas-charged ones as they are also called, today show off even in the optics of fairly budget car models. And what about budget ones, even a used car, the most used one, can be easily equipped with these light bulbs. First of all, such lamps ensure safety on the roads, because for normal traffic, not only at night, you need good and clear light. Imbued with the idea of creating something unusual, xenon manufacturers came up with a way to increase the brightness of luminosity indicators in gas-charging lamps by as much as 3 times. As a result, xenon finds application immediately, eliminating all “competitors” and remaining a sales leader until bi-xenon comes out with its own characteristics.
Bi-xenon lenses VAZ 2109
Although the principle of glow in these two types of lamps is identical, they have differences that will be useful for the reader to know about. Let's first look at the features of xenon and then bi-xenon to understand the difference between them.
Xenon Features
- The set of xenon headlights includes high-power gas-charging lamps. They are also called H>
Bi-xenon lenses for VAZ 2109
Note. Despite this, many drivers today prefer a symbiosis of halogen and xenon. As a result, the owner of a car with such headlights feels calm on any road at any time of the day. Good visibility even of the roadsides is provided to him.
- A striking example of such a symbiosis is the installation of xenon for low beam and halogen for high beam. As a result, high beams, which are more often used on deserted intercity highways at night, will solve problems with visibility 100 percent. There is a good amount of cost savings - you don’t have to fork out money for xenon for long-range headlights, but only for low-beam headlights.
Bi-xenon lenses for VAZ 2109 BOSH
Bi-xenon and its features
- The complete opposite of halogen bulbs is bi-xenon. This type combines many advantages, including performing one function instead of two.
Note. Some cars have only one lamp for lighting (high/low). In this case, using bi-xenon will be the right decision.
- Bi-xenon lamps use one gas-charging lamp, which works for both low and high beam.
- The low/high beam control in bi-xenon occurs due to the displacement of the lamp screen. In other words, the luminous bulb in the lamp itself moves.
- Bi-xenon, or rather its kit, costs more than xenon.
As a result, we draw the following conclusions:
- Both of these lamps (xenon and bi-xenon) have the same principle.
Difference between xenon and halogen lighting
- Xenon lamps can be installed on both beams (high/low).
- Bi-xenon, on the contrary, is capable of combining both lights (high/low) in one housing.
- The bi-xenon is controlled mechanically, due to a moving element inside the bulb.
- Bixenon is more expensive than xenon, but is considered more versatile.
For VAZ 2109
Bi-xenon in the headlight of a VAZ 2109
Installing bi-xenon on a VAZ 2109 will provide many advantages, including a significant improvement in lighting quality. The light emanating from the headlights of the VAZ 2109 will be bright, saturated and pure white. Thus, safety increases significantly and the driver who carries out this tuning protects himself, passengers and pedestrians from accidents in unforeseen situations.
Note. It has been proven that good headlights prevent the driver's eyes from getting tired quickly. As a result, you can travel the longest distances in your car, making much fewer breaks.
Installation Features
VAZ 2109 is probably the most popular car that undergoes such tuning. But you should know some features that make it possible to carry out a competent replacement:
- If the glass on the old optics is corrugated, you will have to pre-polish it, or better yet, completely replace it with a smooth one. If you don't change the glass, or at least polish it, the light won't be normal. He will become distracted, causing harm and discomfort to oncoming drivers. The level of security will be significantly reduced.
- After self-installation, you need to be able to correctly configure and adjust the bi-xenon, otherwise such headlights will blind oncoming drivers.
Installation
We figured out the features. Now let's move on to the main thing: installing bi-xenon. Modernization of head optics must be carried out competently and strictly according to the instructions. Installation can be done in more than one way:
- You can install such light bulbs in the lenses without modifying the curtain.
- You can simply install bi-lenses purchased at the store.
- You can install bi-xenon, removed from the headlights of any foreign car.
Note. It is important to know that only headlights manufactured by the Kirzhach plant are suitable for installing bi-xenon. This headlight unit has the low beam necessary in this case. Opposite the low beam module, on the headlight glass, there are no light flow correcting lenses, lenses or prisms.
Ollo bi-xenon installation algorithm:
- The main thing during installation is rigid and correct fastening of the modules inside the headlight. In this case, such headlights will shine evenly, in the right direction, and they will not rattle when the car goes over bumps.
Bi-xenon headlights VAZ 2109 OLLO
- The bi-xenon lens is attached a little differently than the standard lens. You will definitely need an adapter, which can be made from an iron plate. It just needs to be cut out at the location of the frame for the module.
- To attach the frame, you will need to make holes. It is advisable to mark them with the help of a half-standard low beam module.
- First you will need to make a central hole with a diameter of 37 mm.
- We fix the plate to the frame so that the desired mark is on top.
Note. It is recommended to hide the wiring inside the headlight so that the bi-lens does not attract attention and looks like a factory one.
- We screw the lamp into the module.
- We connect it to the ignition units.
- We screw it to the frame.
It is very important to correctly connect the bi-xenon wiring:
- First you need to connect the control of the low/high beam element (curtain) to the high beam.
- We are assembling the headlight.
Hella bi-xenon installation algorithm:
- We are modifying the seats so that the lens is installed perfectly straight.
- We do the wiring in the same way as in the case described above.
Note. In this case, the low beam wire will serve as a relay regulator that supplies power to the gas charging light ballast.
- We install the ignition unit, preferably in a place where there will be the least amount of dirt and moisture.
Note. You can also install Galaxy bi-xenon. Being a kind of copy of Bosch bi-lenses, these options are an order of magnitude higher. Installation is carried out in the same way.
Bi-xenon headlights for VAZ 2109 from different manufacturers
Knowledge 19 stunned
Do you want to sell swedes? Be aware, yak
Additional headlight LED 30W ice headlight fog lights Lens VAZ GAZ Lada Deo
Auto parts and accessories » Auto accessories
Read more: Gasoline pump 2110 performance characteristics
295 UAH
Bi-xenon lenses for headlights of VAZ, Tavria, Slavuta, ZAZ G5 Ultra Plus
Auto parts and accessories » Auto accessories
Guaranteed to withdraw the goods, or the money back to the card. More details.
820 UAH
Dnipro, Babushkinsky 19 zhovt.
Headlight VAZ 2110, 2111, 2112 Lens Formula of Light"
Auto parts and accessories » Auto parts
Guaranteed to withdraw the goods, or the money back to the card. More details.
617 UAH
Zaporizhzhya, Khortytsky 19 zhovt.
Bi-xenon lenses for headlights g5 H4/H7 Lanos, Lanos, Nexia, Tavria, VAZ
Auto parts and accessories » Auto accessories
Guaranteed to withdraw the goods, or the money back to the card. More details.
595 UAH
Lenses for headlights 3.0 inches for VAZ, Lanos, Tavria, Slavuta. Bi-xenon
Auto parts and accessories » Auto accessories
Guaranteed to withdraw the goods, or the money back to the card. More details.
999 UAH
Headlights with lenses, lensed headlights VAZ 2107,05,01. 1 year warranty.
Auto parts and accessories » Auto parts
2,900 UAH.
Headlights with lenses, lensed headlights for VAZ 2109, 2108, 21099
Auto parts and accessories » Auto parts
2,900 UAH.
Selling headlight lens for VAZ 2110, 2111, 2112
Auto parts and accessories » Auto accessories
Guaranteed to withdraw the goods, or the money back to the card. More details.
200 UAH
Vinnytsia, Staromisky 12 zhovt.
Fog lights VAZ 1118 Kalina LENSES! Tuning 2pcs CHROME rims!
Auto parts and accessories » Auto accessories
Guaranteed to withdraw the goods, or the money back to the card. More details.
560 UAH
Kropyvnytskyi, Leninsky district 11 zhovt.
Headlights VAZ 2107/05/04 with lenses and bright LED backlighting.
Auto parts and accessories » Auto parts
2,750 UAH.
Installation of bi-xenon lenses, xenon, tuning, dimming, VAZ headlights
Business and services » Auto / motorcycle services
Headlight VAZ 2110 – 2112 WITH LENS! assembled (made by Formula Light Russia)
Auto parts and accessories » Auto parts
Guaranteed to withdraw the goods, or the money back to the card. More details.
619 UAH
Kropyvnytskyi, Leninsky district 8 zhovt.
Fog lights VAZ 2170 Priora LENS! (2 pieces) assembled (made by Lavita Paul
Auto parts and accessories » Auto parts
Guaranteed to withdraw the goods, or the money back to the card. More details.
570 UAH
Kropyvnytskyi, Kirovsky district 6 zhovt.
Headlights VAZ 2108, 2109, 21099 with lenses.
Auto parts and accessories » Auto parts
Guaranteed to withdraw the goods, or the money back to the card. More details.
2,900 UAH.
Headlight VAZ 2110 VAZ 2111 VAZ 2112 Priora Kalina With and without lenses.
Auto parts and accessories » Auto parts
Guaranteed to withdraw the goods, or the money back to the card. More details.
475 UAH
selling a lens for a VAZ 2106 headlight
Auto parts and accessories » Auto parts
50 UAH
Headlights with lenses for VAZ 2108,2109,2199
Auto parts and accessories » Auto accessories
2,450 UAH.
Glass VAZ 2113-2115 under the right lens
Auto parts and accessories » Auto parts
250 UAH
Lenses VAZ 2110, 2111, 2112.
Auto parts and accessories » Auto parts
380 UAH
- Recently reviewed
- Obrani ogoloshenya ( 0 )
- Find search results ( 0 )
Vibachte – this stupor is no longer available
However, you can recognize similar confusion in this category.
Problems with law
Today there is no fine for installing bi-xenon if you meet a number of requirements in accordance with the law. The times of “free” xenon are over. What needs to be done for the installation of bi-xenon to be considered legal? The rules are given below:
- If xenon or bi-xenon is installed at the factory, then there will be no problems. The manufacturer provides for certification in advance in such cases, bringing all norms and rules into compliance.
- Installing bi-xenon on a VAZ 2109 is, in any case, an independent intervention in the design of the car, so it is necessary, first of all, to equip the device with automatic adjustment of the tilt angle adjustment.
Note. The automatic corrector is capable of maintaining a constant tilt of the headlight beam relative to the road. You can install an autocorrector on a VAZ 2109, either imported or domestically developed.
- It is also necessary to equip the bi-xenon with a washer, which is a necessary attribute today. When the glass is dirty, according to legal experts, the headlights give a less clear picture and are capable of blinding oncoming vehicle drivers.
After the front optics are in order, you need to resolve issues with documents:
- Contact the traffic police at the place where the car is registered with a statement indicating that changes have been made to the design of the car.
- Then you need to send an appeal to NAMI-PTIA-FUND, from where you will receive the appropriate conclusion.
- Next, we take the car to check its technical condition, in accordance with what is written in the application.
- We receive new documents.
This entire procedure does not require investing a lot of money. For just 5 thousand rubles it will be possible to formalize all this and legalize the bi-xenon on the VAZ 2109. When working with your own hands, it is recommended to do everything according to the instructions, preferably step-by-step. In this case, a creative approach to the matter must be excluded, because we are talking about safety. Video and photo materials will really help in your work. The price for installing such headlights in specialized services by professionals is quite high. Therefore, it is recommended to learn how to do everything yourself.
Correct installation of xenon
It's the 21st century and technology doesn't stand still. Previously, car owners installed in their headlights those lamps that were in the store and did not think that there might be something better. Now the so-called “xenon” has appeared, which is installed on many new cars from the factory, and on other cars that do not have it from the factory, xenon is installed manually or at specialized services. The word xenon itself means “alien,” translated from Greek; this word was used to name an inert gas that was discovered only at the end of the 19th century. By the way, to ignite this gas you need a very high discharge, namely 25,000V. Why are xenon lamps better than conventional halogen lamps, which faithfully serve the majority of car owners? And the fact that they shine better. Take a look at the picture below, the difference between the luminous flux from a halogen lamp and a xenon lamp is immediately visible
Of course, installing xenon in the headlights of your car will cost more than changing halogen ones, but I think if you decide to do it, you won’t regret it later, especially at night. Before buying a xenon kit, you need to decide what kind of xenon you need? You can install xenon, or you can install bi-xenon. The difference between them is that bi-xenon is low and high beam in one lamp, and just xenon is only low beam, although for some it is quite enough even in the dark on country roads. If on your car the low and high beam are located in different headlight compartments, then you can install xenon anywhere, and if one lamp is responsible for the low and high beam, then it is better to install bi-xenon, otherwise you will not have high beam. The standard xenon kit includes:
- two xenon lamps;
- two ignition units (to create a 25,000V discharge);
- two fuses;
- wires;
- fasteners;
- installation guide.
Xenon also differs in the color of its glow, or more precisely in its color temperature, which is measured in Kelvin. By looking at the picture, you can see what temperature corresponds to a particular color, and choose the color that suits you
You also need to make sure that the installation of xenon in your car is allowed according to GOST. Any headlights have markings, the designations “DC”, “DR” and “DCR” indicate that it is possible to install xenon lamps in such headlights, and all other markings prohibit the installation of xenon. Of course, it is possible to convert the headlights to install xenon. It is necessary that lenses are installed in the headlights, a headlight washer and an automatic luminous flux corrector are installed. The main requirement, of course, is the presence of lens optics, which collects a powerful luminous flux into one point, when ordinary headlights scatter it across the entire road, thereby blinding other drivers. When buying a xenon kit, you should not choose the cheapest one, since its lamps and ignition units can burn out more often, so it’s better to spend it once than to change something every month and buy xenon only in specialized stores.
Xenon for VAZ 21099
Xenon for VAZ 21099 can be purchased for low and high beam. Xenon VAZ 21099 is selected according to the lamp base. If the high beam and low beam are in one lamp, it is bi-xenon. To install xenon, you do not need to change the headlights. Xenon can be installed in any VAZ 21099 headlights. If the on-board computer queries the performance of standard lamps, xenon must be purchased and installed only with decoys.
Xenon can be installed both in lenses, if they are already installed, and in simple reflectors. You can buy and install lenses and xenon in VAZ 21099 headlights from us. Headlight lenses are selected according to the diameter and distance to the headlight glass. Lenses are available for low beam and high beam. You can also buy and install bi-xenon lenses with angel eyes. If such lenses are placed on the low beam, then the high beam can either be dimmed, or it will work in parallel with the high beam from the lens.
If a standard xenon is installed on a VAZ 21099, we can select an analogue of the standard xenon units, or replace the standard xenon with any other one. You can also buy standard used xenon units from us.
Cost of xenon and bi-xenon VAZ 21099:
| Xenon options | Xenon price |
| Xenon VAZ 21099, low beam | from 3,500 rub. |
| Xenon VAZ 21099, high beam | from 3,500 rub. |
| Xenon VAZ 21099, in PTF | from 4,500 rub. |
| Xenon CAN VAZ 21099, with blende | from 3,500 rub. |
| Bixenon VAZ 21099 | from 5,000 rub. |
| Bi-xenon CAN VAZ 21099 with blende | from 6,000 rub. |
| Xenon lamp VAZ 21099 | from 1,000 rub. |
| Bi-xenon lamp VAZ 21099 | from 1,200 rub. |
| Xenon ignition unit VAZ 21099 | from 1,000 rub. |
| Xenon lenses VAZ 21099, with and without eyes | from 4,500 rub. |
Sign up for xenon installation VAZ 21099
8 (812)
701-02-01
The cost of xenon depends on whether it is new or used, the manufacturer, as well as on availability in our warehouse or delivery time to our store.
You can buy and install xenon in the PTF VAZ 21099. Xenon in the fog lights is selected according to the base and the distance to the PTF glass. When installing xenon in a PTF, be sure to take a xenon kit with waterproof ignition units. Because they will be installed below, dirt, salt, and reagents fly there. If the ignition unit is ordinary, it will quickly fail.
VAZ 21099 xenon rating based on owner reviews:
1. Zumato (Japan) 2. Hella (Germany) 3. Philips (Germany) 4. Sho-Me (Taiwan) 5. Klunger (China)
When to buy xenon for VAZ 21099:
— the standard xenon ignition unit has failed; — dim light from halogen lamps; — the old non-standard xenon has failed.
DIY xenon installation
It is better to install xenon in specialized services that can issue you a certificate stating that the xenon is installed in accordance with all the rules. But you can, of course, install xenon yourself in a garage. No special knowledge is required here, the main thing is to do everything according to the instructions, which are usually included with the xenon kit. Installation of xenon occurs in several stages, let's look at each of them. First of all, remove the terminal from the battery; in general, you should always remove the terminal from the battery if you are going to do anything with the wiring. Next, for convenience, it is better to remove the headlight from the car. Now remove the lamp cover and remove the halogen lamp. You need to drill a hole in the headlight housing for the wires that come from the lamp, and do not forget to close the hole in the housing with the rubber band that is on the wire. Next, you need to connect the wires from the lamp to the ignition unit according to the diagram, which should be included with the xenon kit. Using the same diagram, we connect the xenon lamp ignition unit to the wires that previously went to the halogen lamp. We attach the ignition blocks somewhere away from the engine and where there is no moisture, i.e. somewhere near the headlight. It is recommended to install xenon via a relay; usually, if the kit already includes a relay, then there should be instructions for its installation. For clarity, look at the picture below, everything is clearly drawn here and you should not have any difficulties installing xenon on a car
If you do not have this relay in your kit, then you can buy a standard 4-pin relay, for example, from the starter relay of some Russian car, although it is better, of course, from a foreign car and assemble the same circuit. The relay is installed in order to relieve the standard wiring at the moment of ignition of the xenon. Now you know how to install xenon in your car headlights, just don’t forget to go to a service center to have your headlights adjusted, otherwise you will most likely blind oncoming drivers.
How to install lenses in headlights with your own hands?
The car market offers a wide selection of lenses and ready-made kits. You can purchase components both in auto and online stores. If you plan to go to a car service center, the lenses themselves are enough. If you are going to install the optics yourself, it is better to purchase a kit. As a rule, the kits contain everything you need for installation.
Although installation is not a complicated procedure, it does require certain skills. If you lack the skills, it is better to contact a service station.
To install lenses on a VAZ 2114 with your own hands, you first need to disassemble the headlights.
Read more: Hyundai Getz under the hood diagram
Sequencing
- headlight preparation;
- warming up the headlight;
- glass removal;
- lens installation;
- glass installation;
- assembly.
The protective film is removed after completion of all installation work.
For installation work you will need the following tools:
- Screwdriver Set;
- cardboard box;
- pliers;
- sealant;
- industrial dryer;
- protective gloves.
Preparing the headlights
The headlights are cleaned, washed, wiped with a rag and dried. The surface of the headlights must be clean.
The plugs and ventilation pipes are removed from the headlights. Remove the turn signals and “oversized” cartridges.
Remove the glass holder latches, unscrew the screws, remove the protective covers and springs securing the lamps.
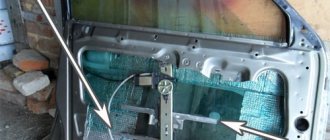
Warming up the headlight
The headlight is heated to soften the sealant and remove the glass. It is placed in a cardboard box with a hole for blowing through with a hairdryer. The box is closed and they begin to blow hot air. Direct air flow should not hit the headlight. The box is heated for 15-25 minutes. On a hair dryer, set the blowing temperature to 250-300 °C. If you don’t have a hairdryer, warm up the headlight for 15-25 minutes in a household oven at 70-90 °C.
Glass dismantling
After warming up, the hot headlight is disassembled using fireproof gloves. It is taken out of the box and placed glass side down. If there is a bend, the headlight begins to be disassembled from the side opposite to the body bend. Use a screwdriver to remove all the latches holding the glass to the body. If the latches are not removed, the headlight is not warmed up well; it must be reheated. Remove the glass from the headlight (do not get the sealant on the reflector) and remove the reflective cap.
Installing lenses in VAZ 2114 headlights
On the details they find about. During installation, this side should be on top.
The wires from the curtain and the angel's eye are passed through the hole for the lamp. On the front side, the lens is placed in a reflector.
If necessary, install an adapter ring. The lens is screwed so that there is no play.
Headlight assembly
The case is heated for 7-10 minutes in the same mode.
A 2-4 mm layer of new sealant is applied to the outside of the housing.
The headlight glass is installed back and pressed. All latches should be in place.
Install the removed fasteners with elements.
Screw the lamps into the lenses.
Remove the protective film.
The headlights are allowed to dry for 4-8 hours. Ready-made headlights are installed in the car.
Thus, installing lenses in the VAZ 2114 headlights will be an important factor in increasing safety. The driver will feel more confident on the roads and react in a timely manner in unforeseen situations.
Installing xenon in fog lights (PTF)
Xenon is installed in foglights in the same way as in headlights, only it is still easier and faster. The main thing, after xenon appears in the PTF, is to lower the luminous flux of the fog lights down a little, so as not to blind oncoming drivers. The requirements for installing xenon in foglights are as follows: lenses must be installed in the headlights, the headlights must have a marking in the form of the letter “D”, which indicates that xenon lamps can be used in the headlights for lighting (the letter “H” indicates that in the headlights Only halogen lamps can be used).
What happens if you install xenon in headlights that are not designed for this?
What do you think? Firstly, with a 99% probability you will blind drivers of oncoming cars, and secondly (which is worse for you) if you are stopped by traffic police inspectors, you may lose your license for a period of 6 months to 1 year with confiscation of instruments and accessories. So it’s up to you to decide whether to install xenon according to all the rules or drive around and blind everyone you meet. By the way, humanity does not stand still and now people are already installing xenon lamps not only in headlights and PTF, but also in reverse, here, of course, no lenses or permits are needed, I think that no one will bother you for this, especially that parking in the dark, after installing xenon in reverse, will be a complete pleasure. In conclusion, I would like to say that installing xenon is not a complicated operation that anyone can do. The main thing is that if you decide to install it, then do it competently and do not save money, especially since there is nothing on the automotive market now and the choice of everything is simply huge at different prices and from different manufacturers. If you want to learn more about the light from xenon and halogen lamps, watch the following video: