News:
Hello!
We are sincerely glad to see you on the website of our club! Most likely, the FULL DRIVE lifestyle is close and understandable to you. Here you can meet and communicate with people who share and understand your aspirations and hobbies.
Before you start communicating, please read the Forum Rules
With the arrival of cold weather, many motorists think about one of the most important devices - the interior heater. Moreover, this happens, in most cases, precisely when the stove suddenly stops performing its functions properly, and the car becomes unbearably chilly. We figure out why the car heater is capricious and improve the performance of the standard heater.
How does a car heater work?
Before understanding the reasons for the poor performance of a standard car heater, it would be useful to delve into the principle of its operation. In a nutshell, this simple device functions as follows.
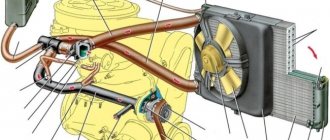
In the vast majority of modern cars, the engine cooling system is responsible for heating the interior: hot coolant passing through the jacket of the engine cylinder block moves through the pipes into the radiators - the main one (of the engine cooling system) and the heater radiator (which is located in the car's interior). The air entering the car interior is driven through the latter by a small fan. Air flows heated by a hot radiator are distributed through the air ducts and create a comfortable temperature inside the car.
Thus, the heating of the air inside the car is primarily related to the temperature of the engine and the liquid that cools it - the higher it is, the easier and faster the interior warms up. However, the system has many other components that increase or decrease the efficiency of a standard stove - dampers, valves, filters, radiators, fans and the air ducts themselves. Let's study the influence of each component on the operation of the stove and try to make them function more efficiently.
Note that before troubleshooting the heater, it would be useful to remember the following. Different car models, due to their design features, heat the interior differently, especially in frosty Russian winters. According to experts, a normal situation is when, at -25°C outside, a stove operating at full power heats the lower part of the car interior to +16°C, and the upper part to +10°C. However, this is only the minimum permissible temperature, which is not comfortable for most drivers.
Heater core contamination
The efficiency of a heater core depends on three main factors - its effective surface area and materials, throughput and temperature of the coolant passing through it.
This small-sized radiator is hidden behind the center console of the car and is almost inaccessible for inspection by ordinary motorists. Checking the condition of a part visually is extremely problematic, and replacing it with a new one sometimes results in many hours of disassembling and reassembling the entire front part of the car (of course, for an immodest fee).
The stove radiator is a very delicate part and is afraid of any contamination - both external and internal. During long-term operation of the car, the radiator fins become clogged with dust and dirt that enters the system along with the outside air. And the thin tubes through which the coolant circulates become overgrown with dirt from the inside. As a result, the efficiency of the system drops sharply - the air flow decreases and the radiator temperature decreases. This is the most likely cause of cold weather inside the car in winter.
After several years of using the car, it is best to replace the heater radiator with a new one, without waiting until it begins to perform its duties poorly. Contamination of this element of the system is inevitable and cannot be prevented. In addition, over the years, there is a real danger that the seal of the cabin radiator may be compromised, which in some cases leads to a sudden burst of pipes and severe burns to the front passengers. But more often, the radiator begins to gradually poison the coolant - it flows under the floor covering of the cabin, causes an unpleasant odor and strong fogging of the windows from the inside, and also contributes to the process of body corrosion.
VAZ 2107 stove: design, malfunctions and repairs, modification of the heater - Website about
VAZ cars of the classic family were equipped with a fairly efficient interior heating system, providing good heating of the interior in winter. In addition to high efficiency, the stove on the VAZ-2107 is distinguished by its simple design, which ensures proper reliability of this unit, although it does have weak points.
Heater device VAZ 2107
The design of the VAZ-2107 stove includes the following components:
- a housing with dampers installed in it;
- stove radiator;
- fan with electric motor;
- air ducts;
- damper control mechanism.
The interior heating system does not use electronic components or complex components, so the stove is reliable and easy to operate and maintain.
The source of heat in the heating system of the VAZ-2107 interior is the liquid from the power plant cooling system.
Heat transfer is carried out thanks to a heat exchanger - a radiator, which is installed in the stove body under the front panel and connected to the cooling system.
The design provides for shutting off the supply of heated antifreeze to the heater radiator by means of a special tap cut into the coolant supply pipe.
From the body, the air flow is distributed in several directions - to the windshield, to the center of the cabin, to the side windows and to the footwell area. To supply air flow to the windshield, there is an air duct with an outlet at the top of the front panel.
Air is supplied to the side windows through air ducts running inside the panel. Deflectors with dampers are installed at their ends, which more effectively directs the air flow. The same deflectors are located on the front panel in the central part, through which air is supplied to the center of the cabin.
Heated air enters the leg area directly from the body.
The VAZ-2107 stove provides for the forced creation of air flow. And it is done using a fan driven by an electric motor, located in the stove housing under the radiator. The electric motor operates in two modes - with different rotation speeds.
The heater is equipped with three dampers to distribute air flows. The first of them is the air supply damper. With its help, the air supply into the cabin from the environment is regulated.
The second damper distributes the air flow along the necessary air ducts - either to the windshield area, or to the central and side deflectors. The third damper regulates the air supply to the leg area.
The first two dampers are controlled using the sliders of the control mechanism, the third is controlled by a separate lever located on the side of the center console near the pedal assembly.
Air is supplied into the cabin from the street through air intakes on the hood. To prevent water from entering the cabin (when driving in the rain), the air flow that has passed through the air intakes first enters a special box where the water is separated. And only after that it goes to the air supply damper.
Control mechanism
The control of the VAZ 2107 stove is mechanical. It consists of a fan switch and a block of sliders. The control mechanism is installed on the center console at the top, which provides easy access to the elements.
There are three sliders of the control mechanism, and each of them controls its own element:
- The top one is responsible for supplying antifreeze to the radiator and is connected by a cable to a tap installed on the inlet pipe. The extreme left position of the slider means the tap is closed (the stove does not heat), the right position means the tap is open (antifreeze enters the radiator).
- Middle – air supply damper control. When you move it to the left, the damper shuts off the air supply from the street (closed air circulation in the cabin), while the right position means the air flow is open (air from the street enters the cabin).
- The lower one controls the damper for distributing the flow through the air ducts. Left position - the flow is supplied through the side and central deflectors, right - to the windshield area. Each of these sliders can be adjusted to any position to achieve optimal stove operation.
Principle of operation
The heating system works simply - to ensure air heating, the driver uses the upper slider to open the antifreeze supply valve to the heater radiator.
If the air supply damper is open (the middle slider is in the extreme right position), then the air flow through the box that separates the moisture and the damper enters the stove body.
Passing through the radiator, the air heats up, and then moves depending on the location of the remaining dampers.
If the lower slider is moved to the right, then the heated air will go to the windshield area, and if it is positioned to the left, it will go to the center of the cabin and to the side windows. To supply heated air to the feet, the driver needs to lower the lower damper lever down.
When driving at high speeds, the air flow through the air intakes moves intensively, so it is not necessary to turn on the fan. But if the movement speed is not enough, the fan creates forced circulation.
Using dampers and a fan, the driver controls the stove - sets the speed of air movement, the degree of its heating and the area of distribution.
Stove malfunctions
Due to the simple design, there are not so many faults in the interior heating system of the VAZ-2107. They are divided into mechanical and electrical. Mechanical problems include:
- jamming of the antifreeze supply valve;
- radiator clogged;
- breaks in the drive mechanism cables;
- smudges.
The tap and heater radiator are the “weak” points in the VAZ-2107 stove. If in winter the tap works frequently, then with the onset of summer it turns off and remains in that position. Because of this, it jams, and when winter comes, attempts to open it lead to a break in the control cable.
:The heater on the classic does not work. VAZ 2101-07. Looking for a reason
It is difficult to “move” a faucet that is stuck in one position, so it is easier to replace the faulty unit. And cutting off the antifreeze supply also affects the radiator.
The absence of fluid movement for a long period (when operating a car in the summer, when the stove is not in use) leads to intensive formation of oxides inside the radiator, which clog the heat exchanger pipelines.
Because of this, the throughput of the radiator decreases, and with it the performance of the stove.
A clogged heater radiator is washed, but if there are a lot of deposits, then they can only be removed mechanically, and for this the radiator is unsoldered. Soldering it back is difficult and sometimes it is easier to replace the heat exchanger than to wash it.
Leaks are also a common failure. They occur at the junction of the pipes, and also if a crack appears in the radiator. In the first case, the leak is eliminated by tightening the fastening clamps, in the second - by soldering or replacing the radiator.
Electrical faults include burnout of the electric motor, open circuit of its power supply and breakdown of the control key.
Reasons for decreased performance
In addition to obvious malfunctions due to which the stove does not work or functions incorrectly, there are other problems with the heating system of the VAZ-2107 interior. The main one is a decrease in stove performance.
If the stove heats poorly, then the reason lies in:
- Malfunctions of the power plant cooling system (reduced pump performance, stuck thermostat).
- Radiator clogged.
- Formation of an air lock in the heater radiator.
- The air intake damper seal is worn out.
To find the cause of decreased performance, start by checking the heating of the heater radiator. To do this, heat the engine to operating temperature, fully open the antifreeze supply valve to the stove and hand check the degree of heating of the supply pipe before and after the valve and the radiator itself.
If the pipeline is hot before the tap, but not after it, the tap is jammed. If the radiator does not warm up, the reason lies in severe clogging of the heat exchanger or a plug in it.
If the pipeline does not warm up even to the tap, inspect the cooling system.
If the radiator warms up well, but it is noted that the stove heats worse, then check the functionality of the air intake damper and the condition of its seal. It wouldn’t hurt to check the stove body and air ducts for leaks and cracks.
To ensure that the VAZ-2107 heater heats well, before the winter period check the functionality of the tap, replace the antifreeze (with flushing the system), inspect the control mechanism and the functionality of the dampers.
Source:
VAZ 2107 heater fan does not work
Hello. This time I will write about possible reasons why the heater motor on a VAZ 2107 may not work. These reasons can also be attributed to other classic models such as VAZ 2105, 2106, 2101, 2103, 2104.
- To check all possible malfunctions, you need to have at least a test lamp, or better yet, a multimeter.
- If you find out that it is the heater motor that has broken down, then read the article “Replacing the heater motor in a VAZ 2107.”
- To understand what can break and why the VAZ 2107 heater fan may not spin, you need to consider the electrical circuit for powering this motor.
Connection diagram for heater fan VAZ 2107
The diagram below shows how the stove fan (4) . Power from the battery, through the mounting block (1) , goes to the ignition switch (5) and again goes to the mounting block (1) .
In the mounting block (1) it passes through fuse F1 (10 amperes) and goes to the stove speed switch button (2) .
Next, power from the button goes either through resistance (3) to the motor (4) , or directly to the stove motor (4) .
The VAZ stove fan will not work if any of its circuit components is faulty. You can determine the reason why the VAZ 2107 heater fan does not work:
- There is a fault in the mounting block.
- The contacts of the heater fan speed switch are burnt out.
- The speed control resistance has burned out.
- There is a malfunction in the heater motor itself.
Let's take a closer look at each of the faults.
Malfunction in the VAZ 2107 mounting block
If the stove stops blowing air, then first of all look to see if fuse F1 in the mounting block is intact. Usually, if this fuse blows, then the heated rear window and reverse lights stop working along with the heater. This fuse must be rated 10 amps . No more and no less.
If you install a fuse of less than the nominal value, it will constantly burn out, and if you install a fuse of a higher nominal value, it is possible to burn the mounting block. If you have a fuse of a higher rating (as in the photo below), then the likelihood increases that the mounting block has failed and the plus is not supplied to the speed shift button.
Source: https://avtorazborka77.ru/tormoznaya-sistema/pechka-vaz-2107-ustrojstvo-neispravnosti-i-remont-dorabotka-otopitelya.html
Operating principle of the heater
To make the right choice, you need to know the principle of operation of the heating system in a car.
Heat enters the car interior from the engine, this is a side effect of its operation. Heat is generated as a result of fuel combustion and from rubbing surfaces. To remove heat from very hot parts, the engine is equipped with a cooling system, an integral part of which is interior heating. Therefore, the hotter the engine gets, the better the heating. Hot coolant is supplied to the heater core, and the fan, passing air through it, dissipates heat throughout the cabin.
The temperature of the air leaving the deflectors is regulated by a tap located on the line between the motor and the stove. This is a regular shut-off valve with a mechanical or electrical drive; it regulates the amount of coolant that passes through the heater (by increasing the temperature on the control unit, the valve opens more; by decreasing the temperature, it closes). How the stove will work greatly depends on its operation. If it does not work correctly (does not fully open the passage for liquid), then it will be cold in the cabin.
Replacing the Lada 2104 stove (VAZ 2104)
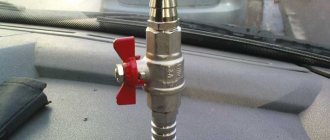
The VAZ 2107 heater valve is an element of the cooling system and is designed to regulate the supply of coolant to the heater radiator.
In its open position, hot antifreeze or antifreeze enters the radiator, which heats the air pumped by the fan. This way the interior is heated during the cold season.
During the warm season, the tap is turned off, which causes the coolant to bypass the “stove” without affecting the temperature in the cabin. All domestic “classic” cars, as well as VAZ 2108, 2109, 2110, 2113-15, are equipped with such a crane.
Heater valve malfunctions
Despite the improved design, the heater valve on the “classic” remains one of the most problematic components due to frequent failure.
Some car owners prefer not to use it at all, leaving it in the open position all year round, blocking the flow of warm air into the cabin only with a damper.
This is not a way out of the situation; heat will still flow, especially if there is even the slightest problem with the damper.
The most common causes of crane failure are:
- oxidation of the locking mechanism;
- violation of tightness.
In the first case, the heater valve simply stops working, making it impossible to open or shut off the pipeline. But most often another problem arises - a leak, which causes depressurization of the housing.
A clear sign of a faucet seal failure is a decrease in the level of coolant in the expansion tank, a damp carpet under the glove compartment, a specific smell, or a greasy coating on the windshield - the result of evaporation of antifreeze or antifreeze.
Most heater valve designs do not have a dismountable body, which eliminates the possibility of their repair.
Replacing the heater tap
The process of replacing a faucet, although it requires some time, is not particularly difficult and can be easily done with your own hands. For this you will need:
- set of wrenches;
- screwdriver with Phillips bit;
- container for draining coolant;
- new heater valve with gaskets;
- automotive sealant;
- rags.
First, let's select the faucet itself. The catalog number of the original spare part is 21010-8101150-00. On sale you can find analogues presented in the table.
Look for faucets with a ceramic shut-off mechanism. They last longer due to the fact that ceramics do not oxidize.
We place the car on a pit or overpass. If the engine is hot, be sure to let it cool.
Remove the crankcase protection.
We unscrew the drain plug on the radiator, first placing a container under it and opening the filler cap.
We open the hood and find two radiator pipes for the “stove” on the passenger side. Use a screwdriver to loosen the clamps and disconnect the hoses. Using a 7-mm open-end wrench, unscrew the bolts securing the radiator and remove the rubber seal.
We move into the passenger compartment to the passenger seat. Open the glove compartment and use a Phillips screwdriver to unscrew the screws securing the glove box body. Let's take it out.
Next, remove the storage shelf; you need to unscrew the screws with a Phillips screwdriver.
Using a 10mm wrench, unscrew the nut of the air duct bracket. Remove the heater mounting brackets. We take out the right air duct.
Using a 7 wrench, unscrew the bolt securing the crane control cable. We move the cable to the side.
Using a 10mm wrench, unscrew the two bolts securing the faucet to the radiator. Let's take it out. In this case, coolant will flow from the radiator. Be prepared to use a rag.
We install the new faucet in place, not forgetting to change the rubber gaskets and lubricate the place where it connects to the radiator with automotive sealant. We fasten the control cable, checking its tension.
We reassemble everything that we took apart in reverse order. We do not install the glove box until we check the tightness of the tap connections and its operation.
We tighten the drain plug on the cooling radiator. Pour coolant into the neck. We start the engine, warm it up until the fan turns on. We check if there is a leak from the tap. If everything is in order, put the glove box in place.
Replacement result
After replacing the heater tap, check its operation by turning on the fan, opening the air intake damper completely, and opening and closing the flow of coolant into the heater radiator. When the flow is blocked, the temperature of the discharge air should drop significantly.
If there was a leak from the faucet before the repair, wipe the inside of the windshield with an alcohol solution to remove deposits and dry the carpet.
Now you can fully regulate the climate in the cabin, and not worry about a coolant leak, at least for some time.
Hello, from this article you can learn how to replace the heater radiator on a VAZ 2101, 2102, 2103, 2104, 2105, 2106, 2107.
In fact, heater radiator leaks are a fairly common problem in old Russian cars, especially if this happens in the cold season, then the problem becomes even worse, it’s cold in the cabin, and the windows sweat.
The first signs of failure of the heater radiator are the smell of antifreeze in the cabin and the damp carpet at the passenger's feet, since that is where the heater radiator is located.
Another situation is also possible: the heater radiator may not leak, but produce little heat, this is due to the fact that over time it becomes heavily clogged with various dirt and rust and its heat output decreases. We will consider replacing the heater radiator using the VAZ 2107 as an example; on other rear-wheel drive VAZ cars, this procedure is carried out in a similar way.
https://www.youtube.com/watch?v=JYTmgBBKOtY
Together with the heater radiator, you can change the heater valve at the same time, because you still have to remove it. To replace the heater radiator you will need: a 7 and 10 wrench, a flat screwdriver, antifreeze, a new heater radiator. First of all, place some rags under the heater radiator on the interior side to prevent it from dripping onto the carpet.
Next, take a screwdriver and loosen the clamps of the heater radiator hoses under the hood. After this, we remove the hoses from the radiator pipes; you can place a bottle under the hoses to collect the draining antifreeze. Next, take a key or socket 7 and unscrew the 2 bolts that secure the seal to the shield and remove it. Then we disconnect the drive rod from and remove the heater fan casing.
Installing the heater radiator on a VAZ 2107 is done in the reverse order.
After installing a new radiator, add antifreeze to the max level in the expansion tank.
Now you need to expel the air from the cooling system, to do this, warm up the engine to operating temperature and accelerate, if this does not help, then you will need to stand on some hill, the steeper the better, with the front up and also accelerate.
So, dear friends, today we will tell you in accessible language how to get to the heater motor on a VAZ-2107 in order to replace it or repair it, depending on what forced you to get it out.
Let us immediately note that if the heater motor on your seven began to squeal when cold, or squeal, then this will only get worse, the motors from the factory are bushed, lubrication will not lead to anything, it may return you silence for a short time, but not for long, so in this case only replacement.
And ideally, replacing the heater with a bearing motor - it certainly won’t squeal. So, first we will need to remove the beard on our seven. First, we remove the gear shift knob, it will interfere with us, and we remove the radio from the shaft and disconnect the connectors.
It’s different for everyone, some may not even have a radio.
First, let's unscrew the shelf, everything is simple here, the action is in three photos: To further remove the beard, we need to remove the panel with the clock and cigarette lighter, pry it off from the right or left side with a flat screwdriver and pull it out of the latches: Then, disconnect the wires from the clock , cigarette lighter (for ease of assembly, I would advise marking them), remove the socket to the side and get access to two nuts, here it will be convenient to use a 10 socket wrench. Unscrew the nuts, do not lose the washers, look down where the buttons are.
There is a decorative plug on the side that looks at the rear passengers, we pry it off with a screwdriver, and under it we see two screws screwed into the tunnel: We unscrew them, disconnect the pads from the buttons, the panel no longer holds anything.
We move it to the side and gain access to the stove body: Now, we disconnect the side air ducts, carefully remove them from the latches with a flat screwdriver (the photo shows how they snap into place): We are interested in the lower and middle parts of the stove body 2107, in order to remove them you need to get close to metal latches, there are only four of them - two on each side, here they are: It can be problematic to unlatch them with your hands, we recommend using a screwdriver, like in this picture: After the latches are removed (be careful when removing, they can “shoot” and fly away in an unknown direction), the lower part of the stove body is calmly pulled out by hand: Here we see our motor.
Replacing the VAZ heater radiator Details
The motor itself is held in the lower part of the case, also on two metal latches, we snap them off, disconnect the terminals. That's all, assembly is carried out in the reverse order, about 40 minutes are spent on everything.
By analogy, the heater motor is replaced on the VAZ-2105 and VAZ-2104, the only difference is in the beard itself and its fastenings. A little later we will tell you about the nuances of replacing the heater motor in these and other VAZ models. Good luck on the roads and don’t let your car break down.
We will be glad to see you in our VAZ classics club on the forum. P
Having come across an article on the Internet about modifications to the VAZ 2107 heater, I decided to write a short post.
Get to the point. Even earlier, I came across an article about improving the interior heating of VAZ 2107 - 2105, where the emphasis was placed on significant sealing of all connections in order to avoid loss of air flow. This option will partially give results, but not always.
I want to write about improving the air supply source - the fan. The stove radiator itself is capable of giving off quite a lot of heat, there is simply not enough air flow. To solve this problem, it was decided to use a heater fan motor from a VAZ 2108 - 2109. For comparison:
- The standard VAZ stove fan motor of classic models is 3000±150 rpm with a current consumption of 4.5 A.
- On the “chisels” we see the following characteristics - 4100±200 rpm, with a current consumption of 14 A!
As you can see, the current consumption is not childish, but the air flow will be stronger. For maximum effect, a five-blade fan is also used. What was done first? Let's look at the photo:
To begin with, of course, everything was dismantled and dismantled. The comb (1) was cut off and the fan speed control resistor was replaced. Why was this partition cut down? The fact is that when installing an electric motor from a VAZ 2108, a difficulty arises, which is due to the large dimensions of the chisel engine. And in order to completely close the heating of the feet, it must be removed.
According to the author’s calculations, the result should be almost 2 times more air.
Replacing the electric motor of the heater VAZ 2107 - 2105
The first step is to drill a hole in the impeller, diameter 7 mm. Then carefully press the impeller onto the shaft of the “eighth” engine and, through experiments, achieve minimal vibration and noise. Important! Before installation, you must perform a test run, then proceed with installation.
You may have a question, why change the mode switching resistor? It was replaced after testing, with a standard resistor there is quite a lot of air flow.
It will also be important to replace the heater fan rotation mode switch, since it is not designed for high current and simply melts. It is connected according to the scheme from the VAZ 2108, that is, in the end we get a three-speed fan, which turns on only when the ignition is on.
Operating experience
Reviews are mostly positive:
- Even on a VAZ 2104 with a large interior volume, it is very rarely necessary to turn on the rear window heating.
- Faster heating and defrosting of the windshield.
- Accordingly, the efficiency of the heater radiator increases, and the cabin has become significantly warmer.
But not everything is so rosy:
- Along with the increase in air flow, the noise level of the entire installation also increases.
Device
The radiator of the heating system is similar to its older brother from the cooling system. And their functions are similar, only the large one releases heat into the atmosphere, and the small one into the cabin. Both have two tanks in their design, which are connected to each other by tubes. Plates are attached to the tubes by soldering, increasing the cooling area (the more plates, the greater the heat transfer). Therefore, when choosing, you need to pay special attention to the number of plates. This can be done by placing both copies together and visually inspecting the density of the plates. Which radiator has a higher density, the heat transfer is higher. Liquid inlet and outlet pipes are attached to one of the tanks. Some models are equipped with places for attaching to a car.
Features of unit dismantling
Regardless of what work you plan to carry out, it is necessary to remove the heater. It is impossible to dismantle the heat exchanger without draining the antifreeze, since the entire stove will be flooded with coolant. The drain plug can only be reached by placing the car on an overpass or a hole in the garage. Warm up the engine slightly to help the fluid flow faster. Let's take a closer look at removing the radiator:
- Unscrew the caps on the expansion tank and heat exchanger.
- Prepare a clean canister, place it under the cylinder block and unscrew the cap. Wait for the antifreeze to drain and replace the plug.
- Go to the engine compartment. Using a screwdriver, loosen the clamps that hold the heating system pipes. Remove the heater valve hoses and tubes. At this point, some liquid may spill out. Remove it with a rag.
- Go to the interior and remove the shelf for the radio or “beard”. In the standard version, it is mounted on two self-tapping screws.
- Behind the center console there is a heater tap, which must first be released from the cable with a key.
- The heater housing consists of two parts that are brackets. Unfasten them and pull out the heat exchanger along with the tap.
- After removing this part, inspect it and dismantle the tap. Evaluate the quality of the gasket; if it is worn out, you need to install a new one.
- Check the functionality of the tap.
Now you can repair or replace the radiator. Assembly is carried out in the reverse order; the gaskets are additionally coated with sealant to ensure that no leaks occur. As you can see, this work is easy to do with your own hands. Difficulties arise only when draining the coolant and when working in tuned salons. After assembly, pour only high-quality liquids into the expansion tank; the used antifreeze must be poured out; do not mix antifreeze with antifreeze. The new heat exchanger must also be of high quality. Buy spare parts only from reputable manufacturers with excellent reviews.
Copper stove radiator
- Copper has greater thermal conductivity than aluminum. And with an increase in thermal conductivity, heating improves.
- Maintainability. Copper is soft and will not be damaged by minor dents. Even if cracks appear, burst tubes can be soldered, leaving thermal conductivity unchanged.
- The copper radiator is equipped with a tank made of the same material, which significantly improves its performance characteristics.
Flaws
This type has only one drawback - its price.
Article: 2101-8101060, additional articles: 2101-8101060-02, 2101-8101050
Order code: 104243
- Buy with this product
- show more
Heater radiator 2101-8101060-01
The heater radiator is designed to heat the cabin of cars. The heater radiator is copper-brass soldered, tubular-tape using traditional soldering technology.
Radiator Specifications:
- Number of rows of tubes, pcs: 3
- Heat output, kW (kcal/h): 7.5 (6500)
- Capacity, l: 0.9
- Overall dimensions, without pipe extension, mm: 254x67x184
Applicability
: VAZ-2101, 2103, 2105, 2107 without crane.
Information used: JSC "SHAAZ".
- Passenger cars / VAZ / VAZ-21021 drawing
- » href=»/catalog/vaz-3/legkovye_avtomobili-30/vaz_2102-4/otopitel-58/#part5845″>Heater radiatorVentilation and heating / Heater
- Passenger cars / VAZ / VAZ-21041 drawing
- » href=»/catalog/vaz-3/legkovye_avtomobili-30/vaz_2104-5/otopitel-41/#part13225″>Heater radiatorVentilation and heating / Heater
- Passenger cars / VAZ / VAZ-21061 drawing
- » href=»/catalog/vaz-3/legkovye_avtomobili-30/vaz_2106-7/otopitel-43/#part19459″>Heater radiatorVentilation and heating / Heater
- Passenger cars / VAZ / VAZ-1111 “OKA”1 drawing
Read more: Light bulbs on Chevrolet Cruze 2012 - » href=»/catalog/vaz-3/legkovye_avtomobili-30/vaz_1111__oka_-16/otopitel-32/#part66526″>Heater radiatorVentilation and heating / Heater
- Passenger cars / VAZ / VAZ-21011 drawing
- » href=»/catalog/vaz-3/legkovye_avtomobili-30/vaz_2101-3/otopitel-58/#part1361″>Heater radiatorVentilation and heating / Heater
- Passenger cars / VAZ / VAZ-21031 drawing
- » href=»/catalog/vaz-3/legkovye_avtomobili-30/vaz_2103-106/otopitel-38/#part9829″>Heater radiatorVentilation and heating / Heater
- Passenger cars / VAZ / VAZ-21051 drawing
- » href=»/catalog/vaz-3/legkovye_avtomobili-30/vaz_2105-6/otopitel-41/#part16331″>Heater radiatorVentilation and heating / Heater
- Passenger cars / VAZ / VAZ-21071 drawing
- » href=»/catalog/vaz-3/legkovye_avtomobili-30/vaz_2107-8/otopitel-42/#part22757″>Heater radiatorVentilation and heating / Heater
Today, the next article in the series “Crystal VAZs or typical breakdowns of domestic cars” is dedicated to the “classics”: VAZ-2101, 2103, 2104, 2104, 2105, 2106 and 2107. These cars have been driving along our roads for decades and, despite Despite all the shortcomings that we will talk about, their popularity is still high.
In the series of articles “Crystal VAZs or typical breakdowns of domestic cars,” we will tell you about typical problems that occur when operating cars from the Volzhsky Automobile Plant. In this article we will talk about the VAZ-1111 (“Oka”) car.
Aluminum radiator
- The first and most important advantage will be its price. It is almost two times smaller than that of its copper counterpart.
- With an increased number of plates (increased cooling area), the heat transfer will be less than that of copper, but not so significantly.
- Prevalence in the new car market. Cars of recent years produced in our country are equipped with aluminum radiators.
Flaws
- The low thermal conductivity of the material is the biggest disadvantage.
- Non-repairability: if the tubes are damaged, they cannot be soldered, and the entire assembly has to be replaced. A plastic tank can be damaged by the slightest blow. Some copies may have a crack in the tank out of the box. There are “craftsmen” who change tanks, but this is unreliable, and there is a high probability of failure of the entire stove.
- Susceptibility to corrosion. Aluminum is more susceptible to corrosion, which leads to poor heat transfer and the formation of smudges and failure of the entire interior heating system.
Summarizing all of the above, we can say that both types are clogged with dirt equally, both from the inside and the outside. And while it is possible to wash the outside of the device, doing it properly inside is problematic. And if the cooling system of your engine is clean (the engine has been overhauled or a new car has been done), then it is better to choose a copper option, if this is possible for your model. Well, if the condition of the water jacket is unknown, it is better to take an aluminum one and replace it after a few seasons with the same cheap option.
Causes of heating system malfunction
Experts identify several reasons why normal circulation of antifreeze is impossible:
- Coolant leak. It can occur as a result of natural wear and tear of parts of the cooling system, damage to the unit by corrosion or a hard object. In this case, it is necessary to replace the radiator or other damaged parts of the system. A malfunction in the stove shows itself as antifreeze leaking into the cabin, under the feet of the front passenger or driver.
- Obstruction of the internal tubes of the heat exchanger. This is evidenced by the impossibility of adjusting the air supply - only a cold or exceptionally warm stream will blow into the cabin. In this case, it is possible to get by by washing and purging the unit.
It is important to make sure that the cause of the leak is in the heat exchanger. In the VAZ-2107, taps often leak or pipes leak. Copper-brass units can be soldered yourself or in a car service, but this is a temporary measure. Experienced craftsmen recommend replacing the unit even if there are blockages, since their appearance is one of the signs of the onset of corrosion.


