Install an engine heater, 220V for easy starting in any frost. VAZ 2108-2115-2172.
How the antifreeze heater works - installation on a VAZ 2109.
What is and how does an antifreeze heater work? How to install an engine pre-heater on a VAZ 2109 yourself? antifreeze heater 12 volt antifreeze heater 220 volt do-it-yourself antifreeze heater 220v installation of an antifreeze heater pre-heater for a VAZ 2114 engine installation of an electric heater on a VAZ 2109
heating installation for VAZ 2108
RECOMMENDATIONS FOR HEATER INSTALLATION
When installing the heater on a VAZ 2101...2121, it is necessary to position it so that air does not accumulate inside the body, as shown in Figures 1.1 and 1.2. In this area (without liquid) the heating element will be
how to eliminate black smoke 2108
how to make gills in the hood
RECOMMENDATIONS FOR HEATER INSTALLATION
When installing the heater on a VAZ 2101...2121, it is necessary to position it so that air does not accumulate inside the body, as shown in Figures 1.1 and 1.2. In this section (without liquid), the heating element will burn out and the heater will fail. Using the hoses included in the kit, position the heater as shown in Figure 1.3. When filling the system with antifreeze, release the air in the place indicated by the arrow (for example: if the clamp is loose, insert a screwdriver between the hose and the body; when antifreeze appears, remove the screwdriver and tighten the clamp). Item no. Operation Instructions for execution
1
2
3
1
General preparation
Prepare: tools - wrenches; pliers; knife; container for draining coolant with a volume of 7-10 liters.
2
Car engine preparation
Close the interior heater valve. Remove the cap from the expansion tank. Remove the air filter (eng.
knocking sound in front suspension
Niva 21213 tuning
VAZ-2108..2115) and high-voltage module (VAZ-2108..2115 with 8 class engine) Unscrew the drain plug of the cylinder block and drain the coolant. Remove thermostat hoses (according to application).
3
Preheater preparation
Assemble the heaters with the hoses from the kit (see Fig. 2, 3, 4), pre-tightening the clamps.
Figure 2
Figure 3
Figure 4
4.1
Installation of a heater on a VAZ-2101…2107
Place clamps on the hoses of the prepared heater (Fig. 2) and carry out installation according to Fig. 5. When tightening the clamps, it is necessary to fix the heater in a position that provides a sufficient gap from its body to the battery.
4.2
Installation of a heater on a VAZ-2108…2115 (with a shortened pump supply pipe)
Before installation on VAZ-2108...2115 cars, left in Fig. 3 (outlet) hose, shorten by 20 mm on the side with an internal diameter of 32 mm to ensure optimal placement of the heater during installation. Place clamps on the hoses and carry out installation as shown in Fig. 6 (an example of installing a heater on a VAZ-2110 with an 8-valve injection engine; installation on other cars is carried out similarly). Tighten the clamps.
Figure 5
Figure 6
4.3
Installation of a heater on VAZ-21213, -21214, -2131, IZH-2126-030 (door VAZ-2106)
Before installation on vehicles, the lower one in Fig. Shorten 4 (inlet) hose by 20 mm on the side with an internal diameter of 32 mm to ensure optimal location of the heater during installation. Place clamps on the hoses and carry out installation as shown in Fig. 7 (example of installing a heater on a VAZ-21213). In Fig. Figure 8 shows the location of the heater on the IZH-2126-030 car (dv
VAZ 2114 panel gluing
VAZ-2106). Tighten the clamps.
Figure 7
Figure 8
5
Fixing the network cable
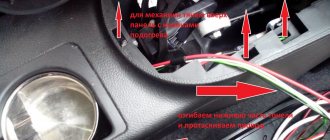
The power cable should be laid and secured with straps to ensure its safety from mechanical damage, as well as possible contact with moving and heated parts of the engine. For a heater that has a detachable connection on the power cable, it is necessary to connect the connectors and securely fix (see above) sections of the wire near this connection to prevent disconnection during vehicle operation.
6
Final operation
Screw the drain plug into the engine cylinder block. Fill the cooling system with coolant. Check connections for coolant leaks and repair if found. Open the interior heater tap. Install the air filter and high-voltage module (for VAZ-2108..2115 with an 8-cl. engineered engine) Start the engine and warm up until the thermostat opens. After stopping the engine and relieving the pressure in the cooling system, add coolant to the required level. Screw on the expansion tank cap.
7
Checking the heater operation
Turn on the heater to a 220 V network (after a few seconds you will hear the noise of the heating coolant), check the heating of the heater body. A sign of normal operation of the heater is the gradual warming up of the engine block.
ATTENTION! The heater can only be operated after the engine has warmed up to operating temperature (the thermostat must be open) and the efficiency of the interior heater has been checked.
replacing crankshaft oil seal VAZ 2109
This must be done to eliminate air locks in the cooling system.
condensate in the cylinder
thermostat stove 2109
VAZ 2107 carburetor without suction
Similar articles:
Useful tips → Winter driving rules
Useful tips → How to protect your car and property from theft?
Helpful tips → How to properly drive over a speed bump
Useful tips → How to get out of a skid correctly
Useful tips → Secret letters in your car
January 20, 2011 Auto news 25130 views
Rating: +1015 Votes: 5128
Comments
No comments yet. Yours will be the first!
Add a comment
Repair
- Engine repair
- Body work
- Freight transport
Statistics
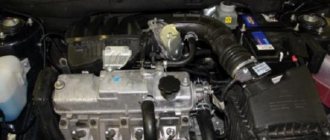
Installation of a pre-heater using the example of a VAZ 2110
Every time I warmed up the car in winter, I thought about how hard it was for the engine to work.
Thoughts were swirling in my head about a deterioration in mixture formation, an increase in the torque resistance of crankshaft rotation, and increased wear. Of course, I pampered my workhorse with synthetic oil, but last winter, as a result of short and frequent trips, the spark plugs did not have time to be cleaned, and when frosts hit below 30, the ignition system paired with the battery did their dirty work - the car sometimes did not start. Whether you like it or not, you need to drive every day, but you don’t really want to carry the battery home every evening. While working with Volkswagen cars, I looked at their standard Webasto and mentally tried them on for my car. Since this winter was predicted to be cold, I found out the prices for the Webasto heater and realized that it was somehow expensive (the most budget option is about 35 thousand). Having heard my thoughts expressed out loud on this topic at work, the additional specialist suggested that there are cheaper domestic analogues. Yeah! When I went to the website, I saw a promotion: a heater without access to the signaling system - 11500, a timer is included in the basic kit. It's decided! With difficulty I waited for the treasured parcel, but everything turned out to be not so simple. I’ll tell you about the intricacies of installing pre-heaters, because while I was installing a domestic heater, at work I had the opportunity to install a non-standard Webasto and change the standard one, so I have something to compare with. By the way, in aviation, where the engine resource is limited and very expensive, already at an air temperature of +5 the oil is heated to 15 degrees, and the cylinder heads to 30 degrees. Moreover, to reduce wear on the motor, the screw is manually turned 4-6 turns.
The installation was carried out in a VAZ 2110 car. First of all, I decide where to put it. I open the hood and there’s the adsorber, I don’t need it. I will uninstall. There remains a tube for the adsorber from the tank. I think: this is great, I’ll let the supply from the tank flow through it, and I don’t even have to pull the line. But no, experts suggested that the fuel supply pipe should be thin, as given in the kit, because the fuel pump there is not the same as on a fuel injection system, but is designed on the principle of an injector: the rod runs in a plunger and spits out fuel in small portions. It even knocks like a nozzle (by the way, you can check by touch whether it is working at the moment), so it won’t work with a thick line and won’t pump much.
The installation must be done in several stages: install the boiler in the existing place, taking into account the fact that hoses must be pulled to it. If there is no space under the hood of a foreign car, you can install it under the bumper or under the fender liner. The kit includes a universal mount. In a domestic heater, the air supply pump is separate from the boiler. And on imported analogues it is built-in and very successfully located under the hood behind the cup of the front pillar. There are no problems connecting to the fuel tank. We remove the fuel pump module and drill an 8.5 mm hole in the cover, insert a tube (included in the kit) and tighten it with a nut.
The Webasto company has written instructions for most cars in Russian with photographs, so installation is easy - you don’t have to figure out what to put where, and which hose to connect to. Separately, related companies offer control panels (remote and with a timer) and a CAN connection module. The instructions describe in detail how to connect with and without a microclimate. Well, the Webasto installation kit is much more convenient, there are all sorts of little things, such as protective fittings, hoses, etc.
The next stage is installing the boiler. Webasto and Teplostar are approximately the same in size, only Webasto, with the same dimensions, has an air blower already built-in, while Teplostar has a separate module, so Webasto is easier to install.
On the sixth Golf, the heater was placed under the front bumper. Next we pull the line from the tank to the heater. The lines, fuel pumps and methods of connecting various systems are approximately the same. General requirements must be observed: install the pump at an angle of at least 15 degrees so that it does not become airy. Webasto has a pump mount; on the domestic kit it fits well with clamps.
When installing the pipeline (usually next to the standard fuel supply line on plastic clamps), rises must be avoided, because the fuel moves very slowly (0.6 l/h), and if an air lock forms on the rise, it will be difficult for the pump to pump it. After installing the pipeline, we treat the clamps with lubricant so that they can be unscrewed during repairs, and we pump the system. To do this, remove the tube in front of the pump and use a large syringe to suck out the gasoline from the tank. The tubes are transparent and the passage of fuel and bubbles can be seen. Then we put the tube on the fuel pump, remove it from the boiler and use a syringe to fill the line from the pump to the heater. If you have a manual vacuum pump, then it is also convenient to fill the line, but this must be done with the pump turned on.-
Pump installation. Usually the pump is connected before entering the stove: the incoming pipe is disconnected, and the pump is inserted using the angled hoses included in the kit. It must be placed below the level of the expansion tank. The remote pump comes with a mount and can be placed in any convenient place. After this, you need to fill the system with coolant and expel the air - start it and rev it up.
Well, we stretch the wiring (not a word about vodka :). For those who installed alarms, it’s a trivial matter: put the harness into the cabin on the remote control, spread everything under the hood into connectors and stretch the harness to the fuel pump. Webasto offers different configurations - there is a remote control with a timer, and there is a remote control, which is very convenient and expensive. All this is sold with detailed installation diagrams. There is a power output for the stove fan.
Main technical characteristics and design features
- Power 1.5, 2.0, 3.0 kW
- Rated voltage 220V
- Type of current – alternating
- Current frequency 50 Hz
- Anodized aluminum housing
- Hermetically sealed housing design with an electric heating element completely eliminates the ingress of coolant into the electrical part
- Thermostat (operation temperature 95°C (not lower)
- Small dimensions allow the heater to be conveniently placed in the engine compartment.
The electric liquid heater Sputnik is designed
for pre-heating of internal combustion engines of vehicles and units with a liquid cooling system. The heater is suitable for both cars and trucks of domestic and imported production.
Recently, more and more owners of personal cars on cold winter days prefer the comfort of a warm interior, which has become familiar to professional drivers and is a prerequisite for trucks throughout Europe. Clear visibility, trouble-free engine starting and a warm interior are increasingly recognized as attributes of comfort and safety in a car. In addition, compared to a cold engine, an engine preheated using a heating system starts easily, uses much less fuel and is subject to significantly less wear.
Operating principle of the heater:
built into the engine cooling system. The liquid entering it heats up and, expanding, displaces the cooler liquid. This ensures directed thermosiphon circulation of liquid through the electric heater and the engine cooling jacket. When the engine heats up to a temperature of 80 °C, the electric heater automatically turns off.
Engine warm-up time:
from 20 to 60 minutes depending on the ambient temperature and engine size.
Installation and Maintenance:
Electric engine heaters are installed on all Russian cars. Installation on foreign cars is possible using specialist recommendations. It is recommended to install the electric heater at a car service station. Due to their simple design, electric heaters do not require frequent maintenance.