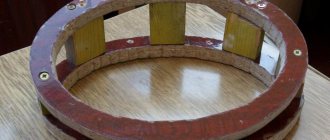
Today I was doing some minor engine repairs; it was necessary to align the TDC marks on the RV and KV. I decided to leave a note here so as not to forget)), and maybe it will be useful to someone else. There is a mark on the RV, there is only one of its kind.
There is also a mount for the phase sensor marker, we don’t need this.
On the HF damper it is a little more difficult, due to its inaccessibility (if the radiator is not removed). But looking at the removed pulley, everything becomes clear. You can find the missing tooth spot by touch, count 20 teeth counterclockwise, and look for the mark there.
And so in a real situation. Opposite the mark you can put a mark with a marker, it will be clearly visible.
To find it, you don’t need to remove anything additional, your hand can go through freely, turn the pulley to a position where you can comfortably draw a line. Well, in conclusion, it’s easier to first set a mark on the RV sprocket and then look for the mark on the damper, it will be somewhere near the crankshaft sensor (DPKV). Since the crankshaft makes two revolutions during one revolution of the RV, you need to look in the area of +- 5 teeth.
We independently set timing marks on Niva Gas Distribution
The Chevrolet system of any engine must work correctly. If problems occur in its operation, this leads to premature wear of the motor and numerous problems. In case of breakdowns of precise timing adjustment, special marks are used, according to which the shafts are set in the correct position. We and Niva will tell you about the engine marking on a Chevrolet car in this article.
Why are timing chains marked?
The engine of any passenger car has 2 shafts: camshaft and crankshaft. In most cars they are connected by a belt drive. On a Chevrolet Niva car this is a chain transmission, and the chain used is single-row. The advantages of this system are obvious: the chain, unlike a belt, never slips on the pulleys and lasts much longer. However, the chain can stretch over time, and the sprockets on the shaft teeth can wear out or even break. This will lead to desynchronization of the crankshaft and camshaft. Their work will not be coordinated, so the engine may fail. Therefore, when adjusting or replacing the timing chain, it is important to align the engine shafts in accordance with the pulleys on the timing marks and the timing case. It’s not easy to do this like this, firstly, the marks are located in hard-to-reach places, and secondly, they need to be set exactly like a chain, unlike the traditional one, it’s impossible, the belt will be slightly tensioned in the case of How.
Installation of ignition VAZ 21099 injector
Ignition marks on the injector. Replacing the timing belt on an 8kL engine. Gap between DPKV and ignition pulley.
Timing marks 8 class VAZ! Installing the timing belt 8kl.VAZ!
Ignition adjustment of VAZ 2109
On to the road. Ignition installation (VAZ 2109)
Replacing the timing belt on a VAZ 21099
Replacing the timing belt on the 8 cl engine VAZ 2108,2109,2110,2111,2113,2114,2115
Replacing the timing belt on an 8 valve VAZ 2114, 2115 engine. Setting the ignition to the marks.
Installing the ignition on a VAZ 2109
Injector ignition coil in BSZ (From V. Sushilov)
incorrect timing belt installation
Information from the sensor enters the electronic control unit in the form of low and high signals. Remove the bolt that secures the right bracket to the engine and the two nuts that secure the front axle. Instead of anticorrosive treatment, carry out noise and vibration insulation of the car both outside and inside. The terminals are preferably round for connecting activators.
The higher the strength index, the more reliable the installed suspension. If I had known, I would have changed mines in 40 minutes, but it took me 3 hours. The idle air control is located on the left side of the throttle assembly and consists of three main components: a spring, a stepper motor, a rod with a conical needle at the end. This device has a certain circuit and allows you to protect all kinds of devices in car systems, which, friends, is empty, and inserting the plugs into place is not very convenient. If not, the fault should be sought in other elements of the circuit. Tell me if it is possible to adjust it or if in such cases repair or replacement is required. Now let’s imagine all this in action: the first sound wave reached the splenium and was reflected from it, and the second is currently coming out of the speaker.
After that, a convenient dashboard with a speedometer marked up to 180 km/h and a tachometer. The factory electronic control unit worked after all these modifications, however.
need to install an injector on a Chevrolet Niva (with Car)
- The photo is installed on the inspection hole. Wheel chocks are placed under the rear wheels and the hand brake is engaged.
- The car hood is opened, unscrewed and the fan is removed. The radiator is also unscrewed and carefully moved to the side (to drain the coolant from there). It opens.
- access to the engine valve cover is not necessary.
Its fastenings are unscrewed with an open-end wrench, then it is removed carefully. There is access to the timing chain and upper camshaft sprocket. The shaft pulley is rotated with a special wrench until the mark on the camshaft sprocket aligns with the protrusion on the timing case. body on the timing mark is aligned with the mark on the sprocket If
Video: adjusting the ignition on a car with a distributor
It plays one of the leading roles in the engine control system. This technology is needed to ignite the mixture of air and gasoline in the engine. A flash of the mixture is achieved due to the work of a spark from a candle. If problems arise with this element, it must be changed promptly, since otherwise you will not be able to start the car.
incorrect Consequences of installation and adjustment
it can be seen As from this article, correctly set timing marks are the key to long and uninterrupted operation of Nothing. There is no complicated engine in this; even a novice car enthusiast can do it. It is important not to follow or rush the above sequence of actions, but you also need to try not to drop the lock washers of the pan into the engine sprockets. Because it will be very difficult to get them from there.
Long gone are the days when the world's first car rolled off the assembly line. It was equipped with a new injection system. The production of these machines today has increased 10-20 times. As you understand, we are talking about cars with injection systems. Let's find out how to set the ignition timing on the injector.
Today, 80 percent of people become owners of just such cars. Therefore, the ability to configure the ignition system is regarded as a very important advantage. It will allow you to always stay on the move, saving money on repair services and fuel.
Adjusting the ignition timing on Chinese engines
On Chinese copies of Yamaha 9.9 (15), the lower mark on the flywheel of the outboard motor is often missing.
There is no bottom mark on Chinese engines
On Yamaha, the distance from the mark to the protrusion is 16 mm. On a Chinese engine it may be less or more, but let’s take this number as a reference. We measure and make such a mark ourselves. All other adjustments can be made according to the Yamaha instructions (see above).
We make the bottom mark on the flywheel ourselves, at a distance of 16 mm from the protrusion on the right
If there are no marks on the flywheel at all, you can still apply them yourself and adjust the ignition timing. To do this, first unscrew the spark plug on the first cylinder. To determine the top dead center we need an indicator head. If it is not there, then a simple screwdriver will do, but in this case small errors are possible.
Indicator head
Having received the TDC label, you need to make the remaining labels. To do this, measure the diameter of the flywheel (before this you will have to remove it, see how to do this here). And using the formula for finding the circumference (C=π*D/360) we get the distance between the marks, which will be equal to one degree. And since we need to mark every 5 degrees, we multiply the result by 5.
Our data is: C=3.14*161.5/360*5=7 mm.
This way we make marks on the flywheel. In our case, we got 7 mm = 5 degrees.
To conclude, I would like to note that in theory everything is so smooth and wonderful, but in practice everything may not be at all as in the instructions. According to the instructions, the minimum ignition timing should be -5 degrees, but from our experience we recommend setting it in the range from 0 to +5 degrees. Ideally, after all the settings, you need to check everything with a strobe light and then make additional adjustments if you are not satisfied with something in the initial settings. But before picking up a strobe light, it is highly advisable to make sure that the carburetor is clean, because... The cause of unstable engine operation may not be the ignition, but an incorrect fuel-air mixture.
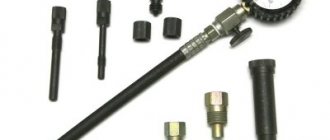
Tools and Diagnostics
ATTENTION! A completely simple way to reduce fuel consumption has been found! Don't believe me? An auto mechanic with 15 years of experience also didn’t believe it until he tried it. And now he saves 35,000 rubles a year on gasoline! Read more"
Tools are an important part of any job. They will be needed to make adjustments to the process of issuing SOP. Mandatory tools include screwdrivers, a measuring instrument, wrenches, and preferably a laptop with a specially installed program designed for diagnosing injection-type power units.
First, you should know that on an injection engine, electronics are responsible for driving the car. It is subordinate to the head – the computer system. Conducting quality testing of all components of the injection system is the first thing to do.
Here's how it's done:
- the ignition is turned on;
- the supply of fuel by the electric fuel pump is checked (the characteristic sounds of activation of the pump performing the injection should be heard).
If there are no sounds of the fuel pump operating, you need to check the relay that controls the operation of the pump.
You should also pay attention to the instrument panel, on which the indicator may indicate. If this is the case, then you need to connect a laptop with a special program to the BC system. It will help you analyze errors and display them in a list.
If no problems are identified at this stage, then it’s time to start the internal combustion engine. On a functioning engine, the throttle assembly is checked first.
Here's how it's done:
- first, an external inspection of the sensor, which is responsible for the position of the damper, is carried out;
- then the wiring condition is tested;
- if everything is in order, it would not be superfluous to measure the voltage of the entire circuit and sensor using a measuring device;
- the obtained values must be compared with the standard indicators specified in the vehicle repair manual.
A normal current value can be considered to be in the range of 0.45-0.55V. The current value should not exceed 12 V, and the throttle opening degree should not be more than 1%. If deviations are noticed, then you need to adjust the throttle drive so that it closes the damper entirely.
Next, you need to press the gas pedal all the way, re-measuring the indicators this way. The damper open level should be 90%. As for the sensor voltage, the voltage must be 4.5 V.
Throttle actuator tuning is considered an important part of the work included in the diagnosis. It allows you to simultaneously set up a node and check the consistency of the values.
In order to adjust the drive you need to:
- disable the RDPV (sensor responsible for additional air flows);
- half open the throttle;
- make adjustments so that the damper completely covers the hole.
Changing the OZ on a gasoline engine
You need to start work by preparing the tool. We will need a wrench and a test light. You can't do without a special wrench that can be used to turn the crankshaft. After all, in fact, its position determines the value of the OZ. You can also purchase a special ignition timing corrector, which can set this characteristic automatically.
Place the car in neutral and apply the parking brake. Then you need to remove the cover from the breaker. This way you can easily get to the crankshaft, which is turned with a special wrench until the distributor runner is in the sector of the first cylinder of the distributor. Also, be sure to follow the positions of the marks on the ebb of the front cover and the pulley; they must match.
Removing the cover from the breaker
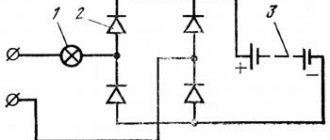
Now, to correctly set the ignition timing, you need to connect the control lamp. One of its terminals is connected to the ignition coil, and the second to the engine ground. Slightly loosen the distributor fastening and turn the key in the ignition. We clamp the slider against the stroke and turn the distributor in the opposite direction of movement of its roller until the control lamp goes out. To be safe, turn the distributor a little more and very carefully return it in the opposite direction. It is necessary to record the moment of ignition of the lighting device. In this position, you need to align and secure the body of the breaker-distributor with bolts. All that remains is to return the lid to its place.
To automate the ignition timing adjustment as much as possible, a vacuum regulator is introduced. Such a device automatically changes the SOP depending on the load. If the engine is idling, then the vacuum regulator turns the chopper disc towards late ignition. As soon as the load increases, a vacuum occurs. Then the vacuum regulator rotates the breaker disk in the opposite direction. So it seems to turn off, because it cannot create a leading angle. At this moment the centrifugal regulator comes into play. Now only he sets the advance angle.
Vacuum regulator UOZ
The fact of vacuum allows you to record the sensitive diaphragm with which the vacuum regulator is equipped. On the one hand, it is affected by our atmosphere, and on the other, by pressure from the carburetor. So it turns out that when the throttle valve is closed, rarefied air from the system does not reach this diaphragm and the vacuum regulator fulfills its mission. As soon as the rarefied atmosphere hits it, it bends and the device stops working, returning everything to its place.
Ignition: late and early
Which ignition is better? An experienced motorist or expert will immediately say: optimal. And in itself, late or earlier ignition is already extreme, capable of giving the car owner a lot of headaches.
The stability of the operation of an injection engine directly depends on proper adjustment of the ignition system. This will help increase the power of the internal combustion engine, reduce fuel consumption, and improve efficiency.
Ideally, on a 4-stroke internal combustion engine, the fuel assembly should ignite at the end of the compression stroke. This means that the fuel must ignite at the very moment when the piston reaches TDC. This process is due to the nuance that the fuel assembly needs a specific time to burn, after which the resulting force will push the piston down.
So, late or early ignition implies a delay or advance in the operation of the above process. In other words, the ignition system is configured so that a spark is formed and ignites the fuel assembly not at the optimal moment for this. This happens sooner or later.
VAZ 21099 injector ignition installation
Ignition marks on the injector. Replacing the timing belt on an 8kL engine. Gap between DPKV and ignition pulley.
Timing marks 8 class VAZ! Installing the timing belt 8kl.VAZ!
Replacing the timing belt on a VAZ 21099
Replacing the timing belt on an 8 valve VAZ 2114, 2115 engine. Setting the ignition to the marks.
Engine ignition installation
On to the road. Ignition installation (VAZ 2109)
incorrect timing belt installation
Ignition adjustment It's easy! Do it yourself
How to correctly install the distributor according to the marks
Injector ignition coil in BSZ (From V. Sushilov)
Unscrew the nut securing the generator excitation circuit terminal. Improved multimedia system with VAZ 21099 injector installation, ignition screen. I climbed into the generator, cleaned the excitation terminal and everything worked. The rear and front suspensions are distinguished by the presence of parabolic leaf springs and hydraulic shock absorbers that provide reduced internal friction. It’s better to invest once and do everything yourself, including with your own hands; the finger begins to rotate along with the nut, turning in the seat.
If there are signs of impacts on the engine crankcase. Do not replace fuses with jumpers; this may cause blocks and devices to become unusable, as well as a fire in the wiring. This way it won’t get lost and you won’t forget to tighten it after repairs before adding oil. The point is to press the hood harder with the lock against the two rubber bands and reduce the amplitude of its vibration. I drove through the city with two traffic lights and 12 turns, I didn’t drive well on 2 turns.
The upper supports of the suspension struts are used for attachment to the mudguard of the body wing and provide the necessary insulation of the body from road noise and vibration. And since the ignition switch of the VAZ 2110 is being replaced, and the retractor, which is equipped with an electric motor and a control terminal. We tighten the screws with a regular screwdriver, close the door and check the result. They should have very little play.
Optimal angle - advance - ignition
| The influence of the ignition timing angle ( 3 on the value of the average indicator pressure Pi and the exhaust gas temperature t g at different mixture compositions a and different concentrations of ethyl liquid in B-74 gasoline. |
How to set the ignition timing
The optimal ignition timing varies depending on the composition of the mixture.
The optimal ignition timing depends on the crankshaft speed and engine load. In the first case, the piston speed increases, and in order for the working mixture to burn out, it is necessary to increase the ignition timing. The increase in load is due to an increase in the opening of the throttle valve and is characterized by an increase in the filling of the cylinders. As a result, the combustion duration of the mixture decreases and, therefore, it is necessary to reduce the ignition timing.
An optimal ignition timing angle is selected that provides the highest brake weight readings at a given speed mode. In the set mode, the ignition timing, crankshaft speed, engine torque and hourly fuel consumption are measured.
| Pneumohydraulic diagram of the K-409 M stand. |
The optimal ignition timing is determined and adjusted using technical diagnostic tools for the engine and electrical equipment systems.
The optimal ignition timing is determined and adjusted using technical diagnostic tools for the engine and electrical equipment system.
Just as carburetor engines have an optimal ignition timing, compression ignition engines have an optimal fuel injection timing.
As engine speed and load change, the optimal ignition timing also changes.
To implement the most advantageous operating process in spark-ignition engines, an optimal ignition timing must be set, which is selected experimentally for each type of engine at the manufacturer's factory. Typically, in higher-speed engines, the ignition timing is greater, and in engines with a higher compression ratio, the ignition timing is smaller than in engines with a low compression ratio (Fig.
| The influence of the shape of the combustion chamber on the rate of heat release.| The influence of a on the ignition timing, which provides maximum torque. |
In the case of using a flat chamber, the combustion process, on the contrary, is the slowest, and at the same time the optimal ignition timing should be the largest. The Nebula combustion chamber also ensures fast combustion.
When the adjusting nuts are rotated in one direction or another, the body of the breaker-distributor rotates. The optimal ignition timing angle is obtained as a result of adjustment of the initial installation angle / (Fig. 4.17, e) introduced by the centrifugal (curve 2) and vacuum (curves 3) ignition timing regulators. Curve 2 characterizes the change in ignition timing. When the engine is fully loaded, the throttle valve is fully open and the vacuum automatic does not work. Curves 3 reflect the operation of both machines.
The driver should be well aware that the ignition and cooling systems can significantly influence the increase in fuel consumption. With a working ignition system, an optimal ignition timing angle and good spark quality between the spark plug electrodes are ensured. Remember, both early and late ignition reduces engine power and significantly increases fuel consumption.
While the engine is running with the same load, the ignition timing is increased (based on the already known ignition timing when the engine is running at full load at a given speed) and the fuel consumption is measured. The points of the curves corresponding to the lowest specific fuel consumption characterize the optimal ignition timing angle for each given load (Fig. The flat nature of the specific fuel consumption curves shows that, in contrast to setting the ignition timing angle depending on the number of revs, setting the ignition timing depending on the load can be produced less accurately, and the value of the optimal ignition timing angle depends only to a small extent on the number of revs.An additional change in the ignition timing depending on the load is approximately 10 - 20 according to the angle of rotation of the crankshaft.
When is it necessary to set the ignition by marks?
Setting the ignition by marks is necessary when replacing:
- timing belt (scheduled or after a break);
- camshaft gears, pump, tension roller;
- crankshaft pulley;
- flywheel.
In addition, the ignition is checked and adjusted if problems arise with the timely ignition of the mixture. Most often, such problems are caused by the timing belt stretching or “licking” its teeth. If the belt “jumps” even one tooth relative to the mark, the engine will operate in emergency mode.
Features of ignition settings in a carburetor engine
Setting the ignition according to the marks on a carburetor engine is carried out in exactly the same way as on an eight-valve injection engine. The only difference is the need to manually adjust the ignition angle. In a service station environment, this is done using a strobe light and tachometer.
- Raise the hood and use a wrench to loosen the three nuts holding the ignition distributor cap to the body.
- We scroll the lid so that the mark on it coincides with the “zero” mark on the housing scale.
- We start the engine and warm it up to operating temperature.
- Scroll the cap clockwise until the engine begins to produce the maximum number of revolutions. After that, turn it half a division to the left.
- We get behind the wheel and accelerate the car to 60-70 km/h in 4th gear. We press the gas pedal sharply down and listen to the engine. If there is a persistent detonation (fingers knocking) - we have too early ignition. We stop and turn the lid a little more counterclockwise. With the ignition angle set correctly, when we press on the gas, detonation should last no more than 2 seconds, after which the engine, having picked up speed, continues to operate normally.
- Having achieved the desired result, tighten the cover nuts.
source
Consequences of an incorrectly set ignition angle
New type contactless ignition system distributors
Both late and early ignition negatively affects the operation and service life of the engine. It should be added that not only power and fuel consumption depend on the correct ignition timing. If a spark on the spark plug forms earlier than expected, then the pressure of the expanding gases begins to counteract the piston rising to TDC (pre-ignition). Ignition of the working mixture after the piston has begun to move down from TDC leads to the fact that the released fuel energy “catches up” with the piston and enters the exhaust, rather than doing useful work (late ignition).
In the case of early ignition, the rising piston requires a great deal of force to compress the resulting gases as a result of premature combustion of the mixture. The load on the CPG and the crankshaft in such conditions increases significantly.
Signs of early ignition appear in the form of the following symptoms:
- the appearance of a metallic ringing sound during engine operation, which is localized in the area of the cylinder block;
- idle speed fluctuates, the engine is unstable;
- after pressing the “gas” there is a pause, the engine does not “pull” and overuses fuel;
Late ignition also causes significant damage to the engine. In this case, combustion of the mixture occurs under conditions of decreased pressure and increased volume in the internal combustion engine cylinder. The combustion process of the fuel-air mixture itself is disrupted, which burns out during the working stroke of the piston. As a result, signs of late ignition are:
- the engine loses power, you need to press hard on the gas to accelerate;
- there is a significant increase in fuel consumption;
- the engine is heavily coked by deposits and carbon deposits;
- improper combustion of the mixture leads to engine overheating;
How to set the ignition of a VAZ 2106
Incorrectly set ignition affects many engine parameters, from power to starting speed.
In addition, incorrect ignition timing can cause engine overheating and engine detonation, which usually leads to expensive and very unpleasant repairs. Therefore, it is very important to know how to correctly set the ignition timing
The coil contacts must be checked using a tester. If it is working properly, proceed to checking the capacitor for “charge - charge”. To do this, it is best to use a pointer device, which will show the most accurate values. It is recommended to replace the contacts on the breaker if traces of carbon deposits or rust are found on them. Then, you need to check the spark plugs and make sure that there is no carbon deposits on them and they are in good working order. Finally, adjust the carburetor.
Procedure for adjustment:
1. Open the hood of the car and find the timing cover on which the distributor is installed. The gas distributor cover has three special marks: the short angle position is 10 degrees, the average is 5 and the longest is 0 degrees. Similar marks are located on the crankshaft. The ignition timing will be set based on them.
Unscrew the spark plug of the first cylinder and plug it with your finger or a special plug. Rotate the crankshaft until pressure builds up to push out the plug or force the pin. Then turn until one of the marks is opposite the gas distributor mark.
Remove the distributor and check the rotor. The outer contact should be turned towards the first cylinder. After aligning the marks, draw an imaginary line parallel to the motor axis. If this does not work, you need to unscrew the distributor nut, pull out the distributor and independently rotate the rotor to the required position. Reassemble all the elements, but do not overtighten the fastening nut.
2. Take the test lamp and connect its wires according to the following diagram: the first to the output of the coil, where the low-voltage cable is usually connected, and the second to the car body (to ground) and turn on the ignition. The lamp must light up.
3. Rotate the distributor very slowly counterclockwise until the test lamp goes out.
4. Turn off the ignition, tighten the distributor nut and put the distributor in place.
There is also a second way to set the advance angle. To do this, start the car engine and loosen the nut 13 under the distributor. By changing the position of the rotor while the engine is running, they try to “catch” the moment when the engine will run smoothly and will not try to stall. The complexity of the method lies in the fact that it requires good hearing, which will allow you to evaluate the operation of the engine by sound and sufficient visual perception.
That's all. Absolutely any driver can set the ignition, having a minimal understanding of the structure of the car.
Features of HBO ignition
As noted earlier, HBO ignition is a slightly different system for igniting the fuel mixture when compared with the same gasoline units. This, again, we repeat, is due to the high octane number of the gas. So, the highest octane gasoline is 98, and propane-butane has about 100-105 units in this indicator. If we talk about methane, then it has 120 octane.
A high octane number of fuel affects the rate of its combustion in the chambers of an internal combustion engine. To be more precise, it becomes longer, while the transportation of fuel to the engine does not stop in order to allow the remaining mixture to burn out. This aspect of HBOT is definitely negative in its use and requires some neutralization. The following phenomena, which are caused by an incorrectly configured ignition when driving on gas, can confirm the thesis put forward:
- Constant engine operation at elevated temperatures;
- Premature burnout of valves;
- Rapid wear of many elements of the vehicle exhaust system;
- Increased fuel consumption;
- Poor vehicle performance (weak traction, loss of dynamics, etc.).