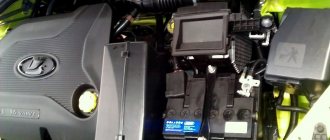
To increase safety (so that the driver does not start driving with the door open and for the alarm to work), cars are equipped with open door sensors (popularly “limit switches” or “limit switches”). Their malfunction causes the interior lighting to work incorrectly and prevents the car from being armed. Let's figure out how to check and, if necessary, replace door switches.
Replacement
To remove the limit switches, open the doors, then:
- remove the protective cover from the sensor by simply pulling it towards you.
- pry off the limit switch with a screwdriver
- remove the limit switches by snapping off the three latches
- disconnect the block with wires.
On some Lada models (for example, Lada Priora or Niva 4x4), the limit switches are attached to the body with a screw.
On the Lada XRAY the limit switch is located in the door lock and changes along with the lock.
Installation is carried out in reverse order.
Installation in a lock
With the second option, the part will be placed not in the threshold, but at the top of the door. The wires are redirected to the lock. In this case, the function of the switch is taken over by the lock contacts. There are practically no difficulties in installation. Refining the circuit involves installing additional wiring and plugs for connections. During installation, it is necessary to protect the wires from abrasion using a corrugated hose or insulating tape. To implement this method, it is necessary to disassemble the lock and remove the locking bracket. The work is carried out in the following sequence:
- Remove the lock.
- Pull out the protective bracket.
- Open the connector plugs.
- Insert terminals.
- Connect the wires on the driver's door side.
It should be remembered that installing and connecting switches on the Lada does not guarantee their stable operation. To eliminate possible problems, you need to know their causes and solutions.
Wiring check
Instructions for cars of the B0 assembly line (XRAY, Largus, Nissan Almera, Renault Duster, Sandero). Remove the limit switch and set the multimeter to voltmeter mode. We measure the voltage at the contacts of the block with the wires:
- If there is no voltage, the circuit of the interior lamp lamp or the lamp itself is faulty.
- if the voltage is significantly less than 12 V, the wire connecting the sensor to ground is probably damaged.
We set the multimeter to ohmmeter mode, connect one probe to ground (body), and the other to the terminal of the block with the black wire. The resistance should be close to zero. If the resistance is high and tends to infinity, the connection between the wire and the body is probably damaged by corrosion or the wire is damaged (treat the connection with a product to protect electrical contacts). If the fault cannot be resolved in this way, it is necessary to remove the interior trim from the pillar, find and fix the fault.
Checking the door switch
When the rod is recessed, the contacts are open. First of all, we check the serviceability of the sensors by opening all the car doors one by one.
Check with a multimeter. We connect a multimeter to the limit switch terminals in ohmmeter mode and check the closure of the sensor contacts (the contacts must be closed, the resistance is close to zero). We press the sensor rod and check the measurements (the contacts must be open - the resistance tends to infinity).
Let us remind you that in some cases (for example, in the cold season) limit switches may work intermittently. For Lada Vesta, Grant and Kalina 2 you can use this solution, and for Priora this.
Limit switch function
The effect of this button is that when the doors are open, a special symbol lights up on the panel. If, when setting the alarm, the door is not closed or not completely closed, that is, the limit switch is open, then the “alarm” will definitely notify you about this.
In some car models, if the keys are in the ignition when the driver's door is open, it is impossible to lower the door locking pawl on it, and the automation will immediately raise all the locks. This will help avoid such a common situation as accidentally slamming the keys in the lock. Limit switches operate both for opening and closing.
If you turn off the limit switches, the open door indication will stop working. Then problems with the alarm may arise. In addition, there are situations when a light is needed in the trunk or interior.
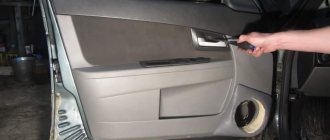
How to remove the front and rear door trim on a Lada Granta
Quite often, Lada Granta owners are not satisfied with the quality of the door trim due to the presence of noises, knocks and creaks inside the door. To fix such problems, you will have to remove the casing. It is not difficult to do this on your own and even a novice motorist can cope with the task.
Removing the door trim yourself is easy
The main reasons why you may need to remove the front or rear door trim:
- creaking, other extraneous sounds inside the door;
- deformation of the door panel due to mechanical or thermal damage;
- defects in the manufacture of door trim;
- wear of clips and latches, which leads to weakening of the fastening;
- window lifter failure;
- failure of the lock or door opening mechanism;
- glass replacement.
Tools and materials
To remove the door trim on a Lada Granta with your own hands, you need to prepare the following tools and materials:
- Phillips and flat screwdriver;
- a special plastic spatula, it makes it easier to remove the panel;
- a set of new latches, as the old ones may break.
The procedure for removing the trim from the front door
Before starting work, you need to place the car on a level area. Be sure to secure it with the hand brake. If you have an electric lock, you must disconnect the power from the battery.
Work order:
- Removing the lock button. To do this, unscrew the button, then use a screwdriver to pry off the plug. After this, unscrew the screw.
- Unscrewing the screws located in the armrest. In addition, you need to remove the plug and unscrew the screw located on the outer part of the handle.
- Removing the two pocket securing screws. They are located at the bottom of the panel.
- Removing the cover from the mirror control knob. To do this, simply pry it off with a screwdriver.
- Removing the panel. Using a spatula, carefully pry up the upholstery and tear it off the fasteners.
- Disconnecting wires. You need to move the panel back a little, and then disconnect the wires going to the column and to the electric lock.
Video: removing the trim from the front door
Removing the rear door trim
The process of removing the panel from the rear door is practically no different from how it was done in the previous case, but there are still certain nuances.
Dismantling procedure:
- Removing the lock button. This is done in the same way as on the front door.
- Removing the window lifter handle. First, press down and remove the socket, and then pull out the latch and remove the handle.
- Removing the handle. First, pry off the plugs, then unscrew the two screws and dismantle the handle.
- Evacuation of the screws located at the bottom of the panel.
- Removing the panel. You need to remove it from the 10 clips, start from the corner and move to the sides.
Installation of the trim on the front and rear doors is carried out in the reverse order of removal. Be prepared for the fact that during dismantling, some of the latches almost always break, so before starting work you should definitely purchase a set of new clips.
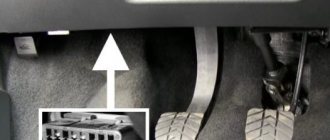
How to find door switches?
If you don’t know where the door switch is located, then you should start searching for them with a manufactured control or “tseshka”. Signals are removed from the door limit switches - the button principle. This is done in order to protect the car alarm system around the perimeter of the car. When the door is open, the limit switch is not clamped, it is free, and a plus or minus hangs on its wire. But this happens extremely rarely.
First of all, you need to find a wire whose polarity changes and either positive or negative appears when the door is closed or opened.
As soon as the control lamp lights up green, you need to press the limit switch of the unlocked door or close it completely. If the lamp goes out or lights up red, then we have found the right wire.
In order to make sure that all the doors are connected to one wire, it is necessary, leaving the control on this wire, to open all the doors one by one. If the control lamp does not respond to the ringing of the remaining doors, then this indicates that in this car all the door limit switches are not connected, and it is necessary to find the individual wires remaining from each door using the same method. As a rule, the driver's door and passenger's door switches are unconnected.
Correct connection of limit switches to the signaling system (E34) — BMW 5 series, 3.5 l., 1988 on DRIVE2
Hello everyone, I continue Part 2 The alarm for unauthorized door opening does not go off when the central lamp is in off mode (that is, when the doors are opened, the backlight is off).
Preface: about 5 years ago, my comrades gave me a Sheriff signaling system with feedback, took all this miracle and gave it to an electrician along with the car (at that time I thought it was competent or not lazy)) Paying 650 UAH. I drove home satisfied, after which I drove around a little more and decided to completely restore the car, well, after 5 years, it finally came down to the signaling)) After I had taken care of the broken central locking wire and, to save battery power, I turned off the lamp and set it to 3 -th position, and it turned out that after arming the alarm does not go off when you open the door. That is, the signal limit switch wire was soldered to the lampshade and in order to close the circuit, the light bulb in this 34k must light up, because it does not have limit switches are parallelized and each limit switch has its own wire (only the rear doors are parallelized) which is included in the modular relay, so it’s obvious and for the future owner I decided to eliminate this defect (soon the BMW plant already made limit switches paralleled on all cars including the late 34).
These connections must be made using diodes to separate the circuits and then everything will be normal (two days have passed by now I’ve finished reading and understanding).
Check If you have the same problem or just want to check, then do the following:
We turn off the lamp or put it in position 3 and try to open the car (after 20-40 seconds, a delay is programmed for comfortable illumination in the signaling), if after opening the alarm goes off, then everything is clear for you (either it was installed by the right person or the limit switches are already paralleled) - so that check this too, you will need to unscrew the front and rear end switches, if the wires are the same color (not including the second one-color brown) then yours are parallel, if the wires are different (I have the front ones: brown with gray with yellow wire (front left) and brown with blue with yellow wire (front right).
rear: brown with purple with yellow wire.) and the alarm works, so respect and respect to the installer, if it doesn’t work, read the solution.
Solution needed: 5 small diodes (you will need three, two for spare), 1.5 m of wire + heat shrink, soldering iron. We look for the signaling box and find in it the door limit switch wire for work with a minus (in my case it is a brown wire, you may have a different one, see your diagram), and look where it goes, if it goes to the ceiling light, then carefully unsolder it, if to the water door limit switch, then carefully disconnect and isolate the door limit switch wire. If the limit switch wire from the signaling is long, then we pull it under the rear seat to the modular relay (on the left), if it’s not long, then we take 1.5 m of wire (preferably the same color, I had green) and lengthen it so that it’s enough to run into all the boxes and bring it out under the seat.
Next, we take three diodes (1 for the left water end, 1 for the front pass end and 1 for the rear ends) and solder equal parts of the wire on each side of the diode (10 cm each)
After this, we align the wires along the length and connect the ends of three separate wires with diodes with the anode side in one direction. Next, we solder this broom with the Anode side (black side) of the three wires already twisted into one, or we twist it to the signal limit switch wire that we pulled under the back seat. Next we look in factory twists (in caps) under the rear seat on the left side of the limit switch wires of the same color as the color of the limit switch wires that we unscrewed on the racks, to be sure we ring so as not to make a mistake. If after ringing we found the necessary limit switch wires in the factory twists, then we connect our wires with diodes, one wire with a diode per twist limit switch, three twists and three diodes. Then we check and rejoice at how the alarm beeps when the door is opened, and at the same time, regardless of the position of the lamp switch. The trunk limit switch can be connected via a relay here under This red-white wire works as a plus (that’s why a relay is used, roughly speaking, to invert) and in my case, the Green wire from the signaling is the trunk and hood limit switch. That is, we join the Red-white one and throw it on the control leg of the relay, on We throw the ground on the second leg, on the third ground, and on the fourth leg the green wire (hood/trunk terminal)
Full size
For clarity
Useful information about the years, the colors of the connection wires. I think that it could have been done even simpler, take out the wire from the lampshade, which receives the signal to turn on the light, also solder the diode with the anode, and throw the cathode to ground.
But this is my theoretical assumption, I could be wrong, I haven’t used it in practice.
Troubleshooting door switches
The fault in this case lies only with the owner of the car, who, due to inattention, was unable to notice the non-working door switches in time. After all, monitoring their operation in each machine is very clear and it is difficult not to notice a non-working condition.
But the solution to this problem today is quite simple - a sealed boot that completely covers the button and does not allow dust, dirt and moisture into this mechanism.
Before you start installing the boot, you need to pierce a cross-shaped notch on its underside where the end switch is attached. After this, you need to install a self-tapping screw in the button hole, then put on the boot and insert a screwdriver through the puncture and secure it to the body. This method surprises with its reliability, simplicity and accessibility.
How to install an alarm?
But if your chisel is equipped with an APS-4 immobilizer and an injection engine, then the above procedure will not be enough. In addition, you will need to arm the car after the “polite illumination” of the interior lamp or alarm is extinguished, and enable the “delay arming” function (if available). All the methods described are quite acceptable for use.
Door limit switches VAZ 2110
The first sign of non-functioning door switches is the fact that the light does not come on when the door is opened, and the alarm does not arm. This problem is most typical for the tenth generation VAZ.
Door limit switches on the VAZ 2110 fail almost every three years. To avoid such problems, it is necessary to clean these parts annually with sandpaper. In addition, for durability (against oxidation), you can treat them with WD-40 and install anthers.
Elimination of operational failures
Devices begin to fail at low air temperatures. On the Lada Granta the door switch is protected.
The cause of equipment failures is the protective caps.
The protective shell is made of rubber. The cap loses its plasticity in severe frosts, which prevents the contacts from opening. To prevent failures of limit switches in Lada, the following measures are used:
- Install the springs under the rubber cover. Spring parameters: diameter - 12 mm, length - 20 mm, wire thickness - about 1 mm. The elastic spring will not let you down even at minus 40°C.
- We remove the protective caps for the winter. You will get rid of the cause of the problem, but the switch remains defenseless against moisture and dirt.
- Lubricate rubber surfaces with silicone. Can help with mild frosts (minus 10°C).
- Treat with water-repellent liquid. This is a temporary measure. Temperature range - up to minus 50°C.
- We replace Lada brand products with imported analogues from DAEWOO NEXIA or CHEVROLET AVEO doors. When purchasing, you should take a factory sample to compare sizes. The housing is inserted into the standard hole and secured with a self-tapping screw.
Refinement of the Lada Granta alarm system will increase the degree of protection of the car, and interior lighting when opening the rear door will create comfort for passengers.