Required materials and tools
The acoustic shelf for the VAZ 2107 is made with your own hands directly from composite materials on a wood base. To make a shelf with your own hands, you will need the following list of materials:
- plywood 16 mm and 12 mm thick;
- decorative materials for lining shelves. These can be: leatherette, dermantin or carpet;
- two-component epoxy resin;
- polyurethane foam;
- several self-tapping screws and bolts with nuts for fastening.
Of course, the new shelf will require appropriate speakers, usually oval or round. To carry out the work you will also need a screwdriver, a jigsaw, screwdrivers and a furniture stapler. In this case, not a collective farm version of the shelf will be produced, but a real acoustic system, which will have not only a beautiful design, but also decent sound parameters.
The procedure for installing an acoustic shelf
The finished part is mounted in place of the standard one using bolts that are removed from the trunk, where the nuts are tightened on them. An acoustic shelf, made by hand for a VAZ 2107 car, is first tried on, then drilled together with the body parts. Bolts are inserted into the holes, with the heads being flush into the material.
All preparatory operations have been completed, and the self-made shelf can be installed in its place in the VAZ 2107 car. Wiring is first laid around the cabin, with the help of which the speakers are connected. The work is finished, and now you can enjoy the result; high-quality music sound is guaranteed with this foundation.
source
Construction of speaker podiums and seat belt boxes
The next step is to make the base for the podiums using a jigsaw. To give the structure rigidity, it is reinforced with 40x20 mm wooden blocks, which are connected to each other by ovals using self-tapping screws. To circulate air between the passenger compartment and the trunk, several holes must be cut in the shelf.
The voids between the podium bars must be filled with polyurethane foam. To prevent the foam from falling out during drying, the voids to be filled must be covered with thick cardboard. When the foam has dried, it is simply formed along the edges and, to smooth out unevenness, treated with sandpaper. The structure of the podiums is reinforced using cardboard impregnated with epoxy glue.
When making boxes, it should be taken into account that the seat belts must go into them from the side. Boxes, as well as podiums, are made of timber, which enhances the rigidity of the structure. After installing the boxes, the rear shelf of the VAZ 2107 takes on a look similar to the factory one. To give it an aesthetic appearance, it should be covered with carpet.
Tip: you can additionally make a bass reflex for an acoustic shelf. To do this, you need to make a hole in the middle of the shelf and cover it with a decorative grille (mesh).
Carpet trim
Fixing the material on the shelf is carried out with small furniture nails or using a construction stapler. The last method is simpler and faster.
When covering a seat belt box with carpet, the easiest way to fix the material is with clothespins. After pasting the boxes can be mounted, secured with self-tapping screws. After covering, the finished shelf is ready for installation on the car.
Tips for working with carpet
Carpet is an excellent material for decorative trim of the rear shelf of a VAZ 2107. When working with it, you need to take into account some unique features:
- Carpet pieces cannot be glued together.
- To give the carpet a certain shape, you need to wet it, stretch it, and then dry it with a hairdryer.
- The easiest way is to glue the carpet to the shelf with spray adhesive.
- In order for the carpet to adhere well, the glue must be applied in a thin layer.
Read, it may come in handy: Mud flaps on the VAZ 2107: replacement features
There are other ways to independently manufacture a VAZ 2107 acoustic shelf. They differ in design, manufacturing technology and materials used. For example, you can make a multi-level shelf that consists of several layers of chipboard or plywood.
Speaker Installation
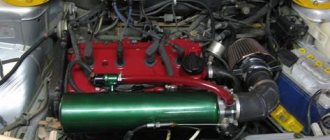
To install acoustics in a car, you will need a set of tools. We recommend having a Force kit for this. Tuning a car with it becomes much easier, since, firstly, their package includes the most necessary tools for work, and secondly, the quality of the tools from this company has already been tested by time. The price for this tool is more than reasonable; this set is ideal for just such work. Moreover, if you own a domestic car, such as a VAZ 2107 or VAZ 2106, it is simply vital for you to have such a tool at hand.
Tweeters
Tweeters (also called tweeters) are best installed as high as possible. This could be the top of the door trim or the front roof pillars. The further you are from the main speakers, the more noticeable the quad effect will be. The passenger tweeter should be directed to the driver's seat, and the driver's tweeter to the passenger seat. Recently popular two-component systems, or rather their buffers, are best placed not in the panel itself, but in the doors or on the rear shelves. And their tweeters, again, are ahead and further away. Those tweeters that do not require filters and are purchased separately can be installed in parallel with the rear or front speakers, it’s a matter of taste. Their power varies: from loud high-frequency support to a thin squeak.
Subwoofer location
It is not recommended to connect all other speakers in parallel. If you are eager to add a couple more, then it’s better to add them to the existing ones. Connoisseurs of loud music are recommended to install subwoofers and amplifiers using special kits that contain terminals, fuses, wires, etc. You can buy such a kit in almost any store for tuning audio systems. By the way, the location of subwoofers and their installation in the trunk is not the same for all VAZ cars. It is important to take into account the body shape (hatchback, sedan, station wagon).
If you want to go further in tuning your car and you are already interested in metallic paint for your car or you want to look at and try on new wheels on your car, we are definitely on the same path. Our resource contains a lot of necessary information to improve and refine your car. Read, learn a lot of new things and share your experience with other car enthusiasts. All together we can make the world of car tuning a little simpler, and the quality level of new projects will rise to a new level every year.
Rear shelf for 2107 podiums: video
Although the VAZ 2107 is an excellent car, it still requires some improvements. For example, in most cases acoustics are not installed in the “seven” from the factory. And living in the modern world, any driver can no longer imagine a car that would lack at least some music. The first level of car audio is the installation of two “pancakes” in the rear parcel shelf of the VAZ 2107, which is located under the rear window, which is the optimal place for installing large speakers. These speakers can be installed in a special plastic shelf, but you won’t be able to get high-quality sound.
In order for the sound to truly satisfy the driver's needs, it is necessary to prepare an acoustic podium made of wood. Making such a shelf out of wood for a VAZ is not difficult; even an ordinary driver without carpentry skills can handle it. Let’s find out in more detail how to make such a structure with your own hands. There are many options for manufacturing rear acoustic shelves on a VAZ 2107, but we will look at the two most common ones, which will allow you to choose the most appropriate method.
Option No. 1: installing a shelf
The finished product is mounted in place of the standard shelf using bolt and nut connections. The corresponding holes should be drilled at the fastening points, and then the shelf should be secured.
After installing the shelf, you need to connect it. For connection, it is recommended to use special acoustic wiring with a cross-section of at least 1.5 mm. Thinner wires will not be able to reveal the full musical potential of the installed acoustics, especially when playing low-frequency components. As a result, we get the following product:
Option No. 2: features of manufacturing an acoustic shelf
The rear acoustic shelf in the VAZ 2107 can be made with your own hands and using another option. The second method is simpler and involves repeating the first method, but without making podium stands for the speakers. The shelf is cut out using a standard stencil and adjusted to size. Then we mark it and cut out holes for the speakers, at the same time we think through and prepare places for attaching the shelf itself to the car body. We also saw holes for the speakers in the iron body panel. It is important that they coincide with the holes in the shelf. We recommend that you carefully glue the metal panel on which the entire structure will be attached with Shumka.
When everything is prepared, you can cover the new product with the material you like and fasten it in place. For even greater lovers of good sound, you can carefully foam the resulting gap between the shelf and the metal with foam. This will make the structure even more monolithic and improve the sound of low frequencies.
Read, it may come in handy: Seats on the VAZ 2107: repair and replacement of old seats
The second option for making a shelf is more practical, since there is more free space for arranging some things. It’s up to you to decide which version of the shelf you choose for your car, just remember that you should approach the manufacture of the shelf responsibly, which will affect the final result of the sound of the music.
Along with the manufacture of the shelf, we also recommend making the door trims, installing podiums for the speakers and soundproofing the car; this will have a very positive effect on the sound quality of the music and driving pleasure.
How to install acoustics in a VAZ 2107
Acoustics in a car serve not only as a useful addition, but also as a means of self-expression. Therefore, the selection and installation of music in the car must be approached with due care.
You will need
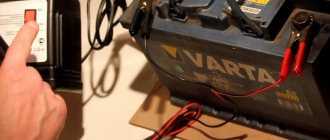
- Battery, car radio.
Instructions
Remember that the main source of power is the battery. It will also be the main culprit of trouble if the positive wire from it gets to the “minus” of the car radio or any of the speaker terminals. Power the radio from the battery or from the ignition switch. For the positive wire, it is better to use a copper wire with a sufficiently large cross-section. Try to make it as short as possible, just like the negative wire.
Lay these wires away from other consumers and without using twists. Do not connect them directly to the radio; do this after connecting the speakers. The terminals of the speakers have positive and negative terminals, which differ in thickness: the narrow terminal is “-”, and the wide terminal is “+”. Remember that incorrect phasing of the speakers will lead to loss of sound quality and failure of the devices.
Make sure that small chips do not get inside the speakers when installing them in unusual places, for example, in the doors or rear parcel shelf. To avoid damage to the device, thoroughly wipe the mounting areas before installation. When purchasing oval speakers, position them so that the short axis is directed diagonally across the cabin.
Check the connecting wires that come with the speaker. If their cross-section is approximately 0.25-0.5 square millimeters, then think about replacing such wiring. Indeed, for high-quality sound from speakers with a power of more than 40 W, it is necessary to use wires whose cross-section exceeds 1 square millimeter.
Remember that the connections should not have a large number of twists. Try to route all wires carefully throughout the cabin. Before final installation of acoustic equipment, perform a test run and check its functionality.
Nowadays, many car enthusiasts cannot imagine their car without high-quality sound and a good audio system. Many also want to have a video system in the car for viewing any electronic media. Therefore, installing equipment yourself will bring not only experience, but also save a small amount of money. However, poor installation can lead to equipment failure and even a fire in the car. Therefore, if you do not have self-confidence, it is better to entrust everything to professionals.
Instructions
Connect the radio to the battery, making sure that the “plus” of the audio system is connected to the “plus” of the battery. Wrong polarity will result in very poor sound quality. By connecting everything correctly, you will get no interference and maximum sound power. Connect the radio through the ignition switch or use the cigarette lighter. Check that the positive wire is stranded and copper - this will reduce noise in the sound. A narrow terminal is a “minus”, and a wide terminal is a “plus”. Speaker wires have a unique marking: positive wires have a “pure” color, and negative wires have the same colors, but with a black stripe. Install an additional fuse that will protect the radio from overheating. Connect it approximately 50 cm from the positive terminal of the battery. Choose a wire with good insulation and a large cross-section. It is better if the positive and negative wires are as short as possible. Connect the speakers to the car radio, observing the polarity. If there are no markings on the speakers, then use a regular battery. If the phasing is correct, the diffuser will bend outward, and if it is incorrect, it will bend inward. Check the insulation of the speaker wires. After this, connect the radio to the battery terminals and turn it on. If you don’t hear any extraneous noise or interference and you like the sound quality, then the installation was successful.
Sources:
- how to install a radio on a VAZ in 2017
While driving a car, the driver must see the current situation not only in front, but also behind the car. Therefore, side rear view mirrors play a very important role. The standard mirrors of the VAZ 2107 are not very convenient due to their small size, and even in winter they freeze tightly. But the situation can be corrected by installing new electrically heated mirrors.
You will need
- Sealant, drill, screwdriver, wires, mirrors.
Instructions
Read the instructions that come with your new mirrors. It should indicate the technical features of the mirrors. First you need to remove the old mirrors. They are usually attached to single-sided screws. Remove the protective cover, under which there are screw caps. Carefully unscrew all the bolts and remove the mirror. Try trying on the new mirror mount. It may not fit exactly in the regular place. You need to purchase a special adapter or adjust the mount to size. It is best to make a small stand between the mirror and the place on the door. It should be made of durable material, such as plastic. You need to choose plastic with added rubber so that it does not burst at subzero temperatures. Make a small drawing of the future stand. Take the dimensions from the new mirror mount. Don't forget about the holes through which the heating wire will pass. Carefully cut out the workpiece with a jigsaw. Sand all edges until completely smooth. Try on the workpiece and file off all protruding and unnecessary parts. Drill a hole for the wire. Place a rubber gasket on its edges, which will not allow the wire insulation to be damaged. Drill holes for screws. Apply sealant to both sides of the stand. This will avoid extraneous sounds when moving. Assemble the entire structure together and carefully press it together. Allow the sealant to set. Tighten all screws carefully. Put on the mirror protective cover. Carefully hide the heating wire under the casing and lead it out through the technical hole in the door. Protect the wire with a special corrugated tube. Make sure that it is not jammed when the door is closed. Connect the mirrors through the fuse to the rear window heating button. Check their functionality.
Video on the topic
Sources:
- how to change a mirror on a vaz
Self-tinting the windows of a VAZ-2107 at home takes a full day. It takes approximately 1 hour to dismantle the glass, 4-5 hours for the tinting process itself, 48 hours for drying and 2 hours for installing them back.
You will need
- — a good tint film, preferably metallized 3 m;
- — shampoo at least 200 ml;
- — rubber spatula-eraser for displacing water;
- - a very sharp knife;
- - spray bottle (can be manual).
Instructions
First remove all windows from the VAZ-2107 intended for tinting. Proceed in accordance with the operating instructions. Wash them thoroughly (you can do this before removing them), ensuring the corners are perfectly clean. Measure the glass to ensure accuracy. According to the obtained dimensions, cut the film, leaving allowances of 5 cm on each side. It is better to cut the film on a suitable piece of unusable glass.
Together with an assistant, divide the film into transparent and dark parts. In this case, an assistant must hold the film. While detaching the transparent layer, continuously moisten the dark layer with shampoo solution. Hand the dark layer of film to an assistant so that he can continuously keep it moist. Discard the transparent layer.
Apply the shampoo solution to the glass with a spray bottle from top to bottom. After this, take the film by the edges and apply it to the glass with the adhesive layer to the surface. If you use a plastic scraper, place a transparent one over the dark layer of film so that when smoothing it does not leave scratches.
Using a rubber spatula, smooth out the film, expelling water and air bubbles from the center to the edges. Start by holding the film and applying gentle pressure to the spatula. Gradually increase the pressing force, carefully expelling water and air. Do not hurry. An hour after the end of the procedure, carefully cut the film, leaving a margin of 1 cm. After another 8 hours, you can cut the film at the root.
To speed up the drying process, direct a stream of warm air onto the fresh tint. This can be done using any hair dryer. When cutting the film, hold the knife at a 30 degree angle to the surface of the film. Dry the tint for 48 hours and install the glass on the VAZ-2107. To tint the front side windows, use a film with a light transmittance of at least 85%. Apply a tinted strip to the windshield using the specified technology. The rear window is difficult to tint yourself. When starting to tint the rear window, gain some experience on the side windows.
Helpful advice
Do not use film made in China. Even if you follow all the technological nuances of pasting, it will soon begin to peel off at the corners.
Designing a speaker system yourself is quite difficult. First you need to decide on the choice of a suitable manufacturing option, and then plan how and what to make the speakers from. Decide what type of acoustics you plan to build, which speakers are best, how much you can spend on parts, etc.
Instructions
Start making your own speakers with detailed design of the cabinet. The most widespread types of acoustic design are a closed box or ZYa and a bass reflex - FI. During the manufacture of acoustic speakers, the choice of housing type is made based on the parameters of the speaker heads. Select the type that suits you and calculate the volume of the case using one of the programs that can be found on thematic resources. The most convenient and easy-to-use JBL SpeakerShop program. Set basic system parameters. The main indicators of acoustics are: power consumption of the sound signal, real sound pressure, range of reproduced frequencies, distortion coefficient, unevenness of the frequency response of the ranges. Pay attention to the development of filters (crossovers) in order to match the amplitude-frequency characteristics of dynamic heads. This is one of the most difficult and delicate moments when making an acoustic system with your own hands. When creating acoustics, you can use special programs for calculating filters, but keep in mind that the output will give a very approximate result. Therefore, be sure to do the final finishing manually. When making speakers, it is better to repeat already developed ready-made circuits. Making an acoustic system yourself is a very labor-intensive task that requires certain knowledge and skills in radio electronics and acoustics. Therefore, if you are not confident in your abilities, use the services of a specialist or friends who could supervise the acoustics manufacturing process.
Sources:
- how to make speakers yourself
Currently, stores offer a wide range of xenon for all VAZ models, starting from 2107 and up to the most modern ones. The procedure for installing xenon yourself on VAZ cars of the 2110-2112 family is not much different from installing xenon on classic models. The only differences are in the operations for removing and installing headlights.
You will need
- — xenon lamps included,
- - a set of keys,
- - drill with 23 mm drill bit,
- — 4 connectors (2 regular and 2 for thick wire).
Instructions
Disconnect the battery. To do this, simply disconnect the negative wire. Disassemble the headlights. To do this, disconnect the two electrical connectors from the headlights, use a key to unscrew the two bolts securing the upper mount of the headlights, remove the radiator cap and unscrew the bolts of the lower headlight mounts, pry up the turn signal side and remove the decorative trim. Next, unscrew the nut securing the headlight unit to the bracket and remove the headlight unit. By turning the hydraulic corrector cylinder, remove the headlight from the housing, then disconnect the direction indicators by unscrewing the two screws. Remove the old lamp. Strip the yellow (positive) and brown (negative) wires. After cutting both of these wires, attach connectors to their ends. For the brown wire, the connectors must have fastenings for thick wires; for yellow wires, connectors with regular fastenings. The fastening points of the connectors must be well insulated, the wire itself is tightly clamped in the mount. Lamps produced by OSVAR are installed without problems. To install BOSCH lamps, you need to widen the hole with a round file. Take a drill with a 23mm drill bit and drill a hole in the center of the protective cover. Pull the wires for the lamp through this hole (this is why installing the connectors was required). Install the lamp itself and secure it in the base. Connect the wire connectors without confusing positive and negative. The ignition unit is connected according to the established instructions included with the xenon. Assemble and install the headlights, connect the battery. Secure the ignition blocks inside the engine compartment using glue, self-tapping screws or clamps. Be sure to adjust the headlights.
Video on the topic
note
If the instructions are not followed and the connection is incorrect, fuses may burn out, lamps and ignition units may burn out.
Helpful advice
Information on the VAZ-Classic website will help you choose the right xenon.
Sources:
Sources:
- Mirrors of VAZ 2107 POLYTECH for VAZ 2106 with windows Part 1
- Removing and replacing side mirrors on VAZ 2104, 2105, 2107
How to install acoustics in a VAZ 2107
www.kakprosto.ru
How to connect a VAZ 2110 car radio with your own hands
Installing a radio in a VAZ
Today you can find almost any speaker head unit on the market. Different prices, different needs and finally, a car radio is purchased. Almost every one of them today is equipped with a radio receiver and is capable of reading discs of any format. And if the choice of a head unit is not a problem for many, then installing a VAZ or other car radio becomes a real problem. In our article we will look at how car radios are connected. Installation on a VAZ 2107 or another model should be easy and quick if you study everything that is presented below.
Installing a car radio on a VAZ 2107
We will begin our story with the simplest way to install a car radio. This approach is completely justified, because it is impossible to learn complex installation options right away and you need to start from the simple. Before purchasing expensive equipment, you should decide on the choice of installer. If you intend to carry out such an operation on your own, then you need to know many secrets. On the contrary, an inexpensive device is very easy to connect and there is no need to spend money on the services of a specialist. So, what does a typical speaker system consist of? Of course, the main role here is occupied by the car radio, the installation of which we will do. But don’t forget about the four standard speakers that come included. You will need to connect wires from the head unit to them.
Note. All speaker components are installed only in places designated in advance by the automaker. This is done not only for the sake of simplicity, but also to avoid short circuits.
Starting the installation process
How to connect a car radio to a VAZ 2106
First of all, you should check the wires of the power supply, each of which should have its purpose written on it. The wire can simply be painted a certain color:
- The red color of the wire will indicate a cable implying power supply of plus 12 V when the ignition is on.
- Yellow will mean constant feeding.
- The blue wire is the power going to the antenna.
- The orange wire is for controlling the backlight.
- The black wire is always negative.
Let's consider installing a head unit, which, in addition to playing CDs, is also equipped with a radio receiver:
- We study the block for connecting speakers (see How to choose speakers for a car radio on your own). It consists of 8 plugs. Each speaker has two plugs. It turns out – 4 speakers x 2 = 8.
Note. The speakers can be installed as follows: two in the front doors, two in the rear parcel shelf.
- We study the player's power supply, which consists of 5 plugs.
Note. This does not mean that it should always be this way. There are different power strips, and they can have different numbers of plugs: 5, 8, etc.
Installing an acoustic shelf on a VAZ 2107 yourself
Installing an acoustic shelf on a VAZ 2107
Installing an acoustic shelf on a VAZ 2107 is a necessity, and not just a whim, as people who are far from car audio think. Car audio is also an art in which there is no place for trifles. Improvement will require serious expenses and achieving perfection in car audio is impossible. Every time you have to make an effort to modernize the entire system. On the other hand, for most car owners who are partial to good music, it is enough to provide good, high-quality sound in the car. And in this matter, the acoustic shelf of the VAZ 2107 will help in the best possible way.