Every motorist wants his car to look unique and stand out among the gray mass of inconspicuous cars. For this purpose, various changes are made to the appearance of the car. Someone wants the color of the car to play with all the shades of the rainbow. Some people prefer different types of matte painting methods. In all this variety of methods and techniques, painting in camouflage deserves special attention. This specific solution is usually used by owners of SUVs and all-wheel drive jeeps in order to emphasize the brutality of their car.
What is this type of painting, and what pitfalls does it prepare for all those who first decided to give their car an army style. I'll try to understand this in more detail.
Types of camouflage car colors
There are many varieties of painting a car in camouflage. Camouflage, as you know, is a method of camouflage characteristic of military equipment. So, depending on various external factors, various changes were made to it to give the car greater stealth.
It is customary to distinguish at least 5 types of camouflage. Each of them is strikingly different from each other, both in the method of application and in appearance.
Camouflage happens:
- urban;
- winter;
- sandy;
- pixel;
- universal.
The first type of camouflage, as the name suggests, is used to covertly move vehicles in urban environments.
It has a number of distinctive features. Thus, it is characterized by more angular straight lines. The choice of colors is largely limited to two or three shades. Among them: blue, white, gray.
The winter variety of camouflage is characterized by gray and blue blurry spots against a white background. In some cases, the use of several chopped corners and edges is quite justified.
From an aesthetic point of view, white camouflage is not very popular. It is most often preferred by those who are not averse to hunting somewhere in the taiga forests in winter.
In addition, there is the so-called sand camouflage. Its second, no less popular, name is “desert storm”. In this type of color, pale yellow, brown and yellow shades can be traced. The method of its application has a number of nuances.
So, when applying layers, they resort to various spraying methods. Final finishing with several coats of varnish completes the operation. It is worth noting that such camouflage, in the case of its civilian use, hardly lives up to its name. It is used only for aesthetic purposes.
Anyone who likes to play games often chooses a pixel color for their car, it looks unusual and attracts the attention of others.
But the traditional type of camouflage, made in the “Khaki” style, looks much more colorful. Dusty earthy tones give the car the features of a real military vehicle, skillfully hidden from enemies.
Types of camouflage tapes
Camouflage film for cars is available in various shades and geometric patterns. A motorist who decides to independently install the tape on a car needs to know the main differences between such products.
Due to the huge difference in the purpose of the film camouflage coating, the coating pattern options intended for installation on cars driven primarily in the city are not suitable for application on SUVs that are planned to travel to wild, uninhabited places.
Among the film materials for car camouflage on the market, the following varieties can be distinguished.
Pixel camouflage
Pixel camouflage is a vinyl film, which, together with the adhesive base, has a thickness of 220 microns. The dot pattern in the form of small rectangles imitates the structure of the display matrix. This type of coloring will transform the appearance of any type of vehicle.
For a car that will be used in the city, most often, a black and white pixel skin is used.
If you need to camouflage a car with pixel film for going out into nature, then a material that has the following is more suitable for this purpose:
- green;
- brown;
- gray, tiny squares.
Using pixel film to camouflage a car allows you not only to hide it when necessary, but also to visually change its dimensions, even if the vehicle is used in urban environments.
Geometric camouflage
Vinyl film for cars, the camouflage of which is made in the form of rectangular multi-colored figures, is called geometric.
Depending on the colors used, the geometric coating can be used both for passenger cars used primarily in the city, and for SUVs for hunting or fishing trips.
For the first option, combinations of black and white rectangles would be ideal, for the second - black, gray and dark green shades.
Forest drawing
This type of camouflage is ideal for making a car invisible in the forest. A distinctive feature of forest camouflage is the very smooth transitions from one color shade to another and the finer details of the pattern.
Vinyl film with a forest pattern is used exclusively for practical purposes. If the main purpose of the car is to deliver it to a place of fishing or hunting, then you should definitely choose a forest pattern to camouflage the car body.
Winter camouflage
The type of coating is a type of geometric, but the only difference is that the color scheme of the design consists of white and dark gray tones. Used by hunters and fishermen who go outdoors in the winter season.
For urban use, the color is suitable only in northern cities, where snow cover remains on the ground most of the time.
Desert Storm
If the car will be used in the desert, then using this type of film is an excellent way to reliably hide the car against the backdrop of sand dunes.
The Desert Storm pattern features round shapes in light orange and brown colors.
Depending on the purpose, the camouflage film for the car is selected based on the primary color of the area where the vehicle will most often be used.
The price does not depend on the type of pattern and color used and starts from 300 rubles per linear meter.
How to paint a car camouflage
To correctly apply camouflage, you can be guided by a previously proven technique, which includes all the features of applying the coating. Nevertheless, this procedure opens up wide scope for the owner for imagination and the implementation of the most extraordinary creative ideas.
One way or another, the painting technology presented using the presented method has a number of features. In order for the camouflage to be carried out in accordance with all established canons and rules, certain requirements must be adhered to.
Namely:
- painting should be done in a ventilated room using personal protective equipment;
- Initially, a base layer is applied, occupying most of the body element;
- a transition is gradually made to smaller details;
- the base layer should be lighter than all the others. It is applied, as a rule, in 2-3 approaches;
- after applying it, the paint should dry;
- the next stage is applying a stencil and applying masking elements of the 2nd layer;
- you should adhere to a pre-thought-out sequence of applying stains;
- stains should not merge with the first base layer;
- the stencil, for greater fixation, should be secured with masking tape;
- it is necessary to use different variations of colors alternating with each other;
- It is best to make the boundaries of the spots blurry, smoothly blending into each other;
- when using a spray gun, to apply stains, you need to adjust the torch to the smallest spray sector;
- You should not apply a large number of spots so as not to overlap the background layer;
- When using a matte finish, in the future, to protect it, several layers of varnish can be applied to it.
In addition, to give greater specificity, leaves, branches and fragments of herbs can be used as a stencil. They are usually brought to the surface of the selected element and sprayed from a spray can. It is not necessary to apply paint over the entire surface of the leaf or stem; it is enough to outline it.
Methods of applying camouflage
With the introduction of more and more new methods of painting cars, it becomes possible to use a wide variety of methods of applying camouflage. Services of this kind are available in many services and tuning studios involved in car decoration. However, you will have to fork out a fair amount for such pleasure. It's much cheaper to do it yourself.
At the moment, there are 3 ways to apply a camouflage coating:
- stencil drawing;
- without stencil;
- with vinyl film.
Each of the presented methods is associated with a number of difficulties, especially for the uninitiated amateur.
Car painting with and without stencil
The most easily implemented of them is stencil. Even a person who is not knowledgeable in painting matters can handle it. In this case, tissue paper and newspapers were most often used in the past. These materials have both advantages and disadvantages.
Due to its thinness, a stencil made of such material can be torn, which creates a more natural, naturalistic effect. The paper, in this case, is glued to the intended part using tape, after which painting is done.
Over time, much more suitable materials appeared. For example, vinyl film.
The necessary designs are cut out on vinyl rolls, applied to the corresponding body elements, and paint is applied.
The non-stencil method is much more time-consuming and requires a lot of effort and patience from its performer. It involves applying a base layer, onto which chaotically located spots and geometric shapes are subsequently applied.
The contours of the figures are limited using masking tape. The configuration of the figures can be very different - it all depends on the imagination of the owner.
Painting a car in camouflage
Painting a car in camouflage with your own hands is the main technology. At the moment, an area that is known to many as painting a car in camouflage is becoming increasingly popular and relatively popular in the field of car tuning. Below is a detailed description of how to paint a car yourself.
Required tools and materials
To carry out such a process as painting a car in camouflage with your own hands, it is worth purchasing and preparing the following materials and tools:
- High-quality aerosol paint, which is sold in special cans and applied to the car. You need to purchase four cans of green, black and brown shades;
- You will need a special vinyl film;
- Sponge and polish;
- Varnish that creates a matte effect on cars;
- Solvent grade 469 in the amount of half a liter;
- 200 ml gasoline;
- An ordinary painting spatula, the width of which is 7 cm;
- A certain amount of clean flannel rags;
- Halogen lamp with a power of 1 thousand watts;
- A large number of old newspapers;
- Special masking tape made of paper, 5 rolls of wide and narrow.
Preparing a car for painting
The most optimal time to paint a car is the summer, since warm weather, as well as a complete lack of humidity, provide optimal conditions for carrying out a variety of painting work.
Painting your car in camouflage with your own hands can be done in the garage; it will be convenient to paint it in a clean and very spacious box. The most important thing in this case is to completely eliminate such unfavorable factors as dust deposits.
Preparation should begin with ensuring that all unpainted areas are completely sealed, only then can you paint the car. For this, old newspapers are used, which are attached to special masking tape. Glass, door frames, and optics should be completely covered. If, after carrying out all the work, it still turns out that paint is present in such places, you should carefully remove it with a solvent. After this, special degreasing of the body surface is carried out using a lint-free cloth, which is pre-moistened in gasoline.
It is not recommended to use a solvent for this purpose, since it is quite aggressive and, at the same time as cleaning the surface, can not paint, but damage the factory coating.
How to paint camouflage using paints
When carrying out a process such as painting a personal car in camouflage, it is quite convenient to use vinyl film. Naturally, the total cost of this coloring method will not change in any way, but the process will go much faster.
The work flow diagram is as follows:
- The film is cut in advance into fairly large fragments, where special holes are made, which will be future stains.
- Using a special technology, a pre-prepared vinyl sheet is glued to the car, as well as to those areas of the body that remain uncovered.
- A similar procedure is repeated with green and brown. The stencil film intended for brown spots is glued in such a way that it often covers all previously applied black spots. As for the green color, the stains are applied strictly overlapping the brown and black ones. We must not forget to ensure high-quality drying of the pigment of each color shade; only after drying can the next layer be painted.
- After the entire body is completely painted, all layers of film are removed without exception. If you are not satisfied with the clear contours, you can refine it with a tool such as an airbrush.
- The final work process is the application of varnish.
Features of applying varnish to a car body
Experts recommend applying a special varnish to the body, which has an attractive matte effect. This composition gives the surface a special velvety structure. It is worth noting that the technology of applying varnish is no different from simple varnishing.
It is worth noting that a solvent is added to the varnish before applying it, as well as a special hardener. The quantity must be strictly as indicated in the instructions. Often these parameters change from one layer to another. For example, for the lowest one, a composition that is more liquid in consistency is used, which is characterized by fluidity. The last layer will require the use of a more concentrated layer, which is thicker.
The varnish is applied to the car in approximately 2-3 layers, before directly applying each of which you need to wait some time to dry it. You can check with your hands; as soon as your fingers stop sticking, you can begin applying the next layer.
Painting - useful tips
The vehicle will look even more original if the spots are made large enough to cover various elements of the body. A special protective screen, also made from newspapers, is formed strictly along the contour of the spots. By doing this, you can avoid painting the excess area black.
It is recommended to begin the process of painting stains on a car of a different color after two or three hours, that is, after the previously applied stains have completely dried. To make the car’s camouflage as seamless as possible, the spots must be drawn overlapping. Applying each layer strictly in two layers is able to provide a rich, opaque color. This is especially true for the green color shade, it is the lightest. In the process of drawing spots, you should move strictly clockwise, with all the body pillars and, accordingly, with the roof.
Summing up
Painting a car in this “camouflage” shade is popular, since this option stands out from the crowd of a huge number of vehicles. It is very important not to overdo it here, since camouflage should not occupy more than half of the total area of the car.
How to pay TWICE LESS for GASOLINE
- Gasoline prices are rising every day, and the car's appetite is only increasing.
- You would be happy to cut costs, but is it possible to live without a car these days!?
But there is a completely simple way to reduce fuel consumption!
Don't believe me? An auto mechanic with 15 years of experience also didn’t believe it until he tried it. And now he saves 35,000 rubles a year on gasoline! Read more about this at the link. kuzovspec.ru
Car wrapping with vinyl film
A fairly common way to apply a camouflage coating to a car is to use vinyl film. This approach does not require highly professional skills and abilities. All you have to do is purchase the film at your nearest store and go ahead.
Despite the ease of the presented method, in order to obtain the desired result, it is necessary to adhere to a certain sequence of actions:
- Carry out a full car wash with water;
- do not start applying the coating until the body is completely dry;
- dismantle all third-party elements;
- degrease the body surface;
- Apply the film evenly to the selected body element.
This method has also gained enviable popularity due to the fact that vinyl film is available in a wide variety. In addition to the traditional coloring, all kinds of camouflage are offered, some of which even copy the coloring of wild animals of the African prairie.
Once an attribute of military camouflage, camouflage, due to its unusual design, began to be widely used by owners of civilian cars. It is believed that it best emphasizes the character of the owner - a strong-willed, selfless person.
One way or another, a car with such a unique surroundings will undoubtedly attract the attention of passers-by, and if necessary, it will certainly help to hide in the folds of the terrain from a potential enemy.
Owners of SUVs very often try to paint them in such a way as to blend in with the surrounding nature as much as possible. This is explained by the fact that this color looks very appropriate for hunting and fishing. In addition, in urban conditions such a car looks very stylish. Painting a UAZ in camouflage can be done by automotive service specialists. This will save you from unnecessary hassle, save time, but will require large financial costs. However, you can carry out the procedure yourself.
When applying, it is important to understand why you need camouflage coloring. This camouflage assumes that the car will operate in difficult natural and weather conditions, mainly off-road. Given such factors, it is necessary to approach this matter very carefully. Camouflage must be resistant to scratches and abrasions. The film doesn't fit. But for city use, the car can be completely or partially covered in a khaki-type film.
The vehicle must be painted in a closed area that is well ventilated. As a rule, any painting is carried out in the summer; in order to prevent dust from settling on the body of the car, you will need a garage. We drive the car into the garage, wipe the dust from the car and cover the car windows with newspapers using 4 cm wide tape. It is better to remove the car optics; if you don’t have time to tinker with them, they also need to be sealed.
Stains can be applied in two ways: painting and film. The first involves applying stains in a chaotic order through a stencil. Before work, you need to arm yourself with polish, newspapers, construction tape, and spray paint. The figures must be overlapped; new spots must “overlap” the old ones. This allows you to control the boundaries and creates a quality pattern. Particular attention should be paid to this, and care should be taken when processing key areas. If light paint is applied to dark paint, then two layers must be applied. Otherwise, the dark one will show through. It is recommended to wait a couple of hours between applying layers.
If you decide to use film, you must first cut it and decide on the image. The car is painted, then the car is wrapped. And this procedure is repeated several times. Then the film is simply peeled off and you get camouflage. The film is glued chaotically and overlapping. The optimal number of layers is three. Three layers of paint and two layers of film.
The final result will depend on how conscientiously and diligently you treat your work.
Many motorists dream of making their car unusual and more attractive in appearance. Painting in camouflage is a real way to stand out from the gray mass. This coloring is perfect for both SUVs and smaller cars, emphasizing their brutality and individuality.
It’s worth taking a closer look at the options for camouflage colors and pattern types to choose the one that’s right for you.
Traditional camouflage
This is a pattern in the classic khaki style, combining non-staining, discreet dusty earth tones with marsh and brown. Gives the car a real military look, ideal for camouflage, but poorly suited for urban conditions and everyday driving.
Geometric camouflage
This pattern is often called chopped. It provides an original design effect - “crushing” the silhouette of an object into parts. Most often, geometry is used on sports cars with a low body height. Also, a similar color is used by the US Army on fighter aircraft. Traditionally, gray, black and white colors are used to create decor, but in unusual versions you can even find pink and purple inserts.
Urban camouflage
Intended for driving in city conditions, it has a number of specific features: the predominance of gray, blue, white, the presence of angles and straight lines.
Digital or pixel camouflage
This design is incredibly stylish, rare, it resembles a combination of small squares that imitate digital pixels, which are noticeable when you magnify the monitor screen. The appearance of the car will look blurry relative to the terrain, despite the angular outlines of the decor. Color combinations can be similar in tone or contrasting - at the request of the owner.
Forest or hunting camouflage
Forest camouflage is a pattern based on dark green, beige, black spots with smooth, soft lines. It is most often chosen by hunters; it is also used to paint military equipment. A type of forest camouflage includes images of grass, vines, shrubs, and savannas.
Winter camouflage
The pattern within winter camouflage imitates nature during the cold season. The most popular colors are gray, white, blue in the form of blurry spots on a light background. Corners and edges can also be used, but in a minimal amount.
White camouflage
It is a subspecies of winter camouflage with the difference that the predominant color is white. It is usually applied by those who hunt in the taiga forest in winter, as well as for military purposes in the North.
Sand camo
Sand camouflage is also called “desert storm”. The main shades here are brown, yellow, and beige. The coloring is popular in the prairies, used by the military in the corresponding area. For application, they resort to the technique of spraying layers in different ways, and then they make the final finishing of the pattern with an airbrush.
How to paint camouflage using paints
If you have chosen the option of painting your car, you need to decide on the type of pattern. We will talk about choosing a pattern below, but for now we will touch on the technical aspects of completing the task. Painting in camouflage requires the artist to understand all stages of painting work. The body preparation must be perfect, unevenness is not allowed. The choice of paint is also quite important. During the coloring process you can use simple methods:
- applying a base layer of paint, and then shaped pasting of spots on the car body;
- painting a car in camouflage using an airbrush and artistic enamel application;
- decorative application of dark spots on top of light paint - the so-called urban camouflage;
- applying dark spots of paint with a transition to create a smooth flow of one color into another;
- the use of small strokes to camouflage a car in an autumn or spring natural landscape.
And if painting a car in camouflage is done for decorative purposes, you can use regular enamel in the middle price category. Using a car for hunting or off-road requires better surface preparation. You can watch videos in which experts talk about the requirements of the material, as well as painting methods in this case. To successfully solve the problem, it is important not just to paint the body, but to provide it with the necessary characteristics for use.
If we are talking about winter preparation of transport for hunting, you can use white colors with camouflage elements. If you take a closer look at the photos of owners of SUVs and other types of vehicles, you can see blue, red colors in camouflage and other unusual solutions. Such camouflage on a car solves specific problems or simply serves to attract attention and stand out from other representatives on the road. You can learn how to paint a car in camouflage, just watch popular videos on the topic and evaluate the work of specialists. But be careful with such training options, since many video creators tell a lot of false things, while they themselves do not know how to paint a car in camouflage. Choose a pattern that you can recreate with your own hands without the help of specialists.
For domestic cars, painting is often used, since this involves repairing the body and protecting it from corrosion. Film solutions also provide good protection, but eliminate the need to wash away old paint, strip everything down to the metal, and apply additional protection. Painting a Niva in camouflage with your own hands can be either very successful or ridiculous. Look at pictures of other people's work to get an idea of what we're talking about.
Painting must be professional or done by skilled hands. And if you can paint a metallic car only in the camera, then camouflage shades can be applied even on the street. Here the dust is not so much scary as the wrong choice of design. So before painting, it is important to think about the proper preparation of all factors. Then you can complete all tasks efficiently.
If you use the car's factory paintwork as a base surface for camouflage, to create camouflage on your car you will need 4-5 cans of aerosol paint in different shades.
Also make sure you have the following materials:
- Masking tape and newspapers (you will need a lot of paper);
- Solvent (registered compositions or white spirit);
- Flannel rags;
- Painting spatula;
- Sandpaper (P600, P1000).
- Petrol.
Camouflage color is not cheap.
Paint the car in a well-ventilated area, having previously carried out a wet cleaning in it. The first stage is gluing the glass (along with sealing rubber bands) and external optics with newspapers; for this, paper tape 3-4 cm wide and newspapers are used.
Next, the surface of the body is degreased with gasoline. We do not recommend using a solvent, since the aggressive composition can corrode the factory paintwork.
The process consists of several stages - spots of the first shade are applied, then the paint is allowed to dry and the next part of the spots is camouflaged. Start by applying dark paint first.
Determine the locations of the stains and their sizes, and stick masking tape around the perimeter of the selected area. Do not allow kinks on the inner contour of the tape, because when painting, the paint will penetrate under the unevenness and the stain will turn out uneven. Camouflage elements appearing on different surfaces of the body look advantageous.
Fix the paper over the pasted masking tape with a second layer of tape so that it completely covers the adjacent space of the body.
Upon completion of gluing, the prepared areas are painted. Working with a spray can, hold the spray nozzle at a distance of 20-25 cm from the body and apply a layer of paint of uniform thickness using diagonal movements (in order for the color to gain depth, you will need to cover the stain 2-3 times, wait 20-30 minutes between applications).
After the spots of the first color have completely dried (pause according to the paint manufacturer’s recommendations), the preparation of the next layer of camouflage begins. The technology for forming the contours of the second and third layers is identical to the process we have already discussed, the main thing is that all subsequent spots should extend into the space of the already applied color.
To camouflage a car using the “stencil” method, you will need 3-4 m of thick paper.
This method is based on budget painting. But the resulting effect is not inferior to the full repainting technology. Spotted shapes are applied in a chaotic manner to the surface through a stencil or using tape onto the existing coating of the car. Factory representatives offer many colors, including VAZ and UAZ.
Read more: Flushing the engine when changing the oil: is it necessary to flush before changing the lubricant and why, how to do it correctly and what is the best way to flush
VAZ has more samples, but UAZ uses camouflage more often. The Ulyanovsk SUV is very convenient for painting in camouflage. Its strict, semi-military factory colors make the task easier and simpler. Example: dirt spots on a sandy background are excellent camouflage. But the work itself requires sterile conditions. The procedure should be carried out in a clean garage, with excellent natural light and at a comfortable air temperature. Before work you need to stock up on materials:
- Polish.
- Old, unnecessary paper (newspapers).
- Adhesive tape for construction (lots of different widths).
- Paint in cans (it is not advisable to use a spray gun and a compressor).
At each next stage, the master considers the location of the spots and determines their shape using newspapers or papers. Using narrow tape, the outlines of the spots are drawn, and sheets are attached with wide tape. Even incomplete painting of a car leads to the consumption of a large amount of paint. Scotch tape will be necessary to protect seals and car windows.
The stencil for camouflage is placed in the desired shape, but the shapes must be overlapped, new spots must “overlap” the old ones. This allows you to control the boundaries and creates a quality pattern. Particular attention should be paid to this, and care should be taken when processing key areas.
When carrying out a process such as painting a personal car in camouflage, it is quite convenient to use vinyl film. Naturally, the total cost of this coloring method will not change in any way, but the process will go much faster.
The work flow diagram is as follows:
- The film is cut in advance into fairly large fragments, where special holes are made, which will be future stains.
- Using a special technology, a pre-prepared vinyl sheet is glued to the car, as well as to those areas of the body that remain uncovered.
- A similar procedure is repeated with green and brown. The stencil film intended for brown spots is glued in such a way that it often covers all previously applied black spots. As for the green color, the stains are applied strictly overlapping the brown and black ones. We must not forget to ensure high-quality drying of the pigment of each color shade; only after drying can the next layer be painted.
- After the entire body is completely painted, all layers of film are removed without exception. If you are not satisfied with the clear contours, you can refine it with a tool such as an airbrush.
- The final work process is the application of varnish.
Camouflage colors
There are seven basic colors offered by different camouflage paint manufacturers. This:
- black;
- brown;
- light green;
- olive;
- sand;
- khaki;
- grey.
In addition to standard tones, brighter colors are also used in the camouflage technique: white, blue and even pink, although they are intended only to add style to the car, but not to camouflage it. Typically, three colors from the list are selected to paint one car, although there may be more if desired by the owner. Masters also use other shades to give the drawing originality:
- light gray dust;
- beige;
- yellow-olive;
- brown skin;
- bronze green;
- anthracite;
- gray-olive;
- bitumen black;
- dark grey;
- bright gray etc.
Stencils for camouflage
How to paint a car camouflage with your own hands? For this purpose, the easiest way is to use special stencils. No less often, blanks are used in specialized services and tuning studios, although the price of professional painting in camouflage will be quite high. You can find a variety of stencils on the Internet, print and cut them out:
- blurry spots;
- outlines of animals;
- grass;
- branches;
- net;
- cells;
- "blots";
- leaves;
- stripes;
- geometry, etc.
It is better to print several identical stencils so as not to transfer them, but to immediately cover a large surface area. You can also create a drawing yourself, then cut it out and apply it in the same way. In addition to paper, for this technique of painting a car, you can take a transparent film, which is used by airbrush masters. It is a little sticky, so it is very convenient to work with. The required shapes are cut out of the film, glued to the base, and after the paint and varnish material has been applied and dried, they are removed.
Painting a car in camouflage with your own hands - stages and tasks
If you have chosen the option of painting your car, you need to decide on the type of pattern. We will talk about choosing a pattern below, but for now we will touch on the technical aspects of completing the task. Painting in camouflage requires the artist to understand all stages of painting work. The body preparation must be perfect, unevenness is not allowed. The choice of paint is also quite important. During the coloring process you can use simple methods:
- applying a base layer of paint, and then shaped pasting of spots on the car body;
- painting a car in camouflage using an airbrush and artistic enamel application;
- decorative application of dark spots on top of light paint - the so-called urban camouflage;
- applying dark spots of paint with a transition to create a smooth flow of one color into another;
- the use of small strokes to camouflage a car in an autumn or spring natural landscape.
And if painting a car in camouflage is done for decorative purposes, you can use regular enamel in the middle price category. Using a car for hunting or off-road requires better surface preparation. You can watch videos in which experts talk about the requirements of the material, as well as painting methods in this case. To successfully solve the problem, it is important not just to paint the body, but to provide it with the necessary characteristics for use.
Choosing a good camouflage color and type for the car
If we are talking about winter preparation of transport for hunting, you can use white colors with camouflage elements. If you take a closer look at the photos of owners of SUVs and other types of vehicles, you can see blue, red colors in camouflage and other unusual solutions. Such camouflage on a car solves specific problems or simply serves to attract attention and stand out from other representatives on the road.
You can learn how to paint a car camouflage, just watch popular videos on the topic and evaluate the work of specialists. But be careful with such training options, since many video creators tell a lot of false things, while they themselves do not know how to paint a car in camouflage. Choose a pattern that you can recreate with your own hands without the help of specialists.
Choice of colors for camouflage
It is most convenient to use paints in cans, produced by many companies specializing in auto enamels. There are even special series of camouflage colors from which you can choose the right ones. Most paints have a matte finish when dry, although glossy options are also easy to find. The most popular paintwork materials for camouflage painting are described below.
Paint Motip Enamel camouflage
The Motip Camouflage aerosol line is sold in 400 ml cans and includes specially designed colors to create a “military” look on any surface. The paint helps to camouflage a car for hunting and fishing; it is also suitable for hunting equipment and accessories that a person carries in the forest. The finished coating is resistant to gasoline, other chemicals and atmospheric factors.
Painting "Raptor" in camouflage
Painting with "Raptor" - a high-quality polyurethane paint - is widely used among lovers of off-road driving. This material provides reliable protection of the body from salts, aggressive chemicals, mechanical stress, temperature changes, and UV radiation. The “military” coloring gives the equipment a memorable, but at the same time camouflaging design. The coating will adhere remarkably well to plastic, bumpers, mirrors, radiator grilles, and will prevent water and dirt from getting into the gaps between plastic and metal parts.
Gun paint KRYLON Camouflage
Krylon Camouflage is a matte anti-reflective paint designed to simulate protective and camouflage finishes. It is intended for creating coatings on cars, sports, hunting or fishing equipment and inventory. All shades of this harmoniously selected range are close to nature and therefore guarantee perfect camouflage.
The paint has excellent adhesion to plastic and metal even without prior priming. The finished coating will be resistant to water, durable, and can withstand mechanical loads well. The paintwork dries in just 15 minutes, which is very convenient for use outside a car repair shop. A second coat can be applied after a day. Final polymerization occurs after 7 days.
Preparation of paint, materials and surface
Typically, a camouflage pattern is applied to the factory body coating, which will serve as a base. Paint consumption is 5-6 cylinders for a medium-sized car. In addition to paint, you need to prepare the following tools and consumables:
It is best to paint a car in a well-ventilated garage or outside, and then only on a clear sunny day. As preparation, cover with newspapers and seal with masking tape all elements that cannot be painted - glass, handles, rubber seals, headlights. Afterwards, the surface of the car is degreased using solvents, after making sure that they are safe for existing paint (it is better to use regular alcohol or gasoline).
Applying paint
Stencil painting is the easiest way to apply camouflage, although in this case all the spots and patterns will be exactly the same. There is an option to use different stencils, although this method will increase the time spent on painting. The procedure for painting a car is as follows:
- stick the stencil on the surface of the car;
- apply aerosol paint, placing it 20 cm from the body (movements should be smooth and have a diagonal direction);
- wait until the paint dries;
- remove the stencil, repeat all manipulations in the following areas.
Masters advise applying dark spots first, which will serve as a basis for lighter ones. When applying a stencil, it is important to avoid creases and damage to the paper - in this case, the paint will end up under the workpiece, and the design will look untidy. The decor looks original, in which large spots extend from one part of the body to another.
Drawing with a stencil
You can also draw camouflage on a car using a stencil. We will need all the materials listed in the previous section. But in addition, you need to stock up on special vinyl films or thick cardboard - they will be needed to make the stencil.
Preparing the machine for work and the principle of applying enamel are no different from those described in the previous section. But we do not form the spots with tape and newspapers, but use a stencil. We glue vinyl films or cardboard with spots cut out onto the body, and then apply paint, color by color.
The disadvantage of this method is that the spots are the same. And in order for the design to look stylish, it is desirable that they be of different shapes and sizes. You can, of course, make many different stencils, but this is quite labor-intensive.
Painting a car in camouflage
Method of painting camouflage without a stencil
This method is more difficult; it requires skill and patience from the performer. First, choose a pattern and color scheme. After preparing the machine, painting is carried out as follows:
- Using narrow construction tape, large spots are formed on the surface of the body, making sure that the strips lie without creases;
- cover the spots with newspapers, giving the lines smoothness, and also glue them with tape;
- apply the darkest color from the can and let the paint dry;
- remove tape and newspapers, form spots to match the second color (they should overlap the first);
- apply paint in the same way;
- repeat the work a third time, applying the lightest shade.
After painting, the body is varnished. To do this, car varnish is combined with a solvent and the body is sprayed in several layers.
After the varnish has dried, you can begin operating the car, making full use of the masterpiece you created with your own hands.
Today, such a direction as painting a car in camouflage is becoming increasingly popular in the field of car tuning. In this article, using a UAZ as an example, we will show how you can “disguise” a car with your own hands.
Painting methods
To camouflage a car using the “stencil” method, you will need 3-4 m of thick paper, masking tape and scissors. This method is easier to implement and requires less time, but as a result you lose the ability to separately set the size and shape of each spot.
Here you will need to cut the paper into square sections 20-30 cm larger than the space of the spots you have chosen (additional sections of paper overlap adjacent areas of the body and prevent paint from getting on them).
A spot of the required configuration is cut out inside the paper, the number of blanks is 5-6 pieces (with different shapes), after which the stencil is glued with masking tape to the car body. Glue carefully so that the workpiece does not move during the painting process.
The painting technology is identical to working with contour spots - each spot is painted in 2-3 layers, subsequent shades of camouflage are applied after the previous color has completely dried, spots of different colors are joined together.
Urban camouflage on a car looks advantageous when the body is opened with matte varnish. The surface is varnished 2-3 days after painting; downtime is required for the painted coating to fully set.
To apply varnish, a spray gun with a compressor is used (opening a large surface of the body with varnish from an aerosol can gives an unsatisfactory result in terms of quality). The cost of daily rental of a spray gun varies between 400-600 rubles; it is irrational to buy this equipment for one-time use.
Before varnishing, prepare the composition - add hardener and solvent to the varnish in the proportions recommended by the manufacturer. The varnish is applied to the car body in 2-3 layers, between which there is a pause necessary for the coating to set “tack-free” (20-30 minutes).
Painting an expensive car in camouflage is best left to professionals
Spraying the varnish is carried out at a spray pressure of 2-2.5 bar in overlapping horizontal stripes, the nozzle of the gun is held at a distance of 20-30 cm from the surface of the body.
If the above technology for camouflaging a car by painting seems difficult to implement, but you still want to decorate the car with camouflage, it makes sense to cover the body with film. For this service, you will need to contact a car dealership (it is impossible to stick the film well at home), however, the cost of film camouflage is significantly lower (price is around 8-12 thousand, including materials) than painting (in showrooms - 20-25 thousand).
Camouflage film for cars is available in a wide range - from desert and forest, to digital and bright chemical patterns. Among the advantages of such a coating are the possibility of dismantling, protection of the body from mechanical damage during urban use, and an expressive appearance.
Vinyl film for cars requires careful selection - the market is filled with low-quality Chinese products, the deplorable durability and wear resistance of which are not justified even by the minimum price of the material.
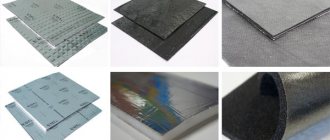
The performance qualities of vinyl materials are influenced by their manufacturing technology, according to which there are two types of films:
- Cast vinyl film - made from a liquid polyvinyl chloride mixture through the process of evaporation of the solvent added to it;
- Calendered film for cars is a material obtained by pressing plastic PVC paste through a block of calenders (press rollers).
Cast films are characterized by high elasticity, mechanical strength and wear resistance. Calendered products, on the contrary, are prone to shrinkage and wrinkles during use. Their only advantage is their low price.
When decorating your car body with camouflage film, do not skimp on the quality of the material and the services of the craftsman, and the coating will fully meet your expectations.
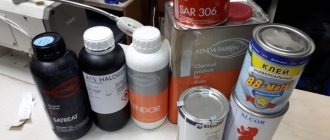
Required materials and tools
- aerosol paint in cans (4 cans of pigment each in black, brown and green), as well as vinyl film (depending on how the camouflage pattern will be applied to the car);
- varnish with a matte effect;
- polish with sponge;
- solvent No. 469 (0.5 liters);
- gasoline (200 ml);
- special painting spatula (width 7 cm);
- clean flannel rags;
- 1 thousand watt halogen lamp;
- as many old newspapers as possible;
- paper masking tape (wide and narrow - 5 rolls each).
Draw without a stencil
To paint camouflage without a stencil, you will need the following equipment:
- a large number of unnecessary newspapers;
- masking tape - narrow and wide, five rolls of each;
- dry, clean flannel rags;
- 0.2 liters of gasoline;
- half a liter of solvent;
- auto varnish with matte or glossy effect;
- kilowatt halogen lamp;
- construction spatula 70 mm wide;
- auto enamel in spray cans - 4 cans for each color of the design.
To begin, we select a drawing. We sift through a mountain of relevant sites on the Internet, leaf through catalogs in stores with military literature, consult with friends, turn our heads 360 degrees on the streets, looking for something suitable on other cars. Having decided on the design, we choose each color for it - you can use any range you want. Or you leave everything as in the found original.
Next, we prepare the room. To work, you will need a well-lit garage with effective ventilation. No dirt or dust is allowed - it will settle on the freshly painted surface, nullifying all your efforts.
Now let's prepare the car. This process consists of the following steps:
- Thoroughly wash the car, remove all dust and any types of contaminants.
- Drying the car dry.
- Removing headlights to protect them from paint splashes. If you don't want to mess with it, you can cover them with newspapers and masking tape. You should also seal the windows and door frames. Be sure to cover all rubber gaskets - paint should not get there.
- Degreasing the car body. It is wiped with a lint-free cloth soaked in gasoline. If swelling of the old paint coating occurs, it needs to be heated with a lamp and the unnecessary peeled off with a spatula.
Preparing the car for painting
Now the car is ready for further work - we can start drawing. The step-by-step process is as follows:
- Using narrow masking tape, we form spots on the car. We try to make them large, capture several elements of the body, and make sure that the tape lays down without creases. Each crease is a thin colored scratch in the drawing.
- We cover all the spots with newspapers, forming smooth lines. We fix them with wide tape.
- Using an aerosol can, apply the darkest color.
- We wait until the paint dries, after which we apply the second layer.
- After the paint has dried, remove the tape and newspapers, and then begin to form spots for the second color. They should overlap the first paint. We also cover the narrow tape with newspapers and secure with wide tape.
- Apply the second color, wait for the paint to dry and apply the second layer.
- Thus, we apply spots of different colors. The darkest color always comes first. The last one is the lightest one. We carefully ensure that each layer is applied only after the previous one has dried.
- We remove the newspapers and remove paint particles with a solvent from those places where it got accidentally.
- We varnish the body. Mix the autovarnish with the fixative and solvent according to the instructions. We cover the body with it in several layers. Apply each next layer only after the previous one has dried.
We prepare the car for painting with our own hands
The best time to paint a car is summer, because warm weather and lack of humidity are the most optimal conditions for painting work. It is recommended to carry out it in a garage or a clean, spacious box. The main thing is to completely eliminate such a negative factor as dust, both in the air and on the surface, otherwise the camouflage pattern may not be as attractive as we would like.
Cover unpainted surfaces with newspaper. Click on photo to enlarge.
We begin preparing the car by covering all unpainted areas with old newspapers. We attach them with wide masking tape. We completely cover the optics, glass, door frames and rubber seals. If, after completing all the work, it turns out that the paint has got onto one of these parts, carefully treat the stained area with a solvent.
Then, we degrease the surface of the car with a lint-free cloth soaked in gasoline. It is not recommended to use a solvent for these purposes, as it is too aggressive and can not only clean the surface, but also damage the factory paintwork.
If you try to paint such an area with spray paint, the coating may become “fur coated”. If this does happen, take a halogen lamp in your hands, heat the surface, and then completely remove the paint with a spatula. If this is not done, when the paint is reapplied, the “fur coat” may appear again.
“Disguise” the car with paints
You can answer the question of how to use a “camouflage” color in different ways. Camouflage on the car body is drawn manually or using a stencil. The first method is, of course, preferable, because then the camouflage will look more natural. On the other hand, using a stencil will help save time. Let's take a closer look at creating a drawing with your own hands.
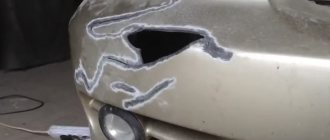
The first paint color we have to work with is black. We will create the contours of the spots using narrow masking tape 2 cm wide. It fits well and allows you to create smoother lines on the body. In addition, paper masking tape can be easily removed from the body without damaging the paintwork. You should pay special attention to ensure that the tape fits tightly to the surface, without forming folds or creases in which paint can accumulate, otherwise the outline may not turn out very neat.
The car will look more original if the spots are made large, covering various elements of the body. A protective “screen” of newspapers is formed along the contour of the spots. He will not allow us to paint unnecessary areas black. After this, apply black spray paint to all the spots. You can start painting spots of a different color only after 3 hours, when the black spots are completely dry. Next we have to paint some areas on the car body brown and then green. We draw the spots in the same way as before.
It is important that they overlap: this is the only way to make the camouflage seamless. We apply each paint color in two layers to ensure a deep, opaque color. This is especially true for green color, since it is the lightest. When drawing spots, we move from the starboard side clockwise, not forgetting about the roof and body pillars.
View of the car after painting. Click on photo to enlarge.
When the camouflage painting is completed and the pigment of all three colors has completely dried, we remove all the newspapers and tape and proceed to varnishing the car.
We suggest applying a varnish with a matte effect to the body. Today, matte “soft touch” varnishes are very popular, which give the coating a velvety texture. The technique for working with such compositions is no different from conventional varnishing:
Immediately before application, a solvent and hardener are added to the varnish in the proportions indicated on the packaging. Often these parameters change from layer to layer: for the bottom one - a more liquid and fluid composition, for the finishing one - thicker and more concentrated.
However, if you do not have much experience in this area, it is better to strictly follow the manufacturer's instructions.
The varnish is applied in 2 - 3 layers and be sure to leave each one for some time to dry. If, when you touch the coating, your fingers still stick, but no longer smear the varnish, you can begin applying the next layer.
Painting with film
For many vehicle owners, painting body parts is simply not possible. There is no place, skills, tools or other factors for this. But car wrapping does not require special preparation and can be done even outside in the warm season. In this case, you can choose the most sophisticated camouflage of the car, the color can be matte or glossy, and the most unexpected and suitable pattern is available. There are a number of advantages to finishing a car with film:
- high-quality film does not fade over time, does not wrinkle and perfectly protects the body;
- the surface of the material is protected from cuts and scratches, which guarantees long-term operation;
- if necessary, you can dismantle it in a few minutes and return the car to its original appearance;
- no need to worry about how to paint a car in camouflage, or overpay for the services of craftsmen;
- Preparation takes a minimum of time and consists of thoroughly washing the body and drying it.
With such a film, camouflage will always be fresh, matching the style and features of the pattern. But film also has its drawbacks. It may look artificial and is often unacceptable for functional use. If the question is about decoratively changing the appearance of the car, then you will not find a better option. In the end, you can remove the film material at any time, which will definitely not work with the paint layer.
This method is not cheaper, but the quality of the drawing will be higher, and the work will be done much faster. The film cannot be used as a base layer. But in the future, this layer can be reused. Vinyl film is required to remove paint after applying layers of camouflage. The most profitable option is a Chinese manufacturer!
Read more: Why doesn’t the starter turn? Signs and causes of a malfunction when the starter does not want to turn the engine
The film is pre-cut and determined with the image. The technology itself is easy to apply with your own hands. The car is painted, then the car is wrapped. And this procedure is repeated several times. Then the film is simply torn off and you get camouflage. The film is glued chaotically and overlapping. The optimal number of layers is three. Three layers of paint and two layers of film. Small adjustments with an airbrush are possible if you are not satisfied with the hard edges that the film leaves.
Create camouflage on a car using vinyl film
When painting a car camouflage, it is very convenient to use vinyl film. Of course, this will not change the total cost of painting, but the process will go much faster. The general scheme for working with vinyl film is as follows:
- the film is cut in advance into large pieces, in which holes are made - these will be our spots.
- the prepared vinyl sheet is glued to the car, and those areas of the body that remain open are spray-painted black.
- We repeat the same procedure with brown and green. We glue the stencil film for brown spots so that it partially overlaps the black spots, and in the case of green, so that the spots overlap on the black and brown ones. Don't forget to thoroughly dry the pigment of each color!
- When the entire body of the car is painted, all layers of film are removed. If you are not satisfied with the clear contours of the spots, you can refine them with an airbrush.
Note to car owners
Painting a car in a “camouflage” color is original; it will definitely be noticeable from afar. However, it is important not to overdo it: camouflage should occupy no more than 50% of the total area of the car body, otherwise you risk being fined by the traffic police.
Camouflage-style paintwork decorates many cars today. These types of colors are becoming increasingly popular and are no longer associated exclusively with military or hunters.
It is impossible to carry out painting in a factory; usually only a single-color paint coating is applied there, so many car owners arm themselves with the necessary shades of paint and try to do the painting work themselves.
Painting in camouflage can be done in different ways, so before starting work and purchasing paints and varnishes, you need to carefully familiarize yourself with them and select the appropriate color.
To apply camouflage to a car you need to have good imagination and design skills
. In order for the design to look organic, you must adhere to the rule of the golden ratio and distribute the spots evenly over the body of the vehicle. There are the following painting options:
- Forest camouflage.
- Desert (shades of sand or brown; camouflage on cars of this type has small and abstract spots).
- Winter version (the pattern has a white-gray-black color scheme and the spots on the body are larger in size).
- Hunting or military (all spots are large, seem to merge into each other and at the same time have blurred edges).
Recently, digital camouflage has become more and more relevant - the spots in this case have clear edges in the form of huge pixels. Typically this design is used to decorate racing and sports cars.
Camouflage on cars: how to avoid mistakes?
The maximum effect from painting a car in the “camouflage” style can be achieved only with the correct selection of the intensity and scale of all the details of the design, the nature of which should be determined depending on the characteristics of a particular car. Don't expect to find a ready-made "universal" stencil. It is not there because only independent design of a camouflage ornament can correctly emphasize the character of the car and its owner. However, this does not mean that in this area there is no set of rules and “laws” that every designer should follow.
Here they are:
- It is mandatory to use color schemes containing shades of green, sand or brown. Otherwise, the basic concept of the idea will be violated, and the car will lose its warlike appearance.
- The size and contour of each spot is set manually, taking into account the characteristics of those parts of the car where they will be applied. In addition, the effectiveness of the machine will increase many times if all the spots are unique (and not made as a carbon copy);
- It is necessary to harmoniously distribute the stains throughout the car body so that large ones alternate with small ones and do not create a feeling of “overload.” In addition to size, the color of the spots should also vary to achieve balance in the entire composition.
Painting a car in camouflage
Despite the fashion, most often hunters or military personnel paint their vehicles in this color. Painting a UAZ camouflage with your own hands can be done with minimal time and labor costs, since such cars often have a khaki or grayish tint. Therefore, you do not need to carefully select shades to complete the work.
To carry out the work, you must purchase the following materials and tools in advance:
- Newspapers and magazines to protect unpainted surfaces.
- Painting tape of different widths in rolls.
- Aerosol paint of the desired shade in cans.
- Spray gun (if the work will not be done manually).
- Solvent.
- Clean cloth.
- Primer and putty (if it is necessary to eliminate some defects on the body).
- Degreaser.
- Varnish and polish for finishing.
It is recommended to apply camouflage to a car in a specially equipped room with a good ventilation system. This will not only avoid defects in the newly applied paintwork, but will also be helpful in ensuring that the applied layers of paint dry as quickly as possible.
It is imperative to work in a protective suit and a respirator, since the fumes from paints and varnishes are very toxic. It is also advisable to equip the room with good halogen lamps that provide glare-free lighting. This allows you to better inspect the surface of the vehicle and apply paint.
The car must be thoroughly washed and dried, and the interior must be covered with film so that no paint gets inside during the work. It is also necessary to protect the glass and optics of the vehicle with newspapers or old magazines and masking tape (if possible, it is better to remove the headlights altogether).
If the car does not have any chips or uneven surfaces, you can immediately treat it with a degreaser and begin applying camouflage. If paint swelling or rust is detected, these places need to be cleaned down to metal, treated with putty, sanded thoroughly and coated with a primer.
Painting - useful tips
The vehicle will look even more original if the spots are made large enough to cover various elements of the body. A special protective screen, also made from newspapers, is formed strictly along the contour of the spots. By doing this, you can avoid painting the excess area black.
It is recommended to begin the process of painting stains on a car of a different color after two or three hours, that is, after the previously applied stains have completely dried. To make the car’s camouflage as seamless as possible, the spots must be drawn overlapping. Applying each layer strictly in two layers is able to provide a rich, opaque color. This is especially true for the green color shade, it is the lightest. In the process of drawing spots, you should move strictly clockwise, with all the body pillars and, accordingly, with the roof.
DIY car camouflage
There are three ways to paint a car:
- Drawing drawings of leaves, reeds and various grasses (a plotter is used for this work). This type is considered the most expensive because it is very difficult to depict.
- Camouflage with blurred edges of spots.
- Camouflage with clear contours of spots.
How to paint it camouflage? All work, regardless of what color and type of pattern needs to be applied, begins the same way - the vehicle is carefully prepared and washed from dirt. Before starting work, you must choose the shade of paint that will be used to paint the top layers.
Here everything depends solely on the imagination and wishes of the owner. You need to prepare specially cut newspapers or self-adhesive film if it is necessary for the pattern on the body to have clear boundaries. After treatment with a degreaser, you need to wait for the car to dry completely in a chaotic manner and, in accordance with your imagination, the film is applied to the body.
You need to make sure that the pieces fit on all parts of the body and do not form kinks. If you do not follow this rule, the paint may lie unevenly in broken areas, and the entire vehicle body will look inorganic after painting. Then a layer of the chosen paint is applied (it is better to start with dark shades).
Painting a car in camouflage is a long process and cannot be rushed. You need to wait until the paint layer is completely dry and only after that the car is covered with film again so that the spots slightly overlap each other. Now you can apply a light shade of paint.
When all the colors have been applied and dry, you can remove all the film. To avoid damaging the edges of the stains, the surface must first be slightly warmed up using a halogen lamp. This way the tape will come off on its own and will not damage the paintwork.
If you want to improve the camouflage a little, you can soften its contours using a black shadow edging. To make car camouflage look more advantageous, some car owners cover the surface with a layer of varnish.
But most people prefer to leave the car as is; the matte finish gives it an unusual appearance (in this case, for additional protection of the paintwork, it is recommended to apply a layer of varnish with a matte effect to the vehicle).
Painting with film
The vehicle will look even more original if the spots are made large enough to cover various elements of the body. A special protective screen, also made from newspapers, is formed strictly along the contour of the spots. By doing this, you can avoid painting the excess area black.
It is recommended to begin the process of painting stains on a car of a different color after two or three hours, that is, after the previously applied stains have completely dried. To make the car’s camouflage as seamless as possible, the spots must be drawn overlapping. Applying each layer strictly in two layers is able to provide a rich, opaque color.
Painting a car with a camouflage pattern came to the world of civilian cars from the military sphere. This coloring, among owners of personal vehicles, is functionally in demand only by hunters for whom it is important to camouflage their car in the forest. In all other cases, camouflage plays a purely decorative role.
The area of operation of the vehicle determines the means by which a camouflage pattern is created on the car body. Based on the coating application method, two types of surfaces are distinguished:
- Paint surfaces, a characteristic pattern on them is formed by combining spots of paints of different colors;
- Film surfaces - the body is covered with vinyl film with a pre-selected pattern.
Camouflage film on a car is a material with low wear resistance; it performs certain protective functions - it prevents scratches and chips from appearing on the covered body, however, such a coating will not survive constant use in conditions of high humidity, dirt and destructive mechanical influences to which those used for hunting and fishing are exposed. cars.
Camouflage film is recommended for decorating city cars - this way you will save time (painting a car takes much longer) and, if necessary, you can remove the coating and return to the original body color.
It makes sense to apply camouflage color on SUVs by painting and then opening the applied pattern with 2-3 layers of varnish, which protects the paint on the body from scratches and the negative effects of the atmospheric environment.
Khaki paint is made by hand by mixing several colors
The options for painting a car in military style are varied. Let's look at the most current types of camouflage:
- Forest pattern - consists of a combination of large spots of beige and black, applied over a swamp green base color. This pattern is found everywhere on domestic military vehicles;
- Desert camouflage - a combination of small white, light brown and burgundy spots. American Army Basic Drawing;
- Winter camouflage is a pattern that imitates the surroundings of a winter forest. Medium-sized spots of gray, white and black are combined.
- Marine pattern is a type of winter pattern, the characteristic colors are light blue, dark blue and gray;
- Digital camouflage is a pattern consisting of small pixel mosaics (spots with angular square contours), shades of gray, black, khaki.
We’ll put “chemical” auto-camouflage into a separate group, which has no military origins. The emphasis in this design is on the visual highlighting of the car, which is achieved through the use of expressive bright colors.
To camouflage a car using the “stencil” method, you will need 3-4 m of thick paper, masking tape and scissors. This method is easier to implement and requires less time, but as a result you lose the ability to separately set the size and shape of each spot.
Here you will need to cut the paper into square sections 20-30 cm larger than the space of the spots you have chosen (additional sections of paper overlap adjacent areas of the body and prevent paint from getting on them).
A spot of the required configuration is cut out inside the paper, the number of blanks is 5-6 pieces (with different shapes), after which the stencil is glued with masking tape to the car body. Glue carefully so that the workpiece does not move during the painting process.
The painting technology is identical to working with contour spots - each spot is painted in 2-3 layers, subsequent shades of camouflage are applied after the previous color has completely dried, spots of different colors are joined together.
Urban camouflage on a car looks advantageous when the body is opened with matte varnish. The surface is varnished 2-3 days after painting; downtime is required for the painted coating to fully set.
Read more: What is xenon and which one shines better: selection criteria (color and shades, glow temperature) and types
To apply varnish, a spray gun with a compressor is used (opening a large surface of the body with varnish from an aerosol can gives an unsatisfactory result in terms of quality). The cost of daily rental of a spray gun varies between 400-600 rubles; it is irrational to buy this equipment for one-time use.
Before varnishing, prepare the composition - add hardener and solvent to the varnish in the proportions recommended by the manufacturer. The varnish is applied to the car body in 2-3 layers, between which there is a pause necessary for the coating to set “tack-free” (20-30 minutes).
Painting an expensive car in camouflage is best left to professionals
Spraying the varnish is carried out at a spray pressure of 2-2.5 bar in overlapping horizontal stripes, the nozzle of the gun is held at a distance of 20-30 cm from the surface of the body.
If the above technology for camouflaging a car by painting seems difficult to implement, but you still want to decorate the car with camouflage, it makes sense to cover the body with film. For this service, you will need to contact a car dealership (it is impossible to stick the film well at home), however, the cost of film camouflage is significantly lower (price is around 8-12 thousand, including materials) than painting (in showrooms - 20-25 thousand).
Camouflage film for cars is available in a wide range - from desert and forest, to digital and bright chemical patterns. Among the advantages of such a coating are the possibility of dismantling, protection of the body from mechanical damage during urban use, and an expressive appearance.
Vinyl film for cars requires careful selection - the market is filled with low-quality Chinese products, the deplorable durability and wear resistance of which are not justified even by the minimum price of the material.
The performance qualities of vinyl materials are influenced by their manufacturing technology, according to which there are two types of films:
- Cast vinyl film - made from a liquid polyvinyl chloride mixture through the process of evaporation of the solvent added to it;
- Calendered film for cars is a material obtained by pressing plastic PVC paste through a block of calenders (press rollers).
Cast films are characterized by high elasticity, mechanical strength and wear resistance. Calendered products, on the contrary, are prone to shrinkage and wrinkles during use. Their only advantage is their low price.
WATCH VIDEO INSTRUCTIONS
When decorating your car body with camouflage film, do not skimp on the quality of the material and the services of the craftsman, and the coating will fully meet your expectations.