Heating equipment is always designed for a certain pressure and pressure in the system. Gas boilers are no exception to this rule. Expansion tanks for gas boilers help them maintain the stability of their parameters.
Peculiarities
The question of how these tanks should normally operate is related either to operational irregularities or to the need for maintenance. The main purpose of using a tank is to eliminate the expansion effect of heating water. It is getting larger, but the volume of pipes, radiators and storage tanks is finite. In closed heating circuits, 100% filling is required, and this means that the excess coolant mass must be dumped somewhere. The tank becomes a suitable place.
If suddenly there is no way out, the liquid will certainly find a path through which the excess will escape. Safety valves usually become such a place, but still this is rather an emergency equipment. Even if they work exactly as they are supposed to, you will have to remove the spilled water and refill (top up) the system. Installing tanks in advance helps prevent this from happening. And even when the coolant boils, keep everything in perfect order.
How is the system structured and how does it work?
Expansion tanks are tightly closed vessels, which are divided into two fragments using rubber membranes. This is not simple rubber, since it must withstand significant heat while remaining elastic and without losing strength.
Important: the pressure must be determined inside the air cavity entering the empty container, strictly at a temperature of 20 degrees. It is equal to the static pressure of a heating system filled to capacity. This condition makes it possible to achieve an equilibrium state of the membrane and compensate for the pressure exerted by the coolant.
That is, by the time it is put into operation, the tank will be completely empty, and its entire volume can be used to correct the thermal expansion of water or antifreeze. If the gas boiler sensor detects that the pressure in the heating system has dropped to 0.7 bar or less, it gives a command to turn off the heater. And the average value that ensures normal operation is 1.2 bar. Since moving from a non-equilibrium position to an equilibrium one, the membrane can increase the pressure further, its initial level for an empty tank is taken to be 0.3 bar (on average) higher than the standard for a heating system.
Conclusion: with a closed heating circuit with a gas boiler, the pressure should be from 0.8 to 1 bar; the parameters of any system deviating from the standards are calculated individually, taking into account:
- expected volume of water or antifreeze;
- Tank efficiency;
- its required value;
- initial pressure at start-up.
Tanks on Baxi double-circuit boilers, as follows from the instructions, must operate at a pressure of 0.5 bar. However, in reality this figure is minimal, and the same pressure of 0.8 - 1 bar allows you to guarantee the normal functioning of the device. The built-in expander with a capacity of 6 liters works stably with heating systems with a capacity of 75 liters (on water). Or 50 l (with antifreeze).
Whether it is necessary to use an additional expansion tank, or whether standard equipment is enough, is decided only by specialists at the time of preparation of the project.
VESKO-TRANS.RU
as a way to parse the extension
tank? Step by step method
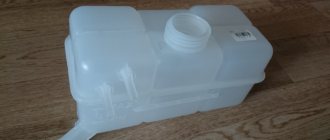
Not all motorists know how to remove the expansion cover. tank _ And many do not even suspect that this should be done. For some, even a confusing task will raise: why? Cork and cork, there is nothing to break, why crawl while everything is working. However, the fact is that it usually works poorly or stops functioning completely.
Despite its simplicity and elemental design, this coating is very important for the proper operation of the entire cooling system. At the same time, it receives significant loads, including from the environment. And if you remember how well some manufacturers work, you begin to understand that there is a high probability of buying an initially unsuitable coating. Smart car owners not only check their purchase, but also change it often.
How to remove the expansion tank cap to learn a little
You also need to figure out how to test its performance and know how to repair plugs.
The entire cooling system is extremely simple: thermostat, clamps and cover. Thermostat. separate conversation; All that can be said about the clips is that they must be intact and tight. But the fork is on the side. important thing, although not difficult to notice. The principle of its operation is that when the pressure inside the tank exceeds (usually when it rises above 1.5 atmospheres), the lid emits excess.
How to control the system and work with it?
It is very important to check the actual pressure in the expansion tanks. Hand-held pressure gauges are almost always used for this purpose, since most air chambers are equipped with standard nipples, like car or bicycle tires. A problem may arise if the boiler is wall-mounted. Compensating devices are most often located on its rear wall, and it can be difficult to use them. The solution is to use a compact mobile pressure gauge.
As soon as a downward deviation is detected, the air should be inflated correctly. Leaving everything as it is, you may encounter emergency shutdowns of the boiler. It is difficult to even say whether this outcome or the release of excess fluid is worse. Each manufacturer of gas boilers advises consumers to measure the pressure in the tank annually. There will be no harm, of course, if you do this twice as often.
It must be remembered that pumping is carried out only when the tank is completely empty; to do this, drain the water from the boiler. The easiest way is to use a bicycle pump while monitoring the result through a hand-held pressure gauge.
The sequence of actions is as follows:
- the heating system taps are turned on;
- water drains from the boiler;
- the tank is inflated to the required pressure;
- the drain valve is closed;
- the heating circuit is saturated to the required level through the provided tap;
- The taps connecting the tank to the heating open.
Possible problems
It is not always possible to pump the expansion tank to the required number of atmospheres. People who strictly monitor the health of their equipment rarely encounter problems, of course. But carelessness or an irresponsible approach can lead to a number of troubles. Often the pressure gradually decreases, and after a series of boiler top-ups, the tank fails. It even goes so far that the membrane is deformed by the spool when pressed against the wall.
In this case, repair is impossible; the expander can only be replaced completely. It also happens otherwise: the pressure in the heating circuit is at the maximum permissible level, but the tank has not been serviced and remains without pressure. As soon as the heating system stops and begins to cool, the liquid will compress, making it impossible to correct the change in pressure. As a result, the boiler gets into an “accident”. Problems of this kind can be caused by prolonged use of a hot water heater or power outages.
Another likely scenario is that new water has to be supplied systematically and for no apparent reason. For example, the hot water supply circuit is working, and the pressure gauge shows a drop in pressure, the boiler stops working. Since thermal expansion is not compensated, heating of the coolant leads to the release of its excess by safety valves. If you do not notice this situation in time, you can face serious troubles. Therefore, it is necessary to pay maximum attention to the condition of the expansion tank and regularly measure the pressure inside it.
How to disassemble the expansion tank cap? Step by step method »
Not all car enthusiasts know how to disassemble the expansion tank cap. And many do not even suspect that this needs to be done. For some, the task at hand will even cause bewilderment: why? There's a plug and a plug, there doesn't seem to be anything to break there, so why bother while everything is working. However, the fact of the matter is that it usually works poorly or stops functioning altogether. Despite the simplicity and elementary design, the mentioned cover is very important for the normal operation of the entire cooling system. At the same time, it receives significant loads, including from the environment. And if you remember how well some manufacturers work, you begin to understand that the chance of buying an initially unsuitable lid is quite high. Car owners, wise from sad experience, not only check their purchase, but also often modify it.
How to disassemble the expansion tank cap is not enough to know
, you also need to imagine how to check its performance, and be able to bring the plug back to life.
Why do you need a cover?
The entire cooling system is extremely primitive: a thermostat, clamps and a reservoir with a lid. Thermostat is a separate matter; All that can be said about the clamps is that they must be intact and tightly tightened. But the plug on the tank is an important thing, although it looks simple. The principle of its operation is that when the pressure inside the tank exceeds (usually when it rises above 1.5 atmospheres), the lid releases the excess.
When the engine cools, the pressure inside the tank drops, and to equalize it, the lid must let air in from the outside. And at the same time, it must be screwed tightly and remain airtight.
What is wrong with the lid?
The spring that regulates the intake-exhaust operation corrodes quite quickly. After all, the air released is hot, but the air brought in is not dry. As a result, condensation forms, settling inside the plug and eating up the springs. The situation is even worse in winter. The same condensation quickly becomes ice, and the valves stop working until the lid thaws.
Since it does not have time to warm up, it will soon have to repair the radiator, the tank itself, the stove, etc. So it’s never a bad idea to check the tank cap in winter.
Disassembling the cover
The process itself does not even require accompanying photographs, since, as has already been said, in a structural sense this detail is not anything complicated.
If the plug is not new, but already installed on the tank, to check it, the first step is to unscrew it. It is better to do this when the engine and cooling system have completely cooled down.
- Use a small flat screwdriver to pry it up, after which the rubber seal in the form of a ring is removed;
- The casing located inside is pryed off and removed in the same way. This should be done carefully, holding it so that when the spring is working, the casing does not shoot into your eye;
- The insides are being examined. If the spring itself is alive, both it and the small valve are removed, after which all the dirt accumulated in the cover is cleaned out. Craftsmen advise using simple soapy water and cotton swabs for the ears for these purposes;
- Both a cleaned and a completely new plug need to be checked for functionality, since even just from the factory, the caps may need some work.
Additional Information
The expander helps to absorb hydraulic shocks created by air pockets and sudden closure of the valve. Tanks can perform this function if they are placed on the return flow of the coolant directly in front of the boiler. Do not assume that the pressure set at the factory will be ideal for practical needs. It is reconfigured using a spool valve.
Important: any pressure gauge, when measuring pressure in the expander, registers only an excess value; to obtain an absolute figure, add 1 bar.
A pumped tank does not work well, since the air will push the coolant out. If everything is configured correctly, but the fuses continue to periodically discharge water, most likely the problem is in the expander being too small. Therefore, it is worth choosing tanks that hold 10% of the total coolant circulating in the system, or even more. Since the tank does not have fittings for pressure gauges, they must be connected to the nipple. It is located on the side opposite to the coolant-filling circuit.
Since car and bicycle pressure gauges measure pressure in MPa, you need to compare their readings with the pressure in the heating system (expressed in bar or kgf/sq. cm). One bar is equal to 100 kPa. When using a car meter, it is recommended to wait 10 minutes after turning off the boiler for the circulation to stop. When the tank is built into the boiler itself, it is necessary to shut off not only the shut-off valves, but also the coolant supply and its return. By following these recommendations, you can significantly simplify your life.
To learn how to check the serviceability of the expansion tank, see the following video.
The circulation of coolant in the heating system is ensured not only by pumps, but also by maintaining the required pressure. In the event of low pressure, the movement of liquid in the pipes slows down, for this reason the automation mechanisms are triggered. This leads to a reduction in the operating period of the heating system.
How to repair the expansion tank of a heating system?
The circulation of coolant in the heating system is ensured not only by pumps, but also by maintaining the required pressure. In the event of low pressure, the movement of liquid in the pipes slows down, for this reason the automation mechanisms are triggered. This leads to a reduction in the operating period of the heating system.
Looking for a leak
Loss of the sealed state of the heating system leads to a loss of pressure. By conducting a complete inspection of the heating device and pipe system, leaks can be detected. Leaks to the naked eye are determined by the accumulation of moisture at joints or holes with a characteristic white coating.
When inspecting, you should pay attention to the connecting elements, couplings at soldering points and direct connections to heating devices. A system with metal pipes may leak at longitudinal seams. Once a leak is discovered, it is worth taking care of its elimination. The joints are repacked, gaskets and gland seals are installed, with a thickness slightly greater than the previous one. If the pipeline is damaged, the damaged section must be replaced.
Expansion tank problems
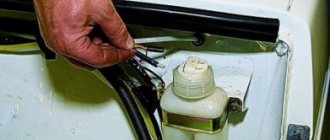
One of the reasons for the drop in pressure may be a breakdown of the expansion tank. There are two reasons for this: wear of the membrane and damage to the chamber. It is not very difficult to detect a breakdown in the tank: you need to press on the nipple. If air comes out and a characteristic sound is made, then the tank is in good condition. If water comes out, it is necessary to replace the membrane or the expansion tank itself.
You should not try to glue the membrane, because in the process of constant compression and stretching, the hole will appear again. There is a boiler with a built-in tank. In this case, there is no need to look for components for boiler equipment; it is easier to install an external tank and install a plug on the old one.
Repair of expansion tank cap
Without paying due attention to such a seemingly insignificant element as a cover, the driver may face serious engine damage. Few people know, but the expansion tank cap controls the pressure in the cooling system. Special valves inserted into the cavity of the cover relieve excess pressure or release air to increase the volume of antifreeze required for circulation in the system.
The lid reliably seals the cooling system and also serves to stabilize the internal pressure of antifreeze (antifreeze)
Repairing the tank cap includes three stages:
Moreover, even a novice driver can complete all stages.
How to disassemble the cover
Repairing the expansion tank cap yourself is the simplest procedure, since the cap has a simple design and does not require special tools for its restoration. All you need is your hands and a screwdriver with a thin flat blade. You need to follow the following algorithm:
Unscrew the cap from the tank.
Remove the product and clean it with a dry cloth to remove any drops of coolant.
A rubber seal is inserted into the cavity of the lid; you need to pry it off with a screwdriver blade and pull it out.
Then remove the spring that is hidden under the rubber.
Immediately under the spring you can see a small valve device - pry it up with a screwdriver and pull it out. The second valve is located next to the first one - it also needs to be removed.
This completes the disassembly of the expansion tank cap. All components have been dismantled - you can start cleaning them.
Photo gallery: procedure for disassembling the cover
How to clean the expansion tank cap
After the lid parts have been removed, you need to thoroughly rinse the cavity of the product itself. In practice, soap solution and cotton swabs are used for washing . The purpose of this procedure is to clean out deposits of dust, dirt, and coolant leaks from the cover cavity.
Dirt settling on the valves significantly reduces their ability to operate, so the cover must be cleaned and washed periodically.
After all hard-to-reach places in the lid cavity have been cleaned with a cotton swab and soap solution, you can install the parts in the reverse order. It is recommended to replace the spring or rubber seal if there is visible damage or deformation.
