Why and when is pumping required?
Process diagram
We recommend that you watch the video about bleeding the brakes on a VAZ 2110 to clearly see the entire process from start to finish. The need for this kind of procedure is due to the fact that the system becomes airy; excess air does not allow the brakes to respond to the pedal being pressed at the right time. When driving at high speed, seconds matter, so the brakes must work one hundred percent.
Plus, there are a number of other reasons for which pumping is required:
- When pressed, the brake pedal of the VAZ 2110 sinks, it becomes like cotton wool;
- You have made adjustments to the braking system;
- A brake fluid leak was discovered and cracks formed in the supply hose;
- Old brake fluid is of poor quality and therefore needs to be replaced;
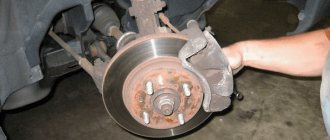
- The brake discs were replaced;
- The water level in the brake fluid has increased due to the hygroscopicity of the composition.
Pumping scheme
How to bleed brakes on a VAZ-2110? In order for the work to be done efficiently, you need to know in what sequence to remove air from the system. The pumping scheme is the same as in the case of other front-wheel drive VAZ cars. The work is carried out according to the “crosswise” principle. In the first stage, air is removed from the rear right wheel. Next they move to the front, to the left wheel. After this they return back to the left. And at the final stage, the front right wheel is pumped. This scheme is explained by the fact that the contours have different distances from the main cylinder. And they always start from the farthest, moving towards the nearest.
You may be interested in: Automatic parking system: operating principle
Sequence of work
Sequence
There is a certain order for bleeding the brakes, which is strongly not recommended to be violated.
- The rear right one comes first.
- The second is the front left.
- Third - rear left.
- The last fourth thing to bleed is the front right brake.
Scheme for pumping brakes on a VAZ-2110
The brake system of the VAZ-2110 has two circuits operating in a diagonal pattern. This dictates the procedure for removing air from the system. When performing work, it is necessary to follow the following pumping sequence:
- Right rear wheel.
- Front left.
- Rear left.
- Front right.
The procedure for bleeding the brake system of the VAZ-2110 and modifications.
Necessary materials
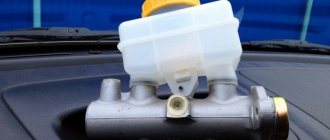
Before you start bleeding, you need to stock up on brake fluid for topping up.
It is important to remember that the liquid must be the same brand that was used previously. If we are not sure what kind of brake fluid is poured into the VAZ-2110 system, it is better to play it safe and replace it completely . Otherwise, when mixing fluids of different types, clots may form in the system, which will damage the brakes.
Also for work you will need a transparent container half filled with liquid, a hose for the fitting about 40-50 cm long, a socket wrench with a cut out segment (union wrench).
Bleeding the brakes with an assistant
An assistant will be needed. Go.
- Open the lid of the fluid reservoir and add it to the maximum allowable mark.
Leveling up
So, we come to the main question - how to properly bleed the brakes on a VAZ 2110. But the important point here is whether you are going to do the work yourself, or call a friend for help. Depending on this, pumping is performed in a slightly different way. Let's talk about each of them.
Self-leveling
If you couldn’t find an assistant, you can easily handle the task yourself.
Container with TJ
To get started, arm yourself with:
- Brake reservoir cap without sensors, regular black;
- Automotive nipple;
- Use a round file or a 14 mm drill.
- Make a hole in the lid, insert a nipple into it so that there are no gaps and the element fits tightly. This device replaces a ready-made aerator, which is sold in stores.
- Using the manufactured device, connect the valve of the spare tire or removed wheel with the valve of the reservoir.
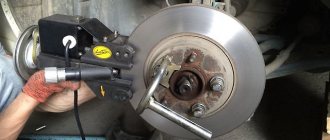
- Jack up the car and remove all wheels.
- Unscrew the fitting intended for bleeding the brakes. The air will expel the brake fluid with air bubbles.
- If it is not possible to use a tire or you have a compressor, use it. Just make sure the pressure is no more than 1 atmosphere.
- Perform a similar sequence of procedures on each brake, following the sequence indicated above.
With an assistant
If you still managed to find a partner to work with, that’s good. This way, pumping the brakes is not only more convenient, but also more fun. Plus, the quality of the operation is often higher.
Top up
The sequence of your actions in this case will be as follows.
- Check the car for brake fluid leaks.
- Add TJ into the tank to the maximum level. It is designated as MAX.
- Hang up the wheel on which you plan to bleed the brakes. You already know the sequence.
- The rear brakes have a pressure regulator that can be locked with a screwdriver. It is inserted between the plate and the piston.
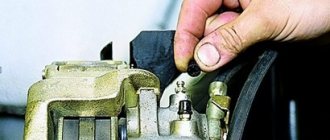
- The brake device has an air release valve. Dry it thoroughly, remove the cap and place the rubber hose on the head.
- Prepare a transparent container with a volume of about 3 liters in advance and pour into it some of the brake fluid used in your car. The other end of the hose must be immersed in this brake fluid.
- Command your assistant to sharply press the brake pedal about 5 times in a row. During the last press, the pedal is held in the down position.
- While he holds the pedal, you open the valve about 50-75 percent and watch the brake fluid flow out through the hose.
- Initially, liquid with bubbles should come out. As soon as the leak stops, the valve closes.
- Is the valve closed? Then tell your friend to release the pedal.
- But this is not how the brakes on a VAZ 2110 are pumped in just one step. For a high-quality procedure, you will have to repeat it 3 more times. You need to achieve a result in which no air bubbles come out of the hose.
- Carry out a similar procedure with all brake mechanisms in the specified bleeding sequence. Don't forget to remove the screwdriver that is blocking the pressure regulator.
Let's start the operation
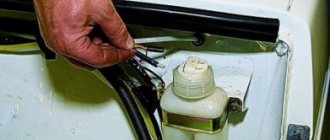
So, we place the car in the pit and open the hood. You need to unscrew the cap of the brake fluid reservoir, after first removing the chip that goes to the level sensor. Add liquid to the maximum mark. Close the lid.
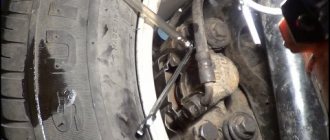
How to bleed brakes on a VAZ-2110? The next step is to find the fitting. It is located on the back of the rear wheel drum. You need to remove the protective cap from it. Next, put a hose on the fitting. The latter should enter the bottle with the other end.
Next we will need the help of a second person. He must sit behind the wheel and build up pressure in the system by pressing the brake pedal several times. You need to press about four times, at intervals of one to two seconds. But you can't let go of the pedal. It must be held until the liquid stops flowing from the hose.
After pressure has built up in the system, we carefully unscrew the fitting half a turn. Then the aired liquid will go into the bottle. If there is a lot of air in the system, close the fitting and repeat the procedure again. When the liquid comes out without bubbles, you can complete the procedure. Close the fitting, remove the hose and put on the cap.
Next we move on to the front wheel. How to bleed brakes on a VAZ-2110? The procedure is performed in the same way. You need to release the liquid until it comes out without bubbles. After this, they move on to the remaining two wheels according to the diagram.
Procedure for bleeding the brake system of a VAZ
Good brakes are the basis of our safety. The safety of family and others, as well as the integrity of the car. And this is not so little.
The brake system loves to be looked after and maintained. Replacing only the brake pads and brake discs is not the entire maintenance of the brake system; you also need to change the brake fluid every 2 years.
First, you need to look at the car's owner's manual and find out the manufacturers' recommendations. In the manual you can find out exactly when the brake fluid should be changed - once every 2 years or after 50-60 thousand kilometers.
Regularly changing brake fluid is the main reason why brakes are bled. It should be. But there are also unplanned cases when you need to pump the brakes.
- Changes in the behavior of the braking system. There may be several reasons. The important thing is that the brake pedal travel increases.
- Bleeding is carried out after any repair of the brake system: this can be tuning the brake system, repairing or servicing brake discs or cylinders, replacing brake pads, and so on.
In all cases, you need to know that the brakes need bleeding, so it is important to know how the brake system is pumped. But there is another option - contact a car service. In this case, you don’t need to think about how to properly pump the brakes.
Before you start bleeding the brakes, you need to first learn about some subtleties. If you only know about the general principles and sequence of bleeding the brakes, then you may not know about some design features of the brake system.
Bleeding the brakes is done in order to remove air from the brake system, which is sealed. You can pump it yourself, but it will take a lot of time and will not be very convenient.
Bleeding the brake system: step-by-step instructions
Find out how to bleed the brake system on a car yourself correctly. Step-by-step instructions “for young” car enthusiasts. Useful tips and answers to questions: how to detect air and how often to change the brake fluid in your car.
First, a little theory. Bleeding the brake system on a car is necessary to get rid of the air that forms in it over time. There may also be other reasons for the appearance of air in the brake system, for example:
- when repairing the brake system itself (for example: replacing the vacuum brake booster or master cylinder, any tuning and other interference with the brakes);
- in case of depressurization of the brake system in case of damage to oil pipes or hoses (they could be outdated and cracked);
- when replacing brake fluid, you should begin this procedure immediately;
- when there is a large drop in the brake fluid level in the master brake cylinder reservoir beyond about.
How to detect trapped air in the brake system? All this can be noticed when braking (the braking stroke will increase, not a smooth stop) and when you press the pedal itself, its increased stroke and softness of pressing will be detected. In fact, this is a very important unit in the car - after all, the lives of both the passengers themselves and those who are outside the vehicle depend on its smooth operation. So the proper operation of the brakes should come first.
The process of bleeding VAZ brakes
To bleed the brakes, you will need an assistant who must sit inside the car and press the brake pedal on command. You can do mechanical processes yourself.
Further in the manual you need to clarify what car model the brake bleeding scheme is. If the manufacturer has not indicated what kind of pumping scheme, then there is a general rule:
- start with the wheel that is furthest from the master cylinder.
- For example, pump the rear right wheel, rear left wheel, front right wheel, front left wheel. Such a pumping scheme can ensure efficient removal of air from the brake system.
The next step is preparing a simple device for bleeding the brakes. This device consists of a plastic (rubber) hose, which is placed on a fitting, and a container.
But in auto stores there are special devices for bleeding brakes, which are manufactured industrially. But if you take into account the fact that the brakes will not be pumped every day, then you need to think about the feasibility of the purchase.
Brake bleeding technology:
- brake fluid is poured into the master cylinder reservoir;
- the brake system fitting near each wheel must be cleaned of dirt;
- a small amount of brake fluid is poured into a pre-prepared container;
- a hose is connected to the bleeding fitting, and the other end must be lowered into a container with liquid;
- your partner will need to press the brake pedal firmly several times, keeping the pedal pressed;
- Next you need to unscrew the fitting. After this, you can see how the brake fluid comes out into the container. Bubbles will show whether there is air in the brake system;
- the fitting is wrapped, and then they move on to the wheel, which is next according to the diagram.
There are two important points. First, use only the brake fluid recommended by the manufacturers. In this case, there is no need to save money.
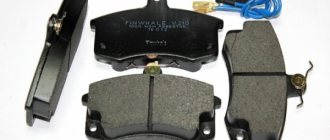
If the pedal remains soft after bleeding, then you need to diagnose the brake pads and brake discs. Often the brake pedal fails because the brake discs or pads are worn out.
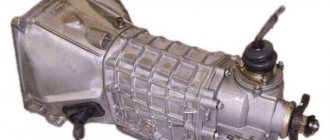
Procedure for bleeding brakes on 2110
You will need the following set of tools and materials:
- Jack and stops.
- Keys to “19”, “8”.
- Special wrench for brake pipes (at “8”).
- Jar and transparent tube.
- Brake fluid.
Try not to mix liquids from different manufacturers. The additives they contain may be incompatible, resulting in the formation of sediment or a change in the state of the substance. In addition to everything listed above, you also need an assistant. Put him in the driver's seat.
And how to properly bleed the brakes on a VAZ 2110 yourself? It's very simple - you start with the furthest wheel and end with the closest one (relative to the master cylinder). To be more precise, you start pumping from the rear right. Then left, front right and left front. The essence of the procedure is to get rid of air in the tubes.
Let's look at the example of one wheel. Place the transparent tube onto the bleeder fitting. It must be “torn off” in advance using a special key. This tube will allow you to visually monitor the air leaving the system. Subsequently, turn the fitting half a turn to bleed the air. An assistant must press the brake pedal several times, then lock it in the depressed position.
Unscrew the fitting and bleed the air. It is advisable to place the edge of the tube in a jar with a small amount of liquid - for convenience. The assistant will feel the brake pedal sink. Tighten the fitting and instruct your partner to make a few more pedal movements. Continue this until no more bubbles come out of the tube. Only after this can you proceed to the next wheel.
Bleeding the brake system is essentially the process of getting rid of air in the brake system. It is necessary to get rid of air in the brake system after each brake fluid change, brake lining replacement, brake cylinder replacement, vacuum booster replacement, or a sharp drop in the brake fluid level. Even if the replacement was very minor, for example, if the brake cylinder was replaced and the release of brake fluid was under control, you still need to pump the brakes. To understand how to properly bleed your brakes, carefully read this article to the end.
When it is necessary?
As a rule, if all brake components are in good working order and the brake fluid paths are sealed, then they do not require any bleeding. But if a fuel fluid leak occurs due to damage to the “overpasses” and a drop in its level, both brake repair and mandatory bleeding will be required.
This is a vitally necessary procedure, because airiness in the system can lead to the fact that at the very moment when everything is decided by seconds, the brakes will not work. And there will be nothing left to pump, and no one...
Therefore, let’s take care of this immediately, if we find that the brake pedal has increased travel, it has begun to “go limp,” as car enthusiasts say – the brakes are “wobbly.”
Hydraulic brake circuit diagram
In addition, there are other reasons why pumping is necessary:
- You had to interfere with the operation of the system;
- There were cracks in the hoses, leaks of fuel fluid;
- The brake fluid turned out to be of poor quality and needs to be completely changed;
- Have you changed the brake discs (sooner or later this needs to be done);
- The water content in the fuel fluid has increased (it is hygroscopic, i.e. it absorbs and accumulates water), so it sometimes has to be changed.
Working with a partner
It’s best – it’s more convenient, more reliable – to bleed the brakes together. By the way, this is exactly how more than 80% of VAZ 2110 owners perform this operation.
First of all, make sure that there are no leaks of the fuel fluid anywhere, and everything is sealed. Then add fluid so that it is at the level of the “Max” line.
Now start bleeding the brakes:
- The wheel on which you will bleed the mechanism needs to be hung, but how to properly alternate the wheels has already been said;
- The rear brakes have a special pressure regulator. It must be unlocked by inserting a screwdriver between the piston and the plate;
- Locate the air bleed valve on the appropriate brake mechanism. Wipe it, remove the cap and put a rubber hose on the head;
- Pour a little of the same brake fluid that is in the system into a previously prepared three-liter jar (or other transparent container), lower the end of the hose so that the hole is immersed in the liquid;
- Your assistant, who is behind the wheel, suddenly presses the brake pedal at full speed about 4 or 5 times. When pressing the last time, hold the pedal with your foot at the extreme pressure;
- At this time, you open the valve halfway or ¾ and observe the fuel fluid that flows out of the hose. There should be air bubbles in it. When the flow stops, close the valve completely;
- Only after this can your assistant release the pedal;
- Then the assistant again “pumps” the brake and keeps the pedal pressed, and you repeat the manipulations with the valve;
- The brake mechanism is considered to be properly pumped when air bubbles are no longer released. That is, 3 - 4 stages may be needed;
- Now remove the hose, wipe the fitting, attach the protective cap to it;
- Repeat these same steps with each brake mechanism. Remember to use the diagonal principle correctly;
- Remove the screwdriver that was used to block the pressure regulator.