Review and technical characteristics of Lada Largus
Lada Largus is an almost exact copy of its prototype, the Dacia Logan MCV. The production of the car at AvtoVAZ’s domestic sites began in 2012, and in terms of its exterior, the car is practically no different from Logan, except for the logo – the Rook on a characteristic horizontal beam on the radiator grille.
Lada Largus belongs to the class of station wagons and since the start of sales and operation the model has received many positive reviews. One of the most positively characterized elements is the very stable suspension, which, taking into account the state of domestic roads, is simply a godsend. Despite the fact that some motorists say that the car is a little heavy to drive and not good enough to drive, this can be a big plus, since the Lada Largus feels very confident on the roads in winter, on slippery surfaces.
Despite the rather stylish and dynamic design, the Lada Largus does not have any special speed characteristics, so the owner will have to be prepared for overtaking on the highway. But, thanks to its shape, the car practically does not react to side winds, which indicates a low windage coefficient.
Since the Lada Largus is available in various variations, this car is simply irreplaceable for large families (in a passenger version) for going out into nature or to the country, or in a cargo version for small private entrepreneurs, builders, and so on.
The most commonly cited design flaw, many owners note the inconvenient location of the spare wheel, which is located under the bottom, not only making emergency replacement difficult, but also leaving every chance for the driver to get thoroughly smeared in the mud while carrying out work.
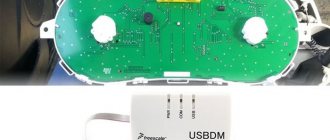
Lock the airbag computer using a diagnostic tool. Remove the driver airbag module (DIAM). Remove the steering wheel, steering wheel covers, steering column switches, steering column adjustment handle and transponder ring. Having overcome the resistance of the clamps, fold back the decorative plug 1, image 122, unscrew screw 2 and dismantle the rear part of the floor tunnel lining 3 (flat screwdriver, replaceable Torx T20 head, wrench).
Image 12-2 - Fastening the rear part of the floor tunnel trim of the LADA Largus car: 1 - decorative plug; 2 — screw for fastening the rear part of the floor tunnel lining; 3 - rear part of the floor tunnel lining
Unscrew 2 screws 1, image 12-3, securing the front part of the floor tunnel lining (replaceable Torx T20 head, knob).
Image 12-3 - Fastening the front part of the floor tunnel trim of the Lada Largus car: 1 - screw securing the front part of the floor tunnel trim; 2 - front part of the floor tunnel lining
Unscrew nut 4, image 12-4, and 2 screws 1. Remove boot 5 of the gear shift lever. Separate the cable harness block from the cigarette lighter 2 and dismantle the front part of the floor tunnel lining 3 (replaceable head 10, replaceable head Torx T20, extension, wrench).
Image 12-4 — Fastening the front part of the floor tunnel trim of the LADA Largus car: 1 — screw securing the front part of the floor tunnel trim; 2 — cigarette lighter; 3 — front part of the floor tunnel lining; 4 — nut securing the front part of the floor tunnel lining; 5 — gear lever boot
Remove the central trim 1, image 12-5, instrument panel, overcoming the force of the clamps. Separate the cable harness connectors from the switches and remove the cover plate. Remove the plug from the center console of the instrument panel or the radio with CD player 2, separate the cable harness blocks and the antenna (radio and CD player puller).
Image 12-5 - Central console of the instrument panel of the Lada Largus car: 1 - central trim of the instrument panel; 2 - radio and CD player
Remove decorative trims 1 and 3, image 12-6, overcoming the force of the clamps. Unscrew 2 screws 2 securing the visor of the instrument cluster and remove it, overcoming the force of the clamps (replaceable Torx T20 head, knob)
Image 12-6 — Decorative overlays on the instrument panel of the LADA Largus car: 1 — left overlay; 2 — screw securing the visor of the instrument cluster; 3 - right pad
Unscrew the four screws 1, image 12-7, securing the instrument cluster 2. Separate the two cable harness blocks and dismantle the instrument cluster (replaceable Torx T20 head, knob).
Image 12-7 — Fastening the instrument cluster of a Lada Largus car: 1 — screw securing the instrument cluster; 2 - instrument cluster
Remove the wind window pillar trims left 1 and right 5 (see image 12-1), overcoming the force of the clamps. Remove handle 4, image 12-8. Unscrew the 2 screws 3 securing the regulator 2 of the headlight range control, remove it from the hole in the instrument panel (replaceable Torx T20 head, knob). Having overcome the force of the clamps, fold back the decorative plugs 5 and unscrew one screw 1 each of the lower fastening of the instrument panel on the left side and the right side (replaceable Torx T20 head, knob).
Image 12-8 — Attaching the headlight level control and instrument panel: 1 — screw for the lower fastening of the instrument panel; 2 — headlight range control gearbox; 3 — screw for fastening the headlight corrector; 4 — handle for headlight adjustment; 5 - decorative plug
Unscrew screw 1, image 12-9, securing the instrument panel through the window that opened after dismantling the radio and CD player (replaceable Torx T20 head, extension, wrench).
Image 12-9 - Central fastening of the instrument panel: 1 - screw of the central fastening of the instrument panel; 2 - instrument panel
Unscrew the 2 screws 1, image 12-10, securing the heating, air conditioning and ventilation control unit 3 to the instrument panel, squeeze the stoppers 2 and push the block inside the instrument panel (replaceable Torx T20 head, knob).
Image 12-10 — Fastening the heating, air conditioning and ventilation control unit: 1 — screw securing the heating, air conditioning and ventilation control unit; 2 — stoppers; 3 - control unit for heating, air conditioning and ventilation
Unscrew 2 screws 2, image 12-11, securing the instrument panel 1 to the heater body (replaceable Torx T20 head, extension, knob).
Image 12-11 — Attaching the instrument panel to the heater body: 1 — instrument panel; 2 — screw securing the instrument panel to the heater body
Unscrew one screw 1 from the right and left sides, image 12-12, of the outer fastening of the instrument panel 2 (replaceable Torx T20 head, knob).
Image 12-12 — Upper fastening of the instrument panel of the Lada Largus car: 1 — screw of the outer fastening of the instrument panel; 2 - instrument panel
Remove the instrument panel. When dismantling, remove the diagnostic plug from the socket in the glove box and separate block 1, image 12-13 (dismantle with an assistant).
Image 12-13 - Cable harness block: 1 - cable harness block; 2 - instrument panel
Unscrew four nuts 2, image 12-14, securing the passenger airbag module 1, separate the cable harness block 3 and dismantle the passenger airbag (replaceable head 10, knob).
Image 12-14 — Fastening the passenger airbag: 1 — passenger airbag; 2 — nut securing the passenger airbag; 3 — cable harness block
Remove outer ring 1, image 12-15, ventilation nozzles. Dismantle the inner ring 2 of the ventilation nozzle and, pressing the three latches 3, remove the housing 4 of the ventilation nozzle from the instrument panel.
Image 12-15 - Ventilation nozzle: 1 - outer ring of the ventilation nozzle; 2 — inner ring of the ventilation nozzle; 3 - stopper; 4 — ventilation nozzle housing
Installation Install the removed parts in the reverse order of removal. Unlock the airbag computer using the diagnostic tool
Next page""""""
- 10. 11. 12. 13. 14. 15. 16. 17. 18. 19. 20. 21. 22. 23. 24. 25. 26. 27. 28. 29. 30. 31. 32. 33. 34. 35. 36. 37. 38. 39. 40. 41. 42. 43. 44. 45. 46. 47. 48. 49. 50. 51. 52. 53. 54. 55. 56. 57. 58. 59.60. 61. 62. 63. 64. 65. 66. 67. 68. 69. 70. 71. 72. 73. 74. 75. 76. 77. 78. 79. 80. 81. 82. 83. 84. 85. 86. 87. 88. 89. 90. 91. 92. 93. 94. 95. 96. 97. 98. 99. 100. 101. 102. 103. 104. 105. 106. 107. 108. 109. 110.
coming
Exterior of Lada Largus
As already mentioned, the appearance of the Lada Largus is an almost complete copy of Logan with some small touches from AvtoVAZ. The car’s belonging to Tolyatti manufacturers is most clearly visible from the front, by the characteristic emblem on the radiator grille. The headlights look rather modest; the picture is completed by a bumper with smooth outlines and a large air intake mouth.
When viewed from other sides, Lada Largus looks like an ordinary station wagon from any manufacturer. All similar models are characterized by a sloping hood, a flat roof, and side glazing that takes up a large area. At the rear, judging by the photo, you can see two asymmetrical doors, a non-bulky bumper and vertically oriented optics on the sides.
Operations for removing the Lada Largus instrument panel
1. Disconnect the wire from the negative terminal of the battery. 2...and remove from the bracket glued to the windshield. 2. Remove the steering wheel (see “Removing and installing the Lada Largus steering wheel”).
3. Remove the steering column switches as an assembly with the driver’s airbag contact ring (see “Replacing the steering column switches on Lada Largus”).
5. Remove the floor tunnel lining.
6. Remove the trims of both front pillars. 7. Pry up the edge of the central trim of the instrument panel and, overcoming the resistance of its spring clips, disconnect the trim from the instrument panel.
Proceed with caution, as the clamps are very rigid and if too much force is applied, the appearance of the trim or instrument panel may be damaged.
8. Squeezing the clamps, disconnect the wiring harness connectors from the front door power window switches, central locking, heated tailgate glass, and hazard warning lights and remove the central trim of the instrument panel. 9. Remove the audio system head unit. 10. Through the opening that opened after removing the audio system head unit, remove the central screw of the top fastening of the decorative panel. 11. Remove the heating (air conditioning) and ventilation control unit
12. By pulling along the axis, remove the headlight range control knob.
13. Remove the two screws securing the adjuster to the panel and push the adjuster shaft toward the panel and push the adjuster shaft into the panel.
14. Pry open the decorative plugs for the screws of the lower mounting of the instrument panel on the left and right.
15. Remove the two screws securing the console to the bracket on the base of the body.
16. Remove the two lower side mounting screws located on the left
18. . as well as two upper screws of the side toruses into the panel. fasteners located on the left.
20. Remove the fastening screw.
21. Remove the steering wheel adjustment lever
22. Take out the right...
23. . and front pistons securing the left lower panel flap.
24. Remove the instrument panel, removing the diagnostic connector from the glove box socket during removal.
25. Install the instrument panel in the reverse order of removal.
Interior of Lada Largus
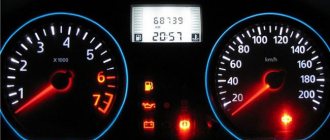
The interior of the car, as can be seen from the photo, is practically indistinguishable from the same Logan and is just as ascetic and unremarkable. In the arrangement of instruments and other elements, you can notice the same ergonomic errors that were characteristic of Logan. The set of instruments is laconic, the two-color screen of the course computer and instrument dials are surrounded by chrome trim. The information content of the devices is quite good. The steering wheel is large, mounted on three spokes and has the AvtoVAZ logo in the center.
The number of controls on the central panel is minimal. In the maximum configuration you can find a radio with AUX and USB connectors; in the initial and middle configurations there is a plastic plug instead of a radio. Nearby are the controls for ventilation and heating (air conditioning and stove). Between them there are also buttons for the electric windows of the front windows, the rear door lock, the heated rear window and the hazard warning lights.
All upholstery is made of hard plastic and fabric, and the comfort provided by the seats is minimal. The front seats are quite flat, lateral support is minimal, but the range of adjustment is quite wide. In the luxury version, the driver's seat even has lumbar support and seat height adjustment.
There is also more than enough space for passengers in the second and third rows; the roof does not create an oppressive impression, however, climbing into the third row is not very convenient. However, the car was created to transport goods and passengers on a budget basis. It doesn’t have to be very comfortable, but it copes with its main tasks perfectly well. Despite the cheapness of the interior and upholstery, everything is made quite well and firmly; unnecessary noise or squeaks from poorly secured elements are not annoying, as in other similar cars of this class.
The luggage compartment of Largus deserves special mention. In the version of the car with five passenger seats, its capacity is 560 liters. With the rear seats folded, the compartment capacity increases to 2350 liters, making it possible to transport furniture, refrigerators and other large cargo without any problems. In the passenger version with seating for 7 passengers, the rear row of seats can be easily removed, after which the station wagon will become a truck with the same spacious trunk.
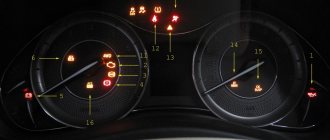
Lada Largus dashboard description
Please note that the instrument panel layout may differ depending on the vehicle version.
1 - Side deflector. 2 - Airflow grille. 3 — Switch lever: — direction indicators; — outdoor lighting; — fog lights; — rear fog lamp; - sound alarm. 4 — Instrument panel. 5 - Space reserved for installing the driver's airbag. 6 — Lever of the steering column switch for windshield and rear window wipers/washers. Button for controlling data output to the on-board computer display. 7 - Central deflectors. 8 - Glove box or space reserved for installing a passenger airbag. 9 — Airflow grille. 10 - Side deflector. 11 - Warning decal prohibiting the use of a rear-facing child restraint (in which the child sits rear-facing) in a front right seat protected by a functioning airbag installed in front of that seat. 12 - Glove box. 13 Space reserved for installation of a car radio (optional) or glove box. 14 Power window switch. 15 Central door lock switch. 16 Hazard switch. 17 Air conditioning system controls. 18 Socket for additional equipment. 19 Parking brake. 20 Rear window lock switch. 21 Electrically adjustable outside rear view mirror position regulator. 22 Space reserved for installing an ashtray, or a holder for glasses. 23 Gear shift lever. 24 Rear window heating switch (depending on the vehicle configuration, a plug is installed). 25 Power window switch. 26 Ignition lock and key. 27 Headlight direction control in the vertical plane. 28 Hood lock release handle. 29 Fuse compartment - mounting block.
Note: many car owners unsuccessfully try to find the instrument panel backlight brightness control on the dashboard. The Lada Largus does not provide such adjustment.
While holding the daily mileage button, turn on the ignition. After 5 seconds the panel goes to self-diagnosis. Let's release the button.
Dimensions and technical characteristics of the Lada Largus car
The overall dimensions and other data of the Lada Largus car are as follows:
- Seats – 5 or 7 pcs.;
- Length – 4470 mm;
- Width – 1750 mm;
- Height – 1636 mm;
- Front wheel track width – 1469 mm, rear – 1466 mm;
- Curb/gross vehicle weight – 1185/1985 kg;
- Trunk capacity is 535 or 135 liters, increases to 2350 liters;
- Fuel tank – 50 l;
- Ground clearance – 145 mm.
Lada Largus cars are equipped with two modifications of atmospheric gasoline engines with a displacement of 1.6 liters each and with eight or sixteen valves. With any of them, only a manual transmission is available for installation - manual transmission JR5 or JH3/VAZ, each with five gears. Drive type – front.
The first of the engines, the eight-valve K7M/VAZ-11189, provides a power of 84 hp. With. and a maximum speed of 155 km/h, acceleration to 100 km/h is carried out in 14.5 s, and average fuel consumption when driving in the combined cycle is 8.2 liters per 100 km.
The second power unit, K4M, equipped with sixteen valves, produces 105 hp. With. and provides a maximum speed of 165 km/h, and accelerates the car to 100 km/h in 13.1 s. Gasoline consumption with this power unit in the combined cycle is 7.9 liters per 100 km.
Cars Lada Largus operating manual condition as of June 29, 2012
Please read this manual carefully before operating your vehicle! In it you will become familiar with the features of its design, controls, equipment, as well as safety requirements and rules of use. The car has high dynamic qualities, so during the initial period of operation, regardless of your driving experience, we recommend that you exercise caution until you fully master the technique of driving it. When the vehicle is moving, in order to ensure safe movement and avoid an emergency, it is not allowed to let go of the steering wheel.
LADA Largus vehicles are intended for transportation of people and luggage (in the quantity and weight declared by the manufacturer - see Table 2 in the “Technical characteristics of the vehicle”) at ambient temperatures from minus 40°C to plus 45°C on public roads with hard surfaces. coating that meets the requirements of GOST R 50597. LADA Largus station wagon cars are intended for use as a family car in the city and rural areas, for active recreation outside the city, for business trips, official transport, and for transfer transportation. The car is suitable for both everyday needs and long trips. Depending on the configuration, the car interior provides comfortable seating for 5 or 7 people on seats in 2 or 3 rows, respectively.
LADA Largus vehicles with a van body can be used for transporting small and medium-sized cargo in the city and rural areas. The car interior provides comfortable seating for 2 people in the front seats. If it is necessary to drive on roads with crushed stone surfaces or over potholes, it is necessary to select a mode that: – will ensure the safety of the protective covers of the suspension, front wheel drive, and protective body coatings from damage from crushed stones flying out from under the wheels; – eliminates or minimizes sharp shocks from the suspension and strong “torsional” loads on the body. The maximum climbs to be overcome are no more than 30%. The car meets the requirements established in the Russian Federation for product quality and safety. The vehicle’s compliance with the specified requirements is certified by the relevant authorized bodies of the Russian Federation by issuing a “Vehicle Type Approval”, the number of which is indicated on the summary plate of the factory data (see the figure in the subsection “Passport data”).
During operation, do not allow damage to the car, including due to mechanical, chemical, thermal and other external influences, as well as road accidents, since these damages affect the general technical condition of the car, the safety of its operation, consumer properties and the ability to use in accordance with with its intended purpose within the vehicle service life established by the manufacturer.
Prices and configurations of the Lada Largus car
There are three main trim levels available for the Lada Largus model: Standard, Norma and Lux.
The Standard assembly includes an eight-valve K7M power unit with a five-speed manual transmission JH3 and the following options:
- Driver airbag;
- Seat belts for the driver and front passenger with limiters;
- Clips for child seats;
- Vacuum brake booster;
- Mechanical optical lighting corrector;
- Inertial seat belts – 5 pcs.;
- Rear seat head restraints;
- Locking doors from opening by children;
- Immobilizer;
- Chair upholstery made of fabric material;
- Plastic upholstery;
- Brushed carpets in the cabin and luggage compartment;
- Bracket for securing cargo;
- Tilt adjustment of the steering wheel;
- Lighting in the luggage compartment;
- Indicator of non-switching off of side lights;
- Single ignition key and door locks;
- Audio preparation;
- Stamped wheels R15;
- ABS and EBD systems;
- 12V socket;
- Cabin air filter;
- Light tinting;
- Rails;
- Full size spare wheel.
This build is average both in terms of options and price, which is why buyers most often choose it. The cost of a Lada Largus car in the Norma configuration is 544 thousand rubles. It additionally includes the following options:
- Sun visor with mirror for front passenger;
- Possibility to recline passenger seats in a 60/40 ratio;
- Power steering;
- Seat belt height adjustment;
- Central locking;
- Power windows on the front windows;
- Bumpers painted in the same color as the body;
- Moldings on the side doors.
The Climate option package additionally includes:
- Air conditioner;
- Heated front seats.
And the Comfort package for the Norma package includes an airbag for the front passenger with the ability to turn it off, a luggage rack, a curtain shelf in the luggage compartment, and an audio system with two speakers.
The Luxury equipment of the Lada Largus car has the following parameters:
- Sound signal in two tones;
- On-board computer;
- Fabric inserts on door trim;
- Chrome elements in the interior trim;
- Leather steering wheel;
- The ability to adjust the driver's seat with lumbar support in height;
- Cigarette lighter with ashtray;
- Pockets on the front seats;
- Central locking with remote control;
- Electric windows on the rear windows;
- Exterior mirrors with electric drive and electrical heating;
- Painting door handles and mirror caps to match the body color;
- Thresholds on the front doors;
- Fog lights;
- Alloy wheels R15;
- Audio system with four speakers;
- Parking sensors front and rear;
- Parktronic.
Not long ago, the Lada Largus Cross entered the showrooms of official AvtoVAZ dealers for sale, available to buyers only in one, Luxury configuration.
This modification is equipped with only one engine - sixteen-valve K4M with 1.6 liters and 105 liters. With. productivity. Along with it, only one transmission is available - the French manual transmission JR5. This front-wheel drive station wagon has increased ground clearance; AvtoVAZ does not plan to produce an all-wheel drive version of the Lada Largus.
The set of options for the Lada Largus Cross is practically no different from that of the regular luxury version of this car.
How to remove the instrument panel on a Largus
Removing the instrument cluster
Lada Largus
We carry out the work when replacing the instrument cluster, as well as when removing the instrument panel and steering column. Disconnect the wire terminal from the negative terminal of the battery.
Remove the upper casing of the steering column (see “Removing the steering column
switches and switch connector with spiral cable drum device", p. 220).
Remove the instrument panel console trim (see “Removing switches”, p. 222).
. disconnect the two blocks (gray and black) from the combination connectors.
. and remove the instrument cluster.
LED indicators installed in the instrument cluster are soldered into the board and cannot be replaced. If the signaling device, dial gauge or display fails, replace the instrument cluster with a new one.
We install the instrument cluster in the reverse order.
Lada Largus. Removing the instrument panel
We carry out the work when dismantling the heater, radiator and heater fan, air conditioner evaporator or when replacing the wiring harness.
We show the operations on a car equipped with two airbags.
Disconnect the wire terminal from the negative terminal of the battery.
Remove the steering wheel (see “Removing the steering wheel”, p. 175).
We remove the steering column switches together with the connector (see “Removing the steering column switches and the switch connector with the spiral cable drum device,” p. 220).
We remove the instrument cluster (see “Removing the instrument cluster”, p. 229).
We disconnect the wire blocks from the ignition switch and the immobilizer coil (see “Replacing the immobilizer coil and the ignition switch contact group,” p. 206). We remove the floor tunnel lining (see “Removing the floor tunnel lining”, p. 255).
Location of the front passenger airbag wiring harness blocks in the vehicle interior.
Using the Torx T-20 key, unscrew the two self-tapping screws securing the headlight beam direction regulator.
. and push the regulator inside the instrument panel.
Overcoming the resistance of the plastic latches, we wring out the upholstery
left front pillar.
. remove the lower clamps from the holes in the instrument panel and remove the upholstery of the left front pillar. Similarly, remove the upholstery of the right front pillar.
Content
The situation in Russia is such that most families can afford a maximum of one car. And the best body for them is a large station wagon, which can accommodate all family members, pets, belongings and garden seedlings. The new car market offers few station wagons, and those that are sold do not fit into the budget of the average family. For such cars, Russian buyers go to the secondary market.
In this material we offer an overview of the Russian station wagon Lada Largus, for which on average they ask for 463 thousand rubles. The model has been produced since 2012 in three body types: a van, a five-door station wagon and a cross-version of the station wagon. “Largus” has only one generation so far; there have been no restylings or updates yet.
Motors and gearboxes "Lada Largus"
At the start of sales, Largus received reliable engines from Renault: a 1.6-liter with 84 hp. With. and 105 l. With. And although the engines were in no hurry to boast of efficiency (14 l/100 km) or even a hint of dynamics (acceleration to “hundreds” takes 14 seconds), with good maintenance they “ran” up to 400 thousand km! But in 2020, at the plant in Tolyatti they decided that French engines in a domestic car were expensive, impractical and generally bad manners, and began installing Russian engines on the Largus.
Our country cannot yet boast of achievements in the field of automotive industry, so the target audience did not accept engines from Vesta and Grants with joy. New engines are a little more economical (11 l/100 km) and more dynamic (12 seconds to “hundred”), but they do not have the same reliability. The resource has decreased to 200 thousand km, regular minor breakdowns have replaced problem-free operation.
Buyers did not have a choice of gearbox: all versions were equipped with a manual transmission. The box does not require special attention and lasts a long time. It is filled with oil for its entire service life, according to the manufacturer, but experts recommend changing it at least every 100 thousand km.
French gearboxes, which were installed with Renault engines, annoyed drivers with increased speed in fifth gear. Already at 90 km/h the speed was about three thousand, and at a speed of 110-130 km/h the engine howled at four thousand revolutions. Even the music couldn’t drown out the roar of the engine, and fuel consumption increased with every kilometer. This disease is treated by removing the box cover and replacing the fifth gear gears. The boxes that were installed with domestic engines no longer suffered from this problem.
Replacing light bulbs with LED ones in Largus
During the operation of the car, headlight lamps can burn out - this happens periodically on almost all cars. Of course, you can change the light bulbs at an authorized dealer or workshop, but it is not necessary to pay for the work that you can do yourself. On the Lada Largus, the popular H4 type lamps (60 or 55 Watt power, 12V voltage) are used for low and high beam operation. One bulb is responsible for both high and low beam, its resource ranges from 2 to 4 thousand hours of operation.
The following foreign manufacturers have proven themselves as manufacturers of high-quality lamps:
We recommend using domestic brands - they are very inexpensive, but also have very good quality.
Please note that lamp replacements are carried out only in two pieces!
When selecting a lamp in a store, make sure that, in addition to the proper service life, they have a brightness of approximately 1500-1600 lm and a power of 45 to 60 watts. If the light of a lamp is important to you, you can choose a slightly yellowish shade (halogen lamps) or the so-called. pseudoxenon (slightly bluish light). The second option has a significant drawback - in rainy weather or fog, headlights with such lamps are not always clearly visible on the road. We still recommend that you purchase ordinary halogen light bulbs, which, although they are inferior in brightness to xenon and LEDs (although the latter, despite their higher cost, last longer and shine stronger), in rain or fog they will in any case be more effective in terms of glow.
No tools are required to change the lamps. The only thing to remember is that you should never take a new (or old, if it works) lamp by the bulb itself, this can lead to its loss of functionality - only hold on to the base!
Why it’s impossible to love the Lada Largus: the model’s disadvantages
To find out all the disadvantages of the Largus, we interviewed owners, studied user forums and, based on reviews, compiled a list of the car’s shortcomings.
Largus breeders have many questions regarding ergonomics. For example, the seat heating buttons are located in the “blind zone” next to the seat adjustment lever. For some reason, the joystick responsible for adjusting the side mirrors is located under the handbrake. The horn is hidden on the steering column lever. The electric windows were placed on the dashboard closer to the gearshift lever.
The interior is far from ideal: the materials used in the decoration are cheaper than the cheapest ones. The driver's seat and dashboard creaks from the factory.
The Largus salon is too ascetic. There is no heated windshield, steering wheel or rear seats, no modern multimedia, no good sound and no electronic assistants even in the options. Lada offers Largus buyers only heated front seats, an old radio, ABS and rear parking sensors.
Review of typical problems of Lada Largus
Due to the replacement of the engine range in 2020, owners of Largus cars with an 87-horsepower engine from Granta were faced with the problem of bursting expansion tanks. They were replaced under warranty in the first few years, but pay attention to this before purchasing.
Almost immediately after purchasing new models, even before the first 10 thousand km, the first speed wipers stopped working. It can be treated by cleaning the contact or replacing the entire unit, which just as quickly fails.
Often, many cars have jumping idle speeds, like acrobats in a circus, due to deformation of the throttle valve sealing ring.
In many cars, air conditioning condensation poured into the passenger compartment under the front passenger's rug. The culprit is two drainage holes - in the air conditioner housing and the valve itself, which did not match each other in size.
The back of the driver's seat often does not hold up and gradually leans back due to unreliable fastenings.
The boots of CV joints do not withstand the harsh Russian tests of frost and roads and tear, which is why dirt gets into the hinges.
Features of heating and air conditioning of the Lada Largus car
The heating (air conditioning) and ventilation system is a single complex that provides the most comfortable conditions inside the car, regardless of weather conditions and driving conditions
The system includes a heater (increases the air temperature in any mode of operation of the system), an air conditioner (reduces the temperature and humidity of the air, is installed depending on the vehicle configuration), an air blower, air ducts with a filter (provide air exchange in the cabin, clean the air from dust) and a unit control (controls all elements of the system to obtain specified comfort parameters).
The vehicle is equipped with a liquid-type interior heater.
The heater radiator is connected to the engine cooling system by two hoses running in the engine compartment.
The radiator is placed in a plastic casing of the climate unit, installed under the central part of the instrument panel.
Main heater components:
– heater radiator 6, designed to heat the air entering the passenger compartment with the heat of the engine coolant;
– air blower 11.
The electric motor 12 of the air blower, excited by permanent magnets, provides a controlled supply of outside air to the heater and air conditioner dampers.
To obtain different values of the air blower rotation speed, a block of additional resistors is installed in the power supply circuit of the electric motor;
– damper 15 for the air temperature regulator coming from the heater into the passenger compartment. The amount of air passing through the heater radiator and the outside air passing bypassing the heater radiator depends on the change in its position;
– dampers 2 for the distribution of air coming from the heater through the air ducts into the passenger compartment or for blowing the windshield.
Air conditioning system design
In a variant version, the vehicle is equipped with a compressor-type air conditioning system.
The heater and air conditioner evaporator units are arranged in one unit.
The air conditioning system controls are located in a block common with the heater controls.
A schematic diagram of the movement of refrigerant in the air conditioning system is shown in the figure.
The compressor is mounted on the engine cylinder block and is driven by a ridge belt.
The compressor circulates the refrigerant in the system.
The compressor shaft is mounted in the aluminum front housing cover on bearings and sealed on the drive pulley side with an oil seal.
Pulley 2 of the compressor drive is mounted on a double-row ball bearing and rotates constantly when the engine is running.
When the air conditioner is turned on, torque is transmitted from the pulley to the compressor rotor through a friction clutch with an electromagnetic drive.
If the system is working properly, when the air conditioner is turned on, a click is heard - this is the clutch pressure disk 1, under the action of an electromagnet, that engages with drive pulley 2, and the compressor rotor begins to rotate.
But during operation of the air conditioner, the following compressor malfunctions may occur.
If, when the air conditioner is turned off, the clutch makes strange noises during rotation, gets hot, or has a burning smell, then its bearing has probably begun to deteriorate.
In this case, the bearing must be replaced.
In some advanced cases, it may be necessary to replace the compressor clutch assembly or its component parts.
If you don’t hear a clicking sound after turning on the air conditioner, the following problems are possible:
– a refrigerant leak has occurred and the control system blocks the compressor from turning on;
– the pressure sensor in the system has failed;
– malfunctions in the electrical circuits of the control system;
– the winding of the clutch electromagnet coil has burned out;
– the engine control unit for some reason (high engine coolant temperature, high engine speed) blocked the compressor from turning on.
If the clutch rotates easily and freely, but when you turn on the air conditioner you can clearly hear extraneous noise or even the engine stalls, then the compressor is most likely jammed.
The internal pumping part of the compressor cannot be repaired. In this case, the compressor will have to be replaced.
And the last, most unpleasant option.
A click is heard, the clutch easily rotates the compressor shaft, but the air in the cabin does not cool. In this case, the compressor runs idle, pumping nothing.
Only an experienced specialist with special monitoring and diagnostic equipment can determine this malfunction.
The cause of the malfunction can be most accurately determined after a complete diagnosis at a specialized service center for the repair of automobile air conditioners.
The condenser (air conditioning radiator) of a multi-flow type is located in front of the radiator of the engine cooling system.
It is attached using four brackets to the radiator frame.
The condenser honeycombs are made of flat, thin-walled aluminum tubes with internal longitudinal baffles for rigidity and external fins to improve heat transfer.
Aluminum tanks, with flanges for connecting pipelines and receiver
The height of the tanks is divided into sections, therefore, passing through the condenser, the refrigerant flow changes direction several times
In the condenser, the vapors of the refrigerant compressed by the compressor are condensed and the heat released is removed into the surrounding air.
When the air conditioner is turned on, the engine control unit turns on the power circuit for the electric fan of the engine cooling radiator, which improves heat exchange in the condenser and reduces the pressure in the air conditioning system.
At least once a year, preferably before the start of summer operation, wash the fins “A” of the condenser honeycomb from adhering dirt, dust and deicing agents “B”. This will improve heat transfer, reduce pressure in the system and increase the service life of system elements.
Do not use high-pressure water jets to clean the condenser. This may cause damage to the “B” thin-walled fin plates.
Even with regular cleaning, the need to replace the condenser arises much more often than we would like.
The fact is that it is the first to absorb the flow of deicing agents, dirt and pebbles from the road. And the walls of the tubes are thin.
In most cases, the condenser is damaged by corrosion in the third or fourth year of operation.
If the seal of the condenser is compromised as a result of corrosion, it will be more expensive to repair it. Even if an argon welder manages to patch the hole, a leak may soon appear in another place. The pressure in the system on hot days can reach 25–28 bar.
In addition, the complex structure of the condenser tube should be taken into account: along it it is divided by partitions into channels, so there is a high probability that after welding some of the channels will be blocked. Accordingly, the dissipated power will drop and the performance of the air conditioner will deteriorate, especially in traffic jams and in hot weather.
After each experiment with patching the condenser, you will need to pay for removal and installation, welding of the condenser and refilling the system with refrigerant. So it’s better to install a new condenser right away
The evaporator is located in the heating (air conditioning) and air ventilation system unit in the cabin.
The evaporator is made of aluminum tubes with external fins to improve heat transfer.
Passing through the evaporator tubes, the boiling refrigerant actively absorbs heat from the air blowing on the outer finned surface of the tubes. The air is cooled and supplied to the vehicle interior by an air blower.
When the air passing through the evaporator cools, the water vapor contained in it condenses.
The condensate drains through a drain pipe located on the lower part of the right side of the body panel to the underbody of the vehicle.
If the ambient air humidity is high, a puddle of water may form under the car, which is an indirect sign that the air conditioning system is working properly.
During vehicle operation, particles of road dust and dirt settle on the outer surface of the evaporator, damp from condensation.
This layer becomes an excellent environment for life and rapid reproduction of putrefactive bacteria and fungal cultures
Over time, an unpleasant odor appears in the car. It is felt especially strongly when the air conditioner is turned off and in humid weather.
In order to minimize the risk of this problem, when purchasing a new car, it is necessary to carry out preventive treatment of the evaporator with special chemicals, regularly replace the cabin filter and clean the drain pipe
If, despite the measures taken, the smell still appears, contact a specialized car air conditioning repair service to disinfect or flush the evaporator
If the contamination is very severe, the evaporator will have to be replaced.
On the side surface of the evaporator there is a flange for attaching a thermostatic valve.
thermostatic valve is located in the evaporator housing.
The valve is attached to the pipelines and the evaporator using flange connections
Having passed through the throttling hole in the valve body, the liquid refrigerant sharply reduces its pressure and begins to boil
A control element is installed in the valve body, which changes the flow area of the throttling hole depending on the pressure and temperature of the refrigerant
The control element is set at the factory and cannot be adjusted during operation.
The receiver-dryer is installed on the condenser on the left side and forms a non-separable unit with it.
Inside the housing there is a filter element (cartridge) filled with desiccant granules (silica gel)
The liquefied refrigerant passing through the receiver is cleaned of possible impurities, dirt and moisture. At the bottom of the housing there is a hole for replacing the filter element.
In case of repair or replacement of elements of the air conditioning system, if it was in an open state (any components were removed, pipelines were destroyed, etc.), the receiver-dryer cartridge must be replaced. Otherwise, after charging the system, the refrigerant will not be dried and acids may form inside the system, which will destroy the air conditioner parts from the inside.
Pipelines connect all elements of the air conditioning system into a single sealed circuit.
The pipelines and their mounting flanges are made of aluminum alloys.
Protect metal sections of pipelines from dents and kinks. Any narrowing of the pipeline flow area leads to a decrease in system performance.
To connect mutually movable elements of the system, pipelines in some areas are equipped with flexible inserts made of synthetic materials.
O-rings made of neoprene are installed at the junctions of individual elements of the system.
During system repairs and when pipeline sections are disconnected, the O-rings must be replaced.
Tighten the threaded connections of the pipelines to the recommended torque.
Weak or excessively tight tightening leads to deformation of the sealing surfaces and leakage of refrigerant.
Service valves for connecting diagnostic and filling equipment are located on the pipelines.
The valves are closed with threaded caps to protect them from dirt.
The valves are equipped with spools that are similar in design to the wheel tire spools, but differ from them in size.
A special key is used to turn the spools in and out.
It is prohibited to check the presence of refrigerant in the system by pressing the service valve spools, since after such a check the valve spool may not close completely and refrigerant will leak from the system!
The pressure sensor is installed in the engine compartment on the high pressure line pipe section.
Based on sensor signals, the electronic engine control unit turns off the air conditioning compressor in the event of depressurization of the system or an emergency increase in pressure in it in order to protect the compressor from overloads.
The control unit for the heating, air conditioning and interior ventilation system is installed in the instrument panel.
Refrigerant
The system is charged with HFC-134a (R-134a) refrigerant. The total filling volume is (450±25) g.
A special oil FD 46XG (PAG) has been added to the refrigerant to lubricate the compressor. It is strictly prohibited to use other types of refrigerants and oils in the system.
During the operation of a car air conditioner, situations periodically arise when the air conditioning system requires servicing or repair.
For this purpose, modern diagnostic and repair equipment is used. The most common situation is the depressurization of the system and the release of refrigerant from it.
To detect leaks, highly sensitive halogen leak detectors with sound indication are used.
In some difficult cases, the method of so-called ultraviolet diagnostics of the tightness of the air conditioning system is used.
The method consists of introducing a special dye into the system in microdoses.
In places of microleaks, the dye, together with the refrigerant, gradually reaches the outer surface of the system elements.
During inspection of the system, the dye begins to glow (fluoresce) under the influence of ultraviolet rays from a special lamp and refrigerant leaks become visible.
It should be noted that the dye does not have any negative effect on the system. It can remain in the refrigerant and circulate through the system for as long as desired and only serve its purpose when a leak occurs.
After repairing the air conditioner, it is necessary to evacuate and charge the system with the appropriate refrigerant (R-134a).
The amount of air conditioner refilling is individual for each car model.
To carry out high-quality refilling of a car air conditioner you need:
– precision pressure gauge blocks with special connecting tips;
– two-stage vacuum pump to completely remove air and water vapor from the system;
– high-precision (division value no more than 5 g) scales for dosing refrigerant.
Due to the specific features of repairing the air conditioning system, this section describes only work on the removal and installation of individual elements and the system control unit
Work related to filling the system with refrigerant should be carried out in specialized service centers.
The air conditioning system is charged with high pressure refrigerant.
Contact of liquid refrigerant on human skin causes severe frostbite, therefore, if possible, carry out all work related to the maintenance, repair or dismantling of air conditioning system elements in specialized service centers equipped with professional technological equipment. When carrying out work on your own, take precautions.
Ventilation system design
The vehicle uses a supply and exhaust ventilation system.
Outside air can enter the cabin through the door windows when the windows are down and through the air blower grille located in front of the wind window.
Air from the air blower is supplied through air ducts into the vehicle interior through the windshield window nozzles, side and central nozzles, as well as through the lower nozzles of the heater housing.
Exhaust ventilation is carried out through a grille installed in the trunk of the car.
When placing cargo in the trunk, if possible, try not to block the ventilation grille. Leave a small gap between luggage and trim panels.
Effective operation of exhaust ventilation improves the temperature in the cabin and reduces the formation of condensation on the window glass.
Externally, the exhaust ventilation openings are closed by deflectors with petal valves, which are installed in the rear part of the body, in the cavity of the rear bumper.
Safety precautions when servicing the air conditioning system
Refrigerant is a chemical compound that must be handled with care to avoid harm to health.
Work in a well-ventilated area and avoid inhaling refrigerant vapors.
When performing work involving depressurization of the air conditioning system, you should always wear safety glasses and wrap fittings, valves and connections with a clean cloth.
It is prohibited to carry out welding work on a vehicle near components and pipelines of the air conditioning system.
It is prohibited to bend flexible pipeline inserts (hoses) with a radius less than four diameters of the flexible insert.
Inspect the hoses regularly for cracks and abrasions.
Before disconnecting the air conditioning system piping, all refrigerant must be removed from the system.
Unscrew the threaded connections of the system elements slowly. Keep your face and hands away from the disconnection point to avoid injury if there is still liquid refrigerant in the system.
If pressure is detected in the system while disconnecting the pipes, remove the refrigerant from the system.
Immediately after disconnecting any part of the system, cover the openings with caps or tape. This will prevent moisture and dirt from entering the system, which can cause failure of the pumping part of the compressor.
Should I buy a used LADA Largus?
"Largus" is not intended for beauty, comfort, dynamic and fast driving. Although the suspension has been adapted to Russian bad roads, the car’s handling is average. The car rolls in turns, but the car tries its best to maintain its trajectory. This is a roomy and reliable workhorse.
The dilemma of choice will be what year of car to choose. French engines last longer, but are not pleased with fuel consumption and poor gearbox settings. Russian engines break down more often, but are slightly more economical and do not have problems with the gearbox. New models may be in collateral, old ones may have incorrect mileage.
Here's an example. The new Largus 2020 with a mileage of only 3.5 thousand km. A dream is not a car:
Checking through avtocod.ru dispelled dreams: the car is listed as collateral:
Another copy, this time from 2014. Available for half the price:
The mileage is twice as much as stated in the ad:
There are also registration restrictions, unpaid fines and leasing. In general, this is also not an option.
If you find a “pure” Largus, take it. This is a budget passenger car with the spaciousness of a minivan, which will become a reliable friend and faithful assistant for your family.
Author: Ekaterina Lipatova
Would you take a Lada Largus? Or maybe you have had experience using such a car? Tell us about it in the comments.
Largus station wagon review
This car can easily adapt to any of your needs.
LADA Largus ideally combines comfort, practicality and high payload.
The car looks very friendly: faceted lines of body panels, decisive wheel arches, original taillights, and a signature radiator grille. Strong, well-built, confident Largus clearly states: “You can rely on me!”
LADA Largus has a dynamic body design, a modern interior and a surprisingly spacious interior.
Largus is the only car of its class that provides truly comfortable seating for seven adult passengers.
Thanks to folding seats, LADA Largus can be easily transformed to suit any needs - from a tourist trip to the transportation of large cargo.
LADA Largus is adapted to Russian operating conditions, and the proven design and technology ensure the high quality of the vehicle.
Some cars are designed for speed records. Others - to dazzle everyone with a bright design.
And Largus is created for real life. He will go where there is no way for a sports car. And they will look at him with love. Because it is the working car that is truly beautiful.
- Small overhangs and a ground clearance of 170 mm (145 mm with the maximum permitted load) - we have a car with excellent cross-country ability for its class.
- The high-torque motor confidently accelerates the Largus at full load.
- Interior transformation: from a 7-seater station wagon to a 2-seater truck.
- The third row of seats can be removed (without tools) and stored in the garage.
- The maximum load on the rails is 80 kg.
- Convenient hinged tailgates are fixed in several positions.
- The engine compartment is protected by a powerful mudguard made of 2 mm steel.
- 15-inch wheel rims.
LADA Largus is an amazingly roomy and very comfortable car.
The wide driver's seat is equipped with height adjustment and lumbar support. Truly comfortable seats have been created for passengers in the third row: men above average height feel free here. Each of the three rows of seats is equipped with air ducts to warm the feet of passengers.
The car's chassis is tuned for comfort: a long wheelbase ensures a smooth ride, and the energy-intensive suspension copes well with different types of surfaces. The front subframe provides confident stability and controllability at any speed.
LADA Largus is European-quality. All systems - from pedals to door handles - work with minimal effort. Thanks to the careful selection of materials, high acoustic comfort is ensured - even with high mileage, there are no squeaks in the cabin.
Despite its European pedigree, LADA Largus is a car for our roads.
A reliable long-travel suspension that easily “swallows” bumps and potholes, high ground clearance and good geometric cross-country ability – these are confident arguments against surprises on roads and directions!
- All external body panels of LADA Largus are made of double-sided galvanized steel.
- The B0 platform on which Largus is built has proven itself well all over the world.
- Largus is entirely manufactured using RENAULT-NISSAN Alliance technologies.
- The basic design, originally created for Eastern Europe, was adapted for Russia: the suspension and brakes were strengthened, the thickness of the anti-gravel and the area where it was applied to the bottom was increased, and chip protection linings appeared on the wheel arches.
- LADA Largus has original engine control calibrations, which make the car fully adapted to Russian gasoline.
- The terms of the LADA Largus warranty are 3 years or 100 thousand kilometers.
Removal and installation of the Lada Largus instrument panel
Tools:
- Open-end wrench 10 mm
- Medium flat screwdriver
- Torx key (asterisk) T20
- Driver for socket attachment
- Knob attachment 10 mm
1. Place the car in the workplace. Raise the hood, disconnect the ground wire terminal from the battery (10mm wrench).
Figure 1 — Instrument panel assembly
1 — upholstery of the wind window pillar, left;
2 — instrument cluster;
3 - dashboard;
4 — passenger airbag module;
5 — upholstery of the wind window pillar, right;
6 — ventilation nozzle;
7 — floor tunnel lining;
8 — central trim of the instrument panel;
9 - steering wheel;
10 — Driver’s MNPB.
2. Lock the airbag computer using the diagnostic tool.
3. Remove the driver air bag module (DIA).
4. Remove the steering wheel, steering wheel covers, shift paddles, steering column adjustment knob and transponder ring.
5. Having overcome the resistance of the clamps, fold back the decorative plug 1, Figure 2, unscrew screw 2 and remove the rear part of the floor tunnel lining 3 (flat screwdriver, replaceable Torx T20 head, wrench).
Figure 2 - Fastening the rear part of the floor tunnel lining
1 - decorative plug;
2 — screw securing the rear part of the floor tunnel lining;
3 - rear part of the floor tunnel lining.
6. Unscrew two screws 1, Figure 3, securing the front part of the floor tunnel lining (replaceable Torx T20 head, knob).
Figure 3 — Fastenings of the front part of the floor tunnel lining
1 — screw securing the front part of the floor tunnel lining;
2 — the front part of the floor tunnel lining.
7. Unscrew nut 4, Figure 4, and two screws 1. Remove cover 5 of the gear shift lever.
8. Disconnect the wiring harness block from the cigarette lighter 2 and remove the front part of the floor tunnel lining 3 (replaceable head 10, replaceable head Torx T20, extension, wrench).
Figure 4 — Fastening the front part of the floor tunnel lining
1 — screw securing the front part of the floor tunnel lining;
2 - cigarette lighter;
3 — front part of the floor tunnel lining;
4 — nut securing the front part of the floor tunnel lining;
5 — gear shift lever cover.
9. Remove the central trim 1, Figure 5, of the instrument panel, overcoming the force of the clamps.
10. Disconnect the wiring harness connectors from the switches and remove the trim.
11. Remove the plug from the center console of the instrument panel or the radio with CD player 2, disconnect the wiring harness connectors and the antenna (radio and CD player puller).
Figure 5 — Central console of the instrument panel
1 — central trim of the instrument panel;
2 - radio and CD player.
12. Remove decorative trims 1 and 3, Figure 6, overcoming the force of the clamps.
13. Unscrew two screws 2 securing the visor of the instrument cluster and remove it, overcoming the force of the clamps (replaceable Torx T20 head, knob).
Figure 6 — Decorative overlays of the instrument panel
1 — left pad;
2 — screw securing the visor of the instrument cluster;
3 - right overlay.
14. Unscrew the four screws 1, Figure 7, securing the instrument cluster 2. Disconnect the two wiring harness blocks and remove the instrument cluster (replaceable Torx T20 head, knob).
Figure 7 — Mounting the instrument cluster
1 — screw securing the instrument cluster;
2 — instrument cluster.
15. Remove the wind window pillar trims left 1 and right 5 (see Figure 1), overcoming the force of the clamps.
16. Remove handle 4, Figure 8. Unscrew the two screws 3 securing the headlight range control regulator 2, remove it from the hole in the instrument panel (replaceable Torx T20 head, knob).
17. Having overcome the force of the clamps, fold back the decorative plugs 5 and unscrew one screw 1 of the lower fastening of the instrument panel on the left and right (replaceable Torx T20 head, knob).
Figure 8 — Attaching the headlight level control and instrument panel
1 — screw for the lower fastening of the instrument panel;
2 — headlight level control;
3 — screw for fastening the headlight corrector;
4 - headlight level control handle;
5 - decorative plug.
18. Unscrew screw 1, Figure 9, securing the instrument panel through the window that opened after removing the radio and CD player (replaceable Torx T20 head, extension, wrench).
Figure 9 — Central mount of the instrument panel
1 — screw for the central fastening of the instrument panel;
2 - dashboard.
19. Unscrew the two screws 1, Figure 10, securing the heating, air conditioning and ventilation control unit 3 to the instrument panel, squeeze the clamps 2 and push the unit inside the instrument panel (replaceable Torx T20 head, knob).
Figure 10 — Mounting the heating, air conditioning and ventilation control unit
1 — screw securing the heating, air conditioning and ventilation control unit;
2 — clamps;
3 — control unit for heating, air conditioning and ventilation.
20. Unscrew two screws 2, Figure 11, securing the instrument panel 1 to the heater body (replaceable Torx T20 head, extension, knob).
Figure 11 — Attaching the instrument panel to the heater body
1 - dashboard;
2 — screw securing the instrument panel to the heater housing.
21. Unscrew one screw 1 from the right and left sides, Figure 12, of the upper fastening of the instrument panel 2 (replaceable Torx T20 head, knob).
Figure 12 — Upper mount of the instrument panel
1 — screw for the upper fastening of the instrument panel;
2 - dashboard.
22. Remove the instrument panel. When removing, remove the diagnostic connector from the socket in the glove box and disconnect block 1, Figure 13 (remove with an assistant).
Figure 13 — Wiring harness block
1 — wiring harness block;
2 - dashboard.
23. Unscrew four nuts 2, Figure 14, securing the passenger airbag module 1, disconnect the wiring harness block 3 and remove the passenger airbag (replaceable head 10, knob).
Figure 14 — Fastening the passenger airbag
1 — Passenger’s MNPB;
2 — nut securing the passenger airbag;
3 — wiring harness block.
24. Remove outer ring 1, Figure 15, ventilation nozzles.
25. Remove the inner ring 2 of the ventilation nozzle and, pressing the three clamps 3, remove the housing 4 of the ventilation nozzle from the instrument panel.
Figure 15 — Ventilation nozzle
1 — outer ring of the ventilation nozzle;
2 — inner ring of the ventilation nozzle;
3 - retainer;
4 — ventilation nozzle housing.
Installation
1. Install the removed parts in the reverse order of removal.
2. Unlock the airbag computer using the diagnostic tool.
The article is missing:
- Photo of the instrument
- High-quality photos of repairs
Source: https://lada-largus.narod.ru/html/panel.html
Seven-seater saloon
The third row of seats in the Lada is by no means symbolic. Not only children, but also adult passengers can easily endure a long journey in the gallery. Largus is indeed capable of taking seven people on board and delivering them in comfort. The rear features not only full seats and seat belts, but also attributes of additional comfort - cup holders and opening windows. So, if you need a car with the capacity of a minivan at a reasonable price, there are no alternatives to Largus.
Capacity
Built on the basis of the first-generation Renault Logan, the station wagon formally belongs to the B-class. But you can't tell by the dimensions. Some people also consider the Lada Vesta SW to be an overgrowth of the B segment, but meanwhile the Largus is 60 mm longer than the Vesta and by as much as 270 mm in wheelbase! It’s clear now how, with more than enough space in the second row of seats in the car, there was also room for a trunk of record volume. With a five-seat cabin configuration, it holds 560 liters, with a two-seat configuration - 2350 liters.
Even when seven people are sitting in the cabin, there will be 135 liters left for their luggage. Not much, but still a very decent indicator. Moreover, Largus is not limited to an ordinary trunk. Thanks to the high ceiling above the second row of seats, the designers added a spacious shelf. She is also ready to accept some things. Let's not forget that the package includes roof rails. This means that cargo can also be placed on the top trunk.
Interesting modifications
The former head of AVTOVAZ, Bo Andersson, caught the fashion for pseudo-crossovers and gave instructions to quickly prepare new products. As a result, the “urban” Lada 4x4 Urban, Cross versions of Kalina and Largus were born simultaneously. The latter received increased ground clearance from 145 to 170 mm, a practical body kit made of unpainted plastic and original interior trim. As a passenger car, Largus looks unprepossessing, but the “off-road” decor has noticeably ennobled it. Therefore, there were many willing to pay extra for it. Buyers also liked the opportunity to get a car with a fiery orange interior.
Reliability
The myth that a foreign car cannot be adapted to harsh Russian conditions better than native domestic cars was dispelled first by the Renault Logan, and then by its derivative Lada Largus. This machine is truly extremely reliable and durable. Examples of operation in taxis and the commercial sector are the clearest proof of this. The B0 platform units are unpretentious, their design has been proven over the years.
Replacing French engines with VAZ ones only added to the model's advantages. They turned out to be no worse in terms of service life, but at the same time more powerful, “faster” and more economical. In addition, an increase in the percentage of localization helped curb price increases.
Editorial Largus, who has been working in ZR since 2012, was no exception to the rule. Over more than 120,000 km of mileage, it required minimal unscheduled interventions, but they turned out to be uncritical and non-disastrous.
Dashboard Lada Largus (removal and installation)
The Lada Largus car is equipped with a prefabricated instrument panel, consisting of a decorative panel and a panel frame. The decorative panel is a molded plastic piece that is screwed to the frame. Attached to the decorative panel are control instruments, vehicle controls, heating (air conditioning) and ventilation systems, as well as linings that cover components located under the instrument panel or serve to install instruments and controls; air duct nozzles, glove box. The panel frame consists of steel reinforcement, to which steering elements, wiring harnesses and vehicle electrical system units are attached. The frame is attached to the A-pillars, the front panel, the base of the body and is part of its power structure. In this article we will talk about the procedure for removing the instrument panel from a Lada Largus car. Here are step-by-step photos and a description of them.
Asceticism
Largus's main and most obvious drawback is his deliberate asceticism. The interior has not changed a bit since the first generation Renault Logan. The list of options contains only the necessary minimum, although today more and more buyers want to see some extras in it, such as additional heating, advanced multimedia, and electronic assistants. Largus is only able to offer heated front seats, a single-din radio, ABS and rear parking sensors. There are only two airbags, the air conditioning is manually controlled.
From the outside, the Lada Largus looks more like a slightly improved truck than a civilian passenger car. The situation is partially saved by the body kit of the Cross version. The long-promised automated transmission also never appeared, as did the 1.8 engine. Commercial versions have no use for them, but many people buy Largus as a family station wagon and drive it to work every day. There are also plenty of mistakes in terms of ergonomics. If AVTOVAZ had corrected at least some of these problems, the popularity of the car would have immediately increased. Let's see what the upcoming restyling will bring to Largus.
By the way, Largus also serves in the editorial office of ZR.
You can use it, as well as any other editorial car in our
ZR Park
.
Removing and installing the dashboard of a Lada Largus car
We prepare the vehicle for work. Disconnect the negative terminal of the battery.
Disable the airbag computer using a diagnostic tool.
We remove the driver airbag module (MNAPB).
Remove the steering wheel, steering wheel covers, steering column switches, steering column adjustment knob and transponder receiving ring.
Having overcome the resistance of the clamps, fold back the decorative plug 1, Figure 2, unscrew screw 2 and remove the rear part of the floor tunnel lining 3 (flat screwdriver, replaceable Torx T20 head, wrench).
Unscrew two screws 1, Figure 3, securing the front part of the floor tunnel lining (replaceable Torx T20 head, knob).
Unscrew nut 4, Figure 4, and two screws 1. Remove cover 5 of the gear shift lever.
Disconnect the wiring harness connector from the cigarette lighter 2 and remove the front part of the floor tunnel lining 3 (replacement head 10, replacement head Torx T20, extension, wrench).
Remove the central trim 1, Figure 5, of the instrument panel, overcoming the force of the clamps.
Disconnect the wiring harness connectors from the switches and remove the trim.
Remove the plug from the center console of the instrument panel or the radio with CD player 2, disconnect the wiring harness connectors and the antenna (radio and CD player puller).
Remove decorative trims 1 and 3, Figure 6, overcoming the force of the clamps.
Unscrew the two screws 2 securing the visor of the instrument cluster and remove it, overcoming the force of the clamps (replaceable head Torx T20, knob)
Unscrew the four screws 1, Figure 7, securing the instrument cluster 2.
Disconnect the two wiring harness connectors and remove the instrument cluster (replaceable Torx T20 head, knob).
Remove the wind window pillar trims left 1 and right 5 (see Figure 1), overcoming the force of the clamps.
Remove handle 4, Figure 8. Unscrew the two screws 3 securing the headlight range control regulator 2, remove it from the hole in the instrument panel (replaceable Torx T20 head, knob).
Having overcome the force of the clamps, fold back the decorative plugs 5 and unscrew one screw 1 of the lower fastening of the instrument panel on the left and right (replaceable head Torx T20, knob).
Unscrew screw 1, Figure 9, securing the instrument panel through the window that opened after removing the radio and CD player (replaceable Torx T20 head, extension, wrench).
Unscrew two screws 1, Figure 10, securing the heating, air conditioning and ventilation control unit 3 to the instrument panel, squeeze the clamps 2 and push the unit inside the instrument panel (replaceable head Torx T20, knob).
Unscrew two screws 2, Figure 11, securing the instrument panel 1 to the heater body (replaceable Torx T20 head, extension, knob).
Unscrew one screw 1 from the right and left sides, Figure 12, of the upper fastening of the instrument panel 2 (replaceable Torx T20 head, knob).
Remove the instrument panel.
When removing, remove the diagnostic connector from the socket in the glove box and disconnect block 1, Figure 13 (remove with an assistant).
Unscrew four nuts 2, Figure 14, securing the passenger airbag module 1, disconnect the wiring harness block 3 and remove the passenger airbag (replaceable head 10, knob).
Remove outer ring 1, Figure 15, ventilation nozzles.
Remove the inner ring 2 of the ventilation nozzle and, pressing the three clamps 3, remove the housing 4 of the ventilation nozzle from the instrument panel
Install the removed parts in the reverse order of removal.
Unlock the airbag computer using the diagnostic tool.