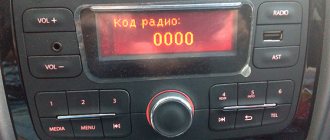
How to connect the radio directly to the battery? 4 ways
Many car enthusiasts are interested in how to connect the radio directly to the battery. After all, incorrectly connected equipment can lead to battery discharge. Which is not very pleasant, and also has a negative impact on battery performance. There are quite a few connection methods, it is possible to choose the most optimal option. The method is selected depending on the operating characteristics of the radio, as well as your needs. Below we will discuss the main ways to connect equipment. All of them can be performed by anyone, even without the slightest idea about electrics. At the same time, methods for simultaneously connecting two radios will not be affected. Note that the principle here will be the same.
Connection features
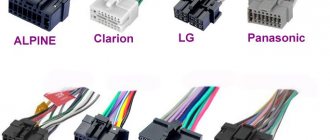
How to connect the radio directly to the battery? This depends on some features of the radio you purchased. Particular attention should be paid to the connector through which power is connected to this media device. The most convenient to use are universal connectors (ISO), connecting a new radio will be as easy as shelling pears, just rearrange the chip with wires to the new equipment. If you have a custom connector, you will have to buy an adapter. Also, some car enthusiasts simply connect the wires to the radio in accordance with the diagram.
We feed plus to the radio
Many people make mistakes when connecting such devices. They take the simplest route and turn on the radio through the cigarette lighter. This does not allow you to use all the technical features of the device. At high volumes, the screen begins to flicker and the sound quality decreases. In general, all the advantages of a high-quality radio tape recorder disappear.
In this regard, it is usually recommended to connect the plus to the radio directly from the battery. This will allow her to achieve optimal nutrition. Don't forget about safety. Be sure to connect through a fuse, this will help avoid short circuits. At the same time, make sure that the wires do not differ in diameter. Modern radio tape recorders have 2 positive terminals.
Yellow is called power, it is responsible for the memory of the equipment. The red wire is the control wire. Both of these terminals should be connected to the battery. For greater convenience, it makes sense to combine them immediately after leaving the connector. This will make it easier to connect the fuse to the circuit. With such a simple connection, take into account the current consumption of the radio in sleep mode. At higher rates, your battery will be drained on the first night.
How to unlock the radio
To unlock the audio system, you must enter a special code, as discussed above. If the process of entering a code is not difficult to understand, then getting it is even more difficult. There are 3 ways to find out the unlock code for your car radio:
- Find the required numbers using different methods without the help of others;
- Ask the dealership for the code to unlock the audio system;
- Call professionals who are ready to “hack” the radio for money.
Let's take a closer look at each method to find which one is right for your situation.
How to find out the code to unlock the radio without the help of others
unlock code, battery replacement
Our contacts: Decoding of radio tape recorders online: https://odocar.ru/ Removing the complete blocking of radio tape recorders and linking to.
Our contacts: Decoding of radio tape recorders online: https://odocar.ru/ Removing the complete blocking of radio tape recorders and linking to.
If you can’t find the unlock code in your car’s glove compartment, you can try searching for sacred numbers on the Internet on special websites. There are a huge number of resources on the network that have special services that allow you to enter the radio number, and the program will determine the code for it. The disadvantage of this method is that in order to determine the audio system number it must be removed from the car, and for this in most modern cars it is necessary to disassemble part of the front panel. Removing the radio is still half the task. It has a huge number of stickers with service information, but which one specifically is the radio code also has to be found on the Internet. If the car model is extremely rare, there is a high possibility that finding the radio unlock code on the Internet will be quite difficult, if possible at all.
Don’t forget about the option of finding out the radio unlock code from the car’s service book. If you got your car secondhand and exchanged phone numbers with the former owner, be sure to call him and try to find out information about the PIN code for the radio.
Unlock the radio at the dealership
dealershipyour car
The disadvantage of this method is that not all dealership centers undertake such work. If the employees agree to help, it will be for a fee, and you will first have to drive your car to the dealers.
Use the services of radio unlocking specialists
Another paid option to find out the unlock code for an audio system is to contact specialists who have special equipment to determine the code of a specific device. You have to pay for their services, but the advantage of the masters is that they will help even in a critical case in which the radio is “tightly blocked.” If you enter the unlock code incorrectly three times, there is a high risk of completely blocking the device. Specialists will handle unlocking it, but only for an additional fee.
You should not try to find the unlock code for the radio; after 3 or 5 attempts, it will be completely blocked, and you will have to spend a significant amount to get the audio system to work normally again.
If the radio is completely blocked, specialists do the following:
- Remove the device from the car, after which it is completely disassembled;
- Next, they find the memory inside the device, and through the use of special equipment, read a code from it, which is “hardwired” and used to compare it with the entered combination of numbers;
- After this, information about the number of incorrect attempts to enter unlock codes is deleted;
- At the last step, the radio is assembled, the PIN code is entered, and the audio system works again.
If you have information about the radio unlock code, try to do as much as possible to avoid a complete loss of power to the multimedia system. Carry with you a working car battery, and if necessary, urgently install it in place of a faulty or discharged battery.
Connection via ignition
In order to avoid a situation with the battery discharging during long-term parking, many drivers connect the radio through the ignition switch. To do this, there is a wire responsible for powering the contact group of the lock; the positive wires from the radio are connected to it. In this case, when the ignition is turned off, the playback device is disconnected from the power supply.
The disadvantage of this method is the need to turn on the ignition if you want to listen to music. This may lead to increased battery drain.
Connection via button
A more optimal solution is to use a button to turn the radio power on and off. Everything is quite simple here. We take the wire that goes to the plus and connect it through a regular button with two positions (on and off). This allows you to most optimally manage the power supply of the radio. When leaving the machine overnight or for a long period of time, simply turn off the power by pressing the button. Usually this button is located on the console not far from the radio itself.
Using this technique will allow you to use your musical equipment regardless of the position of the key in the ignition.
Separate button
One of the most suitable connection options is to output a separate button that will turn off/on the power to the car radio. In this case, the red wire should be soldered not to the ignition switch wire, but to one of the button terminals. The second pin of the button is connected to the battery. Essentially, you can control the power supply yourself. Before parking overnight, you just need to press a button. You will no longer be dependent on the position of the key in the ignition switch.
The option of connecting via an alarm system also has a right to exist. The bottom line is to use contact relays and a diode. This scheme is not very common, so we will not dwell on it in detail.
conclusions
A sound system in a car is necessary because it makes travel much more comfortable. We looked at the most popular options for connecting a radio to a car battery. Which one to choose is up to you. In any case, we note that everything needs to be done carefully, because we are talking about an electrical circuit. You should not neglect safety rules, since a short circuit is not the most pleasant phenomenon, which can have very sad consequences.
In any car of domestic or foreign production it is possible to install a radio receiver or music player that operates from the on-board network. To connect the head unit, standard ISO connectors or various adapters are used. To reduce the leakage current, which can discharge the battery in 5-7 hours, the car owner needs to know how to connect the radio directly to the battery.
Read more: What kind of bulbs are in the headlights of Golf 4
Connection to dimensions
This is quite an interesting way. For this, you will need to find a suitable wire under the dashboard that feeds through the dimensions. On most models, the easiest way to connect is to the glove compartment light bulb. To do this, the wire from the red terminal of the radio is connected through a relay to a light bulb. The yellow wire is connected directly to the power source through a fuse.
Now the radio only works when the lights are on. At the same time, turning off the light does not affect the current memory of the head unit. To save energy, it is recommended to install LEDs in the dimensions.
Conclusion
. It is difficult to imagine a modern car without audio equipment. There are a large number of different devices on the market. At the same time, many drivers are wondering how to connect the radio directly to the battery. After all, there are quite a few methods; different methods are better suited for different machines. Do not forget that connection errors can lead to increased battery drain.
How to connect
You can connect the radio to the VAZ-2106 via the ignition switch, but this scheme is considered less attractive, since you won’t be able to listen to the radio with the engine turned off. The standard connection diagram involves the use of standard wiring. Among other features of connecting the VAZ-2107, we note the following points:
Are you a car driver?! Then you can take this simple test and find out. Go to test »
- It is forbidden to connect directly to the battery, as this can lead to rapid wear.
- To eliminate the possibility of battery discharge, a power button is embedded in the yellow wire.
- There is no standard fuse in the classic assembly. To install it, you need to change almost the entire electrical circuit. The easiest way is to purchase a power cable that already has a safety element built into it. A 20 A device is required for normal starting.
The service life of the speaker system largely depends on the correctness of the created power system. It is recommended to insulate the wire; the contacts are connected by soldering or using special adapters.
Speakers
In order to connect the radio to the VAZ-2106, you should connect it to the speakers. Among the main recommendations we note the following:
- The speakers are being installed and sealed tightly. Otherwise, vibration may occur.
- Most attention should be paid to correct cable routing. At the point of contact with metal, high-quality insulation should be carried out, since vibration can cause the insulation to rub through.
- The connection procedure involves the use of special adapters. In addition, connections can be made by soldering; all connections are insulated.
A modern radio has appropriate outputs for speakers. The power supply network should have a minimum number of connections, as they may cause increased resistance.
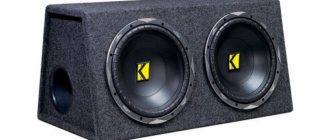
Subwoofer
When improving the sound system of the car in question, a subwoofer is often installed. This element is designed to output low frequency sound. Among the connection features, we note the following:
- A modern device has a corresponding output for connection.
- For a speaker like this, it is recommended to use a larger gauge wire.
It is recommended to lay the cable under the vehicle's skin. The radio tape recorder is connected to the VAZ-2107 using special chips.
Antenna
Before connecting a car radio to the VAZ-2107, you should consider the correct position of the antenna. Various artificial interference can cause signal quality to deteriorate, resulting in extraneous noise. Among the antenna connection features, we note the following:
- There is a corresponding connector for connecting an external device.
- If you do not have the required plug, you can purchase it and solder it to an outdoor antenna.
- A high-quality connection requires insulation using electrical tape or sealant. Too much humidity can cause corrosion, which will degrade the signal quality.
Installing and connecting the speaker system takes a relatively small amount of time. Most attention is paid to laying the cable to the power source, since it uses a battery.
Installing a radio in a VAZ
Today you can find almost any speaker head unit on the market. Different prices, different needs and finally, a car radio is purchased. Almost every one of them today is equipped with a radio receiver and is capable of reading discs of any format. And if the choice of a head unit is not a problem for many, then installing a VAZ or other car radio becomes a real problem. In our article we will look at how car radios are connected. Installation on a VAZ 2107 or another model should be easy and quick if you study everything that is presented below.
Instructions on how to connect the radio to the battery
Car players that exist today have a huge selection in their functional qualities, appearance, cost and other technical, quality and social parameters. But no matter how much this device costs, what functions and options it has, how well the radio will perform its direct duties. Namely, the playback of sound and video recordings from various media of such information largely depends on how the said head unit is correctly connected to the power supply system of your car - the battery.
Scheme
. Correct power connection
To supply power from the battery to the car receiver, three main wires are used: red, black and yellow. Where:
- The black wire corresponds to the negative charge (minus) of the battery.
- Wire in yellow braid, positive value (plus) of the battery.
- Red - positive wire from the ignition switch of a passenger car.
- The main way to fully answer the question of how to connect a radio via a battery correctly is the following diagram:
- The black cable is connected to any element of the car body convenient for these purposes, that is, to ground.
- Yellow - directly to the positive output of the battery. With intermediate installation of a 10 - 20 Ampere safety device.
- The red wire also goes to the positive, but this time to the ignition switch.
For such connections, you should select a copper, multi-core cable with a cross-section of at least 4 millimeters in a reliable insulating braid.
Installing a radio, do-it-yourself connection basics
Any equipment operates from a source of electricity.
A car battery is a source of electricity, but at the same time it poses a danger to radios and speakers.
If you confuse the plus and minus of the radio, or confuse the speaker terminals, you can destroy the equipment.
But at the same time, it is necessary to connect from the battery and not from the cigarette lighter or ignition switch.
If you want clear sound and good power from your music equipment, you must connect to a battery.
An important point is to use short wires.
When connecting the plus, use stranded copper wire with a cross-section of at least 4 mm2.
There should be a 10-20 A fuse on the positive wire of the battery; the fuse should be well insulated and installed from the battery terminal at a distance of at least 40 cm.
Sometimes the manufacturer installs the fuse themselves.
The negative wire should also be as short as possible.
Why do they pay attention to the length of the wires?
But because the short wire can be laid neatly, without twisting and to prevent intersections with other consumers.
The wires are connected to the radio itself after the connection to the speakers has occurred.
To prevent the positive wire of the battery from being exposed, this wire must be well insulated until the moment when the car radio can be powered with the positive wire.
Possible troubles if the radio is connected incorrectly to the battery
The most disastrous result obtained from an incorrect connection of the battery to the car player is the occurrence of a short circuit. Which can not only completely damage the entire audio system, but also damage other electrical circuits of the car.
Also, if the connection is incorrect, the energy battery may be partially or completely discharged. Poor performance of the player's direct functions—sound failures in playback, extraneous noise, wheezing, and similar disturbances.
Radio connection options
There are several ways to connect the radio wires to the battery.
- Connection via ignition switch.
- Via a special button.
- Directly from the battery.
- Connection via the alarm management unit.
- To the vehicle's parking signals.
- To the home electrical network 220 Volts.
Connecting a car player via the ignition switch or button
These connections are recommended as an answer to the question of how to connect the radio so as not to drain the battery.
This is done through the ignition switch as follows:
- The yellow cable (plus) is fixed to the positive terminal of the 12V car battery.
- The red power wire is connected to the ignition (lock).
- Black (ground), goes to a car body part.
This connection is considered the most common and is recommended by experts. The positive and negative sides of this connection method are mutual. That is, the battery does not discharge while in a standby state when the car is parked. But you can listen to music only when the ignition is on.
Connection via a special button.
The wires are connected according to the diagram described above (ignition), with one exception. The red power wire is not connected to the ignition switch, but to the intermediate button. With a cable leading from it to the positive terminal of the battery. Thus, the player can be used without turning on the ignition, and also completely disconnected from the energy carrier (battery).
Antenna connection
Having a radio in the car, some car enthusiasts prefer to listen to music or watch videos. But many drivers like to listen to their favorite radio stations while on the road, which is why every car audio system has an FM tuner. An external antenna is required for its normal operation. Experts recommend installing an active module that ensures stable reception of radio stations. The antenna is powered from the car network via the radio.
Chinese audio devices are equipped with a special output labeled ANT. Depending on the settings, power may be supplied to the antenna when the radio is turned on or only to the radio. The antenna cable is connected to a special socket located on the back wall of the device. The receiving part is located on the windshield. The active antenna is connected with 3 wires:
- Weight. It is connected to the car body or to the standard terminal on the GU body.
- Power wire. Connects to the red wire of the device control.
- Antenna wire. Connects to the corresponding socket on the radio.
In the case of installing a simple receiving device, an antenna adapter containing an amplifier is additionally used to improve the quality of the received signal. In radios with a GPS module, an active GPS receiver is used, which ensures stable operation of both the navigator and the radio. Connects similarly to an active antenna for a car radio.
Hi all! Earlier I told you that I installed a 2din radio from the bottom) After driving for half a year, I got used to it and that thrill of a new thing subsided) Which means it’s time to disassemble and improve)))) Unfortunately, during the work I forgot to take a lot of photos, but it doesn’t matter, I'll write it on my fingers)
1. We unwind and the mafon falls apart into two parts: the face and the back. Since our sound is located in the back, let's take the back and look.
There is a 25v 2200mF capacitor and a TDA7388 amplifier of some kind of Chinese homemade production, because... there are no more markings)))
I didn’t plan to touch the audio device yet, so I didn’t remember it) But I decided to change the amplifier and storage device, rummaging through the bins, I found a 7560, also Chinese, unfortunately, but already factory-made, bought at one time in a good radio store.
Connecting the radio to batteries via side lights
An interesting, but not very clear (at least for the author of the article) connection method. The connection is made through the red terminal of the player to the power cable for the side signals running under the front panel (torpedo). Or to a lamp illuminating the interior of the glove box (glove compartment). With this connection, the yellow cable goes through a fuse to the positive terminal of the battery. With this connection, the radio only works when the lights are on?!
How to connect a radio to a battery at home
Since a car player is a mobile device, its scope of application does not end with the car interior. And throwing away a working receiver when replacing it with a new MMC is quite a shame. In such cases, an excellent solution would be to connect the radio to a household electrical outlet or an old but working battery, at the dacha or in a garage workshop. As a connection diagram, you can select the connection option via a button (toggle switch). If a suitable battery is not available, it can be replaced with a network adapter that converts standard 220 volts into the 12V required to power the radio. Or an uninterruptible power supply with a built-in 12 V battery. With this connection, the radio is not only provided with energy, but is also reliably protected from possible power surges.
Video instructions on how to connect the radio directly to a 12V battery.
How to directly connect a radio
Instructions on how to connect the radio to the battery
(2 ratings, average: 5.00 out of 5) Loading...
Car players that exist today have a huge selection in their functional qualities, appearance, cost and other technical, quality and social parameters. But no matter how much this device costs, what functions and options it has, how well the radio will perform its direct duties. Namely, the playback of sound and video recordings from various media of such information largely depends on how the said head unit is correctly connected to the power supply system of your car - the battery.
Scheme
. Correct power connection
To supply power from the battery to the car receiver, three main wires are used: red, black and yellow. Where:
- The black wire corresponds to the negative charge (minus) of the battery.
- Wire in yellow braid, positive value (plus) of the battery.
- Red - positive wire from the ignition switch of a passenger car.
- The main way to fully answer the question of how to connect a radio via a battery correctly is the following diagram:
- The black cable is connected to any element of the car body convenient for these purposes, that is, to ground.
- Yellow - directly to the positive output of the battery. With intermediate installation of a 10 - 20 Ampere safety device.
- The red wire also goes to the positive, but this time to the ignition switch.
For such connections, you should select a copper, multi-core cable with a cross-section of at least 4 millimeters in a reliable insulating braid.
Possible troubles if the radio is connected incorrectly to the battery
The most disastrous result obtained from an incorrect connection of the battery to the car player is the occurrence of a short circuit. Which can not only completely damage the entire audio system, but also damage other electrical circuits of the car.
Also, if the connection is incorrect, the energy battery may be partially or completely discharged. Poor performance of the player's direct functions—sound failures in playback, extraneous noise, wheezing, and similar disturbances.
Radio connection options
There are several ways to connect the radio wires to the battery.
- Connection via ignition switch.
- Via a special button.
- Directly from the battery.
- Connection via the alarm management unit.
- To the vehicle's parking signals.
- To the home electrical network 220 Volts.
Connecting a car player via the ignition switch or button
These connections are recommended as an answer to the question of how to connect the radio so as not to drain the battery.
This is done through the ignition switch as follows:
- The yellow cable (plus) is fixed to the positive terminal of the 12V car battery.
- The red power wire is connected to the ignition (lock).
- Black (ground), goes to a car body part.
This connection is considered the most common and is recommended by experts. The positive and negative sides of this connection method are mutual. That is, the battery does not discharge while in a standby state when the car is parked. But you can listen to music only when the ignition is on.
Connection via a special button.
The wires are connected according to the diagram described above (ignition), with one exception. The red power wire is not connected to the ignition switch, but to the intermediate button. With a cable leading from it to the positive terminal of the battery. Thus, the player can be used without turning on the ignition, and also completely disconnected from the energy carrier (battery).
Option for connecting a car radio via an alarm system
This scheme is relevant for remote control of the radio in case of contactless shutdown. A distinctive feature of this method is the installation of a diode in the electrical circuit section of the red cable. And five contact relays in the yellow wire and cable of the alarm device. This scheme is not particularly popular due to, albeit not very complex, but still additional, electrical installation work.
Connecting the radio to batteries via side lights
An interesting, but not very clear (at least for the author of the article) connection method. The connection is made through the red terminal of the player to the power cable for the side signals running under the front panel (torpedo). Or to a lamp illuminating the interior of the glove box (glove compartment). With this connection, the yellow cable goes through a fuse to the positive terminal of the battery. With this connection, the radio only works when the lights are on?!
How to connect a radio to a battery at home
Since a car player is a mobile device, its scope of application does not end with the car interior. And throwing away a working receiver when replacing it with a new MMC is quite a shame. In such cases, an excellent solution would be to connect the radio to a household electrical outlet or an old but working battery, at the dacha or in a garage workshop. As a connection diagram, you can select the connection option via a button (toggle switch). If a suitable battery is not available, it can be replaced with a network adapter that converts standard 220 volts into the 12V required to power the radio. Or an uninterruptible power supply with a built-in 12 V battery. With this connection, the radio is not only provided with energy, but is also reliably protected from possible power surges.
Video instructions on how to connect the radio directly to a 12V battery.
1avtozvuk.ru
Optimal connection of the radio to the car battery directly
Added: September 14, 2017
A radio is an indispensable attribute of any modern car. As a rule, more functional equipment is purchased instead of a standard device. In any case, the radio must be connected correctly. Note that there are several options for solving this problem. In this article we will list the main methods for connecting a car radio.
Almost all devices of this type today are equipped with a universal connector, thanks to which even a novice car enthusiast can handle the connection. There are also various adapters on sale that can make the task easier. Another option is to connect the wires according to a color scheme (usually it comes with the radio).
Connection to battery
Many motorists tend to connect the radio to the battery directly. In this case, you can provide the device with optimal power. This will also allow you to listen to music without having to turn on the ignition or a special button (we’ll look at these methods below).
Power is supplied through three main wires - yellow, red and black.
- red wire – positive, connects to the positive terminal of the battery;
- yellow wire – positive, connects to the positive terminal of the battery through a fuse (10-20 A), is responsible for powering the radio settings memory;
- black wire – ground, connects in any convenient place to the car body or connects to another similar cable.
Important! Don't forget the fuse to avoid short circuit.
The disadvantage of directly connecting the radio from the battery is that when idle, the radio often consumes energy (especially Chinese products from little-known brands). As a result, one fine day your car’s engine may simply not start due to a completely discharged battery. That is why we recommend connecting using one of the methods below.
Optimal options for connecting a car radio:
- through the ignition switch;
- via button;
- through the alarm system.
To solve the problem of possible battery discharge during long periods of inactivity, most car owners connect the radio to the ignition switch. You need to find the wire that powers the contact group of the ignition switch and screw (solder) the red wire from the radio to it. The yellow wire is connected to the positive terminal of the battery (so that the settings are always stored in memory). The black wire is to ground, as usual. It will no longer be possible to listen to music with the ignition off.
Separate button
One of the most suitable connection options is to output a separate button that will turn off/on the power to the car radio. In this case, the red wire should be soldered not to the ignition switch wire, but to one of the button terminals. The second pin of the button is connected to the battery. Essentially, you can control the power supply yourself. Before parking overnight, you just need to press a button. You will no longer be dependent on the position of the key in the ignition switch.
The option of connecting via an alarm system also has a right to exist. The bottom line is to use contact relays and a diode. This scheme is not very common, so we will not dwell on it in detail.
conclusions
A sound system in a car is necessary because it makes travel much more comfortable. We looked at the most popular options for connecting a radio to a car battery. Which one to choose is up to you. In any case, we note that everything needs to be done carefully, because we are talking about an electrical circuit. You should not neglect safety rules, since a short circuit is not the most pleasant phenomenon, which can have very sad consequences.
autofakty.com
Omsk forum :: (radio tape recorder, connect directly or through the ignition?)
srrg5554 wrote: The radio is red + with yellow + twisted together and on the + battery, I turn off the radio on the socket, does the battery run out when the radio is turned off (if you connect directly to the battery after turning off the radio, the panel remains backlit.) Or do you need the key? ignition red +.
In general, does the current consumption of a switched off radio depend on where the red + is thrown on the ignition switch or directly to the battery?
One power wire - lock it. The other wire is on duty, for memory of settings and clock, if there is one, it is on the acc.
[external reference]
— Also, when powering the radio, two wires, red and yellow, are used. In this case, yellow is responsible for powering the radio's memory (settings), and red (power) turns off the operation of the radio and involves connection to the ignition switch. That is, when you stop and turn off the ignition, the radio will automatically turn off. The most convenient, in my opinion, would be to connect the red and yellow wires in parallel and turn off the radio only using a button on the radio panel. But there may be certain problems here, since some radio tape recorders are designed schematically in such a way that the radio amplifier (output stages) is constantly powered by the red wire even in standby mode; accordingly, such a radio tape recorder will consume increased current in standby mode, which can lead to rapid battery discharge car in the parking lot.
omsk.com
autoprivat.ru
How to connect a car radio in a car with your own hands? (photo - video instructions)
Good afternoon. In today's article I will tell you how to connect a car radio in a car and analyze typical errors in connecting radios. Traditionally for our site, the article is equipped with detailed photos and video instructions.
Attention!
If, when connecting, you arrange the so-called. A short circuit can lead to melted wires, burns and, in extreme cases, a fire. Please, when connecting the car radio, be careful, carefully insulate all wire connections and do not forget about the fuse...
To connect the radio we need:
- The car radio itself, the speakers and their wires
- Stationery knife or special knife. tool for removing insulation from wires.
- Insulating tape.
- Fuse (10a-15a) and its connector.
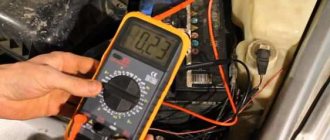
- Multimeter or test light.
- Crown battery
The simplest option is that the car has audio preparation.
Audio preparation – i.e. Special connectors, an antenna are installed in the car's wiring, and speakers are fixed in standard places. For many models, audio preparation is an option, and many owners refuse it in order to reduce the cost of the car when purchasing, but this should not be done, since radio installers will ask for much more money for it.
With factory audio preparation, installing a radio comes down to purchasing an adapter between the wiring connectors and your radio.
Adapters are freely sold in most stores that sell radio tape recorders, but if you want to save money, you can order them on AliExpress.
The adapters look like this:
The second most difficult option is that the car does not have audio preparation, but a radio tape recorder was previously installed (for example, a cassette).
In this case, you need to replace the radio connector with a new connector (or maybe you’ll be lucky and they will match).
The diagram for connecting a car radio looks like this:
Most likely after you cut off the old radio connector (it’s better to do this with the battery terminal removed). You will have several wires and you need to determine where they are coming from, usually you need to find the permanent positive, positive from the ignition, ground and speakers.
How it's done?
— We expose the wires using a utility knife and arrange them so that they do not short-circuit.
— We put the terminal on the battery.
— We connect one terminal of the test lamp (or multimeter) to the car body (ground) and with the second terminal, sequentially, we touch each of the exposed wires. When the light comes on or the multimeter shows voltage, congratulations, you have found a permanent positive.
— It’s better to immediately twist it with the radio connector (usually the wire is yellow and BAT +12v is written on it) and insulate it with heat shrink or electrical tape. A fuse with a rating of 10-15 amperes must be installed on this wire.
— We are looking for the plus from the ignition switch, to do this we open the lock to the “ignition on” position and similarly, using a multimeter or a light bulb, we look for the required wire. The found wire must be connected to the red wire of the radio connector (usually ACC+ is written on the wire); we do not isolate it yet!
Note (sometimes this wire is connected to a permanent positive, but in this case the radio will drain the battery, since it will not have a standby mode)
— We are looking for ground, to do this we disconnect the control lamp from the body and connect it to the last twist we just made and connect the second terminal of the control (multimeter) in series with the remaining wires. Once the light comes on (or the multimeter shows voltage), you have found ground. We connect it with a twist to the black wire of the radio connector (usually it is labeled gnd, ground)
Installing a radio, how to choose wires
Speaker wires also have their own markings.
The positive wires have a solid color, and the negative wires have the same color plus a black stripe.
This means that a solid-colored wire connects to the wide speaker terminal, and a wire with a black stripe goes to the narrow speaker terminal.
The negative wire for a pair of speakers of an acoustic system located on the side or from the front, with a system power of up to 20 W, can be common.
And if the system has a power of 30 W. and more for each channel, each channel has its plus and minus.
It is forbidden to confuse or swap wires.
It is forbidden to connect the minus to the car body to ground the speaker.
This procedure results in loss of power and distortion of sound.
If the radio has low power and manual tuning, there may be two or four speaker wires with a plus and not one wire with a minus.
In this case, for all speakers, the minus is connected to the main negative wire of the radio; it must be routed to the car body or to the minus terminal of the battery.
Almost all speaker systems, when purchased, have connecting wires. But these wires are testing and not installation.
Since the cross-section of these wires is very small, no higher than 0.5 mm2, it is not capable of transmitting all the power to the speakers without loss.
Such wires can only be used for speakers whose power is not higher than 20 W, and the diameter of the speakers is not more than 13 cm - such speakers can only create auxiliary acoustics.
Powerful speakers from 40 to 100 W, with a speaker diameter of more than 16 cm, are connected with special speaker wires.
The wires are made of oxygen-free copper and their cross-section is from 1 to 4 mm2.
On such wires there are arrows indicating the correct direction from the car radio to the speaker, and the direction of the coil of the copper bundle significantly affects the sound.
Do-it-yourself car radio installation and connection
Installing a car radio is a creative process, but not very complicated. An experienced car enthusiast, at least a little familiar with the basics of electrical engineering, will be able to connect the car radio with his own hands without any problems. We will tell you in this article how to properly connect a radio in a car, and in what order this should be done.
It should be remembered that an incorrectly installed and connected radio will not only sound bad, but may even lead to a short circuit or even a fire in the car.
A good video instruction for installing and connecting a car radio in a car can be seen in the video at the bottom of this page.
Incorrect connection of the car radio causes the following problems:
- When parked, the radio consumes too much electricity, as a result of which the battery is constantly discharged and if parked for a long time, there is a chance that the engine will not start.
- When listening to music at high volumes, the radio starts to “stutter” and significant distortion of the sound signal appears. Also, at high volumes, the car radio may simply turn off.
- When you turn off the power, the radio settings are lost.
All of these problems in 90% of cases arise due to incorrect connection.
How to enter a car radio code
Even if you found out the code yourself, you need to be able to enter it. The method of entering numbers is non-standard. In addition, each manufacturer provides its own option for entering the code. In some cases, there are separate input methods for each car radio model. We will tell you how to enter a PIN code on radios of various brands and models if you do not have instructions for the device.
The video shows an example of unlocking a car radio:
VW Alpha CC
To enter the code, you need to turn on the power of the device and wait until SAFE appears on the screen. Press 2 buttons simultaneously - TA and TP. They must be held until “1000” appears on the display. Now you can enter the correct code using buttons 1, 2, 3, 4. The buttons should be pressed several times. When the correct code appears on the screen, press and hold the TA, TP buttons again for 3 seconds.
Toyota 13702
This device model has a three-digit code. Turn on the radio and wait until Security appears on the screen. Now press the top arrow button. Hold it down and dial “1” at the same time. The Security text on the screen should change to Code. Using keys 1–3, begin entering the correct PIN code. To confirm the entered combination of numbers, press T1. The Security message will appear on the display again for a few seconds, after which the car radio will turn off. It can then be turned on and used again.
Entering a code when unlocking the radio
Ford (for most models)
Turn on the car radio and wait for the mark on the screen prompting you to enter a code. Entering numbers in Ford devices must be done by indirect dialing. You need to use the 1 key until the first number appears on the screen. You must enter the remaining numbers in the same way, but use buttons 2, 3, 4 sequentially. If entered correctly, confirm your choice with key 5.
Renault (for most models)
Typically, the code contains four digits. To enter, use the car radio's standard joystick or keys. Press the buttons several times in accordance with the code numbers. After entering, press and hold button 6.
In the video - unlocking the radio on Renault:
Nissan Note
Let's look at entering the code using the example - “5475”. To dial the first digit (5), press button 1 five times. Then press button 2 four times, 3 seven times and 4 five times. After entering the correct combination, press the Tuner Search button. If the code contains the number “0”, you do not need to enter it at all.
Opel Vivaro
The peculiarity of this car radio is that it does not have a display. Therefore, entering the code is quite difficult and you need to be extremely careful when typing numbers. Turn on the device and hold the AS button until it emits a characteristic beep. After that, use keys 1–4 to enter the correct code, pressing each corresponding number of times. Then you need to press AS again and hold for a couple of seconds until the radio emits a loud signal.
Now you know how to decode car radios. We recommend that, once you know the code of your device, you write it down securely. For example, the numbers can be indicated in your road atlas or in your service book. Then you definitely won't lose your code.
Features of installing car radios
According to the installation method, modern car radios come in two types: built-in and stationary.
- Built-in car radios are usually equipped with a removable front panel or a special curtain - the devices are simple, but effectively protect the radio from theft.
- Stationary car radios are usually installed by car manufacturers on the assembly line. Their original shape and non-standard sizes save them from theft.
When installing a car radio with your own hands, you need to consider the following features.
Firstly , you need to connect the radio only in accordance with the instructions. Failure to comply with this rule may lead to its failure or even fire. In this case, you should not use installation instructions for other car radios, since even the same manufacturer may have different plugs and wire markings depending on the model.
Most radios have a connection diagram on the top cover, and we will provide a typical connection diagram for a car radio below.
Secondly , you need to remember that the wiring of most domestic cars since Soviet times has been designed for the installation of radios and radios with mechanical settings, which can create additional inconvenience.
Setting up the radio
The main settings of the head unit include:
- menu language selection;
- disabling the demo screensaver;
- programming radio frequencies;
- setting the operating parameters of external players switched through the AUX port;
- adjusting the balance between speakers;
- setting frequency cutoff parameters (not available for all radios).
If an additional amplifier is used in the design of the car's speaker system, then you need to disable a similar device in the radio. Such manipulation is not required for all devices. Then the parameters of the external device are separately configured (in accordance with the instructions). Do-it-yourself settings and installation do not require special knowledge, but if the user is not confident in his own abilities, then it is recommended to visit a service center that installs speaker systems in cars.
The process of installing and connecting a car radio
The installation process for car radios of different types and manufacturers is not much different from each other. To do this, the container without a radio is installed in a standard socket and fixed by bending outward the metal petals along its perimeter.
- In modern cars, a special ISO standard connector is provided for connecting the car radio. The whole connection in this case comes down to the fact that you will need to insert the connecting block of the car radio into the corresponding ISO connector of your car.
- In older cars, as well as in many domestic cars, the ISO connector is not provided by design. To install a car radio in this case, you will have to purchase the appropriate connector and connect it yourself. Fortunately, the wires on such connectors are usually marked and signed.
Let's move on to connecting the car radio wires to the ISO connector. Take a look at the connection diagram below. As can be seen from the diagram, the left side of the ISO connector is responsible for powering and controlling the radio, and the right side is for connecting speakers to it.
Typical connection diagram for a car radio
The main step in connecting a car radio is connecting the power. It is at this stage that most mistakes are made.
Power is connected to the car radio through a separate fuse using a flexible stranded wire with a cross-section of at least 3 mm 2. In most cases, it will be enough to use a 10 ampere fuse; it will reliably protect the power circuit from emergency situations.
The radio is powered through three wires: yellow, red and black.
+12 V (yellow) – main power wire. It powers the built-in amplifier and also serves to save car radio settings. This wire is connected through a fuse directly to the battery. It is advisable that the length of the wire from the battery to the fuse does not exceed 30 cm.
ACC (red) – control of turning on the car radio from the ignition switch. On many vehicles, the ignition switches have an ACC (accessory) position. When you turn the key to the ACC position, power is supplied to the car radio, interior heater and cigarette lighter socket, but the car's ignition system is de-energized.
GND (black) – connects to the negative terminal of the battery. But this is ideal. Due to the low power of the car radio, it is allowed to connect the black wire to the car body. You must first ensure good contact with the body by cleaning the joint from dirt and oxides. You can also use contact lubricant to protect them from oxidation.
The yellow power wire can also be marked as B+ , BU , Batt .
It can be connected to the red ACC wire (bypassing the ignition switch) - this will allow you to listen to music without a key. But in this case, the radio will constantly consume current, and if the machine is idle for a long time (from several days to 2-3 weeks), your battery may run out.
The following wires are responsible for connecting acoustic speakers to the car radio:
- FL – front left,
- FR – front right,
- RL – rear left,
- RR – rear right.
When connecting the speakers to the radio, be sure to maintain the correct polarity, otherwise the sound will be of poor quality, since the acoustics in this case will work in antiphase.
In some car radios, the outputs to the speakers are duplicated with separate “tulip” type connectors - it is advisable to use them if the acoustics installed in the car have the same connectors.
It is advisable to use special speaker wires to connect speakers. They often come with a radio.
And do not even think about connecting any of the terminals intended for connecting acoustics to the ground of the car - you will be guaranteed that the car radio will fail!
The remaining wires in the car radio are responsible for controlling additional functions and equipment.
ANT (white) – antenna control. Acts as a power source for an internal active antenna, or provides a control signal to turn on an automatic external antenna.
ILL (ILLUMINATION) – is responsible for the backlight of the car radio. Connects to the “plus” of the side lights power supply circuit.
MUTE – controls muting the sound from the car mobile phone kit. The sound is turned off when this pin is connected to ground.
Parking Line – found on most car DVD players. Connects to the parking brake sensor. With this connection, you will be able to watch DVD only when the car is in the parking brake.
After connecting the power, acoustics and antenna wires to the ISO connector, this entire harness is pulled inside the container so that their ends with connectors extend into the car interior at a length convenient for work (approximately as shown in the photo at the beginning of the article), and connected to to the corresponding connectors on the rear wall of the radio.
After this, the car radio must be turned on and listened to. If everything works fine, then it can be inserted into the container until it stops (the latches on the sides should work).
Connection methods
The most optimal way is to connect the radio directly to the battery, which reduces the voltage drop and protects the power circuits using a built-in fuse. But the downside is the accelerated battery discharge, which occurs even when the head unit is turned off.
The standard connector to the radio contains 3 cables responsible for supplying power; the insulation colors are unified for all manufacturers. The red and yellow wires connected from the battery together make it possible to listen to music without turning on the ignition. The black wire connects to the point that provides negative power. There are special bolts welded on car bodies that are used to connect negative cables of electrical equipment.
We feed plus to the radio
Before connecting the cable to the battery terminal, you should install a tip that will ensure reliable contact at the junction. The tip is attached to the battery terminal using a standard bolt. A fuse rated for a current of 10-16 A is installed on the cable; the element is placed at a distance of 200-250 mm from the voltage source. The wire is then routed through the engine compartment and then fed into the vehicle's interior through a stock conduit designed for wiring or alarm harnesses.
If the additional cable is assembled from several parts, then the elements are connected by terminals, which are covered with an insulator on top.
To protect the harness from damage, it is recommended to use a corrugated plastic sleeve, which is attached with clamps to the standard electrical lines.
Contact of cables with hot or moving elements of the vehicle structure should be avoided. The cable brought into the cabin is equipped with a metal plug, which is used to connect the electrical wiring of the radio.
Through the ignition
To avoid draining the battery, the radio is connected via the ignition switch. When the ignition is turned off, it is impossible to use the head unit. For switching, a supply wire protected with red insulation is used. An additional yellow cable leads directly to the battery terminal.
If you cross both wires into a single circuit activated through the lock, then the settings will be reset every time you turn off the ignition.
Via button
The use of a separate switch to interrupt power to the car radio is used on vehicles equipped with an ignition switch without an ACC position. The power wire with a red sheath coming from the head unit is soldered to one of the terminals of the button, the other terminal is equipped with a cable going to the battery.
The push-button switch is located on the instrument panel or center console. To start working with the player, you need to press the selector; you do not need to insert the key into the ignition switch.
To dimensions
In this case, the cable with yellow insulation is led to the positive terminal of the battery, and the red positive harness is connected to the side lighting circuit. The closest place for switching is the illumination lamp of the additional socket or glove box.
Read more: Granta reviews with photos
When the external lighting is activated, voltage is supplied to the radio, but if the light is turned off, it will not be possible to turn on the equipment. The advantage of the technique is the ability to listen to the radio without turning on the ignition, but the side lamps additionally drain the battery.
When installing a car radio, it is useful to know
During the process of installing and connecting a radio in a car, non-standard situations often arise that cannot be foreseen in any instructions.
So, if you use a standard car antenna when installing a car radio, then sometimes the length of its wire may not be enough. Many cars are still equipped with antennas designed to install old-style radios. Their antenna socket is located on a “tail” that is only about fifteen centimeters long.
In this case, you can try to connect the antenna blindly after connecting all other wires to the radio. If this fails, then, most likely, you will have to remove the console and insert the antenna plug by touch after installing the car radio in the container.
By the way, after about half an hour of this “Kama Sutra” you will probably begin to think about buying a new car radio antenna.
If it becomes necessary to remove a car radio with a removable front panel from the container, you will need to insert two flat keys included with the radio onto the sides of it until they stop. But before that, do not forget to remove the front control panel - it is usually detached with the “Release” button.
Installation of acoustics
The standard speaker system consists of two front speakers and two rear speakers. The optimal routing of wires to the acoustics is to run cables under the panel for the front speakers, and under the beard, near the handbrake, under the rear seat, for the rear speakers. You just have to lift the cover to run the wires under it.
Front speakers are best mounted in doors. It will be beautiful if you use podiums. The rear speakers are installed on a shelf; it is also better to install a podium between the shelf and the speaker. Try to route the wires so as not to touch them while operating the car. Connection to the wires of the block is made according to the diagram drawn on the sticker on the body of the radio, or in the instructions.