Review of popular shelves on Priora
Priora station wagon acoustic shelf
Let's look at the most popular shelves sold today in stores in our country. First, let’s find out what technical characteristics stand out for the shelves on the Priora that have sidewalls.
| Type | Rear acoustic shelf with sides |
| Automobile model | 2171 station wagon |
| Material | Plywood or MDF |
| Shelf/sidewall thickness, mm | 10/25 |
| Possibility of upgrading the shelf | Can be made directional (for an additional fee of 200 rubles) |
| Possibility of installing a subwoofer | It is also possible for an extra charge |
| Shelf cost | 1600 rubles |
It is clear that the main advantage of a shelf with sides is the location of the speakers (see How to choose speakers for a car radio on your own). They do not stand on the main plywood, but on the side parts. This provides a unique opportunity to conveniently load cargo into the trunk for transportation. Now you won’t have to remove the shelf with the speakers every time. In addition, it is possible to select the desired color of the polo, depending on individual preferences and matching the interior color.
Graphite shelf produced in Tolyatti
| Type | Acoustic shelf |
| Price | 1250 rubles |
| Possibility of reupholstery with imported fabrics | For extra charge |
| Suitable Speakers | 6x9/13 cm/16 cm |
| Shelf dimensions, cm | 130x50x30 |
| Shelf weight, kg | 7 |
Priora station wagon acoustic shelf
Shelf without sides Tolyatti
| Type | Acoustic shelf without sides |
| Speaker sizes | 13/16/20 cm |
| Price | 700 rubles |
| Shelf weight, kg | 8 |
| Dimensions, cm | 130x70x40 |
[email protected] ICQ:1067993 Skupe:tunavto free in Russia 8 800 77-55-098
Shelf VAZ 2172 (hatchback) (without sidewalls)
Shelf VAZ 2172 (PRIORA hatchback) without sidewalls. Installed instead of the standard one. Shelf thickness 20 mm, material: plywood, carpet. The shelf is designed to install speakers 6×9″, 13cm, 16cm. The installation is hidden. This product is designed to improve the sound quality of the speaker system of your car, and, importantly, hides the speaker system installed in your car.
| Prices for installation in our specialized centers | VAZ-2101 2104-2105 2106-2107 | VAZ-2108 2109 21099 | VAZ-2110 2111 2112 | VAZ-2113 2114 2115 | VAZ-2121 2131 | Chevy NIVA |
| Installation in front doors 10/13cm. | 300 | 300 | 200 | 200 | 300 | 300 RUR |
| Installation of rear speakers 13cm. | 300 | 200 | 200 | 300 RUR | ||
| Installation of speakers in a 6x9cm shelf. | 300 | 300 | 150 | 300 | 300 | 300 RUR |
| Installation of speakers on a podium in the front doors 16cm. | 400 | 400 | 400 | 400 | 400 | 400 RUR |
| Installing a wooden shelf | 300 | 300 | 150 | 300 | 600 | 600 RUR |
| Installation of podiums | 400 | 400 | 400 | 400 | 400 | 400 RUR |
| Installing stands for tweeters | 150 | 150 | 150 | 150 | 150 | 150 RUR |
| Audio system setup | 150 | 150 | 150 | 150 | 150 | 150 RUR |
| Installing a car radio | 300 | 100 | 100 | 100 | 300 | 150 RUR |
| Installing the antenna on glass | 100 | 100 | 100 | 100 | 100 | 100 RUR |
| Installing an antenna on the roof | 300 | 300 | 300 | Rub. | ||
| Amplifier installation | 1400 | 1000 | 1000 | 1000 | 1400 | 1200 RUR |
| Prices for installation in our specialized centers | VAZ-2170- 2172 Priora | VAZ-2190 Granta | VAZ-1117- 1119 Kalina | Lada Largus | Gazelle | Foreign cars |
| Installation in front doors 10/13cm. | 200 | 200 | 200 | 300 | 300 | from 500 rub. |
| Installation of rear speakers 13cm. | 200 | 200 | 200 | 300 | from 500 rub. | |
| Installation of speakers in a 6x9cm shelf. | 150 | 150 | 300 | 300 | from 500 rub. | |
| Installation of speakers on a podium in the front doors 16cm. | 400 | 400 | 400 | 500 | 500 | from 600 rub. |
| Installing a wooden shelf | 150 | 150 | 600 | 600 | 500 | from 500 rub. |
| Installation of podiums | 400 | 400 | 400 | 500 | 500 | from 600 rub. |
| Installing stands for tweeters | 150 | 150 | 150 | 150 | Rub. | |
| Audio system setup | 150 | 150 | 150 | 150 | 150 | 150 rub. |
| Installing a car radio | 100 | 100 | 100 | 200 | 300 | from 300 rub. |
| Installing the antenna on glass | 100 | 100 | 100 | 100 | 100 | Rub. |
| Installing an antenna on the roof | 300 | 300 | 300 | 300 | Rub. | |
| Amplifier installation | 1000 | 1000 | 1000 | 1500 | 1400 | 1500 rub. |
INSTALLATION INSTRUCTIONS:
- Remove the plastic sides.
- Remove the seat belts.
- On the seat belt bracket there is a bolt for securing the backrest, place a washer under it and adjust it so that the seat is closed.
- A wooden side frame is installed, the iron corners must fit into the eyes located near the glass.
- Try on and mark the contours of the corner (100X75) with a pencil so that the long side of the corner is on the sidewall, and the short side is pressed against the body (next to the standard place, but not into it). Screw the corner to the shelf with 3.5X19 self-tapping screws along the marks.
- Through two holes (next to the hole in the sidewall (for bolt point 3), we use an awl to mark places for drilling in the seat belt bracket.
- We drill the holes with a 3.6 mm drill.
- We install the speakers so that the contact connectors are directed towards the back, using 3.5X25 screws - 8 pcs.
- Reinstall the side panel. Secure the corner to the body with galvanized 4.2X16 self-tapping screws, and into the drilled holes on the seat belt bracket with two 4.2X32 galvanized self-tapping screws.
- Screw a galvanized 4.2X32 self-tapping screw from below, from under the sidewall shelf into the body pillar through the hole in the sidewall, next to the standard place.
- Insert the flashlight into the shelf and connect it.
- Pull the standard upholstery onto the sidewall, screwing it with 3.5X19 self-tapping screws (5 pcs.) to the bar. In the place where the lantern is located, trim the upholstery with a knife.
- Install the other side panel in the same way.
- Place the lid on the sides.
Manufacturing
Priora acoustic shelf
As you can see, such shelves stand in different ways. But one thing is for sure - to have a good quality acoustic shelf, you will have to pay at least 1.5 thousand rubles. A fair question arises: is it possible to make such a shelf with your own hands, taking into account your own wishes regarding its design. The answer is clear - of course, it is possible.
How to remove the rear parcel shelf of a Priora sedan
When studying the nuances of the removal process, all work should take no more than 20 minutes.
To remove it you will need a regular Phillips screwdriver.
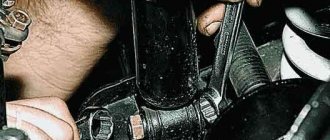
- First of all, we need to disconnect the wires from the speakers located on the shelf. To do this, disconnect the connector from the brake light.
- Next, we move into the car interior and remove the elements of the rear seat. This must be done in order to ensure maximum convenience and ease of work.
- Now you need to release the armrest. As a result, two mounting screws for the trunk hatch will become available, which you will have to unscrew using a regular Phillips screwdriver.
- We find 4 special locking latches, which are located along the entire perimeter of the metal structure. To unfasten the shelf, you need to press on its protruding base, which is located inside the latch, and at the same time pull it upward. Similar manipulations are performed in relation to all four latches.
- Now that the element is not firmly fixed, you need to slightly lift the front part of the shelf and pull it towards you with a little force. This is required so that three special seals pop out from under the glass.
- This completes the dismantling.
Reinstallation is similar to the above removal process.
Priora 2 (2016) rear parcel shelf is rattling, what do you recommend, can I have a photo?
The original one on Priora costs 7-7
by Adminrive · Published 04/05/2013
Be careful on the roads
by Adminrive · Published 10/08/2015
Important nuances
Acoustic shelf for lada priora
You need to know the following. The acoustic shelf for a station wagon should have distinctive features and be different from the shelf from a sedan. In principle, the manufacturing does not have any special differences, but a number of subtleties are still present. Not only the sound element, but also the safety of the people inside the car will depend on them. The difference implies not only the mounting of the shelf and its features, but also a number of other differences. For example, it is impossible not to take into account the size of the car interior. A station wagon, as you know, is larger than a sedan, so you need to pay attention to this.
How to install an acoustic shelf on a Priora with your own hands
How wonderful it is to listen to good music in the car. However, for this you also need to work hard first. The fact is that it provides for the installation of only two speakers. In car doors, at the bottom, and in the hinge area. However, modern music systems for cars sound much better in the quad configuration. That is, if there are 4 columns. And it’s best when two additional speakers (speakers) are located in the rear of the cabin.
Refinement of the station wagon shelf
Acoustic shelf lada priora
You can start modifying the standard factory shelf if you don’t want to change it. On a station wagon, the factory shelf does not have a straight surface for mounting speakers. What is the point of revision? Ensure a flat surface, that's right. The material in this case will also be plywood, the thickness of which is 20 mm. As for the width, 35 cm is what you need.
Note. Note that the factory shelf is made of 2 layers of plastic.
- We cut off that part of the factory shelf where the speakers will be inserted with a sharp knife;
- We cut out the outline of the factory shelf from plywood;
- We glue the additional option to the back of the factory shelf using epoxy.
Note. In the process of such refinement, a difference is possible. To avoid this, it is recommended to cut 2mm plywood along the contour of the cut out part, and then glue the whole thing to a thick piece of plywood.
- Acrylic-based putty (for wood) will help hide all seams and irregularities, and sandpaper will clean the surfaces until they are smooth;
- At the end, we tighten the entire resulting shelf with carpet and, just in case, weigh it down with vibration material.
Making a shelf for a station wagon and hatchback
The acoustic shelf for the Lada Priora hatchback or station wagon is made of the same materials. The process of working on the design is also similar. It differs in that standard shelves in cars with a hatchback or station wagon body type consist of two elements. One part can be folded down to make it easier to load luggage.
You can create such a shelf model in two ways:
- Both parts are cut out according to the template of standard elements. One part is slightly shorter - 1-3 cm. Both parts are fastened with epoxy glue and self-tapping screws.
- To make the folding part of the shelf, plywood is taken that is thinner than the insert part. Some people make it simpler: they modify an old folding shelf, weighing it down with insulating material. You can also use old fixing parts.
Acoustic shelf for Lada Priora
To install the structure in a hatchback or Priora station wagon with your own hands, proceed as follows:
- The rear seats are removed.
- The standard shelf is removed. A new template is made from it.
- The hatchback-type interior has an acoustic shelf with sidewalls. This is different from the sedan interior in the Priora car. Speakers are also installed on the sides. At the discretion of the owner, these speakers can be of different sizes and shapes.
- The sides are also dismantled. And based on them, a template for new ones is created. Some simply transfer the parameters onto the base material using a marker. All subsequent steps are similar to the previous installation option.
Acoustic shelf for Lada Priora hatchback
There are some special features when installing speakers: it is recommended to point them at the glass. This will result in an even distribution of sound throughout the cabin.
To raise or turn the podium in one direction or another, metal plates are used. They are attached to the base. If there is free space, you can carefully fill it with foam. When it hardens, cut off excess pieces. The inside of the structure is covered with insulating materials. The sides are upholstered, the speakers are mounted and the acoustic shelf is installed in its place.
Improving sound insulation when installing an acoustic system for Lada Priora
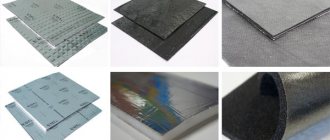
When installing speakers with higher power on a VAZ 2172, the sound insulation of both the rear panel and the car doors, instrument panel and ceiling should be improved. You can get rid of extraneous sounds in your car using vibration and noise insulating materials, as well as protective covers.
Since the new acoustic shelf of the Priora Hatchback is made of dense plywood, sound insulation begins with the installation of vibration-absorbing materials, such as vizomats, ECO, vibroplasts, etc. Next, a second layer of sound-absorbing material such as “Accent” or “Isoton” is applied. In this case, the thickness of the sound insulation layer should be taken into account, otherwise the installation of plywood parts will become impossible.