How to remove the rear axle of a VAZ 2106
When the parts are completely worn out, when you already understand that partial repair of the rear axle will no longer help you, you need to remove the rear axle of the VAZ 2106. The axle is also removed to replace the beam in case of various damages. To carry out repair work, prepare the necessary tools, namely ten, thirteen, fifteen, seventeen and nineteen wrenches, a mounting blade, pliers, a large screwdriver and a special wrench for the brake pipe. Everything is there, then you can start repairing, for this:
- Put the car on the parking brake.
- Remove the rear wheels from the car.
- Drain the oil from the rear axle housing.
- After disconnecting the rear parking brake cable from the guide, remove the sheath from the two guides on the car body.
- Disconnect the rear driveline from the rear axle gearbox.
- Disconnect the pressure regulator drive lever strut by unscrewing the nut of the lower mounting bolt and disconnect the strut from the rear axle.
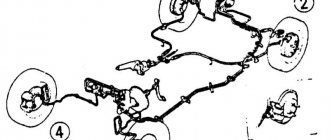
- The fastening of the brake hose fitting pipe also needs to be loosened. After loosening the fitting, remove the bracket securing it to the bracket.
- On the rear axle housing, disconnect the brake hose from the tee.
- Next, you need to prepare special supports that need to be placed under the rear axle beam and slightly lowering the car onto the beams, thereby slightly loading the suspension.
- Remove the rear springs, disconnect the rear shock absorbers from the rear axle.
- Unscrew the nuts securing the bolts of the left upper and left lower longitudinal rods to the bridge beam and disconnect them. Similarly, disconnect the right longitudinal rods. Next, unscrew the fastening bolt and remove the transverse rod.
Check once again whether you have disconnected everything from the rear axle and after you have made sure that everything is normal, you can lift the car and the rear axle will remain on the supports. At this point, the work on removing the rear axle of the VAZ 2106 can be considered completed; install it in the reverse order.
Rear axle VAZ 2106. Device. Gear ratio
The standard structure of the rear axle, which is equipped with the VAZ 2106, consists of a traverse and a gearbox. It is to the first that the latter is attached. It contains the main gear, which has a drive pair of gears, as well as a differential.
Rear axle VAZ 2106. Diagram
Explanation of the VAZ 2106 rear axle diagram:
- Wheel brake drum mounting bolt;
- Guide pin;
- Axle bearing oil deflector;
- Brake drum;
- Cast iron brake drum ring;
- Rear axle wheel cylinder;
- Fitting for bleeding the brake drive;
- Axle bearing;
- Bearing lock ring;
- Rear axle beam flange;
- Axle shaft seal;
- Suspension spring support cup;
- Rear axle beam;
- Upper suspension rod mounting bracket;
- axle guide;
- Differential bearing nut;
- Differential box bearing;
- Differential box bearing cover;
- Breather;
- Differential satellite;
- Main drive driven gear;
- Left axle shaft;
- Axle gear;
- Rear axle gear housing;
- Drive gear adjusting ring;
- Bearing spacer;
- Drive gear bearing;
- Drive gear oil seal;
- Oil seal deflector;
- Flange-fork universal joint;
- Screw;
- Oil deflector;
- Main gear drive gear;
- Axle of satellites;
- Axle gear support washer;
- Differential box;
- Right axle shaft;
- Brackets for fastening suspension parts;
- Axle bearing thrust plate;
- Rear brake shield;
- Rear brake pad;
- Friction lining;
- Axle shaft flange.
Malfunctions of the rear axle gearbox:
- during its operation, loud noises are heard;
- the external temperature regime of the housing increases;
- This part is constantly jamming.
In these cases, it is recommended to completely replace the components and checking the oil fluid level is indispensable. That is, you will need to buy an oil seal, bearings, and an axle shaft. However, you can immediately purchase a used rear axle.
At the same time, despite the strength characteristics of the fastening, it, due to its design features, does not have a complex structure. Therefore, even a driver who has minimal knowledge of locksmithing can handle it.
Video review on how to determine what is buzzing:
In some cases, repair work is carried out. Here, experienced mechanics must take into account one nuance - the gear ratio. Size is also of great importance. The key factor is the cost of repairs.
The gear ratio is the ratio of the number of teeth of the driven gear and the drive gear, one of the main parameters of any transmission.
The gear ratios of the VAZ classics vary and are equal:
- 3.9 — gear ratio in the “six” VAZ 2106;
- 4.1 - in the “troika” VAZ 2103;
- 4.3 - in the “kopeck” VAZ 2101.
Which gearbox should I choose, 2103 or 2106?
In the “nature” of Zhiguli gearboxes there are 4 types:
- VAZ 2101 - gear ratio 4.3
- VAZ 2102 - 4.4
- VAZ 2103 “troika” - 4.1
- VAZ 2106 “six” - 3.9.
The gear ratio is the ratio of the teeth, for example, in a “six” gearbox the large gear is marked 2106 1143. Therefore, to determine the pair, 43/11 = 3.9 is necessary. The larger the number of the pair, the more high-torque the car will be, but it will lose maximum speed. Most often, you can find two types of gearboxes in stores: with a pair of 4.3 and 3.9.
Please note: when replacing a faulty gearbox with a gearbox with a different gear ratio, you will need to replace the speedometer drive, otherwise the speed readings on the speedometer will be incorrect.
Replacement of VAZ 2101-2107 gearbox
Work order:
- We hang up the rear axle, drain the oil from the crankcase, remove the wheels and brake drums, and remove the axle shafts. We disconnect the driveshaft from the drive gear flange and move it to the side.
- Using a “13” wrench, unscrew the eight bolts securing the gearbox housing to the rear axle beam.
- Remove the gearbox assembly.
- We install the new gearbox in the reverse order of removal. Apply sealant to the threaded part of the crankcase mounting bolts. After installation, do not forget to fill the rear axle housing with 75W-90 transmission oil. Crankcase volume is 1.3 liters.
Replacing the rear axle of a VAZ 2106
When it is necessary to replace the rear axle of a vehicle such as a VAZ 2106, you will need to acquire special tools for working with this unit. A standard driver kit is provided for this. In this case, you cannot do without a liquid intended for degreasing surfaces. So, experts recommend using white spirit and gasoline.
In order to dismantle the rear axle, you must:
- install the car using a pneumatic lift (repairs can also be performed on an overpass or by driving the vehicle into a deep pit intended for inspection);
- drain the engine fluid into a container and disconnect the universal joint with a part such as the flange mount of the shank;
- dismantle the axle shaft of the humming rear axle, unscrew the fastening element, align the rear axle gearbox with its beam;
- replace the unit, make adjustments if necessary, check the unit for operability;
- clean the structural elements of the unit, degrease the oil seal and bearings, fastening components;
- connect the gearbox to the rear beam of the vehicle and, using the cross technique, tighten the fasteners.
- pour motor fluid into the unit.
Replacing the beam (stocking) of the VAZ rear axle gearbox. Video
Changing the oil in the rear axle of a VAZ 2106
Often, car enthusiasts who own a vehicle such as the VAZ 2106 ask the same question. They are interested in which oil fluid is best suited for the rear axle of their car. At the same time, they ask - what volume is needed and how to change the oil?
There are different opinions. But experts recommend filling the rear axle gearboxes of this machine with transmission oil, which is marked 80W90 . For example, this is Lukoil 80W90 GL. This group of oils also includes TAD-17 80W-90 or the so-called TNK.
When we've sorted out the oil, it's time to answer another question. Perhaps he is one of the most important. Namely, how much oil is required? So, the oil volume is as follows - 1.3 liters. At the same time, it is possible to change the oil in the gearbox. True, in this case you will need 1.4 liters.
As for the interval, it is necessary to change the oil fluid after every 30,000 kilometers of the vehicle. If you convert the mileage into a time frame, you get 3 years of operation.
The oil fluid is replaced in accordance with the established procedure:
- First of all, you need to use a lift or inspection hole. You will also need a key for “seventeen” and a hexagon for “twelve”.
- Next, unscrew the drain plug in the bridge and place a special container designed for draining the oil fluid. At the same time, the filler plug is also unscrewed. This is necessary so that the oil fluid flows out faster.
We unscrew the drain and filler bolts. When the oil fluid is drained from the bridge, the drain plug is screwed in and new oil is poured. Here you need to use the filler hole. You will also need a special syringe or other suitable tool.
Fill with a watering can
How to change the oil in the rear gearbox of a VAZ. Video
It would be a good idea to treat all components with washing liquid.
Determining the oil level in the gearbox
If we talk about the volume of liquid poured into the gearbox, it is 1.35 liters. The algorithm for replacing the oil composition in the rear axle is in many ways similar to the algorithm for replacing the oil composition of the gearbox.
It is recommended to change the oil fluid before operating the vehicle in both the winter and summer seasons. By the way, the viscosity of the composition is different for these periods: in winter the consistency is more liquid, in summer it is more viscous.
Before replacing the oil composition in the rear axle of a VAZ, you can determine the fluid level in the gearbox. To do this, you will need a container with a volume of slightly more than 1.5 liters.
The next stages of work look like this:
- First of all, you need to put the car on the inspection hole;
- Next, you should clean the dirt from the drain and filler plugs;
- Using a 17 mm socket wrench, you need to unscrew the plug covering the filler hole;
- Next, you should check the oil fluid level using a suitable tool, for example, a screwdriver - the fluid level should reach the very bottom of the filler hole;
- If the oil fluid level does not reach the lower edge, you need to add transmission fluid using a special syringe, and then tighten the hole well using a plug.
Replacing the rear axle gearbox
Good day everyone, and today we will talk about such a procedure as replacing the rear axle gearbox on Zhiguli “classic” cars, and in particular on the VAZ 2106. It was not possible to make a video guide today, but I think that even from the photo report presented below, everything will be clear and understandable. Before you begin, you need to prepare the necessary tools that will be needed for this repair, namely:
- open-end wrench 13 and socket wrench 12 mm
- flat screwdriver
- hammer
- 12 mm socket head
- extension
- ratchet handle
Let's look at the whole procedure below, but first you need to keep in mind that you will need to do some work:
After all the preparatory steps have been completed, you can proceed directly to removing the gearbox. To do this, disconnect the cardan from the shank by unscrewing the 4 fastening nuts:
And lightly hit the cardan with a hammer. The result is the following picture:
After that, using a spanner wrench, we tear off the bolts securing the gearbox to the rear axle housing of the VAZ 2106, and then you can use a socket and ratchet to unscrew all the bolts completely (there are 8 of them in total):
When the last bolt remains to be unscrewed, you need to hold the gearbox so that it does not fall:
And having unscrewed it, carefully remove the gearbox from the bridge housing, as shown in the photo below:
If necessary, the gearbox is repaired or completely replaced, after which everything is put back in place in the reverse order. It is worth noting that it is better to install a new gasket at the joint, since it is not intended for reuse.
Regarding the price, we can say the following: you can buy a new gearbox for a VAZ 2106 from 4,500 rubles, although you can find a used one that works quite well, but several times cheaper.
Rear axle repair and gearbox replacement
Depending on the cause of the breakdown, the following repair work may be necessary to restore the transmission’s functionality:
- replacing the VAZ 2106 gearbox oil seal;
- replacement and adjustment of the main pair;
- Troubleshooting differential and shank bearings and replacing them if necessary;
- replacement of VAZ 2106 gearbox.
Repair with replacement of bearings and (or) elements of the main gearbox pair is very difficult in technical terms. It requires special knowledge and tools in the process of adjusting the VAZ 2106 gearbox. As a rule, this unit is adjusted either at the factory or in specialized workshops. By watching a video about repairing a VAZ 2106 gearbox, you can see this for yourself. Meanwhile, in order to prevent damage to this transmission element, it is necessary to monitor whether the shank nut is tightened and whether there is any oil leakage from the seals.
Replacing the VAZ 2106 gearbox oil seal is necessary in case of transmission oil leaking from under it. Simply tightening the nut is not enough. Therefore, before we learn how to adjust the VAZ 2106 gearbox, we will learn how to replace a leaking oil seal. To carry out repair work you will need:
- a set of open-end wrenches and socket heads;
- puller for removing the oil seal;
- Litol-24 lubricant;
- mandrel for installing a new oil seal;
- hex wrench for unscrewing the drain plug;
- hammer;
- container for draining oil;
- transmission oil.
It is best to carry out work on replacing the rear axle gearbox oil seal in the inspection pit.
Replacement is carried out in the following order:
- We unscrew the plug to drain the oil, and, replacing the container, drain it.
- Unscrew the driveshaft from the rear axle gearbox flange.
- Unscrew the flange nut, counting the exact number of turns, and write down the value.
- Remove the flange. It usually comes off easily, but you can easily tap it with a hammer once it's firmly in place.
- If there are shells on the surface of the flange, or wear in the place where the oil seal fits, it must be replaced.
- Using a puller, remove the worn oil seal of the VAZ 2106 rear axle gearbox.
- Lubricate the new oil seal with Litol-24 grease to facilitate its installation.
- Using a mandrel, lightly hammer the oil seal into place.
- We install the flange and tighten the nut exactly the same number of turns that we wrote down.
- We attach the driveshaft to the rear axle.
- Fill the VAZ 2106 gearbox with oil to the level of the filler neck. It is recommended to use gear oil from well-known manufacturers. It would be useful to add a molybdenum additive to it to reduce friction between parts.
After repairs, it is also necessary to check the condition of the breather and, if necessary, clean it. If there is a need to completely replace this unit, then you need to know that the gear ratio of the VAZ 2106 gearbox is 3.9, and the car’s speedometer readings are guaranteed. Read about how to remove a VAZ 2106 gearbox in other articles on our website.
Adjusting the VAZ 2107 gearbox on the rear axle...
We welcome car enthusiasts of classic VAZ models to the Autoblog site! In these videos we will look at the VAZ 2107 gearbox and adjustment. Nikolai Vladimirovich dedicated the video to the owners of rear-wheel drive cars, since today the trend is towards rear axle gearboxes. As a visual aid for repairs and adjustments, we showed the rear axle gearbox of the VAZ 2107, a common domestic car.
Let's look at the rear axle gearbox...
The main elements of the gearbox are helical gears of the main gear, the so-called “conic” and “planetary gear”, which make up the main gear pair. The plant produced four versions of the main pairs:
- Low-speed, installed on the VAZ 2102. The pair has 9 teeth on the bevel gear and 40 on the planetary gear. The torque transmission number is 4.44, this is a low-speed option. Out of production;
- On the VAZ 2101 - the famous “kopek”, the main pair had 10 teeth on the “point” and 43 on the “planetary”, with a gear ratio of 4.3, discontinued;
- VAZ 2103, respectively, 10 teeth on the tip and 41 on the planetary gear;
- VAZ 2106 - 11 teeth on the “pivot” and 43 on the “planetary”, gear ratio 3.9, is considered a high-speed gearbox.
It should be noted that the main pair with a gear ratio of 4.44 for the VAZ 2102 was, generally speaking, not produced as spare parts and was intended only to complete the VAZ 2102 gearboxes on the factory assembly line.
Why does oil leak from the rear axle gearbox of VAZ 2107, 2106?
It is important to understand when the seal is leaking and when there is simple fogging. If after using the machine no drops of oil are visible near the oil seal, we can assume that the oil seal is simply sweating. In a situation where drops of oil or a trail followed by a drop are visible, we can assume that the oil seal is leaking.
Causes of leakage of the rear gear axle seal of VAZ 2107, 2106:
- Wear of oil scraper elements of the oil seal.
- Rupture of the compression spring of the oil seal.
- Oil seal defect.
- Development on the flange.
- Faulty or clogged gearbox breather.
When the oil seal is just sweating on a VAZ gearbox, you don’t have to change it, but if it leaks, then it definitely needs to be changed! But before changing the oil seal, check whether the gearbox breather is working by simply pressing on its head, and it should move a little. If it is motionless, then the breather is most likely for the leak, because. it does not allow gases to escape from the gearbox, which creates excess pressure and presses the oil out of the oil seal. Also try unscrewing and blowing out the breather before deciding to replace the gearbox seal. Let's now talk about replacing it.
Replacing the rear axle oil seal on a VAZ 2107 with your own hands.
First, let's prepare spare parts and tools. Of the new parts we will need:
- The seal itself.
- Spacer sleeve.
- Oil deflector washer.
- New gear oil.
You will need 1.35 liters of oil. According to Murzilka, it is recommended to change it together with the oil seal. Ideally you need:
- Head 24
- The key is 17 (you can have a head) .
- A dynamometer (can be replaced with spring scales up to 15 kg) or a torque wrench of at least 150 N*cm.
- Open-end wrench 13.
- A good, thick flathead screwdriver.
- Mandrel for oil seal.
- Hammer or mallet.
- Container for old oil.
- Rags.
- Marker.
- Jack.
We've prepared everything and are starting the replacement!
Preparing and dismantling the gearbox oil seal.
We drive the car into a pit or overpass and drain the oil from the bridge (do not forget to immediately screw the drain plug back). We make a mark with a marker at the junction of the cardan with the gearbox (so as not to throw off the balancing during installation). We take a 13 mm wrench and a strong screwdriver or some kind of mounting tool and unscrew the nuts securing the cardan to the gearbox.
We disconnect the driveshaft from the gearbox and see the 24 nut, but do not unscrew it. This is where a torque wrench or dynamometer comes in handy. We need to measure the force at the input to the gearbox until the suspended wheel begins to spin. Use a jack to jack up any rear wheel and then proceed according to the situation:
- If you have a torque wrench, then simply turn the nut 24 degrees until the wheel starts spinning and look at the readings on the wrench at this moment. We remember them because When assembling, we will tighten with the same force.
- If you have a dynamometer (or scales), then we hook it onto the bolt and pull until the suspended wheel moves. We remember the readings because When assembling, we will tighten the nut until we achieve the same readings.
- if you have nothing at all, then make a mark on the flange, nut and gearbox and count how many turns you unscrew the nut to tighten it the same number of turns.
We remove the wheel from the jack (but do not remove it far) and unscrew the nut by 24. To unscrew it, we place bricks under the wheels as stoppers, or we screw in 2 bolts and make a stop from a mounting or pipe as shown in the photo below.
Next, use a mallet or hammer to knock down the gearbox flange through a wooden spacer.
Now you can see the oil seal itself and you can remove it with a screwdriver or wrench.
Installing a new oil seal in the rear axle gearbox.
Wipe the oil seal installation area from dust and debris. Check the flange for wear or rust. Before installation, lubricate the outer part of the oil seal with lithol. Press the new oil seal through the mandrel to a depth of 1.7-2mm from the edge of the gearbox. If there is a large hole on the flange , then it is better to drive the oil seal a little deeper or, conversely, slightly undercut it. Focus only on the outer edge of the oil seal, otherwise you may damage it.
After installing the oil seal, use an oil can to lubricate its inside with oil. And install the flange.
How to tighten the flange nut of the rear gearbox of a classic.
We tighten the nut based on what you had in order to measure the force with which it was tightened. After tightening, check that there is no play either axial (forward-backward), up-down, left-right.
We assemble further in the reverse assembly process. Don't forget to add oil to the gearbox.
Have smooth roads!
Still have questions for the author? Ask them in the comments!
Rear axle design of the "six"
The typical design of the rear axle of a VAZ 2106 is as follows: a gearbox is attached to the traverse, which contains the main gear with a drive pair of gears and a differential.
The front suspension and rear axle are the basis on which the vehicle's wheel travel is based. The actual ability of the car to move depends on the serviceability of these units. Therefore, if the rear axle gearbox of the VAZ 2106 is faulty, i.e. during its operation, extraneous booming sounds are heard, the external temperature of the body part of this unit increases greatly, or it is “jammed”, then an operation such as replacement is required, followed by checking the oil level in this unit. At the same time, you should know that the fastening, despite its strength, is very simple in design and is accessible to a car enthusiast with minimal plumbing skills.
In some cases, the rear axle is repaired, but for this you need to have certain knowledge and skills in plumbing. In addition, adjustment of the gear meshing gap can be carried out exclusively in stationary conditions at a car service station.
Some car enthusiasts prefer, instead of repairs, to purchase a VAZ 2106 rear axle from a car store, the price of which is quite high and is in the range of 4-4.5 thousand rubles. However, not everyone can afford this, and one should not discount the possibility of repairing the product.
Purpose and device
The mechanism that transmits rotation can be of 3 different types: worm, cylindrical and conical. Most often, a worm mechanism is installed on the VAZ 2106. The gearbox has a large gear, on which the cross-section of the serrations is made at an angle. This allows contact with the gear that the driveshaft rotates, causing the rear axle to move.
People who come across these VAZ 2106 parts may have a question: why do you need a cardan? The answer is quite simple. The rear axle is fixedly fixed to springs or a beam with springs. When moving, the bridge changes its position, rising or falling. And the cardan, thanks to its articulated design, can transmit rotation, regardless of how the rear axle is positioned.
Replacing the rear axle
If replacing the rear axle of a VAZ 2106 is necessary, you need to prepare tools for working with the unit. It is enough to have a standard driver's kit and degreasing liquid (white spirit, gasoline) on hand.
To remove the rear axle of the “six”, you must do the following:
- We install the vehicle on a pneumatic lift; otherwise, it is possible to use an overpass or a deep pit for inspection.
- We drain the engine oil into a previously prepared container and disconnect the cardan from the flange connection of the shank.
- We dismantle the rear axle axle shaft one by one and unscrew the fasteners connecting the actual gearbox of the product with the rear axle beam.
- Next, remove the rear axle gearbox, after which we install the updated unit in the reverse order of the removal process. If you decide to make an adjustment, during reassembly you will need to replace the seal between the flange and the bridge, because it cannot be reused.
- Then we clean all joints of the unit from sealant, and then degrease the treated surface and all fasteners.
- At the end of the work, we connect the gearbox to the rear beam of the car and tighten the fasteners with the same force in a cross manner.
- Pour transmission oil into the unit.
The rear axle is adjusted to eliminate backlash in the drive gear axis. The bridge is partially disassembled, and for measurements a special indicating device with a scale is used, where the division value is 0.01 mm. The test is carried out with the cardan removed by moving the flange along the axis, while the movable console of the indicator device rests on the end of the flange part. The axle gap is removed by installing adjusting rings.
Before final assembly of the gearbox, it is advisable to check the correct engagement of the gears of the rear axle “six” using the applied dye. This adjustment is carried out by changing the thickness of the set of adjusting shims. The main defects of this unit include the following malfunctions:
- the appearance of a knock when starting to move or engaging a gear (you should check the differential, the fault lies there);
- the appearance of a hum that sounds evenly when coasting (insufficient amount of oil in the axle, defective differential, insufficient tightening of wheel bolts, low tire pressure, as well as defective bearings of the rear axle axle shafts, defective satellites, violation of the gap between gear teeth);
- during operation, an increased hum is heard (deformation of the beam or axle shafts of the unit, incorrect adjustment or increased wear of the gears and bearings of the product, insufficient level of lubrication in the system and the degree of tightening of the drive gear or wear of the splines on the axle shafts);
- leakage of lubricant from the gearbox of the product (integrity of the oil seal of the drive gear or axle shafts, clogging of the breather, defects in the unit seals).
When we talk about such a concept as the dimensions of the rear axle of a VAZ 2106, we mean, first of all, the gear ratio of the main pair of gears of the gearbox, which varies in value (in a “kopeck” - 4.3, in a “troika” - 4.1, and in a “six” " - 3.9). The gear ratio of the rear axle gearbox is the ratio of the number of teeth of a gear pair. Otherwise, all parts of this unit are unified.
Good day everyone, and today we will talk about such a procedure as replacing the rear axle gearbox on Zhiguli “classic” cars, and in particular on the VAZ 2106. It was not possible to make a video guide today, but I think that even from the photo report presented below, everything will be clear and understandable. Before you begin, you need to prepare the necessary tools that will be needed for this repair, namely:
- open-end wrench 13 and socket wrench 12 mm
- flat screwdriver
- hammer
- 12 mm socket head
- extension
- ratchet handle
Let's look at the whole procedure below, but first you need to keep in mind that you will need to do some work:
- Drive the car into a pit
- Remove rear wheels and brake drums
- Drain the oil from the bridge, you can read about this in this article
- Remove the axle shafts from the rear axle housing of the VAZ 2106
After all the preparatory steps have been completed, you can proceed directly to removing the gearbox. To do this, disconnect the cardan from the shank by unscrewing the 4 fastening nuts:
And lightly hit the cardan with a hammer. The result is the following picture:
After that, using a spanner wrench, we tear off the bolts securing the gearbox to the rear axle housing of the VAZ 2106, and then you can use a socket and ratchet to unscrew all the bolts completely (there are 8 of them in total):
When the last bolt remains to be unscrewed, you need to hold the gearbox so that it does not fall:
And having unscrewed it, carefully remove the gearbox from the bridge housing, as shown in the photo below:
If necessary, the gearbox is repaired or completely replaced, after which everything is put back in place in the reverse order. It is worth noting that it is better to install a new gasket at the joint, since it is not intended for reuse.
Regarding the price, we can say the following: you can buy a new gearbox for a VAZ 2106 from 4,500 rubles, although you can find a used one that works quite well, but several times cheaper.
Let's compare the rear axle gearboxes in the Gazelle, VAZ 2106 and 2107 to understand the features of this unit of the machine, which came from the pen of the Soviet automobile industry.
Differences in VAZ rear axle gearboxes
RZMs differ in the gear ratio of the main pair; in total, there are four types of gearboxes on the VAZ classic:
- 2101;
- 2102;
- 2103;
The slowest one is the RZM 2102, its drive gear has 9 teeth, and the driven gear has 40 teeth. To calculate the gear ratio, you need to divide the number of planetary gear teeth by the number of teeth on the drive shaft; for the VAZ 2102 the drive gear is equal to 4.44.
The “penny” gearbox (2101) accordingly has the number of teeth on the gears 10/43, so its IF is 4.3. The next, faster one is RZM 2103 - it has a ratio of 1041, which means the gear ratio is 4.1. And finally, the “fastest” will be the 2106 gearbox, with the number of teeth 11/43 and an inverter frequency of 3.9, respectively.
Many VAZ 2101-07 owners strive to install the fastest gearbox, but this is not always necessary. If the car often carries cargo, that is, the car is a “workhorse”, high speed is of no use, but high-torque power will be very useful. It should be noted that RZM 2102 was not supplied as spare parts; it was installed only on station wagons.
Features of the gearbox design
An experienced motorist hardly needs to explain what a rear axle gearbox is, and questions like “why does the piece of hardware to which the wheels are screwed have a thickening in the middle?” Probably only students in a driving school can ask. Meanwhile, in this very “thickening” there is one of the most important units of a modern car. Almost all cars, whose origin dates back to the times of the USSR, are equipped with a similar gearbox, the main task of which is to transmit the power generated by the engine to the drive wheels.
The design is basically the same, since you can’t really change anything there. This is a system of gears and shafts connected in a certain order. The difference lies in the gear ratio - a coefficient calculated by dividing the number of teeth of the driven (large) gear by their number in the driving (small) gear. However, there is no need to calculate anything, since all the parameters are indicated in the technical characteristics of the car. The greater the load capacity of the machine, the higher the gear ratio. So, for example, for the rear axle gearbox of the VAZ-2106 and VAZ-2107 it is 3.9, for the Gazelle - 4.55.
If we continue to use the above-mentioned car models as a comparison, then we are unlikely to find much difference in the structure of the gearboxes. Each of them uses a hypoid transmission (gear teeth are located at a certain angle to each other, providing better grip, the absence of extraneous noise and minimal metal wear) and an inter-wheel differential in the form of a planetary gearbox (distributes torque between the wheels of the rear axle). But, if the Volzhsky Automobile Plant models use a classic scheme, when when the movement changes, the incoming torque is directed towards the wheel with a lower load, a self-locking differential or electronic locking can be used in the Gazelle rear axle gearbox.
Device
In order for the car to move, it is necessary to transfer the rotation of the engine to the wheels. But the engine speed is too high, and in order to correctly distribute the torque, a mechanism is needed that changes the gear ratio. Due to the gearbox and different engine speeds, the speed of movement changes, and the main pair of the rear axle takes over the rotation and transmits it to the wheels through gears.
The VAZ rear axle gearbox consists of the following parts:
- flange, it is fixed on the drive gear (shank) of the RZM, and is an intermediate link between the driveshaft and this gear;
- the shank of the main pair, at one end of which there are splines for pressing the flange, at the other end there is a bevel gear with a small number of teeth;
- driven gear (planet gear), it is in mesh with the drive gear, and it is with it that it forms the main gear;
- center differential, allowing the rear wheels to spin at different angular speeds.
The differential design is very simple - the mechanism consists of two axle gears, two satellites and a satellite pin. From the gearbox, the movement is transmitted to the axle shafts, on which the wheels are mounted.
Some service issues
If there are no design differences in terms of the internal structure, they are encountered when servicing the rear axle gearbox. First of all, this is dismantling. There are no special problems with rear-wheel drive cars from Tolyatti. But with the Gazelle of early releases they appear: the entire rear axle was non-separable, forming a single unit with the gearbox. Although it gained in reliability, it nevertheless lost in service. There are no difficulties with vehicles produced in recent years.
Many car enthusiasts are interested in the question of whether it is possible to install gearboxes designed for cars of other brands on their cars. The answer from experts is usually clear: if you have never had to do this, then it’s better not to start. The fact is that the parameters of the rear axle unit are directly related to the characteristics of the engine and the design of the gearbox. If the “internals” of the VAZ-2107 and VAZ-2106 are identical, and there is no difference in such replacements, then with the Gazelle the situation is somewhat different.
It is possible to install a similar unit from the “related” Sobol on the Gazelle, and due to this the car will receive a certain “agility”, but the wear period will be reduced.
Having certain skills in servicing passenger cars, an experienced car enthusiast will be able to diagnose and repair the rear axle gearbox of the “classic” Volzhsky Automobile Plant without any problems. But with Gazelle it’s already more difficult. It is better to entrust all necessary manipulations to an experienced car mechanic. This is also associated with such a problem as removing the filler plug of the rear axle. Without special devices, even such a small thing turns into an impossible task.
It is best to entrust the maintenance of any car to service specialists also because transmission oils, no matter what markings they have, are still quite liquid in consistency. If there are any problems with the rear axle gearbox, then it is also necessary to replace the gaskets and seals, check the breather, bearings, and so on. No one can do this better than a specialist.
