Niva-21213 is good for everyone, but the performance of its interior heating system leaves much to be desired. Since, with the frost of -10 degrees typical for our winter, icing forms on the windows of the vehicle, and it is impossible to be in the cabin without a padded jacket, a hat with earflaps, cotton pants and felt boots, most owners of this vehicle use their own efforts to modernize the car’s heater, eliminating all factory settings. shortcomings. Let us note that its implementation does not require any complex of particularly complex measures, so any owner can cope with the procedure for upgrading the stove on the Niva. So, first things first.
What should you pay attention to when upgrading your Niva heater yourself?
Let us immediately note that there are several options for improving the performance of the stove. The simplest and most banal of them is considered to be the modernization of air ducts. But, most owners do not stop there, but completely remake the heating device, significantly improving its performance characteristics. Popular heater upgrade options:
Refinement of air ducts
- Refinement of air ducts. It is these elements that are the sore spot of the Niva stove, because due to their design flaws they contain many cracks. Warm air escapes through them, which simply heats up the central panel without properly entering the car interior. The defect can be eliminated using any silicone-based auto sealant, which must be used to treat all joints of the air ducts. The only thing is that it is extremely difficult to get to them, so you will have to suffer for some time, but the game is worth the candle, since the result will be a warm car interior.
- Installing a fan of a different model. Since the correct operation of the heating system in a car largely depends on the quality of airflow to the heat exchanger of the stove, a powerful fan is required. Therefore, in the process of refining the heating system, most owners replace the standard fan with the fan of a VAZ-2108 car.
Installing a fan of a different model - the second method
Fan replacement
The main reason for the low temperature in the car is the poor performance of the heater fan, which forces warm air through it into the cabin. In addition, being directly inside the car, it operates quite loudly at high speeds and whistles unpleasantly, especially in winter. Therefore, it is replaced with a fan from a VAZ-2108 (“eight”) car, which together with the casing is often called a “snail”. Their sizes differ slightly, so installing a new one is quite simple, with minor design modifications. Place the fan in the engine compartment, inside the air intake. This significantly reduces the noise from it. The heater radiator shutter needs to be removed.
Replacing the faucet
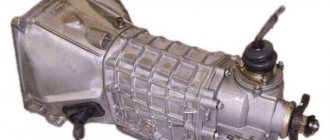
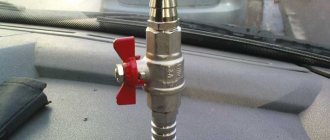
There is another element in the design of the Niva’s heating system that significantly reduces its performance. This is the stove faucet. It has a small cross-section, which in turn significantly slows down the circulation of antifreeze in the system, which is why the stove needs more time to warm up. Replacing this faucet will help improve the situation. The best option is to install this element from a foreign-made car. Heater taps from some Opel or Volkswagen models have proven themselves well.
The faucet is replaced as follows:
- It is necessary to open the hood and get close to the heater hose in the engine compartment, then loosen its clamp and remove the hose from the pipe.
- We unscrew the screws that secure the seal to the plane of the partition.
- Remove the sealant layer by first prying it off with a screwdriver.
- The glove compartment is removed.
- It is necessary to loosen the screw that secures the faucet by approaching it from the interior.
- There is a control cable on the crane lever; it must be removed.
- Depending on the design of the Niva-21213 stove, its body can be secured with two nuts or two screws.
- The new heater tap is installed on the car in the reverse order.
We emphasize that in the case of a screw fastening of the stove faucet to the heat exchanger, this procedure is somewhat problematic, since the nuts constantly fall out. To do this, they simply need to be secured with plasticine or chewing gum. In addition, it is worth adjusting in advance the cable that controls the position of the heater tap. If this is neglected, then during the operation of the stove you will have to constantly climb under the dashboard in order to set its position.
How to replace the stove on a VAZ 21213
Cars admin26.02.2020
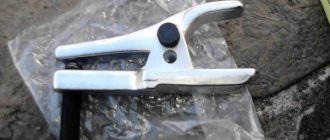
Dear friends, today we will tell you how to independently remove and install the electric motor of the stove fan on the Niva VAZ-21213 and VAZ-21214. The procedure is quite simple; we only need two screwdrivers, a Phillips screwdriver and a flathead screwdriver with a thin blade. The reason for removing and replacing the heater motor may be its squealing due to wear on the bushings. Often even new heater motors suffer from this problem, so when replacing the heater motor, we recommend that you install a bearing motor. To get to the motor we need to remove the lower part of the stove body, and to get to it we need to remove the shelf, the radio panel and the decor on the tunnel.
In general, let's get started, and start by removing the storage shelf under the glove compartment, pick up a Phillips screwdriver and unscrew the following screws:
We move the shelf to the side. Then we move on to the decorative trim on the tunnel, it is also held in place by screws, they are located in this way, see the photo below:
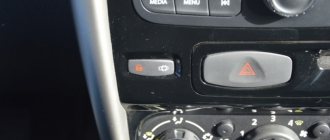
Carefully remove the chips from the cigarette lighter, put the tunnel decor aside, we don’t need it for now. Now let's move on to the tape recorder panel. To begin, use a flat screwdriver to pry up the buttons one by one:
Carefully remove the terminals from them and move all the buttons to the side. We recommend labeling the terminals, this will speed up the assembly process and help avoid mistakes!
Gently pull the plastic nozzles of the stove levers towards you, they will come out with force:
Now again we take the Phillips screwdriver in our hands and unscrew the fastenings of the radio panel to the dashboard on both sides:
Then use a flat screwdriver to pry the panel from above and carefully remove
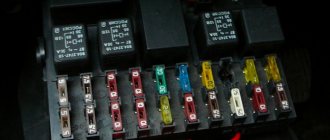
Now we have access to the stove body. But first, we unscrew the rotation relay to remove the minus chip of the heater fan from it:
Now we are interested in the metal latches of the stove, here they are in the photo, there are only 4 of them, two on each side:
They can be removed either by hand or by prying them with a screwdriver. Be careful, they are springy and can fly away in an unknown direction, to the land of lost things
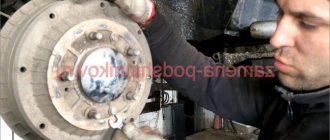
After this, the lower part of the stove body falls into our hands and is calmly removed, we gain access to the culprit of the action - the stove motor:
It is also held on by two metal latches; it is more convenient to pry them off with a screwdriver:
After this, disconnect the motor wiring and remove it from the stove body
We remind you that the stove motor is essentially unrepairable and if it “squealed” then the bushings are damaged and then only a replacement is needed. Ideally, straight to the bearing. When assembling and installing, do not forget to put rubber spacers on the motor, otherwise vibration will occur. We perform assembly in reverse order. So you have learned how to independently remove and install the heater motor on the Niva VAZ-21213 and VAZ-21214. Good luck to everyone on the roads and fewer breakdowns.
Dear friends, today we will tell you how to independently remove and install the electric motor of the stove fan on the Niva VAZ-21213 and VAZ-21214. The procedure is quite simple; we only need two screwdrivers, a Phillips screwdriver and a flathead screwdriver with a thin blade. The reason for removing and replacing the heater motor may be its squealing due to wear on the bushings. Often even new heater motors suffer from this problem, so when replacing the heater motor, we recommend that you install a bearing motor. To get to the motor we need to remove the lower part of the stove body, and to get to it we need to remove the shelf, the radio panel and the decor on the tunnel.
Let's sum it up
As you can see, on all modifications of the domestic Niva SUV, the interior heating system works extremely poorly, and this is mainly due to its design flaws. For this reason, vehicle owners have to constantly look for different ways to solve the problem, constantly upgrading the stove in the car.
As practice shows, it is not difficult to correct all the shortcomings and improve the interior heating. Any driver can carry out the procedure for independently tuning the interior heating system in a Niva-21213 car.
Heater radiator with air conditioning Niva Chevrolet (replacement)
There are two ways to replace the RP on a Chevrolet Niva with air conditioning, each of them has its own pros and cons:
- the first method will take a lot of time, and you will have to disassemble almost the entire instrument panel;
- the second method is relatively fast, but it is necessary to cut and adjust some parts, as the common people say - this is the “collective farm” method.
In order to replace the stove radiator according to the instructions, we perform the following work:
- First of all, we drain the antifreeze - so that it all flows out, we blow into the expansion tank;
- remove the ground terminal from the battery;
- dismantle the glove compartment, it can be easily removed;
- remove the center console, including the radio;
- unclip the front body panels from both A-pillars;
- remove the decorative panel on the side of the center console (driver's side);
- disconnect the instrument cluster;
- loosen the fastenings of the gearshift lever panel, completely unscrew the two screws closest to the panel;
- dismantle the steering column covers and steering column switches;
- unscrew the bolts securing the panel itself (4 fasteners near the windshield);
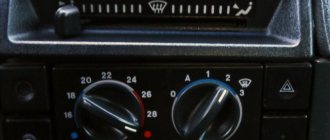
- remove the air conditioner control knobs;
- dismantle the heater control unit;
- unscrew the four steering column fasteners (two on each side), lower the steering column onto the driver’s seat;
- remove the air duct located behind the torpedo;
- disconnect all the cables;
- remove the instrument panel frame;
- unscrew the bolts securing the iron frame of the panel, remove the “piece of hardware”;
- we separate the housings of the evaporator and the radiator of the stove from each other, dismantle the air ducts (central, as well as on the left side);
- we approach the clamps of the stove pipes, loosen them, and remove the hoses;
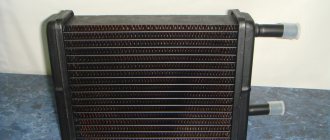
- We remove the stove, change the radiator, then put everything back in place.
The heater radiator on a car with a Chevrolet Niva air conditioner can be changed in another way, but here you will have to heat the plastic and cut out its pieces. The easiest way to use this method is to install a “original” radiator or a copper radiator from a Volga car - it will fall into place more easily. It’s not worth experimenting with copper RP from a “penny” - it won’t fit in size. You will also need long L-shaped stove pipes, they will fit from the VAZ Nine, but you will need adapter tubes and additional clamps - the 2109 pipes are thinner than the Nivsky ones.
The principle of this installation:
- remove the glove compartment, dismantle the air duct on the passenger side;
- after removing the steering column casing and the heater protection in the heater radiator housing (on the driver’s side), we cut out or burn with a soldering iron a rectangular hole for removing the RP; by the contour of the plastic you can understand where exactly the heater radiator is installed;
- We unscrew the clamps of the stove pipes not at the radiator, but under the hood;
- we pull off the stove pipes, drain the antifreeze from them (tilt the hoses down), all the coolant does not need to be drained;
- so that the remaining antifreeze does not interfere with further work, we drill a hole in the old RP;
- Using a soldering iron on an old radiator, we anneal the furnace fittings for the pipes, pull out the control panel to the left (towards the driver);
- on the new stove radiator we install pipes 2109, adjust them to size, assemble the structure with adapter tubes, install the entire assembly in place, secure the RP using a homemade clamp.
To make it easier to carry out all this work, it is better to remove the front seats.
There are many disputes about which replacement is better for a Chevy Niva with air conditioning, but the second method has one serious advantage - the quality of Russian parts often turns out to be unimportant, and if the new heater radiator leaks, you will have to disassemble everything again. In the “collective farm” version, it will be possible to replace the RP a second time very quickly, but disassembling and reassembling the entire instrument panel may take a whole working day.