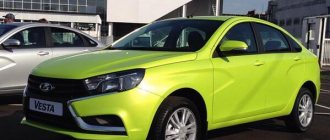
Hello everyone, today we will take a closer look at driving a Lada Vesta. Of course, if you are an experienced car enthusiast, then you probably already know all the controls.
But, if you are a beginner, then the article should probably help you, and you will understand the controls of the West car. And what is responsible for what. So let's get started.
Dashboard Lada Vesta
On a Lada Vesta, the instrument cluster is very different from older Lada models. Therefore, this description will help you understand the meanings of indicators and instrument readings.
- Tachometer. Shows the engine crankshaft speed (x1000 min-1). The presence of the tachometer needle in the red scale area warns of increased engine speed. To prevent damage to the engine, its maximum speed is limited by the electronic engine management system software. Above approximately 6200 min-1 the fuel supply will be limited. Possible interruptions in engine operation and jolts in the movement of the vehicle are not a malfunction. When the rotation speed decreases, the fuel supply will resume. Also, do not allow the engine to operate when starting and while driving at an engine speed below 800 min-1. (ATTENTION! It is prohibited to operate the engine in a dangerous mode (at engine crankshaft speeds above 6200 min-1 and below 800 min-1).
- "Seat belt" warning light
- Warning light "Airbag system"
- Brake failure indicator
- "Electric power steering" warning light
- "Engine fault" indicator
- Battery indicator
- ABS warning light
- Speedometer
- Warning light "Unclosed hood"
- Signal indicator "Hazard alarm"
- Signaling device "Unclosed doors"
- Right and left turn signal indicators
- LCD indicator with functions
- Index "Coolant temperature". Operating a vehicle with a faulty warning light is prohibited. When the operating temperature of the coolant is exceeded (more than 115 °C), the indicator lights up red constantly, and a short-term intermittent buzzer sounds. Do not allow the engine to operate in overheating mode. (WARNING: Do not operate the vehicle with an overheated engine. The vehicle must be taken to a dealer to determine and correct the cause of the engine overheating.)
- Fuel level indicator and indicator
- Signal indicator "Parking lights"
- Signal indicator "Low beam headlights"
- Signal indicator "High beam headlights"
- Signal indicator "Front fog lights"
- Signal indicator "Rear fog lights"
- "ESC" indicator
- "ESC OFF" indicator
Lada Vesta steering wheel
1-4 is climate control and media system control, 2 – Signal, 3 – Steering wheel
The steering wheel on the Lada Vesta car is adjustable in height and reach.
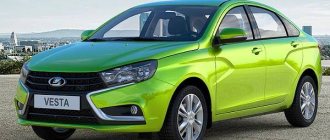
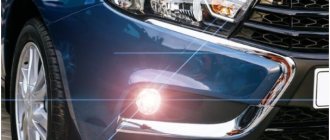
Standard optics Lada Vesta
The manufacturers prepared the lighting fixtures for the Lada vesta car competently. The headlights of the Lada Vesta are equipped with a chrome insert that has a curved shape. With its help, the lighting device is divided into 2 parts.
The Lada Vesta headlight unit includes the following elements:
- Halogen headlights H7 (low beam) and H1 (high beam).
- Model PY21W was used for turning.
- W21 and 5W are used as dimensions and DRLs.
For Lada Vesta steering switches
Switches under the steering wheel on a Lada Vesta car are used to control the glass washer and wipers, turn signals, as well as to control the light.
Let's start with the right steering column switch. The main functions are control of the windshield wipers and washer. Control:
Pull towards yourself - pour water on the windshield, the wipers will make up to three strokes (depending on the time of watering)
Pull down - quickly clear the windshield, one wiper cycle
Switch up one step (—) – intermittent operation of the wipers with variable intensity. The interval between wiper strokes is adjusted using a rotating wheel.
Switch up two steps (1) – intermittent wiper operation with low glass cleaning speed (long pause between wiper strokes)
Switch up three steps (2) – intermittent wiper operation with high glass cleaning speed (short pause between wiper strokes)
Now the left steering column switch. The main function is to control turn signals, lighting, headlights and lanterns. Controls: Pull up – turn on the right turn signal;
Pull down to turn on the left turn signal;
Turn the tip of the switch one notch to turn on the dimensions;
Turn the tip of the switch two notches - turn on the low beam + dimensions;
Turn the ring one notch to turn on the front fog lights;
Turn the ring two notches to turn on the rear and front fog lights;
Press the switch away from you - turn on the high beam;
Pull the switch towards you - briefly turn on the high beams (blink high beams)
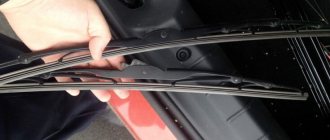
Sequence of actions when replacing a low beam lamp on a Lada Vesta
Required tools:
- rags;
- new low beam bulb (H7 base, power 55 Watt);
- additional lighting as needed.
More details about the types and types of lighting devices on the Lada Vesta are discussed in the article https://remont-avtovaz.ru/kakie-lampy-ispolzuyutsya-na-lada-vesta/.
Parsing algorithm:
- We turn off the engine, squeeze the parking brake, open the hood.
High beam, low beam and dimensions are installed in one plastic housing. The high beam is closer to the edges, the low beam is closer to the center of the car.
Note to the driver!
Do not touch the glass of the lamp with your hands, as this will lead to darkening of the bulb and premature burnout of the filament.
- We turn the plastic cover on the right optic to the left.
- Disconnect the block with wires.
- Compress the retaining spring.
- We disconnect it from the reflector mount and move it to the side.
- We remove the lamp, install a new one, and assemble it in the reverse order.
By analogy, we replace the low beam lamp on the left side.
Control unit for stove (heater) and air conditioner Lada Vesta
The controls for the stove and air conditioner on Vesta are basically standard.
Left regulator – control of supply air temperature (The left regulator additionally has the function of turning on the air conditioner); Right – air flow regulation; Buttons in the middle – setting the direction of air flow.
Adjusting the front seats on Lada Vesta
The height and degree of inclination of the front seats on the Lada Vesta are adjusted using three levers.
They are located on the outside. Two of them are in the horizontal part of the seat, and one is in the vertical (back).
1st lever (longer): when pressed up and down, the seats are adjusted in height - this is a seat lift. 2nd lever: it adjusts the backrest angle.
The 3rd lever provides the degree of lumbar deflection.
It is worth noting that levers 1 and 3 are missing on the passenger seat. Adjustment back and forth occurs via the lower lever, which is located under the seat, on the outside.
Selection and installation of standard lighting fixtures for the Lada Vesta car
What kind of lamps are used for the Lada vesta car? The use of standard or LED lamps is allowed.
Standard models
A standard headlight on a Lada Vesta is estimated at 11,000-12,000 rubles. It is allowed to purchase a lighting device with the required characteristics for a rear or front headlight. At the same time, the final cost of optics largely depends on such indicators as the selected type, manufacturer, and power.
How to replace front optics?
Before carrying out the replacement process, you need to find out how to remove the headlight of a Lada Vesta. To replace the lamps, just disconnect the ground. To do this, unscrew the covers, carefully disconnect the wiring and remove the cartridge from the spring clamp. After this, the light bulb is replaced with a standard or upgraded model. Similar actions are performed if the dimensions and DRLs are replaced.
Replacing the front headlight unit for the Lada Vesta is performed in the following order:
- To remove the fasteners, the required type of keys is used. After this, the front bumper is detached.
- The block is attached to the body using 4 bolts. To unscrew them, use keys that are equipped with heads.
- As soon as the block is removed, the wiring blocks are disconnected.
Installation of a new LED headlight is carried out in the appropriate order. After this, the headlights are adjusted on the Lada Vesta.
Rear lights
The taillights can also be upgraded. Before carrying out all work, the “mass” is removed. In order to remove the light bulbs, the luggage compartment trim is turned away. Under the bevel there are cartridges, one of which goes to the side lights, and the other to the turn signal.
In order to remove the cartridge, the block is disconnected. It is easy to remove the light bulb from the turn signal; you need to carefully pull it out. Those lamps that are part of the dimensions, DRLs, are unscrewed (clockwise only).
To remove the outdoor unit, unscrew the nuts that are located under the casing. To do this, use the appropriate key. Items must be removed carefully.
LED optics
Some car owners perform optics tuning. To transform the Vesta, alternative optics are used - LED headlights. At the same time, various modules have been developed for low and high beam. They differ in the method of obtaining the light spot.
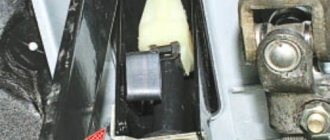
Lada Vesta fuel tank filler plug
To access the fuel tank filler cap, open the hatch located on the right rear fender and unscrew the cap counterclockwise. The plug is protected from falling by a flexible leash connected to the body.
Hello again!
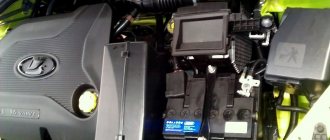
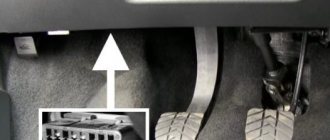
So, I completely installed the PTF. Everything works, the fog lights are on. All that remains is to connect the wiring to the electronics unit to indicate that the PTF is turned on on the dashboard.
Everything is quite simple here. When ordering the board, I asked for an extra pin
with wiring. Raiven-Tumen installed it without any problems or additional payment. True, there was no confidence that he would fit. The pin is absolutely the same as on the board contacts. Looking ahead, I’ll say - I came up)