What are the effective methods and how to seal the gas tank so that it can be used in the future? Similar questions will be discussed in this section. After all, this topic concerns more used cars, and even those of domestic production.
Structurally, gas tanks are practically not protected from external damage, unlike their foreign counterparts. Often, small fractions of gravel, crushed stone, and asphalt bouncing off the rear wheels gradually destroy the coating of paint and primer, causing irreparable damage to the metal. After some time, the metal begins to rust. The driver begins to notice a fuel leak.
How to seal a car's gas tank?
Today there are two options for gluing:
- Using cold welding to seal cracks and holes;
- Epoxy glue or popularly called fiberglass. It is better to buy a two-component one.
Each method is good in its own way. Of course, you can find other ways to eliminate leaks in a gas tank, but they are less effective than the above.
Tools and related equipment
- Several sheets of sanding paper;
- Half a liter of acetone;
- Epoxy resin;
- Fiberglass.
First, we purchase all the above materials, carefully read the terms of the instructions for use.
Troubleshooting algorithm
- We drive the car onto a viewing hole or overpass;
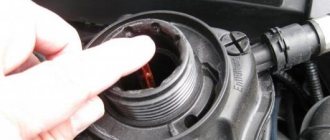
- We mark the location of the leak with chalk;
- We remove the fuel tank from the car;
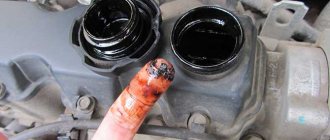
- Pour out the remaining gasoline or diesel fuel;
- Be sure to dry it in the open air, since the vapors of the chemical reagent are explosive;
- Using a rag and a soap solution, we externally clean the gas tank from residual tar, dirt, and other impurities;
- To clean difficult-to-remove chemical compounds, we use coarse sandpaper;
- Degrease the surface of the gas tank with acetone. This procedure must be carried out several times, since the quality of gluing of the gas tank material depends on how well the degreasing is carried out;
Preparation stage and epoxy bonding
For gluing, it is necessary to use glue with a viscous consistency, otherwise the effect may not be achieved.
- We cut the pieces of fiberglass so that they protrude 1-2 cm more than the perimeter of the crack or other damage. We thoroughly soak the scraps of fabric in epoxy;
- Carefully place the fiberglass cloth on the surface of the gas tank so that there are no air bubbles left, otherwise eliminate the defects;
- Using a rag, remove excess glue and resin;
- Smoothes the glass strip with a small piece of plastic to make the platform even;
- After this, we proceed to apply the second ball and carry out a similar procedure. Depending on the degree of damage to the gas tank, the number of fiberglass balls is determined. Accordingly, minimal damage will require a minimum number of fiberglass balls, deeper affected areas will require a larger number of balls.
Note to the driver, it is necessary to remember that the quality of the rest of the structure depends on how the first layer is laid.
Each subsequent layer should be slightly wider than the previous one and at intervals of 15-20 minutes.
In addition, we impregnate the last layer with additional aluminum powder, which can be purchased at a car store.
After a day, the structure will completely dry and harden. You can sand it using fine sanding paper.
We proceed to painting or priming, depending on the need.
We use cold welding similarly to the above processes. Despite advanced technologies in the form of welding, many drivers prefer old, proven and durable methods. So the question of how to seal the gas tank has already been sorted out. A similar procedure can be carried out both in a garage and at a car service center, depending on your decision.
How to seal the gas tank? This question is asked by many motorists, especially in view of the deplorable state of our roads. Sealing a small hole in a fuel tank is not very difficult. The easiest way is to use a two-component composition, more often referred to as cold welding.
But it must be said that such repairs are rather temporary. After polymerization, after a certain period, cold welding loses its elasticity and may begin to crack under the influence of vibration. In this case, the tightness is lost.
The time it takes for cold welding to begin to crack depends on the quality of the composition, and varies from manufacturer to manufacturer. Before applying cold welding, the surface of the fuel tank is sanded with coarse sandpaper and then degreased with a nitro solvent. After applying cold welding and polymerization of the composition, the surface is sanded with fine-grained sandpaper.
Repairing a gas tank using epoxy resin and fiberglass is more durable. Here it is important not only to prepare the surface, but also to uniformly impregnate the fiberglass layers with epoxy resin. So, we found out how to seal the gas tank, let's figure out how to do it.
Sealing technology
The surface of the fuel tank around the defect is treated with coarse sandpaper. The surface should become rough to the touch. Then it is degreased with a nitro solvent.
Several pieces are cut out of fiberglass, which should protrude 5-7 cm beyond the edge of the defect.
Epoxy glue is diluted in accordance with the proportions specified in the instructions. You need to work with glue using rubber medical gloves.
A filler in the form of aluminum powder is added to the diluted epoxy resin. The approximate proportion by volume is 10%. A problem arises due to the fact that the mixture becomes quite thick and does not saturate the pieces of fiberglass well. To make the mixture liquid, it makes sense to heat it in a water bath, stirring constantly. The second way to make the mixture liquid is to add acetone to it.
The liquefied mixture is applied with a brush to a small piece of glass. After this, a fiberglass patch is laid. The fiberglass should be completely saturated. Instead of glass, you can use thick polyethylene or lavsan film, to which the epoxy mixture does not stick.
A layer of epoxy resin is applied to the prepared surface of the tank. After this, the first layer of fiberglass removed from the glass is laid. Straighten it straight with gloved hands.
Epoxy resin is applied to the glass and a second fiberglass patch is impregnated. Then it is laid on top of the applied patch and straightened. You can use 5-6 layers of fiberglass.
After the last layer of fiberglass is laid, the composition must polymerize. Hardening time depends on the ambient temperature.
Once the epoxy resin has hardened, you can sand the surface with fine-grit sandpaper. Then the surface can be painted. It is quite possible to immediately get a glossy surface. To do this, a piece of Mylar film is placed on the uncured epoxy resin and patches, covering the patch. After polymerization, the lavsan is removed and a glossy surface is obtained.
We hope that this information on how and with what to seal a gas tank will be useful to you.
Any device has the ability to wear out and break. It’s the same with a car: its parts can also wear out and become unusable. In particular, if the gas tank of a foreign-made car is leaky, then certain difficulties may arise with its replacement. The fact is that foreign car manufacturers usually do not allow uniformity. Since there may be delays in replacement, it means the gas tank needs repairs. By the way, almost every motorist can seal a gas tank on his own, without resorting to the help of specialists from specialized service centers.
Step-by-step instruction:
1. In order to solder a gas tank with your own hands, you need to make sure you have the tools and appropriate materials. First of all, the driver must have a working soldering iron with a power of at least 100 watts. If a soldering iron heated in the open air is used to seal the gas tank, then this will be the best option. However, today such soldering irons are quite rare, so if you don’t have one, a simple unit with the above power will do.
2. The driver will also need some kind of solder. You can use regular tin. Next, you will need a so-called flux. Fluxes are materials used to combine oxides when soldering metals. Professionals recommend using pickled hydrochloric acid – zinc chloride – instead of traditional rosin. Moreover, it is not difficult to obtain zinc chloride at home: for this purpose, it is enough to drop three or four zinc “tablets” in a bottle with hydrochloric acid diluted 1:1 and wait until they are completely dissolved. In principle, more zinc “tablets” can be added. Instead of zinc “tablets”, you can add pieces of the body of a regular used battery, and you can use pre-calcined borax as a material for flux.
3. The gas tank should also be prepared for repair work. Of course, the fuel must be drained from it into any suitable container, after which the gas tank must be thoroughly rinsed and dried.
4. Carefully treat the leaky area using sandpaper and degrease it with a special product.
5. After completing the preparatory work, it is necessary to warm up the soldering iron to the required temperature, and then warm up the gas tank itself and the materials for soldering (for example, tin). This way, the materials will have time to grip each other, which means the hole will be sealed firmly.
6. If the hole is large enough, it is recommended to use polyester resins as a soldering material and apply them in layers, alternating with fiberglass. Naturally, the more such layers, the better the hole in the gas tank will be repaired. If you resort to this method, you can do without a gas burner.
Many modern vehicles have plastic elements in their design. There have been attempts to produce bodies entirely based on plastics, but due to globalization, automakers continue to stubbornly use metal as the basis for their production. But some automotive elements made of plastic are gradually replacing the usual metal products.
Repairing a cracked metal gas tank
1. The first method of sealing holes in a metal gas tank is quite popular among drivers. Its essence is to seal holes using cold welding. Before sealing a hole using cold welding, the surface around it must be treated with sandpaper, a rust converter, and then just apply cold welding to the surface following the instructions indicated for using cold welding. After the cold weld has dried, the best option would be to glue the area into several layers of fiberglass with epoxy glue.
How to protect the fuel tank from fuel theft?2. The essence of the second method is to eliminate larger holes and holes using tin and a tin plate (or copper plate), i.e. sealing. Before you start sealing, you need to prepare the surface of the tank for soldering and cut the tin plate to the required size.
To prepare the surface of the tank for packing consists of the following steps: the first is to clean the sealed surface with sandpaper and degrease it, then tin the surface. After this, prepare the tin plate using sandpaper and also tin it with tin. Then you’ll just have to solder it, check for leaks and forget about it.
3. The third option for eliminating holes and holes in a large fuel tank is a fairly simple solution. These holes simply need to be sealed using traditional welding. It is more reliable and durable.
Conclusion: In conclusion, depending on the size of the hole or crack, you can choose the appropriate method. It is important to remember that damage to the gas tank is a serious malfunction in the car!
We invite you to familiarize yourself with what products reduce blood pressure at home
Today we will talk about how and with what to properly seal or seal a hole or leak in a car’s gas tank if you don’t have a welding machine or a car service at hand.
We will also consider recommendations and instructions for repairing a leaking gas tank at home with visual photos and videos
The reasons for damage to fuel tanks can be different, in one case it is rust, in another it is a normal trip on Russian roads. A small blow and almost immediately we begin to smell gasoline in the cabin. The fuel level arrow also tells us that gasoline is leaking. How difficult is it to repair a fuel tank yourself?
To drain gasoline from the fuel tank, you will need to tilt the car to one side with a jack and use a tube.
If there is a hole in the gas tank in the lower part, then it will be faster to drain gasoline through it. Then you should dry the gas tank from gasoline vapors.
Repairing the gas tank without removing it or whether it is better to dismantle it is decided depending on accessibility to the place of damage and the type of repair work.
Do you know how our grandfathers used to repair a fuel tank in the field? If a small crack appeared in the fuel tank, the hole was shaped into a round shape using a screwdriver. Next, we selected a bolt of suitable size for this hole and tightened it, first we put rubber washers on it (from the wheel chamber).
If you look at the old 130 ZILs, you will notice that their tanks are completely riddled with bolts, which suggests that this method is quite reliable and durable. Currently, this method is being used by truck drivers.
A leak in a car's fuel tank can be sealed using fiberglass and epoxy glue. In this case, the reliability of the gluing site will be much higher than when using cold welding for gluing.
Purchase the necessary materials to complete the work. In this case, prefer domestic two-component epoxy glue. When choosing, take into account the seller's recommendations and instructions on the packaging.
Locate the leak on the gas tank. If it is located in a hard-to-reach place, remove the gas tank and dry it thoroughly. Clean the gluing area with sanding paper with a rough surface (to improve adhesion). Degrease the surface with acetone. The quality of gluing directly depends on the quality of degreasing!
According to the instructions on the package, prepare epoxy glue and pour it into a suitable container. If you have to glue on the corners and edges of the tank, give it a thicker consistency. Cut the fiberglass into pieces so that their edges protrude a few centimeters beyond the crack. Impregnate the fiberglass itself with epoxy glue.
Begin sealing by placing the fiberglass cloth over the surface to be repaired so that there are no bubbles. Remove excess resin. To improve penetration, tamp the glued layer of fiberglass with the end of a hard brush.
Pay special attention to the first layer: the quality of all work performed will largely depend on its quality. Before applying subsequent layers to the first coat, lightly sand it with coarse sandpaper.
Seal the leak area with several layers of fiberglass. Moreover, each subsequent layer should protrude beyond the edges of the previous one by 1-2 cm. After applying the next layer, wait 15-20 minutes for the glue to dry. Apply each layer carefully and quickly.
Impregnate the last layer of fiberglass with epoxy resin with the addition of a plasticizer (aluminized powder). To do this, in a separate container, mix the plasticizer and resin to a porridge-like consistency. Dry the resulting patch thoroughly for 24 hours.
If desired, putty and paint the gas tank over the applied patch. This will increase the reliability of gluing. Before applying putty and enamel, treat the surface of the patch with coarse sandpaper.
A hole in the gas tank is quite serious damage to the car, if you are not confident in your repair skills, just call the most suitable tow truck and do not waste time on this article, if you still decide to repair it yourself, then the tips below are especially for you. No one is immune from such a misfortune - any sharp pebble can fly out from under the wheel and hit the wall of the gas tank, making a hole in it.
As a result, fuel can seep into the trunk of the car, filling the interior of the vehicle with a pungent odor. At the same time, the fuel level indicator shows a sharp loss of fuel. This situation is very unpleasant, but completely solvable. If there is a large hole in the gas tank, you can use the popular truck driver method. You will need to widen the hole, select a suitable bolt and a rubber gasket (you can cut it out of the chamber yourself).
Now you need a washer to fit, place the bolt in the hole from the inside. It is better to drain the remaining gasoline before these activities. If the selected tires are sufficiently resistant to gasoline, then you can drive a decent distance. If the type of rubber for repair is “damp”, then the product is quickly corroded by gasoline, so the repair procedure will need to be repeated.
In order for gas tank repair to be not only competent, but also safe, certain rules must be followed. They boil down to the fact that all additional equipment will need to be dismantled, the fuel drained and the container washed.
When repairing a cracked gas tank, it is necessary to drain the fuel, remove the container and wash it.
How to remove the gas tank
Removing the gas tank involves removing the hatch, cable, neck, fuel sensor and pump. The list of certain elements, as well as the process of dismantling them, depends on the specific car.
Tools you may need:
- pliers;
- side cutters;
- screwdriver;
- wrench or socket of appropriate size.
Sequence of actions during dismantling:
- First, the remaining fuel is drained. For this purpose, the design of the tank has a special hole in the lower part. To prevent fuel from spilling on the ground, prepare the container in advance. If there is no plug, gasoline can be drained using a hose and a pump bulb.
Before removing the gas tank, it is necessary to drain the remaining fuel.
- After emptying the tank, disconnect the connector, which is responsible for connecting the wires to the fuel level sensor. This connector may be located under the rear seat or in the luggage compartment. The element can be separated by snapping off the special tab. After this, disconnect the ventilation hose located at the bottom of the tank.
After the fuel has been drained from the tank, remove the connector with the fuel sensor wires, as well as the power supply to the fuel pump.
- Using a screwdriver, loosen the clamp of the fuel supply hose and tighten the tube. If the hose does not come off, try turning it in different directions.
One of the stages of dismantling the gas tank is the removal of the fuel hoses, for which the fastening of the clamps is loosened
- Removing fasteners. To do this, unscrew the nuts that secure the clamps securing the gas tank to the body, and then remove them from the studs. The free side is lowered, then the second side of the fastening is released.
To dismantle the tank fastenings, unscrew the nuts securing the fuel tank clamps
- Remove the gas tank filler cap by simply unscrewing it. After this, the tank is moved to the side to release the neck from the rubber seal.
To remove the gas filler neck from the seal, you will need to remove the plug.
- The ground wire is disconnected from the tank body. It is secured with a nut, which must be unscrewed with a wrench of the appropriate size. There are no longer any elements holding the fuel tank in place and it can be removed from the vehicle.
When nothing interferes with dismantling the tank, it is removed from the car
Cleaning the gas tank
After the fuel has been drained from the tank, it will need to be cleaned of contaminants, for example, by washing under running water using detergents. After drying the tank, it is necessary to clearly indicate the places of future work and understand whether there is a need for its dismantling or restoration is possible directly on site.
We invite you to familiarize yourself with Fern with soy meat
How to remove the gas tank
- First, the remaining fuel is drained. For this purpose, the design of the tank has a special hole in the lower part. To prevent fuel from spilling on the ground, prepare the container in advance. If there is no plug, gasoline can be drained using a hose and a pump bulb.
New technologies have many advantages
One of these elements is a plastic gas tank, which has undeniable advantages over its metal counterpart:
- Weight. Plastic products are usually about 3 kg lighter than metal structures. This indicator is especially taken into account in the world of auto and motorsports, in the production of sports cars and motorcycles, where there is a persistent struggle against excess weight;
- Anti-corrosion resistance. Corrosion does not threaten plastic products, unlike metal ones. No matter how the metal is processed from the outside, the aggressive external environment still makes its way to the structure of the substance, causing irreparable damage to it. The same problem is inherent in the internal space; the destroyed surface fills the fuel with metal particles, which contaminate the filters and other elements of the car’s fuel system;
- Safety. A plastic gas tank is easily deformed and takes a hit compared to iron, which, as a result of hard contact with other rigid structural elements of the car, can create a spark, which, in turn, is fraught with ignition of the fuel at best. Perhaps a sadder result is that when fuel vapors are mixed with air in certain proportions, an explosion is possible;
- Manufacturing cost. With an established scheme for the production of this plastic product, its price is much lower than that of iron products. Thus, the use of a plastic tank in the design of the Lada Kalina made it possible to reduce the cost of the car. It is also known that many other manufacturers use polypropylene products, for example, Hyundai, Ford, Renault, Nissan and many other well-known brands.
The photo shows a plastic gas tank. Let's talk about its disadvantages
Disadvantages of plastic compared to iron
Despite the urgency of modernizing the gas tank, the process of transition from iron to plastic was slowed down due to a number of reasons. At the beginning of 2000, new environmental standards were issued, into which plastic fuel tanks did not fit, due to the fact that, despite the tightness of the structure, the leakage of fuel into the environment was more than 20 milligrams per day. The bulk of the losses occurred on the external fuel receiving lines. Currently, the problem has been overcome by shifting the elements of the fuel delivery system into the tank and using a multilayer structure. This modernization has reduced the likelihood of fuel leakage to zero, the main thing is that your hands do not shake when refueling the car.
Today, approximately 70% of new cars are equipped with plastic gas tanks, but problems that cause inconvenience to owners remain unresolved:
Despite the possible troubles, most drivers install plastic gas tanks on their cars. The advantages of these products outweigh the disadvantages. For owners of Mitsubishi Pajero, the anti-corrosion resistance of plastic is important. The owners of the VAZ 2114 are interested in the economic component, because maintenance and repair of a plastic gas tank is cheaper than a metal one.
A simple solution
In some situations, a hole in a gas tank can be repaired using good glue or any equivalent. For not very serious damage, this method will be the most relevant. All you need is a good piece of cloth, which you need to soak in glue and apply to the damaged area.
When you see that the fabric is firmly stuck to the damaged area, treat it with nitro paint; this temporary repair will allow you to easily get to the nearest car service center.
After these tips, you will most likely no longer ask: “How to seal a gas tank?” Now you can carry out repairs yourself at any time and protect yourself from even greater damage to the gas tank.
The leak must be fixed immediately
If a fuel leak is detected in the area of the gas tank, you should stop using the vehicle for the safety of yourself and others. Repairs should be carried out on a removed and thoroughly washed container. Thus, it is possible to conduct a complete inspection of the product that was pierced and accurately determine the location of the problem area. Most often, these are longitudinal cracks or destruction of the weld connecting the elements of the fuel system, which are a consequence of mechanical influence from the outside.
Preparing a tank for repair includes a number of operations:
- Draining fuel. There is a drain neck at the base of the gas tank; by unscrewing the lock plug from it, you can drain the fuel;
- Washing the container. At home, caustic soda is used for washing, using it in proportion - two glasses per 10 liters of warm water. The mixture is poured into the tank and left for at least 5 minutes, after which the container is shaken and the liquid is drained. The procedure is repeated at least 3 times;
- Drying. This operation must be carried out very carefully. It can be done naturally, but it will take a lot of time. It is better to use an industrial hair dryer, thereby ensuring the effect of air blowing under pressure.
Common DIY methods for repairing a plastic gas tank
While washing the container, you may find other problem areas of the surface that require correction. Having assessed the extent of the damage, we decide on the repair method:
- Cold welding. For damage that occupies a small surface, this method is optimal. You will need to clean the damaged area with sandpaper and degrease. After the preparatory operation, kneaded and heated binary glue is applied, pressed tightly onto the surface to be repaired and smoothed evenly. Read the instructions on the packaging for cold welding. For a better effect, you can apply a fabric patch on top of the uncured glue surface and add another layer of glue;
- Soldering. The most common and reliable method, which is used for large and significant damage. You will need a soldering iron with a power of at least 250 Watts and welding skills, although the product has a multi-layer structure, failure to comply with precautions can result in aggravation of damage. Depending on the size and nature of the damage, a patch is cut out in the form of a metal mesh, which will be soldered into the structure of the gas tank. The operation should be carried out in one step to avoid heterogeneous layers and damage to the plastic;
- Placing the patch. This is done using soldering and a patch. It is important to select an element for a patch made of the same type of plastic as the tank. The material marking is usually applied to the product by the manufacturer. It can be polyamide (PA), acrylonitrile (ABS), polypropylene (PP).
DIY car gas tank repair
A car breakdown can happen anywhere. If you notice that the fuel tank of your car is leaking, then the problem must be partially eliminated on the spot. This way you can get to either a service station or a garage, where the problem can be completely eliminated. How? The answer is given below.
General safety rules
If the fuel tank of your car starts to leak, and you decide to carry out the repairs yourself, then you need to adhere to the following rules:
- Before starting repairs, drain all fuel (put the car on a jack and drain the gasoline using pipes);
- Dry the fuel tank thoroughly;
- If necessary, remove the tank (it all depends on the location where the hole occurred);
- Check the entire tank to see if there are still holes somewhere.
Plastic gas tank
Most often, in plastic gas tanks, longitudinal cracks appear on the body of the tank itself or at the place where the tank halves are welded. There are several ways to patch such a container.
Cold welding
Whether it will be possible to repair a fuel tank by cold welding depends on what kind of plastic the tank itself is made of. If soft plastic was used, then it will be more effective to solder the hole, since cold welding will not “fall” due to poor adhesion of such plastic. If the plastic is hard, then you can safely buy cold welding. Use it according to the manufacturer's instructions. Car owners do not give a clear answer as to how durable such treatment will be.
Remember! When sealing a hole in a fuel tank using cold welding, it is very important to thoroughly dry the surface to be treated. Before applying the weld, you need to clean the surface of the tank so that it is clean, slightly uneven, so that the adhesion is more reliable. Cold welding must be labeled as “gasoline resistant” on the packaging, otherwise the work will go down the drain.
Adhesives (sealants)
To seal a plastic gas tank, you can use fiberglass and epoxy resin. Before sealing, clean the surface, then apply a layer of fiberglass and impregnate with resin. Allow the surface to dry, then repeat the procedure. At the very end, treat the surface with an anti-corrosion agent. The entire procedure may take you about 4 hours.
If such a problem happens to you on the road, you can use Moment superglue and a piece of rag to seal it. You need to saturate and apply layers to the hole one by one. This method will help you get to the nearest service station.
Did you know? Today the world is concerned about the problem of environmental pollution from automobile exhaust. Therefore, the Israeli company Solon invented a fairly environmentally friendly gasoline, Gold-95, which produces extremely few harmful emissions into the atmosphere. Also, the price of this gasoline is comparatively lower than other types of fuel. The use of such fuel does not affect the condition of the engine in any way.
Hot soldering iron
The most effective repair method is to solder the gas tank, even if it is plastic. For this you need:
- Soldering iron (200 W power);
- A piece of plastic;
- Alcohol ;
- Metal mesh (1 mm pitch);
- Sandpaper;
- Brush;
- Metal scissors;
- Electric jigsaw.
Important! When sealing a plastic gas tank, you need to use the same plastic from which the gas tank itself is made. Otherwise, different types of plastic will not connect, and the flow will continue. Soldering the fuel tank occurs as follows:
- Using metal scissors, cut out the desired piece of mesh;
- Sand the surface;
- Wipe the mesh and surface with alcohol;
- Heat the soldering iron, place the mesh on the plastic, solder it (hold for 2 - 3 seconds, both materials should be connected, it is not necessary to fuse the mesh completely);
- Clean the patch, degrease it, apply it to the hole and start heating it (the patch needs to be completely fused with the mesh and the tank);
- Hold the soldering iron for 3–5 seconds, otherwise the plastic will be pressed through, and after the patch has cooled there will be no more holes.
Metal gas tank
It is quite possible to repair a metal gas tank yourself in several ways.
Repair using “cold welding”
The principle is similar to repairing a plastic gas tank. First you need to clean the surface from dirt, after which you need to clean the surface and degrease it. Do not degrease the surface of the tank with gasoline, as it forms an oil film.
First you need to buy a special cold welding for metal from a car store. Before use, you need to cut off a piece of this weld, knead it well with wet hands (or gloves), and then cover the hole. Before using the car, you need to wait until the welding polymerizes.
Remember! Due to constant vibration during vehicle use, a hole that was treated with cold metal welding may disperse again. Be careful.
How to solder a gas tank
To seal a steel gas tank you will need the following:
- Gas-burner;
- Soldering iron (300 W power);
- Solder;
- Flux or rosin;
- Soldering acid;
- Sandpaper;
- Copper plate (length and width 2 - 3 cm larger than the size of the crack);
- Drill with wire brush or grinder;
- Alcohol;
- Brush;
- Paint with anti-corrosion effect.
First of all, clean the pothole area of paint and dirt (use an angle grinder or drill with a wire brush/coarse sandpaper).
You can capture 4-5 cm more than the damaged area. Next, use the prepared copper plate. Note! If the hole is located on the curved part of the gas tank, then you need to shape the plate so that it fits as tightly as possible to the surface of the tank.
Clean the plate with sandpaper and treat the surface and patch with alcohol. Turn on the soldering iron and let it heat up to such a temperature that the solder melts easily. Apply acid with a brush to the surface of the tank, then apply flux or put rosin.
Dip a soldering iron into rosin and solder, then press it onto the flux or rosin applied to the tank. After melting the rosin, smoothly work the soldering iron into the tank until the solder covers the metal. Treat the patch the same way, but without acid. After tinning all surfaces, you need to press the patch to the repair site, then press the soldering iron to this place for 5 - 15 minutes. Wait for the solder to melt on both parts. After this, press the patch, do not let it move. When the surface has cooled, treat it with paint.
Interesting fact! The Toyota automaker has begun producing cars that run on hydrogen fuel. Such cars are positioned as additional means of transportation for those who do not want to pollute the environment. Hydrogen fuel is much cheaper than other types of fuel, environmentally friendly and much more calorific than gasoline and diesel. The designers believe that such cars will help save the planet from car exhaust.
Alternative methods for repairing a gas tank
To repair a gas tank, you can use not only, for example, liquid metal welding. There are other methods that are applicable in extreme conditions.
The patch can be installed using a rubber gasket and a nut bolt. Start by widening the hole to the size of the bolt. Place a rubber gasket on its narrow part. Pass the entire structure through the neck into the hole. Install the cuff and washer on the outside, then tighten everything with a nut. Take gas-resistant rubber, but if you don’t have it, you can use a piece of inner tube from a truck. If you make such a patch in good faith, it can last about 5 years.
The gas tank can be replaced with any bottle! This method is acceptable for carburetor cars. You need to fill a plastic container with gasoline, immerse the hose that goes to the tank from the gas pump into it, then securely fasten the container so that it does not tip over. This way you can get to the nearest service station.
Damage can be eliminated with laundry soap. This method is applicable in case of surface problems. You should pay attention to the method of repairing an aluminum tank. To do this you will need aluminum solder, a gas torch, a wire brush and alcohol. As before, you need to treat and degrease the surface, heat the metal with a torch, and then fill the damaged area with it. Continue to heat the hole so that the solder does not cool down, while at the same time scrub the metal of the tank with a brush to remove the oxide layer. Otherwise, the solder will not bond well to the aluminum.
It will be useful for any driver to know how to repair a fuel tank. This way, you won’t be caught off guard by any gas tank breakdown, even if you’re far from civilization.
Subscribe to our feeds on Facebook, Vkontakte and Instagram: all the most interesting automotive events in one place.
Was this article helpful?
auto.today
Security measures
When reinstalling the tank after repair, you should check all the equipment that came with it. The integrity and suitability of the fuel pump mesh, float, and cable are checked. Only after the entire fuel system has been checked, the gaskets and studs are in place, and no new leaks have been found, you can begin to operate the vehicle. In cases of serious deformation, it is better not to tempt fate and replace the gas tank with a new one. It should be remembered that the fuel system is the basis for the safety and good technical condition of the car. Therefore, trust the repair of your vehicle to specialists from official service centers.
- News
- Workshop
Aston Martin will also be converted to electric power
The electric version of the Aston Martin Rapide S sedan was shown exactly a year ago and was positioned as just a concept and a collaboration between Aston Martin and Williams Advanced Engineering. It was this English company that developed the electric “filling” for the car. Over the past year, Aston Martin has found a partner in...
Legendary GM designer steps down
In the entire 108-year history of the General Motors concern, the company has changed chief designer only six times, and Ed Welburn is among the most famous. Back in the 60s, 11-year-old Ed wrote a letter to GM asking: How can I become an automobile designer? The boy received an answer from one of the employees, and it turned him around...
Prestigious hatchbacks: the French will bring new items to Russia
New products, first presented in 2020 at the international motor show in Frankfurt, will enter the Russian market in June this year. This is stated in the official statement of the DS brand. As the manufacturer explains, the entry of the DS 4 and DS 4 Crossback into the Russian market represents “a kind of response of the DS brand to the needs of customers in the class of compact premium cars.” ...
Mitsubishi will make an electric compact crossover
Mitsubishi Motors Executive Director Osamu Masuko announced this during his visit to Australia. He noted that the growing demand for electric vehicles around the world, especially in markets such as China and America, is forcing all leading automakers to pay increasing attention to the development of electric vehicles so as not to lose out in the competition. Electric crossover...
An American made an expensive Ferrari into a cheap one
Arturo Alonso became famous for his ability to create unique car bodies, turning cars into real works of art. With a corresponding price tag, of course. Alonso himself has always emphasized that he is a passionate fan of cars from the 50s to the 70s of the last century, calling this time the “golden era” of automotive design. That's why almost every...
Deputies: left a child in the car - pay 3 thousand
Let us recall that this spring Vladimir Putin instructed the government to develop amendments prohibiting leaving preschool children in a vehicle without an adult. According to current legislation, this violation falls under Article 5.35 of the Code of Administrative Offenses “Failure of parents (...) to fulfill obligations for the maintenance and upbringing of minors), which provides for a warning or a fine...
Video of the day: how not to board a ferry
This is most clearly demonstrated by a video filmed in the Khanty-Mansiysk Autonomous Okrug. The incident occurred when loading a URAL with a trailer loaded with heavy pipes onto a barge, which for some unknown reason was not moored to the shore. Looking ahead, we note that the driver was not injured in this incident. Note that this is not the first funny incident with ferries that has happened in recent years...
After updating the UAZ Patriot will rust less
As the press service of the enterprise notes, in order to increase corrosion resistance and improve car painting technology, the Ulyanovsk Automobile Plant switched to a new technology for priming bodies (cataphoresis), which made it possible to significantly improve the corrosion resistance of the body due to the higher penetrating ability of the soil (the latter due to the presence of an external electrical hidden fields cover...
Google will pay money for driving self-driving cars
An announcement about the search for employees for the position of “unmanned vehicle operator” was published by the recruitment agency Hire Art. Under the terms, a test pilot for an autonomous car will be required to work 6 to 8 hours, five days a week, and receive $20 an hour. The contract is designed for a period of 12 to 24 months. The employee will be required to work...
Honda showed a new inexpensive crossover
As you can see from the official teaser, the novelty is a new crossover, the potential competitors of which could be Ford Ecosport and Renault Duster. As the automaker explains, the name of the new model stands for Winsome Runabout Vehicle, which roughly translates to “attractive compact car.” The new product was specially developed…
Which sedan to choose: Camry, Mazda6, Accord, Malibu or Optima
Which sedan to choose: Camry, Mazda6, Accord, Malibu or Optima
A powerful story The name “Chevrolet” is the very history of the formation of American cars. The name "Malibu" beckons with its beaches, where numerous films and television series have been filmed. Nevertheless, from the first minutes in the Chevrolet Malibu you can feel the prose of life. Quite simple devices...
Car reliability rating
What are reliability ratings used for? Let's be honest with each other, almost every car enthusiast often thinks: the most reliable car is mine, and it doesn’t cause me much trouble with various breakdowns. However, this is simply the subjective opinion of each car owner. When purchasing a car, we...
The cheapest car in the world - TOP 5 of 2020
The cheapest car in the world - TOP 5 of 2020
Crises and the financial situation are not very conducive to buying a new car, especially in 2020. But everyone has to drive, and not everyone is ready to buy a car on the secondary market. There are individual reasons for this - those whose origin does not allow them to travel...
The life of a driver is sometimes difficult - the road is fraught with many surprises. However, most of the troubles arise due to problems with the “iron horse”: an overheated engine, a broken wheel or a muffler that suddenly falls off - the list of such force majeure can be continued indefinitely. One of these problems is a gas tank that is broken on the road, and this article will discuss how to fix this problem.
Damage to a gas tank is a truly unpleasant occurrence, and if a fuel leak is detected, it is necessary to urgently take measures that will allow you to get to a service station for quality repairs or replacement of the tank. The problem will have to be solved quickly and competently: you cannot wait for help and waste precious fuel, and the nearest populated area may be too far away.
You can notice a fuel leak by several signs:
- a sharp smell of gasoline in the car interior;
- a puddle of gasoline directly under the gas tank;
- rapid lowering of the fuel level sensor needle;
- excessive increase in fuel consumption.
Loss of fuel is a signal that you need to look for and eliminate the breakdown. The situation is simplified by the fact that a gas tank with holes in the upper part will still allow access to the workshop, and if there are holes at the bottom of the tank, it will not be difficult to notice them. Usually they occur at the bottom: the cause can be, firstly, various mechanical influences, and secondly, corrosion, corroding the tank on both sides.
Having identified the problem area, you urgently need to patch it using one of the available methods.
Damage and possible ways to eliminate it
Safety rules for welding work.
Damage to the fuel tank is quite easy to identify. Characteristic features are:
- Persistent smell of gasoline inside and outside the car. Gasoline vapors are volatile, so if the tank is damaged, a persistent smell of gasoline appears in the cabin; in addition, in warm weather, evaporation from outside is possible, and the smell appears outside the car.
- Fast (increased) fuel consumption. The most important and accurate indicator. Fuel leaks through the resulting cracks and holes, often leaving marks on the road. If the crack (hole) is large enough, then a stream of fuel can be seen with the naked eye by examining the tank.
- When visually inspecting a car, you should pay attention to areas of the body that are damaged by corrosion. Most often, it is in these areas of the tank surface that damage appears.
Most often, the fuel container deteriorates due to corrosion.
This is especially true for old cars (service life is more than 5 years, regardless of mileage). Rust “eats” metal walls very quickly, so it is necessary to regularly inspect the car and pay special attention to the gas tank. The next reason is impacts from stones and other objects (tree branches, hatches, etc.) on the tank body.
Design of a fuel tank for a passenger car.
This often happens when driving carelessly or driving off-road (country roads and dirt roads). Even a small pebble or piece of glass flying out from under the wheels at high speed can easily break through the walls of the tank, and a crack can also form from the impact. The third most common are accidental collisions with various objects: curbs, hatches, pipes, which have enough strength and protruding parts to cause damage to the car. In this case, the impact of a stone from under the wheels or a blow against some foreign object that will lead to a crack may not be heard. Therefore, it is difficult to determine what exactly caused the damage (the exception is corrosion, in which case the cause is clearly visible).
To eliminate cracks and holes in the tank in a garage, you can use the following technical and technological methods:
- Cold welding.
- Argon arc welding.
- Various adhesives, putties and other available materials (they are used for temporary repairs).
Welding work is quite complex to carry out, so it is worth considering it in more detail.
Cold welding gas tank repair
The most common way to repair a gas tank with your own hands in the field is cold welding. The same method is used by specialists in auto repair shops to bring the tank into proper condition. The repair process itself will look like this:
- first, use sandpaper to clean the damaged area (if this is not done, the applied patch will soon fall off);
- Next, a mixture of epoxy resin and hardener is prepared (you can use a heated engine to heat the mixture);
- Having soaked a fabric patch with the resulting mixture, it must be applied and pressed against the tank.
This method of repairing a gas tank has many advantages:
- the result is of sufficient quality, and in the future you can do without replacing the tank;
- repairs require a minimum of materials and effort.
Cold welding
Depending on the size of the through-to-tear damage, there are several options for eliminating a gas tank leak, including the simplest methods of sealing the holes.
For small sizes, the so-called “folk methods” are quite suitable, involving the use of fiberglass with epoxy glue or repairing the gas tank by cold welding.
In the case of significant torn holes, the only correct solution to the problem that has arisen is to restore the gas tank using electric arc welding methods.
Cold welding is one of the proven methods of restoring the integrity of a gas tank that needs to be repaired. The method is based on the use of a special composition of two components, sold in any hardware store.
When they are mixed and kneaded in your hands, a plasticine-like composition is formed, which is applied to the damaged area (small puncture or crack).
Before applying the cold welding compound, the edges of the breakdown are cleaned of any remaining dirt and paint, and then sanded with sandpaper and degreased by any available method.
Read more: Hammerite paint colors
After about 25-30 minutes, the composition applied and spread over the surface of the gas tank hardens, forming a small and neat “patch”.
However, the cold welding option does not guarantee that the fuel tank will be completely restored, and can only be used as a temporary measure on a long journey or when going outdoors.
DIY gas tank repair using fiberglass and epoxy resin
To implement the second method of eliminating gas tank leaks, fiberglass and epoxy resin are used. The repair is very simple, and the operation algorithm looks the same as with cold welding:
- first of all, the hole in the tank must be cleaned and degreased;
- after this, fiberglass impregnated with resin is applied to the surface (usually two layers of material are applied);
- After the patch has dried, it is usually treated with an anti-corrosion layer.
This method is quite reliable and simple, and if you protect the patch from corrosion, then such a tank will be able to
work for quite a long time. True, on the road you don’t always have the necessary materials at hand, and in this case they can be replaced with ordinary superglue and rag material. A patch made from several layers of fabric impregnated with glue will allow you to easily get to the auto repair shop and carry out high-quality repairs.
Plastic tank repair
To repair a plastic tank you will need:
- soldering iron with a power of over 200 watts (hatchet);
- pieces of the same tank;
- metal mesh (steel or copper) with a pitch of no more than 1 mm;
- alcohol;
- brush;
- sandpaper;
- metal scissors;
- jigsaw
If you decide to repair a plastic gas tank, then buy the same one. This can be done at a disassembly site or through an advertisement in the newspaper. Cut a piece from the repair gas tank that covers the damage by 3–5 cm in each direction.
It is very important to use the same plastic for repairs as the one from which the gas tank is made. Otherwise, there is a high probability that different plastics will not connect.
It is advisable to cut out the plastic from the same area of the repair tank where the damage is located. If this is not possible, do not worry, because you can even seal the fuel tank with several pieces of plastic.
Read more: How to tint a car video
Using metal scissors, cut a piece of mesh of suitable size and shape. Clean the surface of the tank with coarse sandpaper, then degrease it and the mesh with alcohol. Heat the soldering iron to such a temperature that it easily melts the plastic, place the mesh on the tank and fuse it into the plastic. Do not press hard or hold the soldering iron in one place for more than 2-3 seconds, so as not to push or deform the fuel tank. This is especially important where the fuel pump or float is located. It is not necessary to completely recess the mesh into the plastic; it is enough that both materials are connected. Clean and degrease the patch, place it on the tank and start heating it. It is necessary to fuse it with plastic and metal mesh. Do not press hard, do not hold the soldering iron in one place for more than 3-5 seconds, so as not to push through the plastic. When the patch has completely cooled, the plastic tank will stop leaking.
Patch made of rubber, bolt and nut
Another interesting method of repairing a gas tank with your own hands is installing a rubber gasket. Usually, a serious leak is eliminated in this way, provided that it is not possible to repair the tank by other means. To work, you will need a screwdriver, a rubber gasket and a bolt with a nut. The repair will look like this:
- the tank breakdown expands so that a bolt can be inserted into it;
- a bolt with a washer installed on it is pushed through the neck of the tank directly into the hole that needs to be eliminated;
- A gasket is installed on the outside and secured with a nut.
If, upon returning home, the fuel leak no longer appears, you can consolidate your success by applying a layer of paint on top of the patch.
From the point of view of reliability and efficiency, such a patch is the best option for tank repair. The result is so good that sometimes after such repairs the driver manages to drive on the repaired tank for more than one year. However, you shouldn’t delay high-quality repairs of the gas tank - as a rule, the appearance of holes in the tank indicates its wear and tear (unless the hole appeared as a result of a strong impact on the terrain).
“Folk methods” for repairing a gas tank on the road
To carry out field repairs of the tank, you need to carry with you materials that allow you to implement at least one of the above methods: they will not take up much space, and the benefits can be significant. But there are times when the necessary materials are simply not available, or the damage to the tank appears to be very minor. In such a situation, you can solve the problem using one of the popular methods:
- Sometimes the hole in the gas tank is almost invisible, and fuel does not flow through it, but slowly drips. If the cause of such leakage is a small crack, then rub it well with soap. Of course, such an action cannot be called an effective repair, but it will be quite enough to get to the nearest service station.
- If you find a small hole in the tank, you can do it differently: take a small self-tapping screw and screw it into the hole. If you first lubricate the screw with soap and use a gasket, then urgent repairs can be postponed until you arrive in the populated area.
- There is another old method that allows you to get to a car repair shop even with critical damage to the tank. Every experienced driver knows about this method of solving the problem: take a plastic bottle or canister, fill it with fuel, and then connect and fix the fuel hose to it. Of course, this is far from the most elegant solution to the problem, but you can get to the service station this way.
Having corrected the problem in the most appropriate way, you can end the trip, and after that, examine the tank in detail for other leaks and malfunctions. It would be best to entrust the dismantled gas tank to specialists who can accurately determine how suitable it is for driving.
In conclusion, it is worth saying that the most correct way to eliminate a leaking gas tank is to replace it
(especially if the old tank lasted long enough). Of course, it is not worth replacing an almost new tank after every scratch - for this there is welding and soldering, which can be carried out without problems at any service station - but it is also extremely undesirable to wait for the gas tank to completely wear out.
Repair of any type of gas tank without a trip to the service station
Car breakdown is a fairly common occurrence that can catch the driver in the most unexpected situation. Failure of a gas tank is a serious problem that must be at least partially eliminated at the scene of the accident. This will allow you to transport the car to the nearest service center, where a major inspection and repair can be carried out. Repairing a gas tank with your own hands is not too difficult for people who have some knowledge about such repairs.
The location of the gas tank is the lower right corner of the rear sector of the vehicle. This is due to ensuring safety for the driver and passengers, as well as the formation of the correct center of gravity in the car, which improves its handling. However, the lower section most often suffers from constant physical impact, which leads to repeated damage to all the mechanisms located here. The fuel tank is no exception.
Crack in car gas tank
Causes of damage to the gas tank and basic repairs
Failure of gas tanks is most often associated with the gradual development of corrosion processes. Their effect on the inside of the fuel tank is especially dangerous. The provoking factor for the appearance of rust is water. It is almost impossible to avoid it getting into the tank.
Also, the cause of holes in the gas tank may be a malfunction in the vehicle's power system. A discharged pressure is formed inside the tank, which provokes the formation of an extreme load on all the walls of the fuel container. After some time, it becomes covered with small mechanical cracks.
Rules for repairing a gas tank of any type:
- Before starting the procedure, all available fuel must be drained from the gas tank. Using a jack, the car is installed in an inclined position. Gasoline is drained using pipes. Next, the gas tank should be thoroughly dried.
- Determine the extent to which it is necessary to completely remove the fuel tank for repair work. It is recommended to take into account the area of damage and the degree of ease of repair.
- Determine the feasibility of conducting full monitoring of the tank for the presence of additional holes.
Gas tank removed for subsequent repairs
Methods for repairing fuel storage tanks
There are several ways to troubleshoot. Most of them are applicable in extreme conditions, which will avoid spending additional money on calling a tow truck.
Installing the patch using a nut bolt and a rubber gasket. First, using available means, you need to expand the hole in the tank to a size that matches the bolt. A washer with a rubber gasket is placed on its narrow part. Then the entire structure is inserted into the hole through the neck. A cuff with a washer is installed on the outside and tightened with a nut.
The rubber must be petrol resistant. Not every driver has such material stored in his car. A camera from any truck will be suitable as a replacement. This patch is considered quite durable. If installed correctly, you can wait a while before going to a service station. This method is often used by truckers who spend most of their time on the road. A good patch can last more than five years.
Use Moment glue or any of its analogues to repair damage. The method is relevant for not very serious damage. To create a patch, you need a piece of dense but pliable fabric soaked in glue. It needs to be pressed firmly to the site of injury and held for a while. After the main gluing, the patch should be treated with nitro paint from the repair kit. This is a temporary measure to allow you to get to the nearest service station.
In the video, repairing a hole in the gas tank:
Temporary replacement of the gas tank with any bottle. The method is suitable for breakdown of the fuel capacity of carburetor-type cars. A plastic or any other container is filled with gasoline, and a hose running from the gas pump to the fuel tank is immersed in it. The container should be securely secured so that it does not tip over and lead to negative consequences. This method will easily help the driver get out of a difficult situation.
Repairing damage with laundry soap. The method is considered effective only for superficial problems.
Sealing the crack area with epoxy glue and fiberglass. The gluing area must be thoroughly cleaned and dried, and the gasoline must be drained. Clean the work area with sandpaper, degrease and dry again. A piece of fiberglass must be glued to the damaged area. After complete drying, apply another patch of the same type. The number of layers must be at least three. When gluing the last layer, you should use a plasticizer, which can be aluminum powder.
Repair of plastic gas tanks and metal gas tanks using cold welding. The most universal way to deal with holes. Damage is removed using epoxy resin. The first stage of work is sanding the surface with sandpaper. Then, in a separate container, mix the epoxy resin with the hardener until a homogeneous mass is obtained. If heating is required, the container can be placed on the engine. This method also uses a fabric patch. Saturate it generously with the resulting mixture and apply it to the hole in the fuel tank. Let dry thoroughly. This patch is very strong and can last quite a long time.
The result of repairing a gas tank using cold welding
Soldering as a type of repair of any type of gas tank
This method of eliminating a hole is the most sustainable. Suitable for both metal and plastic fuel containers. Knowing how to seal a gas tank, you can extend its service for a long time without buying a new unit at a car store.
Repairing a plastic gas tank is carried out using a soldering iron with a power of 250 watts. The procedure itself is reminiscent of soldering a plastic bumper. Soldering is done from the outside. It is necessary to monitor the tightness and strength of the structure. If additional donor plastic is used, its type must match the original one. Plastic composition markings are usually present on each part. This can be polypropylene (PP), acrylonitrile butadiene styrene (ABS) or polyamide (PA). Metal or copper mesh with fine pitch is used as a reinforcing material. The required piece of it is applied to the cleaned surface and, using a heated soldering iron, is fused deep into the plastic. The remaining plastic on the surface of the mesh is carefully smeared, creating a surface layer. The entire operation must be carried out at one time, otherwise it will not be possible to avoid the influx of multiple layers of plastic.
To repair a metal gas tank, only a soldering iron with a power of 500 watts is suitable. The most ordinary iron can help warm up the body of the gas tank. If necessary, a thin copper sheet can be used for the patch. The solder must be low-melting. The patch is soldered along the entire perimeter, which promotes tightness and reliability of fastening. Before soldering, the work area is treated with soldering acid. This is necessary for the reliability of the connection between the solder and the metal. The patch applied on top is covered with bitumen mastic, which is particularly resistant to corrosion.
The result of repairing a gas tank by soldering
How to get your gas cap back on track
You can pay attention to a malfunction of the gas tank cap if, when opening it, you notice a noise effect associated with air being sucked into the container.
Repairing the gas tank cap is often associated with malfunctions of the plastic lead. You can replace it with ties that hold the wires together. To work you will need three clamps. You should insert one of them into the eye of the fuel tank cap and tighten the loop tightly. Already connect the second clamp to it. Make a small hole in the gas tank flap hinge and attach a loop knot to it. The second end of the clamp, located on the gas tank cap, will be tied to it.
Knowledge of the specifics of repairing a fuel tank is extremely useful for the driver. By understanding repair issues, not a single motorist will be taken by surprise, even far from civilization.
365cars.ru