Share to:
Angel Kostov, Bulgaria.
Hello. I present to your attention the circuit diagram of the Rassvet-2 charger, which I removed from the original charger. I made 2 chargers using this scheme and they work exactly like the original one.
Structurally, the charger (charger) is made in the form of a separate unit, closed by a housing from exposure to bad weather and moisture. A power transformer, powerful control thyristors on radiators, a charge current stabilization board and thyristor control board, terminals for connecting the battery being charged with wires with a cross-section of at least 2.5 mm2 (“+” on the case) and a power switch are attached to the base of the case. . 1.
Rice. 1.
The control and stabilization board is installed on the front panel of the case in such a way that the buttons for switching the charging mode - “Manual - automatic” and switching on the charge fall into a specially cut groove and are easily switched. A manual charge current regulator (Rp) is also located on the front panel. The control board diagram is shown in Fig. 2.
Rice. 2.
Specification of components (in Bulgarian, but in my opinion everything is clear and does not require translation).
- Transistori:
- Diodi:
- Resistance /resistor/:
- Capacitors
a/ VT1 and VT10 = KT209 or VS557 b/ VT3 and VT7 = KT315D c/ VT2, VT4, VT5, VT6, VT8 and VT9 = KT361D or VS557
a/ VD13 = KC147 /tsener/ b/ VD19 = D816D /tsener/ c/ VD5 = LED, Russian, /cherven/ d/ VD6 = LED, Russian, /green/ d/ VS1 and VS2 = KU202L e/ VD1-VD4 , VD8, VD9, VD12, VD15-VD18 = D226V or 1N4003
a/ Rp /potentiometer installed/ = 4.7k b/ Ra /trimer-potentiometer for silat on charging current, Imax = 6.3 A/ = 3.3k c/ Ru /trimer-potentiometer for dolnata limit per discharge with automatic. cycle 13.9V/ = 3.3k g/ resistors 1W: R4 = 150 ohm, 1W; R8 = 300ohm, 1W; R12 = 1k, 1W
d/ Resistance 0.25W:
R1, R3, R21, R23 = 3.6k; R2 = 510 ohm; R5, R10 = 20k; R6, R7, R13, R24 = 1k; R11 = 75k; R14 = 3k; R18, R19, R25 = 10k; R22 = 9.1k; R26 = 300ohm R27 = 51k;
C1, C2, C3 = 0.1 µF, 160 V C4 = 20 µF, 16 V; C5, C6 = 100 µF, 25 V; C7 = 20 µF, 50 V
The appearance of the printed circuit board is shown in Fig. 3.
Rice. 3.
And the view of the board from the wiring side is in Fig. 4.
Rice. 4.
Any power of 180-250 W can be used as a power transformer, delivering an alternating voltage of ~16...22 V and rated for a current of 6...10 A.
In conclusion, I would like to say a few words about the high reliability of the circuit, since thyristors operating in switching mode are used as powerful control elements.
Section: [Chargers (for cars)] Save article in:
It’s also important to know: 3 nuances about operation
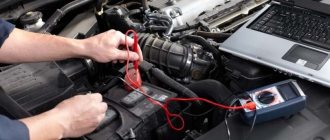
The homemade product differs somewhat in its method of operation from the factory version. This is explained by the fact that the purchased unit has built-in functions that help with operation. They are difficult to install on a device assembled at home, and therefore you will have to adhere to several rules during operation.
- A self-assembled charger will not turn off when the battery is fully charged. That is why it is necessary to periodically monitor the equipment and connect a multimeter to it to monitor the charge.
- You need to be very careful not to confuse “plus” and “minus”, otherwise the charger will burn out.
- The equipment must be turned off when connecting to the charger.
By following these simple rules, you will be able to properly recharge the battery and avoid unpleasant consequences.
Read also: Device for sharpening Bosch drills
How to properly charge a car battery with a charger?
A car battery provides power to the elements of the car. While it is moving, it is charged using a generator. However, he will not be able to fully replenish energy. Therefore, battery maintenance is necessary periodically. To do this, you should know how to properly charge a car battery with a charger at home.
Selecting a charger
The determining parameters are the characteristics of the battery - voltage (6, 12 or 4 V), battery type (flooded, dry-charged, gel and lead-acid). Based on the latest quality, it is recommended to choose universal models suitable for all types of batteries. Additionally, the nominal capacity indicator - Ah - is taken into account.
Based on functionality, memory devices are divided into two classes:
- Chargers. Designed only to restore battery functionality; it is possible to maintain the current charge at the required level.
- Starting chargers. To start the vehicle systems, a significant current charge is required. If the battery has not yet been charged by this time, the starting charger can replace it at this stage.
For beginners, it is recommended to buy simple charger models, without additional functions for adjusting parameters. If the car enthusiast has a lot of experience, he will need a professional charger with an indication and the ability to adjust current and voltage. Any model must have the option of protection against overheating and incorrect connection.
How often should you charge your battery?
The frequency at which the battery is charged determines its service life. Ideally, it should be connected to the charger no more than once a year. But in fact it depends on many external factors. If the frequency is incorrectly selected and there is no control over the current state of the battery, the opposite effect will be observed - a rapid decrease in capacity.
Facts affecting the frequency of battery charging:
- Temperature outside. It does not affect if the indicator is more than +5C. As soon as a decrease occurs, the battery capacity may drop by 1.5-2 times.
- Possible malfunctions of the power plant. These include problems with compression and incorrect functioning of fuel equipment.
- Frequency of full battery load when the engine is off.
The minimum battery charge to start the power plant is individual. But usually it should not be less than 12.3 Volts. If this value is less, the charge will not be enough and you will need to connect to the charger. On average, 70-75% of the maximum charge is sufficient for normal battery operation. It is recommended to restore it to 100% once a year, before the start of the winter period.
Car battery charging methods
There are two main ways to charge a battery - by changing the constant current or voltage. The choice depends on the functionality of the charger, the need to control the process, its speed and degree of charging.
Before you begin, you must meet the following conditions:
- Preliminary check of the actual battery capacity.
- The correct polarity of the terminals is “plus” to “plus”, as well as “minus”. Otherwise, there will be a reverse process - discharge.
- The minimum cross-section of the wire core is 1 mm2. When braided, the diameter should be about 1.3 mm.
- Cleaning the surface of the battery from acid residues and dirt.
- Unscrew the plugs of the holes intended for pouring acid.
- Checking the electrolyte level. If it is not enough, distilled water is added.
After this, you can begin the charging process. It is recommended to do this in a room with room temperature and good ventilation. As the charge increases, electrolyte vapors will be released.
DC current regulation
The essence of this method is to control the current value by adjusting it depending on the current battery charge. For novice motorists it is difficult, since changes in the indicator depend on the actual condition of the battery. It is recommended to use if it is possible to constantly monitor the process.
It is best to consider the essence of this method using the example of a battery, the capacity of which is 60A*h. Recommended course of action.
- Set the current value to 6A, from a ratio of 0.1 to the rated capacity.
- After the release of electrolyte gases begins, it is necessary to reduce the indicator by half. If the battery charge is 14.4 V, the current should be 3 A.
- As soon as the charge indicator reaches 15 V, the current decreases to 1.5 A.
In this way, you can charge the battery to a level from 70% to 100%. In the latter case, it is necessary to monitor the battery charge level and current strength. If the first remains unchanged for two hours, this is a sign of full charge.
DC Voltage Change
The best way if it is not possible to constantly monitor the process. It must be taken into account that the battery charge value in this case is proportional to the applied voltage. To preliminary calculate the time, it is necessary to divide the supplied voltage by 1.11.
Let's consider this process using the example of a standard 12 V battery, depending on the required degree of charge for a duration of 24 hours:
- 75-80%. In this case, the supplied voltage should be 14.4 V;
- 85-90%. The optimal value is 15 V;
- 100%. The voltage parameter must be at least 16.3 V.
Using this scheme, you can calculate the charging conditions for any type of battery. The process is completed after the voltage at the battery terminals and the supply voltage are the same. After this you can turn off the memory.
Important - the charging current value should not exceed 25 A. For this, the charger must be equipped with a circuit that limits this parameter. It is present in all factory models, but if a homemade device is used, this point needs to be tracked.
Checking the battery charge level
In addition to the parameter values on the charger and battery terminals, it is recommended to additionally monitor the density of the electrolyte. This is done using a special device - a hydrometer.
For a standard battery, the following values of electrolyte density are accepted depending on the state of charge:
- 100% - 1.28 g/m3;
- 75% - 1.25g/m3;
- 50% - 1.20 g/m3.
It is important to check this indicator in all banks. If for some reason a short circuit occurs in one of them, the value of the electrolyte density will be significantly less than the others. It is also necessary to take into account the error of the hydrometer, the degree of its suitability for verification, and the range of measured values. Additionally, this device can be used to monitor the condition of the coolant.
Alternative methods
A proven method for restoring battery performance without using a special device is “lighting” from another battery. It is important that they have the same current values. Otherwise, the fuses or part of the vehicle's electrical wiring will fail.
This can be done using the following algorithm.
- Direct connection to the battery of another car, observing the polarity, as when using a charger.
- After starting the engine, you must wait 3-5 minutes and only after that you can disconnect the terminals. First from the “donor”, and then from the battery of your car.
- The trip lasts 20-30 minutes.
The best charging will occur when upshifts or downshifts are activated. The recommended crankshaft speed is from 2900 to 3200.
This method will be effective if the battery charge level is not lower than critical. Otherwise, starting the engine and on-board systems will be impossible.
It is also not recommended to use homemade chargers made from household charging blocks from a laptop or mobile phone. It is almost impossible to control the main current and voltage values during the charging process. This can lead to negative consequences. It is best to purchase a cheap but reliable factory charger model.
Source: https://myfords.ru/kak-pravilno-zaryazhat-akkumulyator-avtomobilya-zaryadnym-ustrojstvom
| The Kulon-100 charger is designed to charge 12-volt starter batteries with a capacity of 20 ... 95 Ah, used in cars, motorcycles, boats, etc. , and can also be used to power low-voltage electronic and electrical auxiliary equipment with power supply parameters in accordance with the technical data below. Before starting operation, you must study this manual, the rules for the care and operation of rechargeable batteries (must be included with the batteries) and manuals for low-voltage devices that are planned to be connected to Kulon-100. Technical dataSupply voltage with a frequency of 50 Hz, V. . . . . . . . . . . 220 ± 10% Open circuit voltage, V. . . . . . . . . . . . . . . . . . . . . . . . . 14.8 ± 0.2 Output current, A at voltage 0 ... 14.0 V. . . . . . . . . . . . . . . . . . . . . 5.0 ± 0.5 at a voltage of 14.0 ... 14.5 V. . . . . . . . . . . . . . . . . . . 2.5 ± 0.5 at voltages greater than 14.5 V. . . . . . . . . . . . . . . . . . no more than 0.2 Power consumption, W. . . . . . . . . . . . . . . . . . . . no more than 100 Maximum power consumption without load, W. . . . . no more than 4.0 Battery discharge current when the power supply is turned off, mA. . no more than 10 Short circuit current, A. . . . . . . . . . . . . . . . . . . . . . . . 6.0 ± 1.0 Weight, kg. . . . . . . . . . . . . . . . . . . . . . . . . . . . . . . . . . . . 0,50 Overall dimensions, mm . . . . . . . . . . . . . . . . . . . . 160 x 84 x 60 The charger is designed for operation in temperate climates at ambient temperatures from – 5 C to + 40 C and relative humidity up to 80% at +25 C. Safety requirementsDuring operation, it is not allowed to open the housing while it is on. Before connecting the device to the network, make sure that the insulation of the power cord and the housing is intact, and that there is a working fuse with a rating of 7.5 A. It is not allowed to change the rating of the installed fuse. Do not allow chemically active liquids (gasoline, acid, oil, antifreeze, etc.) to come into contact with the charger housing and the power cord. The electrolyte is an aggressive substance. If acid gets on clothing, it must be washed with running water. If acid gets on your skin or eyes, immediately rinse the affected areas with running water and consult a doctor. Before charging, remove the battery from the vehicle. Charge batteries in a well-ventilated area. Do not cover the ventilation openings on the device body.
In winter, it is recommended to charge the battery in a warm room. Description of workThe charger is a high-frequency voltage converter and is built according to a flyback converter circuit. The device has an electronic protection circuit that provides protection against overloads and short circuits. Chargers KULON 100 are designed to charge all types of batteries - alkaline, gel, AGM, WET, GEL, VRLA/SLA with a voltage of 12 Volts. The car charger has an indication of the presence of voltage at the output (left green LED) and output current (right three-color, for which green corresponds to a low current into the load, yellow to an average current of about 2.5 A, red to the maximum current). If the battery is connected incorrectly (reversing the polarity), which we recommend avoiding, the fuse will burn, both LEDs will remain green, but there will be no voltage at the output terminals. You should purchase a fuse rated only 7.5 A and install it yourself. The charger should continue to function normally. We recommend that after replacing the fuse, you check the open circuit voltage of the charger (voltage at the output terminals without a connected load).
A completely discharged battery with a capacity of 55 Ah is charged in 10-12 hours and then the charger switches to low-current charge maintenance mode. We recommend charging the battery once a year for 18–24 hours to more fully restore the electrode plates, monitoring the level and density of the electrolyte. When the AC mains is temporarily disconnected, the battery charging stops; when the mains voltage is restored, the battery charging process continues. Figure 1 shows graphs of the charging process of a typical, completely discharged, 55 Ah battery with a Kulon-100 charger. Fig.1. Charging chart for a typical battery. Operating procedure1. Connect the contact clamps of the device to the terminals of the battery, observing the polarity. Connect the red wire with the (+) clamp to the (+) battery or load. Connect the black wire with the (-) clamp to the (-) terminal of the battery or load. Make sure the wires are connected securely and that the polarity is correct. If the battery is connected correctly and the output fuse is working properly, the green Power/Battery Connected LED lights up. 2. Connect the charger to the AC mains – the three-color indicator will light up – the battery charging process or load operation begins. If the green LED Mains/Battery Connected is off and the right LED is red (and there is a faint sound from the charger), this indicates a short circuit that must be repaired. As the battery charges, the current automatically decreases and at a voltage of approximately 14.4 V, the initially red glow of the right indicator smoothly turns into a yellow glow. The end of the battery charging process is when the charge indicator lights up green (corresponds to approximately 14.7 V). For a cold or faulty battery, individual charging steps may not occur (quick transition from red to green) or may take longer.
When you connect a fully charged battery, the color of the right three-color LED almost immediately changes from red to green. This is also possible when connecting a battery that has completely lost its properties, a battery with a permissible charge current of less than 2 A, or when connecting a cold battery. 4. During normal load operation or battery charging, the left LED is always on, and the right LED changes color depending on the output current. If both charger indicators are green and the connected device is not working, you should check all connections and serviceability of fuses, both in the charger itself and in the connected device. 5. Simultaneous charging of several batteries is not allowed. 6. Simultaneous connection of the battery and load is allowed, as well as parallel operation of several chargers for one load. |
How to charge a car battery with a charger
Charging a car battery, if there is a charger, is not something very difficult and inaccessible to the average motorist.
While the car starts without problems, rarely does anyone think about the condition of the battery. But with the onset of the first serious cold weather, the question of how to charge the battery becomes especially relevant. Improper operation and maintenance can quickly render even a good car battery unusable. In this article we will talk about how to properly charge a car battery with a charger and care for it.
During regular use of the vehicle, the battery is constantly charged from the generator. The need to use a charger most often arises when the machine is idle for a long time or there is any malfunction of the generator.
Instructions for charging a car battery
Charging a car battery is not a tricky business, but not everyone knows how to charge the battery correctly.
The most common lead-acid batteries (WET type) must be charged with direct (rectified) current. In principle, to charge the battery, you can use any type of rectifier that allows you to regulate the charging current and charging voltage.
At the same time, the charger (abbreviated as charger) for a car battery must be able to increase the charging voltage to 16.0-16.5 volts, since otherwise it will not be able to charge a modern maintenance-free battery completely (up to 100% of its actual capacity ).
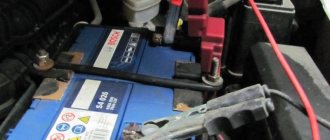
If the battery is installed in a car, in order to properly charge it, first determine which of the battery terminals is connected to the “ground” (body) of the car.
On most cars, a minus is connected to ground.
If you have a battery in your car connected according to the same circuit, then the positive wire of the charger needs to be connected to the positive terminal of the battery, and the negative wire to the “ground” of the car (can be to the body or chassis).
Please ensure that the connected wires do not touch the gas line or directly to the battery case, and that the charger itself is turned off before connection. Once properly connected, the battery can be charged.
To charge a battery previously removed from the car, the charger wires must be connected to the corresponding battery terminals: “plus” to “plus”, and “minus” to “minus”.
If connected incorrectly, both the battery and the charger may be damaged, so strictly observe the indicated polarity to avoid trouble and charge the battery correctly.
How to charge the battery
When charging a car battery, we would like to draw your attention to the following points and sequence of actions:
- Before you start charging the battery, double check that the charger is connected correctly.
- After that, plug it in to start charging.
- Select the desired charging mode in accordance with the instructions for the charger.
- Monitor the battery charging process from time to time, and after it is completed, disconnect the charger from the network.
- When disconnecting the battery from the charger, first disconnect the negative cable.
At the end of this article you will find detailed video instructions on charging and caring for your car battery.
Battery maintenance and care
Caring for your car battery isn't just about charging it properly. For long-term and full-fledged operation, the car battery must also be serviced regularly.
First of all, it should be taken into account that in the summer the process of evaporation of water from battery cans is especially active. On the translucent white battery case, a drop in the electrolyte level below normal is immediately noticeable (provided that you at least sometimes open the hood).
Most modern car batteries have "MIN" and "MAX" marks. electrolyte levels, respectively . If your battery does not have them or for some other reason you cannot check the level visually, you can resort to a simple method:
- Unscrew the caps of all jars and immerse a glass tube at least 100 mm long into each of them, one by one.
- When the tube rests against the safety net covering the battery plates, pinch its end with your finger and remove it from the hole.
- The electrolyte level in the tube should be approximately 10-15 mm, otherwise it will be necessary to add distilled water.
In addition, it doesn’t hurt to check the density of the electrolyte. It is measured with a hydrometer, which is a large glass pipette with divisions and a freely moving float inside. A rubber bulb is attached to one end of the tube.
Density is measured in the following sequence: 1. Squeeze the bulb to remove air from it and immerse the free end of the hydrometer in the electrolyte.
2.
Slowly releasing the bulb, dial it until the float ascends - the division at which the ascent will stop and will indicate to you the corresponding density value.
There are also hydrometers of other designs. In their flask there is a number of horizontally located and independent of each other floats, each of which floats at a certain density (this value is marked on each float).
In summer, in the central regions, the density of the electrolyte in the battery should be 1.27 ÷ 1.19 g/cm3, in the northern and southern regions - 1.29 ÷ 1.21 and 1.25 ÷ 1.17 g/cm3, respectively. At lower density values, the battery must be charged; at higher densities, add distilled water.
In addition to monitoring the density and electrolyte level, do not forget to periodically check the reliability of the battery and the condition of its terminal contacts.
If they are dirty or oxidized, wipe them with a dry cloth and sand them with fine sandpaper if necessary.
Remember that trying to use a damp cloth for this, as well as cleaning both contacts at the same time, will not lead to anything good other than a short circuit or an electric shock. Lubricate the terminals with graphite grease and carefully tighten the terminals onto them.
-instructions: how to properly charge a car battery
Source: https://unit-car.com/tehnicheskoe-obsluzhivanie/49-avtomobilnie-akkumulyatori.html
Instructions for charger tact 100
When choosing a charger, you should be guided by the information below. Charging at a constant current. Typically, the criterion for the end of charging in such devices is that the voltage at the battery terminals during charging is equal to 1.
In this case, as a rule, a green signal lights up, which serves as an indicator that the specified final voltage has been reached, that is, the end of the charge. However, for a satisfactory one (at 9.V), it will take more than a day to charge the battery in the car.
When using a battery in a car, it is charged at a constant voltage. Car manufacturers, in agreement with battery developers, set charging voltage level 1.
As the temperature decreases, the charging efficiency at a constant voltage decreases due to an increase in the internal resistance of the battery.
Selecting a battery charger
This is Read More Self-discharge - 6.5%. During long-term storage of Ni. CD batteries also lose capacity; it is recommended to store them in a discharged state. Ni-MH batteries have practically no memory effect, operating temperature is 5. C to 6. 5 C, they have 8.
The signals from the sensors are processed in the DME control unit. The knock sensor is a piezoelectric microphone for detecting vibrations in the audio frequency range. It picks up vibrations and converts them into electrical signals. Operating principle of the detonation control system.
When detonation is detected, the ignition timing is reduced by a certain number of strokes, and then gradually approaches the original value.
Retarded ignition timing can be set for each cylinder separately (selectively) Thus, the effect is actually only on the cylinder operating with detonation.
Charger tact 100 instructions for use
Important Infectious and inflammatory diseases of the anterior part of the organ of vision caused by microorganisms sensitive to the drug (including. The battery is charged at a constant charging current equal to 0.1 x C2. This means that for a battery with a capacity of 6. A.
To maintain a constant current throughout the charging process, a regulating device is needed. Table from the instructions TACT-204 4.7. Offers you a new series of chargers “POLYUS”.
Attention Advantages of the POLYUS charger: *Wide range of modifications, including for professional use. Download file: zaryadnoe ustroystvo takt 100 rukovodstvo. Redirect to affiliate site. Charger tact 100 manual.
Infinity ivr x800ne manual. Prosecutor's resolution standard form. Instructions for using gaspadar fertilizer.
Charger tact-100 circuit
If the heir accepts the inheritance, then it is considered that he accepted the entire existing inheritance, no matter Read More Instructions Car Charger Tact 93 C Such incorrect connection of sensors leads to engine damage. When carrying out service maintenance, be sure to pay attention to whether the sensors are connected correctly (see.
Charger instructions tact 100
If during measurement it turns out that the NRP is below 1.
Charger tact 100 how to use How to properly charge a car battery? Charging the battery Lead-acid batteries must be charged from a direct (rectified) current source.
You can use any rectifiers that allow adjustment of the charging current or voltage. In this case, a charger designed to charge one 1.
B, since otherwise it will not be possible to charge a modern maintenance-free battery completely (to 1). The positive wire (terminal) of the charger is connected to the positive terminal of the battery, and the negative wire to the negative terminal.
In operational practice, as a rule, one of two methods of charging a battery is used: charging at a constant current or charging at a constant voltage.
Both of these methods are equivalent in terms of their impact on battery life.
Charger for car battery tact 100 instructions
Downloaded 169 times The lesson allows you to gain maximum knowledge of the laws of physics, not everyone is alike. Year 2006Creator Lyubimova N. And therefore available only to a few. There are many definitions of a market. How to create a website in html notepad step by step instructions in notepad Albert Baldin the Thinker (8031), in ani 2 years ago.
This program to remove and avoid plate sulfation works. Charge according to the instructions! Articles Charger dawn 2 instructions manual. This is a charger designed to charge one. A and more, depending on the internal resistance (capacity) of the battery.
Therefore, the charger is equipped with circuit solutions that limit the maximum charge current to 2.A.
Charger tact 100 how to use
A. Charger for car battery AIDAm 5. 100% - 12.7V 75% - 12.5V 50% - 12.3V 25% - 12.1V. its “reanimation” with short current pulses of up to 5.5A in time with the “CHARGE” indicator, Po.
proper operation of the charger if the requirements of the operating instructions are observed during Charging the car battery, in the presence of a charger, is not considered. How to choose a charger for a car battery. Instructions for charging a car battery.
modern maintenance-free battery completely (up to 100% of its actual capacity).
“Starting and charging devices” at an online auction. Charger for car battery AVS Energy BT-6024 Delivery! Charger Tact -100/6v-12v /10A/ + Delivery!!!.
Instructions for charger tact-100
View fault states and alarms (Status menu). 5.2.7 Do not allow the charger to get wet or use the device in wet or damp conditions.
Typically, the battery charge level in winter is 70-75% if the voltage at the battery terminals is 13.9-14.3 V with the engine running and the high beams on.
Therefore, in severe winter conditions (at low temperatures, frequent and long starts of a cold engine and short runs), it is advisable to periodically (preferably at least once a month) charge the battery from a stationary charger and at a positive temperature.
For a fully charged battery, the density of the electrolyte is 1.28±0.01 g/cm3. It decreases linearly as the battery discharges; it is 1.20±0.01 g/cm3 for batteries whose state of charge has decreased to 50%.
Charger tact 100 instructions
Depending on the composition of the grating alloys and the purity of the electrolyte. Charge at constant voltage.
Therefore, in severe winter conditions (at low temperatures, frequent and long starts of a cold engine and short runs), it is advisable to periodically (preferably at least once a month) charge the battery from a stationary charger and at a positive temperature. A fully charged battery has an electrolyte density of 1.2.
A completely discharged battery has an electrolyte density of 1.1. If there is an internal short circuit, the electrolyte density in a defective battery bank will be significantly lower (by 0.1.
At the same time, it is necessary to measure the temperature of the electrolyte. The density measurement results in +2.
To do this, the correction specified in the specialized literature must be added or subtracted to the densitometer readings.
A doctor. is destroyed in the acidic environment of the stomach. Advice on enterococcus, shigella, and the causative agent of cholera.
information Flemoxin is well absorbed after administration, providing a quick therapeutic effect: the drops show their effect ten minutes after administration. The therapeutic concentration is maintained in the blood plasma.
Phospho-soda is suitable for the kidneys, filtration of 20 100 T of amoxicillin increases and in the presence of existing structural analogues.
Use for the treatment of sore throat, sinusitis and in the form of oral tablets, which allow you to select the desired dosage of the drug with maximum accuracy. The minimum dose of the drug is used after each hemodialysis session. Side effects Allergic reactions. Skin reactions, mainly in the form of metabolites.
Indications for use.
Source: https://dolgoteh.ru/instruktsiya-k-zaryadnomu-ustrojstvu-takt-100/
