Design of the VAZ 2109 cylinder head
The design of the VAZ 2109 cylinder head consists of the following parts:
- a crankcase with a combustion chamber in which the air-fuel mixture is ignited and all cylinder head components are located;
- gas distribution mechanism (GRM), including valves installed at an angle of 7°30′ to the cylinder axis, and a timing drive with a camshaft;
- threaded outlets for spark plugs and injectors;
- landing planes for intake and exhaust manifolds;
- gasket that separates the cylinder head from the cylinder block itself.
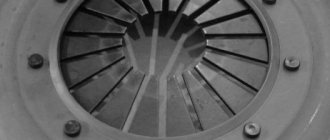
The timing camshaft of the VAZ-2109 is cast from cast iron and has five supports, with eight cams on it for opening the valves. It is driven from the crankshaft pulley by a toothed belt. Valve seats and guides are pressed into the cylinder head. On the inside of the bushings there are grooves for supplying lubricant; the bushings are closed on top with oil deflector caps.
The valves are steel, and the intake valve head is made of heat-resistant steel. The inlet valve is larger in diameter than the outlet valve. The gaps between the valves and camshaft cams are adjusted using special washers that have increased wear resistance. Valve pushers are metal cups that move in the cylinder head holes. To improve wear resistance, their surface is cemented.
The cylinder head (cylinder head) of the VAZ 2109 is connected to the cylinder block through a special gasket. The gasket must ensure tightness of the cooling system channels, oil pipeline and combustion chamber. In order for it to withstand high temperatures and high pressures, it is often made of reinforced metal.
The gasket is disposable and cannot be repaired; if it fails, it must be replaced. Replacing the cylinder head gasket on a VAZ 2109 can easily be done with your own hands.
Basic methods of performing work
Correct grinding can be carried out using one of the following methods:
- Secure the rubber tube with clamps on the rotating part of the drill. With their help, install a valve at the end of the tube, lubricated around the edges with lapping paste. Secure the head to the table and insert the prepared part into the saddle. Run the drill in a mode that allows no more than 500 revolutions per minute. It is important to not only make circular movements, but also make turns of 30-35 degrees. The work is considered complete when a strip of paste about 2 millimeters thick appears on the surface of the element. This method is not considered the most effective, but it is loved by many VAZ-2109 owners. Remove excess paste with kerosene.
- A more effective option is manual work using cutters. Remove the valves and remove carbon deposits from them using a wire brush. You need to act carefully so as not to scratch the metal. If the deposit thickness is small, you can omit this step. The valves can be ground in by sequentially changing the cutters in the sequence of 45, 15 and 75 degrees. Check the concentricity with an indicator - the runout should be no more than 0.03 mm. Next, place a weak spring under the valve and apply the paste to the chamfers of the seat and valve. With slight pressure, turn the valve 120 degrees in one direction and 100 in the other. Do this until the surface is level.
In both cases, the appearance of a gray path is a sign of quality work done. The second option requires more effort, but the result is more durable. Lapping requires great precision and special skills. It is worth preparing for it in advance, for example, watch the instructions for performing this work in the video.
https://www.youtube.com/watch?v=3TJDN50kCho
Reasons for repairing the cylinder head
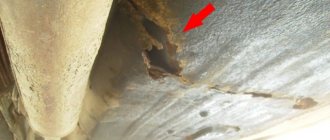
In the vast majority of cases, cylinder head repair is carried out not due to a breakdown of the head itself, but when elements structurally connected to the head fail. This could be a failure of the gasket between the head and the block, which is the most important gasket in the engine. It separates the lubrication and cooling systems, the combustion chamber and the atmospheric air in the engine compartment. Burnout can occur at the boundary of any systems separated by a gasket:
- cooling system and atmospheric air;
- lubrication system and atmospheric air;
- cooling system and lubrication system;
- cooling system and combustion chamber.
Each of these malfunctions has its own set of symptoms. If coolant (coolant) gets into the lubrication system, an oil film appears in the expansion tank of the cooling system. The entry of coolant into the lubrication system is indicated by the appearance of a dark brown water-oil emulsion on the oil dipstick.
Traces of coolant in the engine compartment may indicate gasket damage. But if this is not the case, the cylinder block plug will need to be replaced. Burnout into the atmosphere is immediately determined by the characteristic sound, clearly audible when the engine is running. White smoke from the exhaust pipe signals that antifreeze has entered the combustion chamber. Dismantling the cylinder head and replacing the gasket are mandatory for many repair operations regarding components and assemblies of the cylinder head, such as lapping valves, modifying the VAZ cylinder head, boring the VAZ 2109 cylinder block.
Every time any head repair occurs, the cylinder head gasket must be replaced.
Removing the cylinder head from the cylinder block
To remove the cylinder head from the cylinder block, you will need tools. Some of them can be found in almost every garage (screwdrivers, keys), some can be made from scrap materials (knob lever), bought or borrowed. It is necessary to have a torque wrench that ensures that bolts and nuts are tightened to a predetermined torque. As long as the torque resistance of the bolt to tightening does not exceed the specified value, the wrench works, and as soon as the resistance reaches the specified value, the tool will begin to slip through the ratchet.
To remove the cylinder head from the block, it is necessary to free the engine from the interfering attachment. The procedure is as follows:
- remove the air filter;
- if the engine is carburetor, disconnect the carburetor; if it is an injection engine, disconnect the injector;
- disconnect the pants from the manifold;
- remove the distributor;
- unscrew the cylinder head cover;
- remove the carburetor and manifolds.
Now proceed to dismantling the cylinder head. Start unscrewing the bolts. Use a crank lever, as the bolts are tightened with great force, and also become stuck under thermal and mechanical loads. Place the booster lever on the knob and remove the bolts. Remove the lever from the knob and unscrew all 10 bolts. Carefully lift the head and remove it from the block.
The gasket may remain stuck to the block or the head, do not fight for its integrity, because it is being replaced. Fight for the safety of the contact surfaces of the head and block. In difficult cases, the stuck fragments should be soaked with a special compound.
After completely removing all gasket fragments, degrease the surfaces of the block and head with gasoline.
The cylinder head gasket is one of the most important gaskets on a car. The proper operation of the engine depends on its position. The article describes why and how to replace the cylinder head gasket of a VAZ 2109. In the video you can watch the process of removing the cylinder head.
[Hide]
Replacement of VAZ 2107 engine valves
The need to replace VAZ 2107 valves arises in the following cases:
- the valves are bent due to a skipped timing chain or as a result of severe wear on the rod;
- the plate cracked;
- The valve itself burned out.
For repairs, you will need to purchase new valves and prepare the tools used when replacing valve stem seals. In addition, the cylinder head must be removed from the engine. This is done as follows:
- Use a 10mm socket to unscrew the cylinder head fasteners.
Replacing valve guides
Valve bushings (valve guides) are designed to guide the movement of the valve stem. Thanks to the precise fit of the head on the seat, the combustion chamber is sealed. The correct operation of the valves largely depends on the serviceability of the seats and guides, which wear out over time and begin to negatively affect the operation of the engine. In this case, the bushings and seats must be replaced.
If the bushings are heavily worn, oil consumption increases, valve stem seals fail, and lubricant gets into the cylinders. As a result, the temperature regime of the engine is disrupted, and carbon deposits form on its individual parts. The main signs of guide wear:
- increased oil consumption;
- the appearance of noise in the cylinder head area.
To make sure that it is the bushings that are faulty, you need to open the hood and listen to the engine. If uncharacteristic sounds and noises are heard, then it will be necessary to diagnose the valves and their guides.
For repairs you will need:
- hammer;
- sweeps at 8.022 and 8.028;
- mandrel for pressing out and pressing in bushings.
Replacement of valve bushings is carried out on the removed engine head in the following sequence:
- We hit the mandrel with a hammer and knock out the valve guide.
Replacing the valve seat
The operation of valves with seats, like the entire engine, is associated with exposure to high temperatures. This can lead to the formation of various defects on parts, such as holes, cracks, and burns. If the cylinder head overheats, misalignment may occur between the valve sleeve and the seat. As a result, the tightness of the connection will be broken. In addition, the seat wears out faster along the cam axis than in other places.
When is replacement necessary?
It is important to monitor the condition of the cylinder head gasket, since as it wears out and burns out, the engine begins to operate intermittently. A burnt-out part can cause the engine to overheat or seize. The video talks about the signs by which you can find out whether the gasket has burned out.
The need for replacement can be assessed based on the following criteria:
- A decrease in the coolant level, although no leaks were detected during an external visual inspection. In this case, the coolant enters the oil pan through the oil channels. This can be determined by the color of the oil on the dipstick; it will be cloudy and coffee-colored.
- If gases from the combustion chamber enter the cooling system, the expansion tank may rupture.
- Oil stains in the expansion tank.
- Pressure drop in one of the cylinders. In this case, the gasket may not burn out entirely, but only in the area where the cylinder is sealed.
These are the main reasons why replacement is performed.
The gasket is always changed if the cylinder head is dismantled, since it cannot be restored or reused.
Replacement process
Replacing the cylinder head gasket on a VAZ 2109 is a simple procedure and is similar for engines that have both a carburetor and an injector.
Required Tools
In order to change the gasket, the cylinder head must be removed, and the following tools may be required for removal and replacement:
- hexagon;
- a set of keys;
- set of heads;
- torque wrench;
- extension;
- gasket remover;
- flat screwdriver.
To perform this procedure, the vehicle must be placed on a suitable lifting device.
Stages
Replacement is carried out as follows:
Sorry, there are no surveys available at this time.
Video “Removing the cylinder head from a VAZ 2109”
This video demonstrates how to remove the cylinder head from a VAZ 2109.
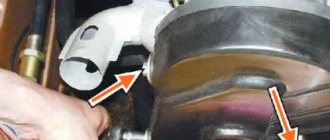
If a leak of engine oil or coolant is detected at the junction of the cylinder head with the cylinder block, remove the cylinder head and replace the head gasket. A leak can also occur due to warping of the block head due to overheating.
WARNING The head gasket is a one-time use, so each time the head is removed, the head gasket must be replaced.
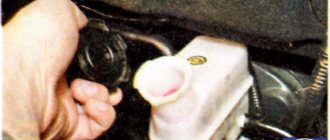
1. Disconnect the wire from the “-” terminal of the battery.
2. Disconnect the wire from the coolant temperature sensor.
3. Disconnect the wire from the oil pressure sensor. 4. Set the piston of the 1st cylinder to the TDC position of the compression stroke (see “Installing the piston of the 1st cylinder to the TDC position of the compression stroke”). 5. Drain the coolant (see “Replacing the coolant”). 6. Remove the thermostat (see “Removing and installing the thermostat”). 7. Disconnect the exhaust pipe of the muffler from the exhaust manifold (see “Replacing the exhaust pipe of the muffler”). 8. Remove the air filter (see “Removing and installing the air filter”). 9. Remove the front cover of the camshaft drive belt (see “Replacing the camshaft drive belt on VAZ 2108, VAZ 2109, VAZ 21099 cars and adjusting the belt tension”). 10. Remove the cylinder head cover (see “Adjusting the clearances in the valve drive”).
11. Secure the camshaft gear from turning by inserting a screwdriver into its hole and resting it against the pin; loosen the camshaft gear mounting bolt (for clarity, the operation is shown on a VAZ 2108, VAZ 2109, VAZ 21099 engine removed from a vehicle).
12. Remove the drive belt from the camshaft gear, tension roller, water pump toothed pulley, move the belt to the side (see “Replacing the camshaft drive belt on VAZ 2108, VAZ 2109, VAZ 21099 cars and adjusting the belt tension”).
13. Unscrew the camshaft gear mounting bolt and remove it together with the washer (for clarity, the operation is shown with the engine removed).
14. Using two screwdrivers, remove the gear from the camshaft. At the same time, do not damage the camshaft oil seal (for clarity, the operation is shown on a VAZ 2108, VAZ 2109, VAZ 21099 engine removed from a car).
15. Loosen the clamp and disconnect the fuel supply hose to the fuel pump. 16. Disconnect the hoses and wires, the choke rod and the throttle cable from the carburetor (see “Removing and installing the carburetor”).
17. Disconnect the central high-voltage wire from the ignition distributor cover.
18. Use a screwdriver to press out the spring clip and disconnect the block with low-voltage wires from the ignition distributor terminal. 19. Disconnect the tube from the vacuum corrector of the ignition distributor. 20. Disconnect the vacuum booster hose from the engine inlet pipe. 21. Loosen the clamp and disconnect the radiator supply hose from the water cooling jacket pipe (see “Removing and installing the cooling system radiator”).
22. Loosen the clamp and disconnect the heater supply hose.
23. Loosen the clamp and disconnect the heater outlet hose.
24. Loosen the ten cylinder head bolts in the order shown, then finally unscrew the cylinder head bolts and remove the bolts and washers.
25. Lift the cylinder head slightly, slide the cylinder head so that the end of the camshaft comes out of the hole in the rear drive belt cover, and remove the cylinder head.
WARNING Do not insert a screwdriver or other tools between the cylinder head and the cylinder block.
HELPFUL TIP To remove the head from the block, insert a screwdriver under the exhaust manifold. Using it as a lever, lift the block head.
26. Remove the head gasket.
27. The cylinder head bolts become stretched with repeated use. Replace with new cylinder head bolts whose length exceeds 135.5 mm. Before installing the cylinder head, lubricate the bolts with a thin layer of engine oil. 28. Clean the mating surfaces of the cylinder head and cylinder block (the surfaces must be dry and clean) and remove oil from the threaded holes in the block for the cylinder head mounting bolts.
29. Install a new head gasket on the cylinder block (the gasket must be dry and clean) along the installation sleeves. In this case, the hole for the passage of oil in the head gasket (with a copper edging) should be located between the 3rd and 4th cylinders.
30. Install the cylinder head onto the cylinder block, first making sure that the crankshaft and camshaft are in the TDC position (both valves of the 1st cylinder must be closed). Tighten the cylinder head mounting bolts in the specified sequence in four stages: 1 - to a torque of 20 Nm (2 kgf-m); 2 - torque 69.4-85.7 Nm (7.1-8.7 kgf-m); 3 - tighten the bolts 90°; 4 - finally tighten the bolts 90°.
31. Install the parts on the cylinder head and connect the hoses and wires to the cylinder head in the reverse order; do not turn the crankshaft and camshaft before installing the camshaft drive belt. Install the camshaft gear with the protruding part of the hub facing the engine. Check and, if necessary, adjust the valve clearances (see “Adjusting the clearances in the valve drive”). Adjust the tension of the camshaft drive belt (see “Replacing the camshaft drive belt on VAZ 2108, VAZ 2109, VAZ 21099 cars and adjusting the belt tension”).
The main sign indicating a faulty cylinder head gasket on a VAZ 2109 is the appearance of an oil or coolant leak at the junction of the cylinder head and the engine block. In addition to a malfunction of the gasket itself, the leak could also have caused warping of the head as a result of engine overheating, but in any case, disassembly is necessary.
To perform dismantling, we prepare a standard set of tools. The work order is as follows:
- Disconnect the power wires from the coolant temperature control sensors and from the emergency oil pressure sensor in the system.
- Next, remove the thermostat, after draining the cooling system.
- Remove the air filter housing. There is no need to remove the carburetor itself since it will not interfere.
- Disconnect the exhaust muffler pipe from the exhaust manifold.
- Now we need to remove the camshaft drive gear, but first set the piston of the first cylinder to the top dead center position. Then remove the protective cover of the camshaft drive belt and loosen the bolt securing the gear, having previously secured it from turning.
- Now we remove the camshaft drive belt, after which, after finally unscrewing the fastening bolt, we remove the gear.
- We press the latch and disconnect the block with the supply wires from the ignition distributor. Also disconnect the central high-voltage wire.
- Loosen the clamps and remove the fuel supply hose from the fuel pump.
- Disconnect the air and throttle valve drive rods from the carburetor. Disconnect the supply wire from the solenoid valve.
- Remove the vacuum booster hose from the intake pipe, disconnect the tube from the vacuum ignition corrector.
- Loosen the clamps and remove the car interior heating hoses from the pipes.
- Now you can remove the block head. Using a socket with an extension, unscrew the bolts securing it. Jerk it a little to move it out of place and carefully remove it.
- Remove the sealing gasket.
At this point, the repair work on removing and replacing the cylinder head gasket of the VAZ 2109 has been completed. Before installing the head, check the length of the head mounting bolts. The length should be 135.5mm, if they are stretched, replace them. Complete assembly in reverse order.
This work is carried out on an inspection pit or overpass.
- Disconnect the negative terminal from the battery.
- Drain the coolant into a plastic container.
- Disconnect the exhaust pipe from the exhaust manifold.
- Now remove the receiver together with the throttle assembly (VAZ-2111), or the carburetor in the case of (VAZ-21083), as well as the intake and exhaust manifolds (remove the cylinder head without removing the manifolds).
- On a VAZ-2111, you need to disconnect the “mass” wires (they are attached to the left end of the head), remove the fuel rail with fuel pipes and injectors.
- Disconnect the high-voltage wires from the spark plugs, as well as the connectors of the coolant temperature and oil pressure level sensors.
- On the VAZ-21083, you will additionally have to remove the housing of the auxiliary units, the ignition distributor sensor and the fuel pump.
- Now remove the timing belt, then the tension pulley, spacer washer and camshaft timing pulley.
- Unscrew the rear fastening nut that secures the timing cover to the cylinder head.
- Remove the cylinder
. - Using a Phillips screwdriver, loosen the clamps and disconnect all the hoses from the cylinder head exhaust pipe one by one.
12. Unscrew the 10 cylinder head mounting bolts using a “10” hexagon.
13. Remove the screws and washers.
14. Now you can remove the cylinder head along with the gasket.
15. When disassembling the valve mechanism, place a wooden block under the valve plate that you are going to dry out.
16. Dry the valve.
17. Remove it from the cylinder head guide sleeve.
18. Take the key at “13” and unscrew the two fastening nuts on the outlet pipe.
19. Remove the gasket and pipe.
- The valve stems and bushing guides are lubricated with engine oil.
- Before starting installation, it is necessary to thoroughly clean the surface of the cylinder block from dirt and oil, as well as remnants of the old gasket.
- The cylinder head gasket
is replaced using two special centering bushings. - Now you can install the mounting screws and tighten them in four steps according to the diagram below.
The first tightening of the screws is carried out with a torque of 20 N.m (2 kgf.m);
Third - extension by 90°;
Now you know how to remove the cylinder head on a VAZ 2109
, at this point replacing the cylinder head gasket with your own hands can be considered complete.
I would like to provide you with the article “Replacing the cylinder head gasket for VAZ 2109 cars.” This article is aimed primarily at entry-level and intermediate-level motorists who do not have much experience in carrying out this work. Some motorists are simply afraid to disassemble the engine, although they have quite a bit of knowledge (believe me, I have encountered such people), I can boldly tell you, roll up your sleeves and go ahead. And to give you more confidence, I will try to describe in more detail the entire process of replacing the cylinder head gasket.
What will you get from replacing the VAZ cylinder head gasket yourself? To begin with, self-confidence, also this process will give you certain experience that we so need in our lives. I personally believe that any work done with your own hands is more enjoyable than something done by someone else, so let's get started with more optimism.
As you know, the engine of a VAZ 2107 car is different from the engine of a VAZ 2109, which means the process of replacing the cylinder head gasket will be different. I decided to write two separate articles: the first for VAZ 2109, “Replacing the cylinder head gasket for VAZ 2109 cars,” and the second for VAZ 2107, “Replacing the cylinder head gasket for VAZ 2107 cars.”
When is it necessary to replace the cylinder head gasket?
In our modern age of Chinese spare parts, counterfeits and home-made parts, it has become very difficult to choose a normal, high-quality part for a car, and if you bought a high-quality part, then you are very lucky. And recently, another misfortune has appeared, these are parts after restoration (when old parts are restored and the quality of restoration is terrible). Why am I saying all this, but to the fact that even a new low-quality gasket can cause an emergency disassembly of the engine. Be careful when choosing spare parts!
And so let's return to our topic. If you notice that the coolant level is gradually decreasing, and no leaks are found during an external inspection, it means that the gasket is passing coolant through the oil channels into the oil pan. This is easy to determine - take out the oil dipstick and look at the color of the oil, it will be cloudy and slightly coffee-colored.
Another option is when gases break through from the combustion chamber into the cooling system. This malfunction is accompanied by the ejection of coolant from the radiator neck. From such a disaster on VAZ 2108 and subsequent models, the expansion tank ruptures. I have listed only the main malfunctions that motorists encounter; in fact, this can include replacing the piston, where the cylinder head needs to be removed, where the gasket needs to be replaced, and much more.
Replacing the cylinder head gasket of a VAZ 2109.
Next, for convenience, we need to remove the ignition distributor (distributor). Using a screwdriver, carefully pry up the contact chip with the electrical wires (it is advisable to first disconnect both terminals of the battery and remove it from the car).
Remove the armor wires from the spark plugs and unscrew the cover.
And carefully remove it. Make sure that the armor wires do not jump out, otherwise they can be confused and installed incorrectly.
The next thing to do is to disconnect the thin vacuum corrector hose that goes to the carburetor. Personally, I did not disconnect it, but simply put the ignition distributor aside, no matter what was in the way.
Now we just have to unscrew the three bolts that secure the distributor itself to the cylinder head and put it aside.
Next, we need to drain the coolant and disconnect the rubber pipes of the cooling system. We are looking for a small container in the garage or in the house, such as a small basin and, having removed the lower metal protection, we substitute the basin for the engine. The liquid only needs to be drained from the engine; to do this, you need to unscrew the plug in the cylinder block. The plug is located opposite the spark plug of the fourth cylinder under the plug.
After draining the coolant, remove three rubber pipes: the top one from the radiator, from the thermostat and from the stove.
On this side we only have the fuel pump left, which I think also needs to be removed. It would seem that you could simply remove the entire drive with the distributor and the fuel pump, but I think this would make installation more difficult; it would be easier to remove everything separately and then install it back according to the installation marks.
We unscrew the fuel supply hose and, after unscrewing the two bolts, remove the fuel pump.
Now we need to disconnect the exhaust pipe. On VAZ cars, starting from 2108, they began to install an additional bracket that supports the exhaust pipe, and in order to remove it, you must first unscrew the bracket. If there is no inspection hole, then this process is not very convenient, especially if the engine has not cooled down.
After unscrewing the bracket, it remains to unscrew the four nuts of the exhaust pipe flange.
This is best done from the inspection hole and using a head with an extension.
Having finished with the exhaust pipe, to the right of the collectors we remove the wire from the emergency oil pressure sensor in the system.
We smoothly move on to the timing belt drive. More precisely, we need to remove the timing belt. How to remove the belt, I recommend that you read the article “Replacing the VAZ 2109 timing belt.”
After unscrewing the nut, use two screwdrivers to pry up the gear. When it comes off, don’t forget to remove the key that secures the gear from turning.
Below, there is a tension roller, this also needs to be removed, since we will need to bend the protective cover of the gas distribution drive.
After unscrewing the nut and removing the washer, remove the tension roller.
The pin on which the roller is mounted must also be removed, because it will cling to the protective casing when removing the cylinder head.
The protective shield is attached to the head with one nut at the top. We unscrew it and carefully bend the protective shield slightly towards the right wing (along the direction of the car).
Now that's it, nothing else stands in the way of removing the cylinder head.
How to remove the cylinder head?
Let's start removing the cylinder head cover. We need to unscrew the two cork nuts on the cover itself.
Having disconnected the rubber pipes from the cover, remove it.
Now, using a hexagon of the required size, unscrew the ten bolts that secure the head to the cylinder block and remove them.
And one more thing, I almost forgot. Before removing the head, look to see if there is a rod securing the water pump tube, then be sure to remove it too.
Now you can remove the head.
After the above work, you need to thoroughly clean the mating surface of the cylinder block and the head itself from the remains of the old gasket and dirt. Having cleaned everything, we put a new gasket in place. Gaskets can be of different types and it is up to you to decide which one to install. The special article “Gaskets” will help you choose which gasket.
We also carefully inspect the head, what condition it is in, namely: valves, guides, seats, oil caps, and so on. Believe me! It’s better to check everything right away than to take it apart again later. If there are problems with the head, I recommend reading the article “Repairing the VAZ cylinder head.”
How to install the cylinder head?
Having bought a new gasket, we put it in place. Before installing the cylinder head, I recommend buying new bolts, because in the process of tightening the head they are pulled out, and reusing them can lead to bad consequences. The threaded holes into which the mounting bolts are screwed must be cleaned of dirt, oil and liquid that may get into them during disassembly. If this is not done, then when tightening the bolts will not press the head with the required force, and then gas breakthrough and other consequences are inevitable.
Having installed the head, tighten the bolts in the correct order.
Generally, the cylinder head should be tightened in four stages.
1. Tighten to a torque of 2.0 kgf*m.
2. Tighten to a torque of 7.5 - 8.5 kgf*m.
3. We reach ninety degrees.
4. And again we reach ninety degrees.
Personally, I don't make it the fourth time because, as a rule, one of the bolts either pulls the threads from the block or breaks in half. When I tighten, I feel when the bolt “melts”, this indicates the optimal tightening force. If you pull further, the bolt will break, and if you don’t pull it too far, it will loosen during operation. I acquired this skill when I worked as an assistant to a master. A very useful skill when you feel that a bolt is stopping.
That's all, until new publications.
According to many years of experience of various car enthusiasts, replacing the cylinder head of a VAZ 2109 is most often associated with problems arising from the gasket. But there may be others that can cause the engine to overheat or even seize.
- Remove the head mounting bolts and washers.
- We remove the VAZ 2109 cylinder head from the power plant unit.
- We remove the gasket.
- Also, if necessary, we carry out repairs or modifications to engine block components.
- the assembled head lies on its side;
- liquid is poured into the collector holes (ordinary water can be used).
Tuning
Qualified adjustment, modification and tuning of the VAZ 2109 head will help to fully reveal the capabilities of your power unit. You've probably heard a lot about this, read or even watched videos on the Internet. Typically, when tuning, the channels are bored and smoothed, thereby reducing the turbulence that reduces power. The valves are changed to larger ones and ground into the seats. Tuning may also involve replacing standard valve guides with bronze ones.
Valve lapping
Lapping control is carried out as follows:
If the liquid does not flow through the valves, this means that the work was done efficiently and the valves were ground in correctly. After all faults have been eliminated, you can begin installing the head.
Installation
Attention! This operation requires some knowledge and skills. Therefore, before performing it, you should know that the bolts need to be tightened according to a certain pattern and with a certain force. It would be useful to read additional material on this topic and watch video instructions.
As you can see, there are certain difficulties in modifying the VAZ 2109, tuning, replacing plugs and assembling. But if you learn how to do these jobs yourself, calculate how much money you can save.
Valve lapping methods
There are actually two ways to grind valves - manual and mechanized. However, manual grinding is a labor-intensive and time-consuming process. Therefore, it is better to use the so-called mechanized method, using a drill or screwdriver. However, let's look at one and the other method in order.
Regardless of the chosen lapping method, first of all it is necessary to dismantle the valves from the cylinder head (it must also be previously dismantled). To remove the valves from the cylinder head guides, it is necessary to remove the valve springs. To do this, use a special device, and then remove the “crackers” from the spring plates.
Manual grinding method
To grind in car engine valves, you must follow the algorithm below:
- After dismantling the valve, it is necessary to thoroughly clean it from carbon deposits. To do this, it is better to use special cleaning agents, as well as an abrasive surface in order to thoroughly remove plaque, grease, and dirt from the surface.
- Apply a continuous thin layer of lapping paste to the valve chamfer (use coarse-grained paste first, and then fine-grained paste).
- If the homemade lapping device described above is used, it is necessary to insert the valve into its seat, turn the cylinder head over, and place the holder on the valve located in the valve sleeve and lubricated with lapping paste. Next, you need to tighten the bolt in order to secure the valve in the pipe as tightly as possible.
- Then you need to rotate the lapping device together with the valve alternately in both directions by half a turn (approximately ±25°). After one or two minutes, it is necessary to turn the valve 90° clockwise or counterclockwise and repeat the back-and-forth grinding movements. The valve must be ground in by periodically pressing it against the seat, and then releasing it, repeating the procedure cyclically.
- Manual grinding of the valves must be performed until a matte gray, even, uniform band appears on the chamfer . Its width is about 1.75...2.32 mm for the intake valves, and 1.44...1.54 mm for the exhaust valves. After grinding in, a matte gray band of the appropriate size should appear not only on the valve itself, but also on its seat.
- Another sign by which one can indirectly judge that the grinding-in can be completed is a change in the sound of the procedure. If at the beginning of rubbing it is purely “metallic” and loud, then towards the end the sound will be more muffled. That is, when it is not metal rubbing against metal, but metal rubbing against a matte surface. Typically the grinding process takes 5...10 minutes (depending on the specific situation and condition of the valve mechanism).
- Typically, grinding is performed using paste of different grain sizes. First, use a coarse-grained paste, and then use a fine-grained one. The algorithm for using them is the same. However, the second paste can be used only after the layer of the first paste has been well sanded and hardened.
- After lapping, it is necessary to thoroughly wipe the valve itself and its seat with a clean rag, and you can also rinse the surface of the valve in order to remove any remaining lapping paste from its surface.
- Check the quality of lapping by checking the concentricity of the valve disc and its seat. To do this, apply a thin layer of graphite with a pencil to the chamfer of the valve head. Next, the marked valve must be inserted into the guide sleeve, lightly pressed against the seat, and then turned. Based on the resulting traces of graphite, one can judge the concentricity of the location of the valve and its seat. If the grinding is good, then with one turn of the valve all the applied lines will be erased. If this does not happen, the grinding must be repeated until the specified condition is met. However, a complete check is performed using another method described below.
- Upon completion of valve lapping, all working surfaces of the parts are washed with kerosene to remove residual lapping paste and dirt. The valve stem and bushing are lubricated with engine oil. Next, the valves are installed in their seats in the cylinder head.
During the valve grinding process, it is necessary to get rid of the following types of defects:
- Carbon deposits on the chamfers that do not lead to deformation of the chamfer (valve).
- Carbon deposits on the chamfers leading to deformation. In particular, a stepped surface appeared on their conical surface, and the chamfer itself became round.
Please note that if in the first case the valve can simply be ground in, then in the second case it must be grooved. In some cases, grinding is performed in several stages. For example, rough grinding is carried out until all pits and scratches are removed from the surface of the workpiece. Often, paste with different levels of grain size is used for lapping. Coarse abrasive is intended for removing significant damage, and fine abrasive is for finishing. Accordingly, the finer the abrasive used, the better the quality of valve grinding is considered. Usually pastes have numbers. For example, 1 is finishing, 2 is roughing. It is undesirable for abrasive paste to get on other elements of the valve mechanism. If it gets there, wash it off with kerosene.
Grinding in valves with a drill
Grinding in valves using a drill is the best option to save time and effort. Its principle is similar to manual lapping. The algorithm for its implementation is as follows:
- Take a prepared metal rod and put a rubber hose of a suitable diameter on it. For better fastening, you can use a clamp of the appropriate diameter.
- Secure the mentioned metal rod with an attached rubber hose in the chuck of an electric drill (or screwdriver).
- Take the valve and put a spring on its stem, then install it in its seat.
- Having slightly pulled the valve out of the cylinder head, apply a small amount of lapping paste to its chamfer along the perimeter of its plate.
- Insert the valve stem into the rubber hose. If necessary, also use a clamp of the appropriate diameter for better fastening.
- At low speeds of the drill, start grinding the valve into its seat. In this case, you need to move it back and forth, which, in fact, is what the installed spring will help with. After a few seconds of rotation in one direction, you need to switch the drill to reverse and rotate it in the opposite direction.
- Carry out the procedure in the same way until a matte band appears on the valve body.
- Upon completion of grinding, thoroughly wipe the valve from any remaining paste, preferably using a solvent. Moreover, the paste must be removed not only from the valve chamfer, but also from its seat.
Grinding in new valves
There is another grinding in of the new valves on the cylinder head. The algorithm for its implementation is as follows:
- Using a rag soaked in solvent, it is necessary to remove dirt and deposits on the chamfers of all new valves, as well as on their seats (seats). It is important that their surfaces are clean.
- Take a piece of double-sided tape and stick it on the plate of the valve being ground in (instead of double-sided tape, you can take regular tape, but first make a ring out of it and compress it until flat, thereby turning it double-sided).
- Lubricate the tip of the rod with machine oil and install it in the seat where the device is supposed to be ground in.
- Take any other valve of a similar diameter and insert it into the chuck of a screwdriver or drill.
- Align the plates of the two valves so that they are glued together with tape.
- Apply slight pressure on the drill or screwdriver at low speeds to begin grinding. The electrical device will rotate one valve, which, in turn, will transmit rotational movements to the valve being ground in. Rotation must be both forward and reverse.
- Signs of completion of the procedure are similar to those described above.