Checking the mechanism
If the driver notices any problems with the steering mechanism. It will be seen and heard. The steering wheel may shake and there may be a drumming sound. When turning, the steering wheel will “wedge” or “knock out”.
Drawing with the names of the elements of the steering column GAZ 3110
You can check the node yourself. To do this you need:
- Put the GAZ-3110 on the handbrake.
- Place supports under the rear wheels.
- Loosen the wheel on the left at the front.
- The front of the car should be raised and placed on supports.
- Remove the wheel.
- After this, remove the protective mudguard.
- In the Volga 3110 interior, completely disconnect the assembly shaft from the mechanism below.
- It is required to mark the position of the control shaft and bipod.
- Remove the bipod from the shaft.
- After removing the bolts, remove the mechanism.
Elimination of power steering pump defects
The faults have been found, now we begin to eliminate them.
Read more: Electromagnetic lock does not open
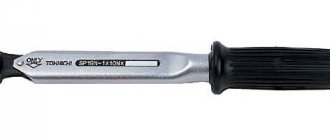
We will need rags, white alcohol, sandpaper with grit P1000/P1500/P2000, a triangular needle file, a drill bit of Ø12mm (or more) and an electric drill. With the shaft everything is much simpler, you will need P1500 sandpaper and with it we begin to clean all the edges of the grooves on the shaft (we clean the outer and side ones on both sides) in all possible ways. We work without fanaticism, the main task is to remove only sharp burrs.
For one thing, you can immediately polish both sides of the shaft a little on a flat surface, it is advisable to use P2000 sandpaper.
Next, we need to check the result of our work, we check visually and by touch, everything is perfectly smooth and does not cling.
The most difficult thing will be with the surface of the cylinder; personally, I couldn’t figure out anything simpler than how to make a spherical grinder from sandpaper, a drill and a thick drill (F12). To begin with, we take the P1000 sandpaper and a drill bit that can be inserted into the drill.
Next, you need to tightly screw the skin against the rotation of the drill, two or three turns, there should be no gaps.
Holding the tightly twisted structure, it needs to be inserted into the drill (the skin should also be clamped).
Afterwards, using the most convenient methods for you, we carefully begin to grind the cylinder, you need to grind evenly, press the cylinder tightly and move it relative to the axis of rotation (at maximum speed). As we eat the skins, we change them, eventually we reach the smallest skin P2000.
The desired result is obtained,
Now everything needs to be thoroughly wiped with a trail of white alcohol. The shaft itself with the blades can be rinsed in it.
After we begin the assembly, everything is put in the reverse order of removal.
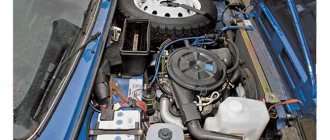
Repairing power steering is a complex task and painstaking work. The article is intended for those car enthusiasts who are familiar with the structure of the main car systems.
Damage analysis
To identify a malfunction, you need to check the crankcase. If there is a crack or chip on it, then it cannot be repaired; you need a new one.
The bushings look worn out. They also need to be replaced. You can find the crankcase assembly at points of sale of parts.
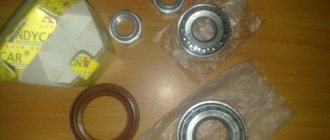
Worm and roller - if deformation is detected - replace. The bearing should be lubricated and without obvious flaws.
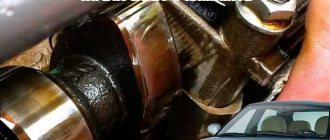
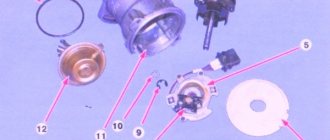
Steering columns removed from the car
If oil leaks occur from time to time, gaskets and seals need to be replaced. Reassembly is carried out in the reverse order, according to the marks made during disassembly.
Repair of gas bridge 31105
Determining the technical condition of the rear axle in road conditions Possible malfunctions of the rear axle, their causes and methods of elimination Before repairing the gearbox, make sure that it needs to be repaired by performing a test in road conditions. Carry out the check on a suburban highway in the absence of heavy traffic, taking the necessary precautions.
Changing the oil in the rear axle housing You will need: a “12” hexagon, a “17” wrench, and a container for collecting used oil. HELPFUL ADVICE Change the oil immediately after a trip, while it is warm and has increased fluidity. In addition, contaminant particles in this case will be suspended in the oil.
Removing and installing the rear axle The rear axle is removed to replace it when all parts are completely worn out, when partial repairs become impractical, or to replace the beam if it is damaged. You will need: a wrench for the wheel nuts, wrenches “12”, “13”, “ 14", "17", hex wrench "12", large screwdriver or mounting tool.
Removing and installing the axle shaft The axle shaft assembly with bearing is replaced if there is increased noise from the rear wheels of the vehicle compared to normal, both when driving in a straight line and when cornering. In this case, increased axial and radial play of the axle shaft is observed. NOTE Axial clearance of no more than 0.7 mm is allowed. BY.
Disassembling and assembling the axle shaft You will need: a bearing puller, a large chisel, a hammer, a mandrel for pressing the bearing, a gas torch. 1. Remove locking sleeve 1 by knocking it down. Compress bearing 2. Remove housing 3 of the outer oil seal. Unscrew two screws 4 and remove the outer oil seal with felt strip from the housing.
Removing the main gear You will need: keys “12”, “13”, “14”, “17”, socket heads: “12”, “19”, extension, wrench, screwdriver. 1. Unscrew the oil drain plug and drain the oil from the final drive housing. 2. Disconnect the rear end of the driveshaft from the main drive gear flange.
Disassembling the main gear drive shaft 1. Press the front bearing inner race. 2. Remove spacer ring 1 of the front bearing. Press the rear bearing 2 with the inner ring and remove the adjusting ring.
Dismantling and assembling the differential 1. Mark the relative positions of driven gear 1 and flange 2 of the differential box. Unscrew the nuts of the 3 bolts securing the driven gear to the differential box and knock the bolts out of the sockets of the driven gear without damaging the threads. 2. Remove (compress) the driven gear from the differential box.
Installing the main gear You will need: keys “12”, “13”, “14”, “17”, socket heads: “12”, “19”, torque wrench, indicator, extension, wrench, screwdriver . 1. Press the outer races of the pinion shaft bearings into the rear axle housing. WARNING If replaced at least.
GAZ-31105 is rear-wheel drive, its rear axle is the drive one.
Detailed design diagram
It consists of a beam, inside of which all the main components are located.
This is what the rear axle from GAZ 31105 looks like
The axis of the drive gear of the bridge is located 4.2 cm below the driven gear, the gear ratio of the main gear is 4.556, this gear is called hypoid. The gearbox contains 2 axles, 4 satellites and 2 bevel gears. The body is made of two halves, bolted together.
Drawing of the Volga 31105 rear axle device
The correct position is set by an adjusting ring located next to it and the bearing. The bearing is pre-tensioned using a spacer ring.
The tips of the axle shafts are inserted into the splined holes of the gears. On the front side of which there are flanges connected to the hub by ten studs. The hub is located directly on the rear axle axle housing. The wheel is hung onto it and tightened.
Possible faults
- The drive gear bearing is faulty or has simply fallen apart. This can be cured by purchasing and installing a new one.
- The bearing rings have weakened in their niche. Repair or replacement of worn elements is required.
- Erasing the teeth of the main gear gear - replacing the gear.
- The lateral distance between the teeth of the main gear is broken - repair with restoration of the previous distance.
- The pretension on the drive gear bearing is off. Restore the previous pretension. In case of large wear, install a new bearing.
- The driven gear has become loose in its lock - tighten the Volga 31105 driven gear fastening nuts.
- The integrity of the teeth of the main gear gears is damaged.
Occurs due to a loose gap or poor quality lubrication of the mechanism. In this case, both main gears need to be replaced.
Source: https://mastershuma.ru/remont-mosta-gaz-31105/
Adjusting the steering gear
Place the front wheels level. You need to place the screwdriver bottom on the steering wheel at the point at the top. Rotate the steering wheel until resistance appears. The wheels are in their original position. When finding a backlash, you need to mark the points.
If the play is 17 mm or more, you need to find this reason. If it is less than the specified distance, then the gap between the roller and the worm is simply adjusted. Remove the front wheel on the left. Using a 30mm wrench, unscrew the cap nut and remove the washer from there. Take a 12mm hex key and unscrew the clockwise adjustment screw a little. Thus, check the play on the steering wheel until it is less than 17 mm, reassemble in the reverse order.
If in the Volga, when turning, the steering wheel returns to its original position, you need to measure the play again.
When a crunching sound occurs in the steering wheel when driving on a bad road surface, or when driving over speed bumps. This occurs at low speeds or at high steering angles. A call to a car maintenance service is required. During diagnostics, a problem related to the steering gear may be identified.
This is what the gas 3110 steering gear looks like
If you have enough money, you can leave the car in a repair shop, where the experts in their field will fix this problem by replacing it with a new one. But, if you don’t have trust or money, you can try to repair the steering gear yourself. This requires, first of all, compliance with safety rules. The presence of a pit in the garage, knowledge of the steering mechanism of the 31st Volga and all the necessary keys for disassembling and reassembling the mechanism.
Power steering pump for Chrysler engine
Shop “GAZ Machine Parts” Moscow,
Putilkovskoye Shosse, building 1 Phones:
(926) 026-027-0 (916) 425-72-10 e-mail: [email protected]
Opening hours:
on weekdays from 9 to 19, on weekends and holidays from 9 to 17
- For almost 15 years, our company has been the official representative of the GAZ and ZMZ plants.
- We sell only original GAZ spare parts.
- For regular customers we have discounts and special conditions for purchasing spare parts.
You can find out about the conditions of permanent cooperation by calling us.
A powerful aid to the driver in the process of driving is power steering. The development of the automotive industry has left behind the times when the steering wheel rotated solely through its own efforts.
We specialize in the supply and sale of spare parts for GAZ Chrysler cars, including the GAZ power steering pump with Chrysler engine
. Wear of parts under the daily load of a car is inevitable.
If the power steering pump on your Volga Chrysler howls and hums, then you need to focus on identifying the breakdown.
During operation, the petals can form a notch, which is what causes the sound effect. It is also possible that the power steering pump GAZ 33105 Chrysler may leak and other breakdowns may occur.
Article Name Manufacturer Price
| 52089018AD | Power Steering Pump Chrysler (MOPAR) Original | Main manufacturer | RUB 23,400.00 |
| 52089018AD | Chrysler power steering pump (MOPAR) Original with pulley | Main manufacturer | RUB 23,400.00 |
| 012(014) | Power steering pump Chrysler Belarus | Belarus | 8470.00 rub. |
| 3419032 | Power steering radiator 31105 (Chrysler) | GAS | RUB 370.00 |
The Volga 31105 Chrysler has proven itself to be excellent. The cooperation between Russia and the United States in creating cars was a successful endeavor. The car turned out to be reliable and powerful. The external exterior of the car does not stand out among its peers. But processing of the internal components was required.
This also applies to the power steering pump on Chrysler. Its adjustment and configuration require an exclusively professional approach - the mechanism is too delicate.
Options for a car owner's actions if he fears a GAZ power steering breakdown:
- get specialist advice;
- Based on the results of the identified malfunction, repair or replace the unit;
- buy a power steering pump for Volga Chrysler from a trusted supplier. Our reputation in the GAZ spare parts market allows us to recommend our own store for purchasing a pump.
You can start the process of purchasing a new pump by studying the price list and calling our professional managers. The price of the GAZ power steering pump in our store is not overpriced.
Malfunctions of the power steering system and methods for eliminating them
Pump faults
| manifestation | malfunction | elimination method |
| An itchy sound that gets worse when you turn the steering wheel in place | Air in oil. Or lack of oil. Or rotor defects (cracks, scuffs - see below). | Add oil. Let it sit for 30 minutes and bleed the system. If this does not help, then disassemble the pump. If there are no burrs on the rotor mating surfaces, install a repair kit. |
| The pump pulley hits or unscrews spontaneously. | The pulley skirt is broken due to improper fit on the shaft or due to shaft defects. | Installing a new pulley, ensuring proper fit. |
| The steering force is large at any engine speed and in both directions. | Safety valve clogged. | Remove the flow valve (can be done without removing the pump), clean it and press in its ball. Achieve tightness. Tighten the safety valve, installing the adjusting washers in place. Replace the filter! |
| The steering wheel turns tightly, but becomes light only at high engine speeds. | Flow valve jammed. | Remove the valve, remove any dirt or chips, and put it back in place. If this does not help, eliminate the distortion of the pump cover. |
| The steering wheel turns tightly and you can hear a whine (itching) from the pump. The steering wheel may become lighter at high engine speeds. | Scuffing of the rotor and mating planes. | Replace the rotor, blades, cage. Sand the mating surfaces. Sand the pump cover. (flatness tolerance 0.001 mm) |
| At low engine speeds, the steering wheel wedges in both directions. Or it twitches. In this case, a squealing noise may (or may not) occur from under the hood. | The drive belt is not tight enough, or the pins are faulty | Pull the belt. But if the belt is worn out, it can slip even with the correct tension. Then replace the belt. |
| Oil leaking from somewhere below the pump | Leakage of the pump seal or rubber O-rings. Leaks in sealing process holes plugged with balls. Pump inlet fitting leaking. | Replacement of oil seal and seals. Sealing holes. |
| Pump jammed | Rotor seizure due to cracking and destruction of the rotor, or from bearing seizure (usually when running without lubrication) | If the rotor is intact, replace the bearing. |
THIS IS INTERESTING: How much coolant is poured into a Chevrolet Niva
Gearbox malfunctions
| manifestation | malfunction | elimination method |
| After the power steering gearbox warms up, biting of the steering wheel appears (more often when turning left) | The most common malfunction. For factory gearboxes it can occur after 40 thousand km. mileage due to a design miscalculation. | Overhaul of the gearbox with replacement of cuffs and rings with special ones using Gidrolab technology. |
| Biting the steering wheel when turning smoothly only to the left and only when “cold”. When warming up, it goes away and can develop into the malfunction described above. | The malfunction occurs on gearboxes produced after the end of 2006. Associated with a new type of cuff at the end of the steering shaft. | Overhaul of the gearbox with replacement of cuffs and rings with special ones using Gidrolab technology. |
| Constant or periodic increased effort on the steering wheel when turning left | Breakout or loss of the upper oil seal of the bipod shaft. It may occur within 30 thousand km. due to a design flaw | Overhaul of the gearbox with installation of a high-pressure bushing. |
| The steering wheel is too light. If you push it and let it go, it tries to turn it all the way. There is a lot of play when the engine is turned off. | Torsion bar failure. Appears after a long drive (5 - 10 thousand km) with a broken bipod shaft seal (the steering wheel is tight only to the left) or a non-working pump. | Replacing the torsion bar. A special stand is required. |
| Oil leak on driver's feet | Leakage of the oil seal, or damage to the rubber ring of the torsion bar (often accompanied by play in the seal). | Gearbox overhaul |
| Leakage from under the top or side cover of the gearbox, or from under the bottom bearing cover, or from technological holes sealed with balls | Defects in rubber seals or chips getting into the grooves of rubber sealing rings | Overhauling the gearbox (sometimes, however, the cause may be poorly tightened cover bolts) |
| Knocks when the steering wheel is swung sharply while the car is stationary and the engine is off | If the steering play (with the adjusting screw) is selected, and after starting the knocking noises disappear, then their cause lies in the weakened fastening of the torsion bar (located inside the spool shaft, and fixed with a pin) | It makes no sense to fix the gearbox for other reasons before overhauling it. Doesn't pose any danger. However, it soon causes oil to leak into the cabin. You also need to check that there is no play in the cardan joint and its attachment to the shafts. This backlash is unacceptable! |
| Variable force on the steering wheel as it rotates. The effort does not increase smoothly, but abruptly. (not found on “silent” gearboxes of modification 103) | Spool jamming. The reason may be a poorly selected spool pair, or a small piston. In the Volga, the reason may be hidden not in the gearbox, but in the cardan transmission of the steering column (beating). | Place the steering wheel in the maximum wedge position, loosen and tighten the steering column mounting bolts. It often helps. Or try to rearrange the cardan with the other end and replace it. If this does not help, then grind the spool, restore the alignment of the spool and, if necessary, replace the gearbox housing with the selection of the piston. |
| In a Sobol car, the steering wheel easily rotates to the left to the middle position, then another half turn and suddenly becomes heavier. Going in the opposite direction is easy. | at normal pressure in the system, the reason lies in the jamming of the bearings of the pendulum arm. | bulkhead left swing arm |
| The power steering does not hum. There is a squeal coming from under the hood when you turn the steering wheel. | incorrect assembly of the gear spool (see also pump malfunctions) | bulkhead and correct assembly (such a power steering was once caught from a store) |
| Uncorrectable steering play | Incorrect adjustment of the preload of the screw-nut bearings. This is done with a screw plug (at the bottom of the gearbox) at the factory. This malfunction is rare. | Gearbox overhaul with adjustment. |
| Intrusive squeaking noise from the power steering even with small steering deviations when driving | The gear clearance adjustment in the gearbox is incorrect. The clutch is overtightened. | On the Volga, loosen the gap adjustment a little (rotating the adjusting screw clockwise (screw inward) 0.5 - 1 turn) |
| Moderate wheezing when the hydraulic booster is running | — | It is not a malfunction. |
| Whistling from under the hood | Loosening the belt tension | Tighten or replace the pump drive belt. |
Source: https://www.gaz-engine.ru/gaz_chrysler/gur_gaz.php
Adjusting the steering screw thrust bearings
1. Having removed the steering mechanism along with the bipod, remove the universal joint fork from the input shaft of the steering mechanism.
2. We fix the steering mechanism in a vice with the input shaft up, positioning the screw axis vertically.
3. In the middle position of the sector shaft, with one hand we swing it by the bipod, and with the fingers of the other hand we check for the absence of axial movement (play) of the input shaft of the steering mechanism.
4. If present, the propeller bearings must be adjusted.
To do this, use a bead to open (straighten) the collar of the adjusting nut.
5. Using a special wrench, turn the adjusting nut clockwise
6. We tighten the bearings.
The nut must be tightened carefully, each time checking for axial play of the input shaft.
After your fingers stop feeling the movement of the shaft, stop tightening.
7. Lock the adjusting nut with a bead, bending its collar into the grooves of the crankcase
The force required to turn the input shaft after adjustment should not increase noticeably.