Body control points are needed for defect detection and adjustment of car body parts.
To correct the geometry of the body, special rulers and tape measures are used, using geometric dimensions, special tools and stands.
By inspecting a car after an accident, the presence of “hidden” deformations in the power elements of the body can be determined:
- by the presence of distortions in the front parts; the magnitude of protrusions of one part relative to another;
— for violations of gaps in the interfaces of openings with doors, hood, trunk lid.
Damage to the body of a passenger car usually leads to the appearance of various distortions, which manifest themselves in violation of the geometric parameters of openings (doors, hood, trunk lid), side members, and interior frame beyond the permissible limit.
Depending on the complexity of the damage, body distortions are classified into 5 types.
Opening skew includes violations of the geometric parameters of various body openings beyond the permissible size.
Various combinations of side door, windshield or rear window frame distortions are classified as this type of damage.
A slight misalignment of the body involves damage that violates the geometric parameters of the openings of the hood or trunk lid (tailgate) beyond the permissible size without violating the geometry of the base of the body, door and window openings, with the exception of gaps between doors and front or rear wings.
Body distortion of medium complexity includes simultaneous violation of the geometric parameters of the openings of the hood and trunk lid (tailgate) or damage to the body with violation of the geometric parameters of the front or rear side members beyond the permissible dimensions without violating the geometry of the interior frame.
For front-wheel drive vehicles, only the misalignment of the rear side members is taken into account.
A body distortion of increased complexity involves a simultaneous violation of the geometric parameters of the front and rear side members or damage to the body with a violation of the geometric parameters of the front and rear side members and the interior frame, or only the front side members for front-wheel drive vehicles - in excess of the permissible size.
Body distortion of particular complexity includes damage with violation of the geometric parameters of the front and rear side members and the interior frame beyond the permissible dimensions.
Elimination of body distortions is carried out by restoring damaged elements of openings, side members, and frames using straightening - stretching, shrinking and straightening until they are given their original geometric parameters.
Below are the geometric dimensions, relative to the control points, of the Lada Granta car.
Figure 2 shows the geometric dimensions of the engine compartment of the Lada Granta.
Figure 3 shows the dimensions of a car windshield.
Figure 4 shows the dimensions of the rear window of a Lada Granta car.
In Figure 5, the dimensions between the measurement points of the luggage compartment of the Lada Granta car body
In Figure 6, the geometric dimensions between the points of the lower parts of the Lada Granta car
Cleanliness under the hood - logbook of the 2012 Lada Granta AT Luxe on DRIVE2
It's no secret that a lot of dirt collects under the hood of a grant. First of all, this is due to the gap between the hood and the frame (not that there is a huge gap; the problem is that it is located exactly in the place where all the dirt flies). Therefore, cunning people figured out how to heal it at a cost of about 300 rubles. I washed the engine at the car wash.
And here is the result of a clean engine compartment of a standard Lada 1.6 16V
Motor after washing
I didn’t bother and bought seals from Alamara (you could, of course, measure the length with a meter, then go to the store and save about 50 rubles) The kit includes one long strip of seal that we will torment with a utility knife. By the way, if you cut it beforehand, it will be much easier than on the machine itself during installation.
As I read, many people didn’t bother and fastened them simply by squeezing the seal. I decided to unscrew the radiator frame and clamp the seal with it for reliability. When I was attaching the seal to the hood trim, I realized that it would be easier to break out the pistons and attach new ones in their place (to push the seal as far as possible). By the way, I didn’t find any grand caps in the stores; I installed the decimal caps; they fit perfectly, tightly. In general, accept the job
Price: 300 ₽ Mileage: 18,000 km
Diagram and location of the Lada Granta fuse box photo and video
YouTube pranks and fuses for the Lada Largus
Most electrical circuits in modern cars are protected by fuses. Firstly, this protects the electrical device itself from damage, and secondly, it prevents the threat of fire due to overheating or short circuit.
We gain access to the fuse box in the cabin
In the Lada Granta, the fuse box, or as it is also popularly called, the mounting block, is located to the left of the driver. To gain access to it, you need to lower the protective decorative plug down.
Removing the decorative plug
Location of the latches of the decorative plug of the mounting block
Removed from one mount
For ease of use, I recommend completely removing the decorative plug and putting it aside. To do this, you need to remove the chip from the trunk opening button. The chip can be easily removed; there are no latches that hold the chip in place.
Remove the chip from the trunk button
Also, the chip is made for fools; you won’t be able to put it on incorrectly, so you don’t need to remember its seating position.
Removing fuses and contact relay
To replace (remove) fuses and contact relays, the mounting block is equipped with special tweezers. For fuses - small tweezers, for contact relays - large tweezers.
Fuse layout diagram in the mounting block
Mounting block diagram | Fuse box (painted numbers all day) |
Clue. On the reverse side of the decorative plug, there is a diagram of the location of fuses and a contact relay in the mounting block!
| F1 | 15 | Controller, engine cooling fan relay, short circuit 2x2, injectors |
| F2 | 30 | Window lifters |
| F3 | 15 | Emergency Signal |
| F4 | 20 | Windshield wiper, airbag |
| F5 | 7.5 | 15 terminal |
| F6 | 7.5 | Reversing light |
| F7 | 7.5 | Canister valve, mass air flow sensor, DC1/2, speed sensor |
| F8 | 30 | Heated rear window |
| F9 | 5 | Side light right |
| F10 | 5 | Side light left |
| F11 | 5 | Rear fog light |
| F12 | 7.5 | Low beam right |
| F13 | 7.5 | Low beam left |
| F14 | 10 | High beam right |
| F15 | 10 | High beam left |
| F16 | — | — |
| F17 | — | — |
| F18 | — | — |
| F19 | — | — |
| F20 | 15 | Horn, trunk lock, gearbox, cigarette lighter, diagnostic connector |
| F21 | 15 | Gasoline pump |
| F22 | 15 | central locking |
| F23 | 10 | DRL |
| F24 | — | — |
| F25 | 10 | Interior lighting, brake light |
| F26 | — | — |
| F27 | — | — |
| F28 | — | — |
| F29 | — | — |
| F30 | — | — |
| F31 | — | — |
| F32 | 30 | Heater, EUR |
Contact relay diagram
| K1 | Heater fan relay. |
| K2 | Power window relay |
| K3 | Starter relay |
| K4 | Ignition switch terminal 15 relay |
| K5 | Turn signal and hazard warning relay |
| K6 | Wiper relay |
| K7 | High beam relay |
| K8 | Horn relay |
| K9 | Low beam relay |
| K10 | Heated rear window relay |
| K11 | Controller relay (engine control unit) |
| K12 | Electric fuel pump relay |
Difference in trim levels: standard, norm, luxury
The mounting block is the same for all vehicle configurations: standard, normal, luxury. Depending on the configuration and equipment of the vehicle, some relays may be missing from the fuse block.
New fuse box
New fuse box diagram
Fuse box under the hood of a car
In the Lada Granta car there is another block of “powerful” fuses under the hood of the car. The fuse rating is from 30A to 60A, which is why this unit is called a power unit.
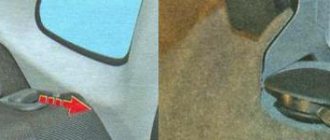
The fuse box is indicated by an arrow
To access the fuses, pull the protective cover upward. It can be easily removed. When choosing a virtual casino, gambling lovers compare many factors. For most fans, it is important which slot machines for money at www.hcsarov.ru/slotsmoney/ the club offers to use. Only licensed software can guarantee fair play and allow you to count on winning real money on an especially large scale. After finishing work, do not forget to return the cover to its place.
Block diagram in configurations: Standard, Norma
| F1 | 30 | Low beam headlights or main relay, circuits protected by fuses F1 and F21 of the mounting block in the passenger compartment |
| F2 | 60 | Generator |
| F3 | 60 | Generator |
| F4 | 30 | Heater fan (heater fuse grants) |
| F5 | 50 | Electric power steering |
Block diagram in the Lux configuration
| F1 | 50A | Heated windshield |
| F2 | 60A | Generator |
| F3 | 60A | Generator |
| F4 | 40A (in the configuration without air conditioning - 30A) | Electric radiator cooling fans |
| F5 | 50A | Electromechanical power steering |
| F6 | 40A | Anti-lock brake system (ABS) control unit |
If the fuse constantly blows, then this is a reason to think about the correct operation of this circuit. We also do not recommend making changes to the design unless absolutely necessary.
To keep it clean under the hood! — logbook of Lada Granta 2190 PORT 2012 on DRIVE2
I bought a seal kit for the 2108 a long time ago in order to put it under the hood to keep the engine clean.
The engine was also washed before the start of winter.
and today it was time to install the seal itself. The topic, in principle, is not new, but I will share how I did it. I installed it on the hood itself, on the trim, as well as to the edge of the radiator grille and to the headlights. It is attached to the hood trim quite easily, the clips are removed one by one and the seal is gradually tried on and attached.
It is better to remove the clips, after installing the seal, return them to their place
It opens easily, locks tightly, and cuts easily. At first I wanted to install it from edge to edge, but I saw that there was quite a lot left and let it all go along the perimeter of the sheathing.
It also fits very well to the grille. But when I installed it, I loosened the bolts so that the seal would fit straight into place.
And the final touch.
Everything is ready, I’ll see if there is any effect.
Fuse box Grant Norma and Lux
Pinout of Lada Priora comfort block
Lada Granta relay and fuse mounting blocks play a very important role in the structure of the car, especially when it comes to electrical wiring.
It is this element with a set of fuses that will reduce the risk of a short circuit in one of the electrical wiring circuits and a possible fire as a result. There are two such blocks in Lada Granta.
One Grant fuse box is located in the passenger compartment and serves to protect almost all electrical circuits, except power ones. But the second block is designed to protect power circuits and is located under the hood, namely in the engine compartment. Next, we’ll talk about replacing them, in case of failure, with our own hands.
Instructions for replacing fuses in the block located in the passenger compartment
Remember that before starting to work with the electrical equipment of the car, you must always disconnect the negative terminals from the battery; this will be correct both from a technical point of view and from a safety point of view.
Next, remove the cover from the instrument panel located next to the headlight control unit. You don’t need any special tools for this; gently pull the upper left part of the cover with your hands and remove it one by one from the latches.
The Lada Granta standard fuse box is identical to the Granta Lux fuse box. In both cases there is a button to open the trunk. It is located below the headlight control unit, so when removing the cover, you need to carefully disconnect it from the plug. To do this, simply hold it with your fingers and slightly pull the plug up. When reassembling, do not forget to reconnect the plug.
After removing the cover, we proceed to directly replacing the fuses.
The reverse side of the cover shows the location of the fuses, the circuit they protect and the current rating.
You need to find out which of the fuse boxes on the Grant has failed. After this, remove it from there, check whether the thread is intact (in terms of burnout), and then install a new one with the same current rating.
Keep in mind that the problem of repeatedly blowing one fuse cannot be solved by installing a fuse with a higher current rating. In this case, the fuse will not protect the circuit, and if a short circuit occurs, a general burnout of electrical devices and circuit wiring will occur.
To replace the fuses in the block located under the hood, we perform the same steps: first, remove the cover by pulling it up, and then determine which of the fuses has stopped functioning. Then we replace it with a new one.
We have analyzed the fuse box updates in the Grant model in detail, but not in every case the cause of failure of electrical equipment is the fuses themselves. We advise you to check the overall functionality of the electrical wiring and devices before replacing the fuse box in Grant.
Also check the entire electrical circuit for which the supposedly failed fuse is responsible. And only after finding out the causes of the problem, proceed to replacing them and continue to use the machine for your pleasure.
VIDEO weak points of the Lada Granta
see also
“Peter - AT” INN 780703320484 OGRNIP 313784720500453
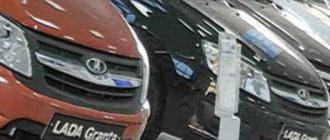
Well, we got there. Howling, rotting, falling apart, being ridiculed... Withstanding all this, holding two bags of potatoes and continuing to move. Not great, not terrible, but super popular - Lada Granta.
No exaggeration, Granta is really very popular in Russia. In any case, Volga Cyber, which we talked about last time , never dreamed of such popularity in its time. If you don’t know yet, in August Lada Granta regained its leadership in the top sales, albeit with a very small advantage, overtaking the KIA Rio. Why do they buy it? She has so many shortcomings!
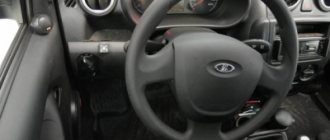
The interior of the Granta really does not look rich - simple instruments, fabric upholstery, hard plastic. But making this claim against an ultra-budget car doesn't make much sense. And the Granta’s interior even has something to praise for: the ergonomics in the given conditions turned out to be very good. But the fact that parts of the interior begin to rattle in the second year of the car’s life, and the door seals cannot cope with dust – these are areas that the manufacturer should work on. But will he do it?
Grante's visibility was inherited from the first Kalina - the power cage of the body, along with the location of the A and B pillars, remained the same. But the mirrors have become larger, and let these “mugs” whistle at speed, but as we find out later, the Grant pilot has no time to be distracted by them at this time. But the visibility through the side mirrors is simply excellent.
In the photo: Lada Granta sedan
In the liftback, the situation with visibility to the rear is a little worse - the wide rear pillars and the strong slope of the glass turn the view through the interior mirror almost into looking through an embrasure, but there are situations that are much worse - on some quite successful cars you can’t see a damn thing back at all. But in general, the Grant driver receives enough visual information for any body type. Thanks to the engineers who once worked on the driving position, the location of the pillars, the height of the window sill line, and everything else...
In the photo: Lada Granta liftback
One of the diseases of a manual transmission is that when driving too actively, the gears “die” and the lever simply stops locking in the selected position. As a rule, the first and second gears to give up under pressure from the “racers” are the first ones to give up. It is significant that this problem occurred even in the first generation of Kalina - there, when the “stirrer” was used too intensively, the synchronizers could not stand it. But it happens that the gears also suffer, literally falling apart.