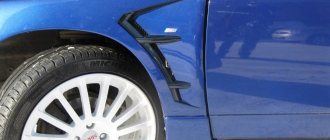
Sound insulation is an excellent tuning option that increases the acoustic comfort of your car. This is especially true for older cars, which for various reasons may not have sufficient sound insulation. For example, sound insulation of a VAZ 2110 car is often installed independently, since during the production of this model engineers did not pay enough attention to sound insulation of the interior.
The process is quite labor-intensive and takes at least one day, but the result will please any car owner. In this article we will look at such an action as soundproofing a VAZ 2110 with our own hands: we will describe recommendations for the selection of materials, tips for preparing for work, and the process of gluing the noise inside the cabin. Having completed work to improve the sound insulation of the car interior, you get both insulation from external sounds and improved sound quality of the acoustics in the cabin.
Materials used for car soundproofing
There are many options for materials used for sound insulation. You can make such material yourself, or you can use one or more of the ready-made solutions:
- Bitoplast is polyurethane foam impregnated with bitumen. Excellent sound absorption due to its porous structure. Today it is the most popular soundproofing material.
- Vibroplast is a bitumen-containing material covered with a layer of foil on both sides. Great for insulating hood, doors and trunk.
- Modelen is used in cases where other materials are not suitable. It consists of fabric impregnated with glue.
- Splen. Its main component is polyethylene foam. Unlike other materials, splen also has thermal insulation properties.
Combine materials depending on the installation location and what goals you are pursuing when gluing the interior. The first 2 options are the most optimal.
Selection of materials
In order for the sound insulation of a VAZ to be effective, it is necessary to select suitable high-quality materials. They are different: some are characterized by rigidity, others by increased ductility. The material should be selected depending on the location of application.
Vibroplast is a single-layer bitumen material trimmed with foil. This material will require approximately five sheets. The hood, roof, trunk and interior floors, doors, wheel arches, front panel are finished with vibroplast.
Bitoplast is similar to impregnated foam rubber. To completely soundproof a car, a couple of 10mm sheets will be enough. Bitoplast is also used as a cushioning material during interior assembly.
Splen has not only noise- but also heat-insulating properties. To soundproof a car you will need about six sheets of this material. Its cost is low, and any place can be treated with splen without thinking about saving.
Modelen is a fabric with a 2 mm layer of mounting adhesive. About 0.5 m2 of such material needs to be prepared. Modelen is suitable as a gasket if it is impossible to use bitoplast.
Preparatory stage. Disassembling the interior
In the process of answering the question of how to make sound insulation on a VAZ 2110 yourself, we will consider the preparatory stage. First of all, you need to drive the car into a dry, clean room, and after that you can start disassembling the interior:
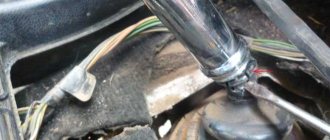
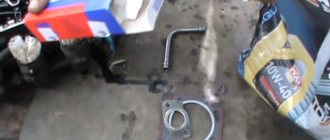
- Torpedo. Do-it-yourself soundproofing of a VAZ 2110 torpedo also begins with disassembly. After removal, you will need to dismantle all the wires, stove and other parts.
- Dashboard. Do-it-yourself soundproofing of a VAZ 2110 panel primarily involves eliminating squeaks at the joints. During preparation, you will have to remove all wires, relays and other elements.
- Doors are one of the main objects of sound insulation. Remove the upholstery and window lift mechanisms to allow access to the metal surface of the door.
If you want to perform sound insulation as efficiently as possible, then you will have to dismantle the interior to bare metal - in this case, nothing will interfere with you while doing the work.
Preparatory activities
Having disassembled the interior and purchased the required amount of materials, you can begin the initial stages of sound insulation.
- Carefully remove all dirt, dust, debris from the places where you plan to paste the sound insulation;
- In addition to the interior, you can install additional Shumka on the hood and trunk. To do this, the casing is removed and access to the metal is gained;
- Cleaned surfaces are treated with degreasers. White spirit is quite suitable. After processing, dry everything dry.
When working with substances such as white spirit, be sure to use a protective mask or respirator. Inhaling fumes can cause serious poisoning and more.
Pasting
- Work begins with gluing vibroplast. In order for the material to lie down and stick to the surface better, it should be heated. A hair dryer is best.
- After heating a sheet cut to the shape of a section of metal, apply it to the surface.
- Pay special attention to the front panel, behind which the engine is located. This is the source of the most noise. Therefore, start pasting from there.
- Also carefully treat the front and rear doors with vibroplast, removing the trim from them, and the area where the muffler passes.
- Now let's move on to isolon. Depending on what you are going to soundproof, you may need about 6 sheets. After all, you can treat with Shumka not only the bottom of the cabin, trunk, hood and doors, but also the niche for the spare wheel, wheel arches, trunk floor, and roof.
- Areas such as the roof, arches, doors, and trunk are covered with isolon without the obligatory use of vibroplast. Although if you are doing work for yourself and for the long term, a vibroplast will not hurt.
- In areas where isolon is glued to open areas of metal, and not on top of vibroplast, use polyurethane foam. It securely holds the material, plus provides additional noise-absorbing properties.
- If you are soundproofing doors, then first there is a layer of vibroplast, and then isolon. You can't do without a double layer here.
- When disassembling the doors, you will see holes in the ends of the door. They are the sources of dust and dirt that penetrates under the casing. Therefore, we recommend treating them with noise and closing them.
- Izolon should be cut to the shape of sections of the door and other surfaces. The material is glued on top of the vibroplast using masking tape.
- For the casing pistons, you will need to make slits in the insulator. Make sure the pins go all the way in, otherwise the insulation will hang loose.
Trunk insulation
Foam rubber
Foam rubber does not need to be glued everywhere as a third layer. There are some nuances here, which we will tell you about.
- First of all, we use foam rubber, not homemade bitoplast. His turn will come;
- Foam rubber will be needed to soundproof the spare wheel niche;
- Don’t forget to cut out a section in the foam rubber so that the material does not cover your car’s body number;
- The same material is perfect for ceiling noise;
- Bitoplast will also serve well for making ceiling noise, then the noise protection will be generally excellent;
- Bitoplast is recommended for doors. It protects against excess noise and provides better sound from your car's speaker system;
- Both materials are glued, that is, foam rubber and homemade bitoplast, using polyurethane foam or liquid nails. Choose the option that you like best.
When choosing liquid nails for soundproofing installation, make sure that this composition can be used in conditions of high humidity, cold, heat, etc.
Hood noise
Self-soundproofing is a labor-intensive process and quite complicated in places. It is not at all necessary to try to isolate everything at once. Take it step by step, step by step. You can start with the hood, trunk, wheel arches.
But if you start disassembling the interior, then it is better to carry out full-scale sound insulation right away, so that later you do not have to repeat the procedures for dismantling the panel, door panels, seats, ceiling lining, etc.
"Ten" is a fairly quiet and comfortable car. The reason lies in the fact that the VAZ-2110 is equipped with a body with good aerodynamics, and modern materials and designs are used in the interior. The standard sound-absorbing panel is also hidden under the hood - it isolates the shield from the engine compartment. And this is not all the standard sound insulation of the VAZ-2110.
But if the car has already managed to “run” several thousand kilometers, then the situation will be completely different. The dashboard squeaks begin to be heard, and it is worth noting that these sounds directly depend on the temperature. If at 20 degrees above zero squeaks are almost inaudible, then at -20 they can be heard from everywhere. In addition to the “moans” of plastic linings, covers, doors and roofs, high-frequency noises from the operation of the gearbox and engine are added.
In such a situation, the best solution is to soundproof the car. It is not difficult to complete - you only need special materials, tools and skillful hands.
Cleaning and degreasing surfaces
Any work related to gluing something requires cleanliness of the surfaces being glued. As a rule, the inside of already disassembled elements is very dusty and dirty. To clean metal and plastic surfaces, you need to perform a number of preparatory measures.
And first of all, you will need a high-pressure washer: carefully, without damaging anything, run a stream of water over all surfaces on which you plan to glue the materials. Next, you need to thoroughly dry all surfaces - there should be no moisture.
Thanks for subscribing!
The next thing is to degrease the surface. White Spirit copes with this task perfectly. The better you do at degreasing and cleaning surfaces, the less likely it is that you will need to repeat the procedure in the near future. Once again, make sure there is no moisture and proceed directly to gluing the interior with soundproofing materials.
Main stage: finishing the interior with insulation
Let's consider a process such as soundproofing a VAZ 2110 car with your own hands. Videos and photos, which are quite sufficient on the Internet, can help you a lot. But if you do not have the time and opportunity to study the topic, then use the following tips:
- The front and lower parts of the interior are glued with vibroplast. The material must be in contact with the surface at every point. For convenience, the vibroplast can be heated with a hairdryer - it will become more pliable. Also, no one forbids sticking more than one layer.
- Do-it-yourself soundproofing of VAZ 2110 doors involves sizing with bitoplast. Doors are the main source of noise, so the more accurately you cut the material, the better the result will be.
- Glue any material onto the internal parts of the plastic parts. It is important to take into account the final thickness so that there are no problems during assembly.
- You can apply other materials on top of the vibroplast - with combined use, the result will be noticeably better.
- After gluing, carefully cover all remaining open areas with foam.
Let's get started
After you have decided on the materials, you need to disassemble the interior of your car - remove the seats and all the interior trim, the front panel, as well as the standard sound insulation, if any.
In the photo we see the interior of the car without seats and floor mats.
When disassembling the interior, it is important not to confuse or lose the fastening parts; we recommend putting them in boxes or jars and labeling them, and gluing small fasteners with tape to the unscrewed part.
We begin pasting the interior from the ceiling and doors
- First, we glue vibroplast to the ceiling and doors, having previously cleaned and degreased them with white spirit. It is necessary to glue as quickly as possible, before the material cools down.
Attention: It is advisable to heat the vibroplast with a technical hair dryer or a regular heater with a fan, so that it sticks better and fits in shape.
- When installing, use a metal roller; if you don’t have one, use any round tool.
- Avoid air bubbles; condensation may subsequently accumulate in them, which will lead to corrosion of the body.
- Vibroplast is mounted on doors and ceilings in cross-section strips, which is stronger and more durable.
Attention: For ease of installation, it is recommended to roll the vibroplast into a roll and unfold it as it is glued.
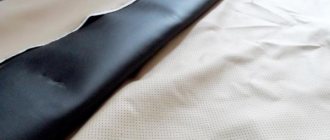
- We glue splen on top of the vibroplast on the ceiling.
Ceiling covered with vibroplast.
Sound insulation of VAZ 2110 doors from the inside using vibroplast.
We glue splen on top of the vibroplast.
Then we cut out and glue the vibroplast on the outside of the door.
Sound insulation with vibroplast outside.
Buy at least a dozen spare door pistons, they break easily, and the ceiling pistons (those at the back) need new ones, since they are disposable.
On top of the vibroplast there is splen again. When gluing doors, it is important to ensure that the insulating material does not interfere with the operation of mechanisms and locks.
Door covered with splen.
Start of work
The first step is to choose the material with which you will soundproof the VAZ-2110 with your own hands. The cheapest material will be foam rubber impregnated with rubber-bitumen mastic. But it will be much easier to buy ready-made materials, since there are a great many of them on the market. You will need:
- Vibroplast, which is a plastic material coated with foil. Capable of absorbing almost all metal vibration. It must be glued to all free metal surfaces. You can use analogues of this material.
- Splen can be used as a heat insulator. It is capable of not only retaining heat, but also absorbing excess noise. Splen must be glued to the vibroplast. It is advisable to stick it on the entire surface.
- Aluminum-based tape is necessary for gluing joints between materials.
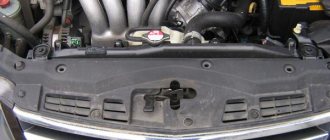
Hood insulation
Insulating the hood itself does not significantly reduce noise, and some car owners do not work on the hood at all. But together with the insulation of the motor shield, a significant reduction in noise is achieved. While insulating the hood as the easiest element to work with, it is easy to gain experience in handling sound-absorbing products.
The primary coating is a vibration damper of the Vizomat MP, Bimast Super brands, which have a foil-coated coating to reflect thermal radiation; a fairly high temperature regime is created under the hood of a running engine, so the vibration damper must be resistant to high temperatures. It is placed between the stiffening ribs on flat surfaces.
For the secondary layer , products coated with foil that reflects sound waves should be used. It is fixed over the entire surface of the hood, including the stiffening ribs.
For the third coating, a factory soundproofing layer is suitable.
Where materials need to be used
It should be taken into account that soundproofing of the VAZ-2110 is carried out with your own hands in several zones. And each of them has its own material. Try to use all materials according to the following recommendations:
- Vibroplast is necessary for gluing on the internal and external surfaces of doors. It also needs to be laid as the first layer on the surface of the roof, trunk door and hood. It is used for pasting the dashboard, interior and trunk floors, and the engine compartment panel.
- Splen based on sealant must be glued to the floor in the trunk and passenger compartment, as well as to the engine compartment panel.
- Adhesive-based splen must be used on the roof and inside the door.
- Bitoplast must be applied on the inside of the instrument panel, as well as on the door trim.
- Anti-squeak tape must be cut into strips and glued to the dashboard, door trim, and plastic elements in places where friction may occur.
- Aluminum tape is necessary to secure the splenite joints.
VAZ 2110 panel, removal and installation of dashboard, sound insulation of VAZ 2110 panel, Car blog
First of all, you need to disassemble the form into two parts. The stop we are going to install will be from the famous Hella brand. Let's try to make a copy of this stack using available materials. We need a blank, and we can stop at an ordinary piece of board. Then we take the flex with the petal disk and give the tree the shape of the desired stack, we will get a blank of their tree, which should exactly repeat the original lantern. But our blank will not have a tail through which the wiring goes.
Then we cover the blank with tape, and then attach it to the lower part of the wing. Then, using ordinary plasticine, you can ensure that the blank fits tightly to the mold and we obtain the necessary tightness.
After about half an hour, you can begin to ferment the mold with gelcoat. Gelcoat is a special paint made from polyester components. The paint serves as a protective and at the same time decorative layer for products made from fiberglass. It is interesting that, if desired, you can select any colors and shades from dealers, thanks to tinting. Before applying the paint, it is necessary to mix the substance with the fixative. Details of the preparation of the gelcoat can be found in the attached instructions.
If you have prepared the paint, apply it to both halves with a soft brush. Now you need to wait about an hour and a half until the substance dries; if it doesn’t stick, then everything is in order.
Then we need to prepare a special glue, which will contain a resin and a fixative. We will use polyester resin, which serves as a binder in the manufacture of fiberglass parts. It is used to impregnate the material, after which the fiberglass becomes strong, rigid and hard. Norpol Peroxide N1 will serve as a fixative. It is added to all chemical processes associated with the manufacture of fiberglass.
When the glue is ready, apply it to the surface of the parts, and put glass mat on top. A little more about this material. It is often confused with fiberglass. The main difference between fiberglass is fabric, which is woven from threads of glass. Fiberglass is also a fabric, but it is non-woven, and made by rolling glass threads, they are finely chopped and randomly scattered. In our particular case, we will use material grade M5 600 1250 1B.
The material, under the influence of the glue, will quickly begin to get wet, and all we have to do is expel small air bubbles from under the glass mat. This can be done using the same brush.
Now you need to wait until the glue begins to harden. This usually takes from half an hour to an hour, and then we proceed to the next stage of work.
We will need a regular retractable stationery knife with replaceable blades. With this sharp knife, we begin to cut off the excess and unnecessary parts of the fiberglass that stick out or protrude. If you see that fibers are still trailing behind the knife blade, it means that everything has not yet completely hardened and you need to wait a little.
When everything unnecessary has been cut off, we connect both halves of the future element. On both parts we pass with a brush along the perimeter to be glued, and then apply filler. It is more convenient to do this using a plastic bag, after first cutting off a corner from it and placing filler inside the bag. We apply it to the border between the product and the form. Then, turning the upper part of the mold over, cover it with the lower part. All that remains is to insert the bolts and tighten the two halves tightly.
Now you need to split the mold into two parts, after unscrewing all the bolts. After that, pry it up with a screwdriver and disconnect it. Using the same screwdriver, pry up the edge of the wing and remove it from the second half of the mold. At this point we can consider that the product is ready. Now all that remains is to apply putty to fit the real stop.
Before you is another modification, this time there are dozens of taillights. Look how they changed after LEDs were installed in them!
Materials: https://vazikov.ru/vaz-2110-2111-2112/ustanavlivaem-stopik-na-desjatku.html
How much material will be needed
To soundproof the VAZ-2110 interior, trunk and hood, the following amount of materials will be required:
- Vibroplast no less than 32 sheets.
- Splenya 4mm thick, glue-based, at least 7 sheets.
- Splenya 4 mm with a base of sealant of at least 11 sheets.
- One roll of bitoplast.
- One roll of anti-squeak tape.
- At least two rolls of aluminum tape.
The maximum amount of vibroplast required for high-quality insulation of a car can be 39 sheets. Splended with glue and sealant - 14 and 8 sheets, respectively. It’s better to take extra soundproofing materials so as not to interrupt your work.
Sound insulation of VAZ 2110,2111,2112 interior
Soundproofing the interior of a VAZ 2110,2112,2111 with your own hands is a broad question.
The article describes how to soundproof the floor, doors, ceiling and trunk. The process itself takes no more than three weeks (if you work independently). To get started, you need to purchase materials and prepare tools. ATTENTION! Now you can buy a completely new radio with a Pioneer AVH-3100DVD monitor for only 2990 rubles! Don't believe me? Then follow the link and see for yourself! Read more"
Components for soundproofing the interior of the VAZ 2110:
- solvent – degreasing liquid: White Spirit;
- sound-proofing materials: vibration-, sound-absorbing; heat-, sound-proof and anti-squeak;
- in the absence of vibration-absorbing material, mastic (liquid metal or vibroplast) is applied using a spatula;
- bolts and screws of longer sizes (after sound insulation the surface rises);
- clips for attaching the ceiling area (the old ones are unusable after removal);
- industrial hair dryer (heats the material and attaches it to the metal in this way);
- a metal roller to eliminate bubbles (condensation may form in the cavity, and over time, corrosion).
Tools for work
It is imperative to clean all surfaces to be treated and wash them thoroughly. The standard sound insulation of the VAZ-2110 must be removed from everywhere. You need to acquire the following tool:
- Sharp scissors.
- Convenient and sharp knife.
- Construction hairdryer.
- With a tape measure.
- Roller for rolling (preferably made of metal).
- Marker.
- Solvent, white spirit, or acetone.
- Clean rags.
All work will take no more than three days if done independently.
Preparation for work
Before starting work, it is necessary to completely disassemble the interior. All trim, front panel, and seats must be removed. If there is standard sound insulation on the VAZ-2110, it is necessary to completely remove it and get rid of the residue using a sharp knife and acetone. When disassembling, do not think about losing the parts that secure all the elements.
Label the nuts and bolts to ensure they are in place during assembly. Small elements must be placed in a bag and glued with tape to the part to which they belong. Only after careful preparation can you begin to apply insulating materials. Be sure to vacuum all metal elements and treat them with a solvent so that the insulating material adheres better.
Interior and trunk wrapping
Now you need to soundproof the car floor. For this purpose, vibroplast and splen are used. Vibroplast is laid as the first layer; it must be applied to the maximum area. Cover the material as best as possible so that it adheres to the metal surface. Splen is applied as the second layer. It also needs to be glued to the maximum area of the bottom of the cabin.
Recently, this type of sound insulation has become popular, such as applying a rubber-bitumen mixture to the outside of the car’s bottom. This allows you to reduce the level of vibration coming from the wheels and road surface. But it will be much more effective if you simultaneously treat the inner surface of the bottom. Everything inside the trunk needs to be carefully sealed with vibroplast. It will be a little more difficult here, since there is a niche for the spare wheel, protrusions for the shock absorber struts, and sometimes the edges of the screws come out.
Shutdown
The last things you need to cover are the trunk lid, hood, and dashboard elements. Try to apply insulating material to all elements of the dashboard that may be sources of squeaks and extraneous noise. After gluing is completed, you need to assemble the entire interior, install the instrument panel, door trim, lay the carpet and install the seats.
The better the sound insulation of the car floor, the less vibration will be transmitted to the interior. After all the work carried out, comfort will be much higher, squeaks will disappear, and even the engine will start to run quieter (it feels like).
| The main noise in the cabin comes from the road, so soundproofing the car floor is one of the main stages of an integrated approach to combating noise and vibration. |
Stories from our readers
“Fucking basin. "
Hi all! My name is Mikhail, now I’ll tell you a story about how I managed to exchange my two-wheeler for a 2010 Camry. It all started with the fact that I began to be wildly irritated by the breakdowns of the two-wheeler, it seemed like nothing serious was broken, but damn it, there were so many little things that really started to irritate me. This is where the idea arose that it was time to change the car to a foreign car. The choice fell on the melting Camry of the tenth years.
Yes, I had matured morally, but financially I just couldn’t handle it. I’ll say right away that I am against loans and taking a car, especially not a new one, on credit is unreasonable. My salary is 24k a month, so collecting 600-700 thousand is almost impossible for me. I started looking for different ways to make money on the Internet. You can’t imagine how many scams there are, what I haven’t tried: sports betting, network marketing, and even the volcano casino, where I successfully lost about 10 thousand ((The only direction in which it seemed to me that I could make money was currency trading on the stock exchange, they call it Forex. But when I started delving into it, I realized that it was very difficult for me. I continued to dig further and came across binary options. The essence is the same as in Forex, but it’s much easier to understand. I started reading forums, studying trading strategies. I tried it on a demo account, then opened a real account. To be honest, I didn’t manage to start earning money right away, until I understood all the mechanics of options, I lost about 3,000 rubles, but as it turned out, it was a precious experience. Now I earn 5-7 thousand rubles a day. I managed to get the car buy after half a year, but in my opinion this is a good result, and it’s not about the car, my life has changed, I naturally quit my job, I have more free time for myself and my family. You’ll laugh, but I work directly on the phone)) If If you want to change your life like me, then here’s what I advise you to do right now: 1. Register on the site 2. Practice on a Demo account (it’s free). 3. As soon as you get something on the Demo account, top up your REAL ACCOUNT and go to REAL MONEY! I also advise you to download the application to your phone, it’s much more convenient to work from your phone. Download here.