Why do you need to change the faucet?
In Niva cars, as in classic Zhiguli models, the heating intensity of the interior is controlled using a special tap. It is installed on the coolant supply pipe leading to the heater radiator. The stove tap is made in such a way as to open and shut off the flow in just half a turn of the rod. Thanks to this, the faucet can be controlled using a rod attached to a lever on the center console.
In reality, no one uses the heater valve as a regulator; more often it is used to cut off the heater from the Niva engine in the summer. This is where the following problems arise:
If you do not shut off the fluid flow in the summer, then the interior of the VAZ-21213 will become very hot. In the Chevrolet Niva, the faucet is missing as a weak link, and the stove is constantly heating up. The design of a regular Niva is not designed for this and the problem needs to be solved somehow.
The situation is the same in the other two cases, and due to a leak, harmful antifreeze vapors will accumulate inside the car. Since the design of the heater valve does not provide for its repair, the part only needs to be replaced.
Modifying the stove: instructions
In order for the modified unit to work more efficiently, it is necessary to install high-quality spare parts on it. This is done as follows:
- A seat is cut out for a new heater from a VAZ-2108. Do this carefully so that it falls through or is higher than the air ducts. In this case, the engine should be positioned so that it does not rest against the hood, that is, as low as possible. Otherwise, its fan will fail very quickly.
- Smoothly remove power from the motor through the outlet hole in the air duct.
- Seal the heater mounting points with sealant. Do not miss any fasteners, otherwise power to the engine will be disrupted during engine operation due to vibration.
- Cut two stainless steel plates to fit the dimensions of the nozzle and the upper opening. Measure several times before cutting the steel.
- Remove the valve (damper) using a wrench and a screwdriver. Do the job carefully so you don't have to buy a new stove.
- Finish the job by installing new ducts and assembling the system.
You should not install an additional heating unit on your Niva; it will not provide much heat, but will increase the load on the engine. After completing installation, it is recommended to check the part in several modes. If there is no vibration or noise, then you can use the updated stove without restrictions.
What to put in place
Before rushing to the store for a new part, you should first disassemble the assembly and make sure that the faucet is to blame for all the troubles. It often happens that the seal between it and the heater radiator, where the rubber gaskets are located, leaks. They become limp and begin to leak coolant. The cause of jamming may be the rod attached to the element.
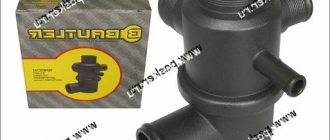
Faucets made of metal or ceramic are available for sale. In terms of price, they are approximately the same; in terms of reliability, motorists praise ceramic ones more. In addition, you need to purchase 2 new gaskets and high-temperature sealant (usually red).
For reliability, some VAZ-21213 owners prefer to install a regular plumbing faucet with a diameter of 15 mm (DN 15), connecting it to the stove with flexible pipes. The option is reliable, since plumbing fittings are more durable than car parts. But then it’s better to forget about convenient controls, because every time you have to dive under the glove box on the front passenger side to open or close the valve. It is also installed on the engine side, under the hood, resulting in the same “conveniences”.
Preparatory stage
To change the heater tap, you need to perform 2 preliminary operations: partially drain the coolant and remove the glove box.
To carry out all the work, you do not need to have any special tools; a regular set of keys, screwdrivers and pliers is enough.
Antifreeze is drained in the following sequence:
The glove box is removed by unscrewing several screws holding it in place. Some of them are located immediately under the glove compartment lid, the other part is in the depths of the box.
Procedure for installing a new part
Due to the fact that the heater radiator is located above the engine, part of the coolant does not flow out of it when it is emptied. And even more so it is full when the old tap is stuck closed. So before disassembling the unit, you need to stock up on a plastic bag without holes: it is convenient to place it in places with limited access.
Disassembly and removal of the tap are carried out in the following order:
The rod mount and pipe must be installed on the new element using fresh gaskets coated with sealant. Then the crane is mounted in place and the unit is reassembled.
Taking this opportunity, it wouldn’t hurt to check the tightness of the connection of the second pipe to the radiator and, if necessary, change the gaskets there. It is also recommended to install new clamps on the hoses.
To avoid air locks when filling the system with liquid, you need to fill it slowly until antifreeze flows from the carburetor heating pipe. In this case, the heater valve must be open.
The heater valve is removed to replace it when it fails or leaks, as evidenced by traces of antifreeze under the front passenger seat.
Below is shown a method for replacing the heater valve without removing the heater core.
(Access to it has some difficulties. In addition, if the car is equipped with a heater radiator with an aluminum core and plastic tanks, when removing the tap, the captive nuts securing the tap usually fall out of their sockets on the tank. Support them when removing the tap and install them in place if they still fell out, it is possible, although somewhat difficult. Therefore, replacing the heater tap can also be carried out on a removed radiator. see here)
We drain the liquid from the cooling system with the heater tap open (see here).
For clarity, operations carried out in the engine compartment are shown with the engine removed.
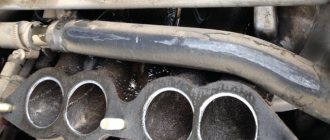
In the engine compartment on the front panel, using pliers, loosen the clamp securing the hose to the lower radiator pipe...
...and remove the hose from the pipe (the hose from the upper pipe of the heater radiator was removed when dismantling the engine).
Using the “7” head, unscrew the two self-tapping screws securing the seal to the front panel.
. and remove the seal.
In the cabin we remove the storage shelf (see here).
Using a “7” wrench, loosen the bolt securing the crane drive rod clamping bracket...
...and remove the rod from the crane lever.
The heater valve is attached to the radiator mod. 2105 (aluminium) with two bolts, to the radiator mod. 2101 (brass) - two nuts.
Using a 10" socket (1/4 inch square) with a cardan joint, unscrew the two bolts securing the faucet to the radiator.
Remove the tap and pipe.
Using a 10mm wrench, unscrew the two bolts securing the pipe to the tap.
We remove the pipe.
...and gaskets.
We install the tap in the reverse order.
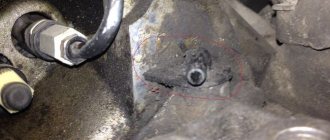
The lower nut securing the faucet to the aluminum radiator...
...during disassembly, it may fall out of the radiator tank socket.
When installing the nut in place, secure it in the socket with plasticine.
Video
»
Today the topic of myrrh-streaming is trending. Poklonskaya’s bust of the bloody Nicholas II was myrrh-streaming, a friend on LiveJournal made a post about the myrrh-streaming of Chinese faucets and collected several hundred comments, and I decided to pick up the baton, because... Just this week, the phenomenon of myrrh-streaming of the heater faucet on the Niva forced me to spend three hours replacing it. A short introduction. Everyone knows about the problem with heater taps on Zhiguli cars and in the fuss they try not to mention this topic. No matter how you try it, these faucets don’t last long. So on April 18, 2020, five days before the two-year anniversary of the car, this ill-fated faucet began to flow like a stream at the most inopportune moment. The interior of the car filled with steam and I had to urgently solve this problem. The problem was solved by closing it (it only began to drip), purchasing a new faucet from Chance-Auto, searching for and purchasing original factory antifreeze (which is not easy), and then replacing the unit a few days later.
For what reasons is the Chevrolet Niva crane replaced?
In a car, the heating valve is a maintenance-free unit, so it is necessary to change it for both technical and financial reasons. If the faucet breaks down, it is only thrown away, and the causes of the malfunction may be as follows:
- Violation of tightness. When the elements rub, they wear out and therefore no longer fit together as they should. As a result, various smudges appear, which are very noticeable.
- Internal oxidation of elements. In summer, the stove tap is closed for a long time, so during this period its elements oxidize and stick to each other. Consequently, it is almost impossible to open the tap without breaking it.
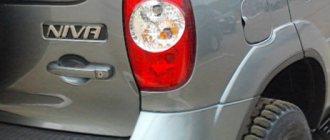
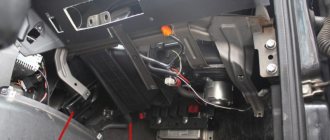
On a Chevrolet Niva, the heating valve for the heater is located in the wall of the engine compartment, so when you open the hood of the car, you will see a pipe that goes to the valve adapters from the radiator. To get to it, you need to dismantle the dashboard in the cabin on the passenger side.
Article on the topic: Do-it-yourself cylinder head repair
The stove valve is mounted in a special niche in the engine compartment
If the faucet has been replaced, then it is better to install new pipes along with it, because during operation they have probably already lost their elasticity.
The principle of installing the stove tap
Before replacing the heating tap on the stove, you need to perform preliminary work:
- remove the glove box;
- partially drain the coolant.
Antifreeze is drained in this way:
- We carry out all work only on a cooled motor, so as not to accidentally get burned. On the left side under the motor we place a basin or any other plastic container.
To dismantle the stove faucet, it is necessary to drain the antifreeze
- If possible, open the tap as far as possible.
In order to drain the antifreeze, you must fully open the stove valve.
- We prepare a meter-long hose, use a key set to “13” to unscrew the plug on the cylinder block. We substitute the hose and insert one end into the basin.
To drain the antifreeze, you need to unscrew the plug on the cylinder block.
- Lightly hold the hose with your hand and little by little open the cap located on the expansion tank. We do this work carefully, as the stream of antifreeze will gradually increase.
In order to remove the heater valve, it is necessary to completely drain the antifreeze.
- Loosen the clamp on the carburetor heating pipe and remove this part from the fitting.
- After all the coolant has flowed out, screw the plug into the block and tighten it well.
The glove box can be removed by unscrewing all the screws that hold it in place. Some of them are located deep in the part, others - under the tank lid.