Instructions for replacing the steering column
The steering system of a car must be treated very responsibly, since it is primarily responsible for the safety of the car when driving. If control problems arise, they must be corrected immediately. One of the breakdowns in this system is the failure of the steering column. The procedure for replacing it is quite problematic, but if you have the right tool, you can get by with minor sacrifices. So, we will need:
- Head for 17 and 30
- Long and powerful crank
- Mount
- Hammer
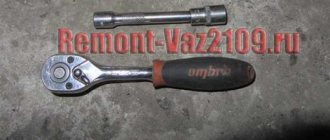
- Ratchet handle
- Regular open-end wrench 17
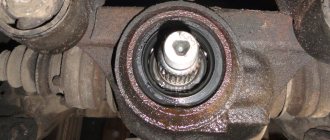
So, the steering mechanism (column) is located on the left side of the space under the hood of the VAZ 2106, it turns out in the very bottom left corner
It is worth noting that before you start replacing it, the first thing you need to do is remove the steering shaft. When everything is ready, you can start repairing
The first step is to unscrew the lower nut securing the column to the steering rods. To do this you will need a fairly long lever, which can be made from two powerful cranks:
When everything is ready, you can start repairing. The first step is to unscrew the lower nut securing the column to the steering rods. To do this you will need a fairly long lever, which can be made from two powerful cranks:
To unscrew it, you will need a very strong force; I pressed my feet from below to break the connection:
In general, it is advisable not to unscrew this nut, since then you will have to knock the column off the splines, which is not a very pleasant task. It is more convenient to simply disconnect the column along with the steering tips. But since I completely disassembled the car, this was not important for me.
After the nut is unscrewed or the ends are disconnected, you can begin to unscrew the bolts securing the steering column to the side member. It is secured with three bolts. To get to them, it is better to remove the front left wheel, it will be more convenient.
We take the head with a 17mm knob and, holding it with an open-end wrench, unscrew the bolts one by one:
Holding from the inside is not very convenient, since there is very little space there; you have to insert the key from the end, especially for the lower nut on one side:
After the bolts have moved out of place, you can use a ratchet, as with it you can do everything much faster.
After the bolts are unscrewed, you can safely move the column to the side:
If the tips are disconnected, the column can be freely removed without any problems. If you unscrewed the largest nut, you will have to knock it off the splines, which brings quite a lot of trouble. The price of a new steering column for a VAZ 2106 and other classic models. If replacement is necessary, we buy a new mechanism and install it in reverse order.
Sources
- https://spike.su/index.php/Steering-rack-VAZ-2101-2106-2107.html
- https://remontysvoimirukami.ru/remont-kolonok-svoimi-rukami/remont-rulevoj-kolonki-vaz-2101-svoimi-rukami.html
Replacing the steering column of a VAZ 2107
Replacing a steering column is a rather difficult task, but it can be done independently if you have some experience in car repair. You will need the following tools:
- Wrenches 17 (socket and open-end).
- Socket heads for 17 and 30.
- Handle with ratchet.
- Mount.
- Hammer.
- Collar.
The column is removed in the following order:
- Disconnect the battery.
- Remove the steering wheel.
- Remove the steering shaft housing.
- Remove the wire block from the ignition switch.
- Remove the ignition switch.
- Remove the steering column switches.
- Remove the steering shaft clamped in the column.
- Using a 30mm socket and a powerful wrench, unscrew the steering column mounting nut. The tightening force here is significant, so the knob must be a fairly long lever. If you can’t unscrew it, you can lengthen the knob by putting a piece of pipe on it.
- Unscrew the 3 bolts securing the column to the body. The procedure is not easy - the distance between the parts and the body is too small, the bolts are difficult to keep from turning. A handle with a ratchet will come in handy here, which will speed up the process.
- Remove the column from the shaft. To do this, you need to knock the column off the tie rod splines using a pry bar. This must be done in jerks, resting your feet on the body.
- Unscrew and remove the shaft seal installed at the bottom of the column.
After dismantling the old column, it is necessary to clean the seat from dirt. Before installing a new column, you should check the condition of its hinge joints and needle bearings. If everything is in order, you can begin installation, which is done in the reverse order of removal.
When installing a new VAZ 2107 steering column, you must pay special attention to ensure that all fastening bolts and nuts are well tightened. Considering how important this unit is for driving a car, play, and even more so, slippage of the steering column splines can lead to tragic consequences.
When installing the steering wheel, pay attention to the position of its spokes.
After completing the installation of parts and connecting the wire block to the ignition switch, you can connect the battery. Column replacement is complete.
We're sorry, but the requests coming from your IP address appear to be automated. For this reason, we are forced to temporarily block access to the site.
To continue, please enter the characters from the image in the input field and click "Submit".
Cookies are disabled in your browser
. We will not be able to remember you and correctly identify you in the future. To enable cookies, follow the tips on this page.
Installing a hydraulic booster on a VAZ 2107
You should be very careful when choosing a power steering configuration. Thus, car enthusiasts on forums often write that factory hydraulic boosters from Lada Priora or Niva often jam, and during operation they require increased attention from the driver.
Therefore, it is more advisable not to chase new products from the domestic automobile industry, but to install standard power steering from the VAZ 2107. And since the “seven” is a rear-wheel drive car, the front suspension will use a mechanism with two pairs of transverse link elements at once. The entire steering system on the VAZ 2107, without equipping it with a hydraulic booster, consists of the following components:
- steering gear;
- three rods with steering tips;
- pendulum;
- swivel axles with rods.
Accordingly, in order to install power steering into this harmonious system, some modifications and upgrades will be required. The new power steering kit for the VAZ 2107 must include the following parts (you need to check their availability before purchasing):
- Hydraulic pump complete with pulley.
- Oil tank.
- Gear mechanism.
- Hydraulic cylinder.
- High pressure hose kit.
To install the power steering on the “seven” yourself, you may need a set of open-end wrenches and removable devices, however, without extensive experience working with car structures, it is not recommended to perform this work.
All elements must be present during installation
Installation procedure for power steering
Traditionally, specialists in auto repair shops install a hydraulic power steering wheel according to the following scheme:
- The car is securely fixed on a lift or on a pit.
- The front wheels are removed, as they make access to the steering rack difficult.
- Using special removable tools, the rod ends are disconnected from the bipod of the steering rack. In some cases, it will be necessary to use lubricant to separate rusted parts from each other.
- From the interior of the “Seven”, work is being carried out to unscrew the spline joints and free the shaft on which the steering wheel sits.
- The bolts securing the steering gear to the spar are removed.
- A new gear mechanism is installed on the vacant landing site, and a hydraulic cylinder is immediately attached.
- In the engine compartment, a special bracket is attached to the surface of the engine cylinder block.
- A hydraulic pump is fixed to the bracket, through the pulley of which the crankshaft belt drive is tensioned.
- Air and oil hoses are connected to the connectors and holes.
- The required amount of oil is poured into the tank (no more than 1.8 liters).
After completing all of the above work, it will be necessary to bleed the hydraulic system and remove any air pockets from it. Pumping is performed as follows:
- Turn the steering wheel sharply all the way, first in one direction, then in the other.
- Perform turning inside out several times.
- Start the power unit.
- Almost immediately after turning on the engine, the force on the steering wheel will be significantly reduced. There should be no leaks in the hydraulic system.
Video: installation process
The procedure will correct the position of the wheels and make the ride smoother and more even.
Replacing the steering gearbox on a VAZ 2104, VAZ 2105, VAZ 2107
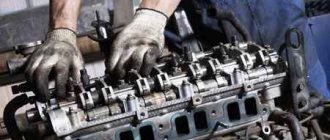
Welcome! Steering gear - it is also popularly called the steering column, thanks to it the wheels of the car rotate, it necessarily consists of a housing and a shaft that comes from it, by the way, depending on the length and thickness of this shaft, as well as depending on the size the parts themselves (For example, from the worm itself, which is located in the gearbox housing) which are located in the gearbox housing, the steering wheel can turn quite easier if all the parts have large shapes (the larger and longer they are, the easier it will be for the car’s steering wheel to rotate), the whole point is that the gearbox facilitates the rotation of the steering wheel and transmits all the torque to turn the wheels of the car, but it, like any other part, wears out over time and mainly after wear it begins to leak, especially if you do not add oil to the gearbox, it becomes so over time It’s hard to turn the steering wheel, this is especially noticeable when driving not at too high a speed, so the gearbox must be repaired (If it can still be repaired) or, if possible, replaced as soon as possible.
Note! In order to change the steering gearbox in a car, you will need tools, namely: A basic set of wrenches, as well as all sorts of other types of wrenches, in addition, we recommend that you use socket heads and a wrench, since it is not always convenient to unscrew the nuts using a wrench key, in addition to this (This no longer applies to tools), you will also need to take an assistant with you, because you will have to carry out this operation together, as it is more convenient!
Where is the steering gear located? It is located in the engine compartment and in the lower part of the car, because of this it is not very convenient to remove it from above, so for such work you need a second person who will take the gearbox itself when you unscrew all the nuts that secure it.
Note! If you want to see the gearbox itself, that is, where it is located, then open the hood of the car and look where on the body (Not on the engine) on the driver’s side, you have a gearbox, which for clarity was shown with a red arrow in the photo below:
Budgetary, but unique improvement of the steering control of the VAZ-2107
Introduction
The VAZ-2107, to which thousands of compatriots are accustomed, is inferior in several respects to its foreign counterparts, which is why motorists who want to improve the characteristics of their own car do their own tuning of the VAZ-2107 steering. A thoughtful and correct tuning solution can be considered the installation of a hydraulic booster or electric power steering. Thanks to competent modernization, a unit will appear in the car, through which additional force is created on the wheels when entering a turn. The improvements made will bring domestic cars closer to the class of more expensive foreign cars.
The structure of the steering rack and mechanism of the VAZ 2107
Steering tuning
Tuning the VAZ-2107 steering can begin with a well-founded decision to replace the factory steering wheel with a sportier device with a diameter of 320 mm. Such a unit will give the car owner many advantages: firstly, he will be able to park with greater maneuverability. When upgrading the steering wheel, do not forget about installing a safety glass.
Those motorists who prefer sports tuning (low-number rack) should be prepared to pay twice as much money for the unit than for a simple standard device. However, after installation, the car will be able to turn the wheels in just two steering turns.
The third step to improve the car could be adjusting the camber and toe. Experts who have been working with different VAZ models for many years increase toe-in and negative camber on the front axle
At the same time, it is imperative to pay attention to the toe-in of the rear wheelbase, which should, on the contrary, decrease
Installing power steering
If a motorist wants to install power steering on a VAZ-2107 with his own hands, which the manufacturer did not consider necessary to install in one of the most budget cars in the whole world, he can take one of two possible paths. Firstly, you can select the optimal steering rack that has power steering and then decide on its further location in the car. True, such an action will require enormous labor and money. Secondly, which is more expedient, you can buy a ready-made kit at an auto parts store that allows you to perform all possible most useful manipulations on the stationary steering rack.
The purchased power steering for a VAZ-2107 will consist of many parts: a pump, a pulley, a steering gear, a hydraulic cylinder, an expansion tank and a hose system.
To install power steering on a VAZ-2107, you need to start with a pump, through which pumping is carried out and a certain pressure is created in the unit. This pump must be placed on the cylinder block, since it will operate due to a belt drive. The next step is to determine where to install the crankshaft pulley. Then the steering gear is replaced. The car owner should check the size of the purchased device in advance, since it will most likely differ from the factory analogue, which may require modification of the installation location of the device.
When installing power steering in your car, you should pay close attention to the hydraulic cylinder, which should be located in the car according to the instructions. Further modernization consists of the location of the expansion tank and the sequential connection of a set of parts with high-pressure hoses. The installed reservoir must be equipped with a special fluid intended directly for the power steering. As a result of the manipulation, it is worth pumping the system.
Signs that repairs are needed
Repair of the Gazelle steering gear
In any car, the steering parts are subject to the greatest degree of wear, since they bear heavy loads when driving on uneven roads, cornering, and sudden braking. Therefore, the Gazelle steering gear often fails, as a result of which it is urgently adjusted. The list of signs of malfunction of the unit in question usually includes:
- Vibration or knocking in the device transmitted through the steering wheel;
- Having difficulty turning the steering wheel;
- Presence of play in the gearbox;
- Oil leaks in the mechanism.
If one or several signs appear, immediate adjustment of the steering gear is required, which will allow timely elimination of malfunctions in the operation of the device and reduce the risk of failure of other components of the vehicle.
Gazelle steering gear
Replacing the timing chain on a VAZ 2106
- Remove the air filter housing from the carburetor.
Unscrew 3 nuts with a 10 wrench, 4 nuts with an 8 wrench
All actions must be performed carefully so that nothing falls on the carburetor. If this is neglected, it will be necessary to remove this unit, possibly the intake manifold.
- Remove the distributor cap and remove the pipe used to supply fuel.
- Using a “10” wrench, remove the 8 nuts securing the valve cover and remove the washers with plates.
- Disconnect the choke cable and throttle valve drive.
- Remove the valve cover with gasket (ideally it is better to replace it).
- Remove the protection from below, drain the antifreeze into the container that was prepared initially.
- Using a wrench set to “19”, loosen the generator mounting nut.
- Loosen the clamp of the lower water pump pipe and remove it.
- Turn off the power to the fan, as well as the power to the temperature sensor on the radiator.
- Remove the radiator with pipes and thermostat.
- Loosen the generator chain tensioner nut. Use a pry bar to move it forward.
- Disconnect the VAZ 2106 alternator belt.
- Using the “36” key, turn the crankshaft by the pulley until the marks of the cover and pulley, the sprocket and the casting in the camshaft bed coincide.
Removing the steering wheel.
Probably one of the most significant elements in the steering circuit is the steering wheel. The steering wheel is usually removed to replace the shaft and contact ring of the horn switch.
Next, we will tell you how to remove the steering wheel and provide explanations with pictures. So, the tools you will need are a 24mm socket with an extension and a screwdriver. Before starting work, set the front wheels straight, and do not change position until the steering wheel is in its original place.
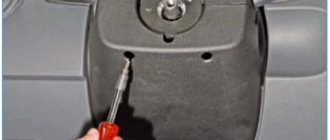
Pry up the decorative trim on the horn switch with your hand.
Take it off
I would like to draw your attention to the fact that when removing the lining you should be careful not to break it
The steering wheel hub and steering shaft should be marked so that their relative position can be determined in the future. The exception would be the case of a complete replacement of the steering wheel.
Attach the socket with extension and unscrew the steering wheel fastening nut
Disconnect the electrical wire to avoid damaging the steering wheel when removing it. Using a sharp blow from bottom to top, remove the steering wheel from the splines.
Unscrew the mounting screws and remove the horn contact ring.
Some batches of cars were produced with slight differences, such as a double cavity on the steering wheel hub, and a double spline at the upper end of the shaft. All this is to place the steering wheel in a strictly defined position.
After the steering wheel has been installed in place, you must ensure that it is in the correct position on the shaft. When the car is moving in a straight line, the steering arms must be in a strictly horizontal position. This is necessary for clear automatic switching off of the direction indicator.
When finally installing the steering wheel, tighten the steering wheel mounting nut in this position.
Hello, in this article you will learn how to replace the steering wheel on VAZ 2101, 2102, 2103, 2104, 2105, 2106, 2107 cars. Of course, removing the steering wheel is not a common operation, but it still happens that you have to remove the steering wheel to restore the audio signal wiring , or to replace the old steering wheel with a new one when it is very worn out, although now the steering wheel is more often changed to a “sports” one. To replace the steering wheel you will need a 24mm socket and a slotted screwdriver. Before you start replacing the steering wheel, you need to align the wheels and steering wheel straight, this is necessary so that when installing the steering wheel in place, you do not lose its normal position. Now take a slotted screwdriver and remove the plug in the center of the steering wheel
After this, use a 24mm socket to unscrew the nut securing the steering wheel to the steering shaft
But you shouldn’t completely unscrew the nut right away; first knock the steering wheel off the steering shaft, and then unscrew the nut completely, otherwise you can get injured when knocking the steering wheel out
Installing the steering wheel is done in the reverse order, the main thing is to make sure that the protrusions on the steering shaft lining align with the slots on the steering wheel
Avtochanel
From this article you will learn how to remove the steering wheel on a VAZ 2101-2107 car, what tools are required for this, and most importantly, how to avoid injury while carrying out this work.
Removing and installing the steering wheel can be done for several reasons:
- replacing a conventional steering wheel with a new or sports version
- After adjusting the wheel alignment angles (wheel alignment), you need to set the steering wheel to the correct position
- it is necessary to remove the steering wheel to gain access to replacing other parts, for example, steering column switches
The procedure for removing the steering wheel:
- Disconnect the negative terminal of the battery so that when working with the steering wheel you do not accidentally turn on the sound signal.
- Use a screwdriver to remove the plug in the center of the steering wheel. (Fig. 1)
- Using a 24mm socket wrench, unscrew the steering wheel mounting nut. (Fig. 2)
- Remove the steering wheel. (Fig. 3)
Removal and installation of the steering mechanism of the VAZ 2106 Zhiguli
- Repair manuals
- Repair manual for VAZ 2106 (Zhiguli) 1976-2005.
- Removing and installing the steering mechanism
Repairing auto parts yourself is a responsible task that should be taken as seriously as possible. Sometimes a faulty spare part takes the driver by surprise, forcing him to spend a lot of time and money searching for a good service station, but there is an alternative solution to the problem; this requires a small amount of knowledge and a set of tools.
When repairing the removal and installation of the VAZ 2106 Zhiguli steering mechanism, you need to be extremely careful and not neglect the little things. To get acquainted with the issue, car enthusiasts often use various Internet portals dedicated to auto parts. Some of them use narrowly focused forums. But, as a rule, only generalized information is provided there, which is known initially. Where can you find a reliable source that offers really useful things? Our portal is open for this 24 hours a day. Online mode allows us to help clients at any time convenient for them. Moreover, a mobile version has been developed that is available to everyone.
A detailed description of such a unit as the removal and installation of the VAZ 2106 Zhiguli steering mechanism has a good structure with thematic headings. In addition, there is always the opportunity to familiarize yourself with the intricacies of installation. There are often situations when a driver is confident in his abilities, but when he gets down to work, questions begin to arise. Thanks to our portal, such moments can be easily avoided. The site is a database that is updated regularly. By using it as a support during repair work, the car enthusiast receives a serious advantage. Each of the articles has reliable support, tested in practice.
In addition to the repair manual, the owner of a personal car will be able to prevent a lot of breakdowns that occur due to the human factor, thanks to the information located on the site. Users are presented with a lot of useful recommendations for proper operation, which will help significantly extend the life of the unit and avoid many negative consequences.
Online support is an excellent and most convenient way to obtain the necessary information. Another significant plus is that articles are written for people. We understand that the reader will do everything with his own hands, and we try to make it as convenient and efficient as possible. Use the resource at any time of the day and find the answer to any question you may have regarding cars.
↓ Comments ↓
1. General information
1.0 General information 1.1 Safety precautions
2. Diagnosis of faults
2.0 Diagnostics of faults 2.1 diagnostics of faults in the engine and its systems 2.2 Diagnostics of faults in the clutch 2.3 diagnostics of faults in the gearbox 2.4 Diagnostics of faults in the driveline, rear axle, chassis, steering and braking system 2.5 Diagnosis of faults in the body 2.6. Diagnosis of electrical equipment faults
3. Engine
3.0 Engine 3.1 Cylinder head and timing mechanism 3.2 Lubrication system 3.3 Oil change 3.4 Replacing the camshaft drive chain guide 3.5 Replacing the camshaft and valve levers 3.6 Replacing the valve stem seals 3.7 Replacing the intake and exhaust manifold gaskets 3.8 Replacing the cylinder head gasket ov 3.9 Disassembling the head cylinder block, valve grinding
4. Engine power system
4.0 Engine power system 4.1 Replacing the air filter element 4.2 Replacing the fuel pump 4.3 Repairing the fuel pump 4.4 Replacing the fuel tank and its hatch cover
5. Carburetor
5.0 General information about the carburetor 5.1 Cleaning the fuel filter 5.2 Replacing the idle air system solenoid valve 5.3. Adjusting the carburetor 5.4 Replacing the carburetor 5.5. Carburetor repair
6. Engine cooling system
6.0 Engine cooling system 6.1 Replacing the coolant 6.2 Replacing the coolant pump 6.3. Replacing the thermostat 6.4 Replacing the engine radiator
7. Exhaust system
7.0 Exhaust system 7.1 Replacing exhaust system parts
8. Clutch
8.0 Clutch 8.1 Replacing fluid and bleeding the clutch hydraulic drive 8.2 Adjusting the drive 8.3 Replacing the clutch master cylinder 8.4 Repairing the clutch master cylinder 8.5 Replacing the clutch slave cylinder 8.6 Replacing the pressure plate assembly and clutch release bearing
9. Gearbox
9.0 Gearbox 9.1 Checking the level and changing the oil in the gearbox 9.2 Replacing the reverse light switch 9.3 Replacing the secondary shaft cuff 9.4 Replacing the gearbox 9.5 Repairing the gearbox 9.6 Replacing the speedometer drive 9.7 Features of repairing a five-speed gearbox
10. Cardan transmission
10.0 Cardan transmission 10.1. Maintenance 10.2. Replacing the driveshaft
11. Rear axle
11.0 Rear axle 11.1 Checking the serviceability of the rear axle 11.2 Changing the oil 11.3 Replacing the axle shaft and its cuff 11.4 Removing and installing the rear axle 11.5 Replacing the cuff of the drive gear 11.6 Replacing the gearbox 11.7 Repairing the gearbox
12. Front suspension
12.0 Front suspension 12.1. Maintenance 12.2 Replacing the bearings and hub cuff 12.3 Replacing the cushions and stabilizer bar 12.4 Replacing the ball joints 12.5 Replacing the shock absorbers 12.6 Replacing the springs 12.7 Replacing the upper arms and their rubber-metal hinges 12.8 Replacing the rubber-metal joints of the lower arms on a car 12.9 Replacing the lower arms 12.12 . Adjusting wheel alignment angles
13. Rear suspension
13.0 Rear suspension 13.1 Checking technical condition 13.2. Replacement of rear suspension parts
14. Steering
14.0 Steering 14.1 Adding oil 14.2 Checking the condition of the steering 14.3 Adjusting the gear engagement 14.4 Replacing steering rods 14.5 Replacing and repairing the pendulum arm 14.6 Removing and installing the steering wheel 14.7 Removing and installing the steering shaft 14.8 Removing and installing the steering mechanism 14.9 Removing the bipod
15. Brake system
15.0 Brake system 15.1 Checking the condition of the hydraulic drive 15.2 Checking the vacuum brake booster 15.3 Checking the functionality of the pressure regulator 15.4 Replacing brake fluid and bleeding the brake system 15.5 Replacing the brake pads of the front wheels 15.6 Replacing the brake pads of the rear wheels 15.7 Replacing the brake caliper of the front wheel 15.8 Replacing the brake cylinders of the front wheels 15 .9 Repair of front wheel brake cylinders
16. General information
16.0 General information 16.1. Checking electrical circuits 16.2 Fuse blocks 16.3 Replacing fuses 16.4 Replacing the main and additional fuse blocks 16.5. Replacing the relay 16.6 Replacing the ignition switch 16.7 Replacing the contact part of the ignition switch 16.8 Battery 16.9. Generator 16.10. Starter 16.11. Ignition system 16.12. Lighting, light and sound alarms 16.13. Windshield cleaner and washer 16.14. Repair of the electric heater motor 16.15. Control devices
17. Body
17.0 Body 17.1 Replacing the front bumper 17.2 Replacing the radiator grille 17.3 Replacing the hood latch 17.4 Replacing the hood 17.5 Replacing the windshield 17.6 Replacing the interior rear view mirror 17.7 Replacing the sun visor 17.8 Replacing the headliner 17.9 Replacing the ceiling grab handle
18. Heating and ventilation system
18.0 Heating and ventilation system 18.1 Replacing the electric heater fan 18.2 Replacing the heater radiator 18.3 Replacing the radiator casing 18.4 Replacing the heater valve
19. Car body care
19.0 Car body care 19.1 Car washing 19.2 Preservation and protection of paintwork
20. Applications
20.0 Applications 20.1 Tools used in addition to the standard set 20.2 Electrical diagram of VAZ-2106, VAZ-21061, VAZ-21063 cars produced in 1976–1987. 20.4 Tightening torques for threaded connections 20.5 Basic data for adjustments and monitoring 20.6 Characteristics of spark plugs 20.7 Fuel, lubricants and operating fluids used 20.8 Lamps used on the vehicle 20.9 Lip seals (oil seals)
| EXECUTION ORDER |
Installation of a sports steering wheel without an adapter on a VAZ 2104-07
If you are not too concerned about the steering column trim in the cabin, then a tuning product from the Sparco brand, equipped with a quick-release device, can be put in “four” without using an adapter. The essence of the method is to use as the last part the central part of the standard steering wheel with a wide platform and slots, and simply cut off the rest. To work you will need:
- electric drill with a 6.5 mm drill bit;
- long M6 bolts – 6 pcs.;
- hammer and core;
- grinder with a circle on iron;
- hex wrench to suit the size of the bolts;
- caliper, ruler.
The flange of the quick-release mechanism fits well on the central part of the standard steering wheel
The first step is to cut out the central part of the standard steering wheel with a grinder and carefully process the edges. Then the order is as follows:
- Having taken the dimensions from the quick-release mechanism, where there are 6 holes for fastening, mark the cut part for them. The central holes of both parts must match.
- Trim the ends of the cut element so that they do not interfere with the tight fit of the new steering wheel.
- Drill holes, having previously marked them with a core.
- Bolt the resulting part to the sports steering wheel mechanism.
Holes are drilled on the old steering wheel for a new flange
As a result, the splined part of the old steering wheel will serve as a mount for the new one. Then install and configure it as usual.
Sparco sports steering wheel with the core from the factory steering wheel
Replacing the VAZ 2101 steering gear
If the steering gear suddenly leaks or noticeable play appears, then sometimes it is useless to carry out a full restoration. Rebuilding the control mechanism will not help either, since the old housing already has wear that will prevent the installation of new elements.
Therefore, a repair kit for the column is not a solution. Replacing the entire unit will be much more promising, and besides, you are interested in this like no one else. Your safety directly depends on its condition, on the form of the steering rod ball pins.
To replace the column on a VAZ 2101, you will need:
- Loosen the wheel bolts.
- Remove the wheel.
- Dismantle the protection.
- Use pliers to pull the pins out of the rod ends.
- Unscrew the nuts from the ends.
- Using a rod wrench, which you can buy at any auto store, remove the ends from the cone.
- Unscrew the bolt, thereby loosening the shaft clamp.
- Using 17mm wrenches, unscrew the nuts from the three bolts that secure the steering column to the body.
- Remove the column from the car.
Installation is carried out in strictly reverse order.
At this point, the replacement of the VAZ 2101 steering gear is considered completely completed; the protection and wheel are put back, after which the procedure for adjusting the toe-in of the front wheels is mandatory.
How to change the steering gear on a VAZ 2107
If there is more serious damage, the steering gear must only be replaced. To do this, you need to purchase a new VAZ 2107 gearbox and immediately fill it with transmission oil. Now you need to remove the faulty gearbox from the car.
- Disconnect the tie rod ends from the tie rods. To do this, first unscrew them, and then unscrew the fastening nuts using a 22mm wrench. To pull them out, you need to use a special puller, which is available in any auto parts store.
- Go inside the car and loosen the clamp that secures the steering shaft to the steering gear. Pull the shaft out of engagement with the gearbox.
- All that remains is to unscrew the three bolts that secure the mechanism to the engine compartment of the car.
- Install the new gearbox in reverse order. Before you start operating the car, do not forget to adjust it.
Gearbox oil
To reduce friction of the internal elements of the steering column, GL-4, GL-5 transmission oil with a viscosity grade of SAE75W90, SAE80W90 or SAE85W90 is poured into the mechanism. In the old fashioned way, many car owners use TAD-17 oil for the unit in question. The filling volume of the gearbox on the VAZ 2107 is 0.215 liters.
Checking the oil level
To avoid premature failure of mechanism parts, it is necessary to periodically check the oil level and replace it.
It is worth taking into account that the fluid from the gearbox, although slowly, leaks, and the leak occurs regardless of whether the column is new or old. The level check is performed as follows:
- Use a 8 wrench to unscrew the filler plug.
- Using a screwdriver or other tool, assess the oil level in the crankcase. The normal level should be at the bottom edge of the filler hole.
- If necessary, add lubricant using a syringe until it begins to flow out of the filler hole.
- Tighten the plug and wipe the steering gear from smudges.
How to change the oil in a gearbox
As for changing the oil in the steering device, this procedure should be carried out every year and a half. If the decision has been made to change the lubricant, you need to know how to perform the procedure. In addition to the new lubricant, you will need two syringes of the largest possible volume (purchased at the pharmacy) and a small piece of washer hose. The procedure is carried out in the following order:
- Use a key to unscrew the filler plug, place a piece of tubing on the syringe, draw in the old oil and pour it into the prepared container.
- Using a second syringe, new lubricant is poured into the gearbox to the required level, while it is recommended to rotate the steering wheel.
- Tighten the plug and wipe off traces of oil.
Video: changing the oil in a classic steering gear
Despite the complex design of the steering mechanism of the “seven”, every owner of this car can perform preventive maintenance, repair or replacement of the unit. The reason for repair is characteristic signs of malfunctions in the mechanism. If parts with visible damage are found, they must be replaced. Since the steering column is one of the critical components of the car, all actions must be performed in strict sequence.
How to adjust the power steering mechanism of a Gazelle car
Page 1 of 2
Adjusting the steering mechanism is necessary when the vehicle's directional stability is low at high speeds (you don't seem to feel the steering wheel at high speeds).
This defect is associated with a violation of the adjustment of the propeller thrust bearings, and in the rack-piston-shaft-sector pair of the steering mechanism.
After adjustment, the force required to rotate the input shaft should not increase noticeably. During operation, you should constantly monitor the condition of the hoses, especially high pressure ones. If cracks, swelling or cuts occur, hoses must be replaced. You should also check that there are no leaks of working fluid (oil) from under the hose clamps, steering gear covers or power pump.
When the pressure in the system increases due to jamming of the bypass valve, the technological plugs in the pump casing can be squeezed out, so you should monitor the system and the quality of the working fluid being poured, top it up, replace it and change the filter in a timely manner. You should not hold the steering wheel in extreme positions for a long time. This can lead to damage and even seizure of the booster pump. A slight noise when the amplifier operates is not a sign of malfunction.
Adjustment
| We remove the steering mechanism without removing the bipod. | 1. We clamp the mechanism in a vice with the fittings down and drain the remaining oil into a container, turning the mechanism shaft with a key to 17. |
| 2. Pressing the spool shaft with your hand, rock the bipod. If axial play of the shaft is felt, adjust the thrust bearings. | |
| 3. To do this, use a bevel or drift to straighten the collar of the adjusting nut, which is cored into the grooves of the crankcase. | |
| 4. Use a special wrench to turn the nut clockwise until the gap is eliminated. At the same time, we control the torque of the shaft, which should be no more than 0.2 kgcm. | 5. To do this, use a dynamometer hooked to a 17 key to measure the turning torque of the spool shaft. With a lever length of 200 mm, the force should not exceed 1.0 kgf. |
| 6. Bend the collar of the nut into the groove with a beard. | 7. Rock the bipod of the steering mechanism with your hand. If a gap is felt, adjust the gearing. |
8. To do this, remove the bipod from the sector shaft.
Page 1 of 2
Adjustment
| We remove the steering mechanism without removing the bipod. | 1. We clamp the mechanism in a vice with the fittings down and drain the remaining oil into a container, turning the mechanism shaft with a key to 17. |
| 2. Pressing the spool shaft with your hand, rock the bipod. If axial play of the shaft is felt, adjust the thrust bearings. | 3. To do this, use a bevel or drift to straighten the collar of the adjusting nut, which is cored into the grooves of the crankcase. |
| 4. Use a special wrench to turn the nut clockwise until the gap is eliminated. At the same time, we control the torque of the shaft, which should be no more than 0.2 kgcm. | 5. To do this, use a dynamometer hooked to a 17 key to measure the turning torque of the spool shaft. With a lever length of 200 mm, the force should not exceed 1.0 kgf. |
| 6. Bend the collar of the nut into the groove with a beard. | 7. Rock the bipod of the steering mechanism with your hand. If a gap is felt, adjust the gearing. |
9. To remove the bipod, unscrew the bipod nut
______________________________________________________________________________
The steering of the Gazelle GAZ-2705 car consists of an adjustable steering column with a shaft and wheel, a steering mechanism and a drive.
The design of the steering column (Fig. 19) allows you to change the position of the steering wheel in height and angle. The steering mechanism of the Gazelle GAZ-2705 (Fig. 19), consisting of a screw with a ball nut 33 and a sector shaft, is mounted in an aluminum crankcase, which is attached to the left side member of the frame using a special bracket. The steering gear ratio is 23.09 (in the middle part).
Fig. 19. Steering Gazelle GAZ-2705
1 — steering wheel; 2, 25 — steering column switch; 3 - retaining ring; 4 — washer; 5 - bearing; 6 — plastic bushing of the bearing; 7 — ignition switch (lock); 8 - lower casing; 9 — steering column shaft; 10 — universal joint; 11 - wedge; 12 — nut: 13 — steering driveshaft;
14 — propeller shaft seal; 15 — cardan joint bearing; 16 — bearing needles; 17 — retaining ring; 18 — steering mechanism; 19 — bipod shaft with gear sector; 20 — universal joint grease nipple; 21 — steering column pipe; 22— bracket; 23 — handle of the steering column fixation mechanism;
24 — upper casing; 26 — steering wheel fastening nut; 27 — steering wheel pad; 28 — ball nut screw; 29 — top cover; 30 — adjusting gasket; 31, 39 — sealing rings; 32 - ball nut ball, 33 - ball nut; 34 - nut; 35 — bipod; 36 - cover; 37 — foam ring;
A screw with a ball nut 33 is installed in the steering gear housing of the Gazelle GAZ-2705 on two angular contact bearings, the outer races of which are pressed into the crankcase and into the upper steering cover, and the inner races are pressed onto the steering gear screw.
Read more: Thermostat VAZ 2114-2115 signs of malfunctions and replacing the thermostat
The turning torque of the steering gear screw is adjusted using shims 30 installed under the steering gear cover. When the screw rotates, the balls roll along a special channel, causing the ball nut to move. The balls are manufactured with high precision and differ from each other by no more than 4 microns.
The Gazelle GAZ-2705 steering mechanism assembly, consisting of a screw, a ball nut and a set of balls, cannot be dismantled. High quality processing and precision selected parts ensure easy and smooth operation of the steering mechanism. With its teeth, the nut engages with the shaft - sector 41.
The bipod shaft rotates on two cylindrical roller bearings, the inner race of which is the bipod shaft.
Fixation of the outer races of the bipod shaft bearings from axial movement is carried out using locking rings 38, and from angular movement - by coring the outer races into the crankcase holes, closed by plug 5.
The screw-ball nut of the Gazelle GAZ-2705 steering mechanism is connected to the steering column shaft using a propeller shaft. The hinge forks are fastened to the shafts using a wedge 48 (see Fig. 19). The steering column is secured with four bolts to the clutch and brake pedal bracket.
The steering column shaft rotates on two ball bearings. Adjustment of the steering column shaft bearings is not required during operation. The steering wheel is mounted on tapered splines on the steering shaft and secured with a lock washer and nut.
note
The technical condition of the steering control of the Gazelle GAZ-2705 can be approximately determined by the amount of free play (play) of the steering wheel.
Maintenance of the steering includes its inspection, checking the fastening of the units, the free play of the steering wheel, checking and adjusting the axial play in the propeller bearings, the clearance in the meshing of the steering gear, as well as lubrication work according to the car’s lubrication map.
When inspecting the steering of Gazelle GAZ-2705 vehicles, it is necessary to check the fastening of the parts. All nuts and bolts securing the steering wheel, steering column, steering gear housing, steering shaft, bipod and steering linkage arms must be securely tightened to the torques specified below.
Then you should check the free play of the steering wheel in the position of the front wheels corresponding to the vehicle moving in a straight line. The amount of free play of the steering wheel should not exceed 25°.
Adjusting the steering of Gazelle GAZ-2705
— turn handle 23 (see Fig. 19) towards you and upward, loosening the fixation of the steering column; — set the steering wheel in a comfortable position; — fix the selected position of the steering column by turning handle 23 down and away from you.
— remove the lower casing 8 (see Fig. 19) by unscrewing two screws and freeing it from the lower clamp; — remove the upper casing 24, bringing the column as close as possible to the driver; — loosen the locknut and tighten the bolt to a torque of 9.0–12.5 Nm (0.9–1.25 kg/cm); — fix the locknut with a torque of 14–18 Nm (1.4–1.8 kg/cm), preventing the bolt from being unscrewed; — check the column fixation; — install the upper and lower casings.
Adjusting the steering mechanism of Gazelle GAZ-2705
Fig.20. Steering mechanism of the car Gazelle GAZ-2705
B - rib on the top cover; C - mark at the end of the screw; 1 - crankcase; 2 - screw with ball nut; 3 - shaft sector; 4 — filler plug; 5 — adjusting shims; 6 - nut; 7 - cotter pin; 8 - fork; 9 - cover; 10 - wedge; 11 — steering shaft seal; 12 — cardan shaft; 13 - sealing ring;
— turn the steering wheel 21/2 turns from the straight-line position in any direction; — swing the steering gear screw by the fixed fork by hand; If in this case the screw has axial or radial movement (play of the fork relative to the steering mechanism cover), then the screw bearings must be adjusted.
Important
The steering mechanism of the Gazelle GAZ-2705 is adjusted in the following sequence:
— disconnect the bipod 18 and the steering wheel shaft fork 12; — unscrew the bolts securing the GAZelle GAZ-2705 steering mechanism to the bracket and remove the steering mechanism from the car; — drain the oil through the hole closed by plug 4; — remove two plugs 20 on the crankcase; — remove two covers 17 and 19 and sponge seal 16 of the sector shaft;
— remove the locking ring 14; — straighten the grooves on the bearings of the sector shaft with a beard and remove them with a puller, eliminating impacts and distortions on the bearing; — remove shaft sector 3; — unscrew the bolts securing the upper crankcase cover, remove the cover and remove one of the adjusting shims 5; — Reinstall the crankcase cover and check the torque of the screw in the bearings. The moment should be 0.4-0.8 Nm (4.0-8.0 kg/cm). In this case, no play of the screw should be felt;
Also check out
- Cover the belts with cellophane or a rag to prevent oil from getting on the rubber.
- Pump out the oil into the prepared container.
- After pumping out the oil, your assistant should turn the steering wheel as far as possible to the left/right. In this case, oil should appear in the tank; it also needs to be pumped out.
- Disconnect the return hose, lower its end into the bottle, and turn the steering wheel. The old oil will be expelled by the system.
- After the oil has completely drained, connect the hose. After the oil has been completely drained, the hose can be reconnected.
- Fill the power steering system with fresh oil to the top.
- After the oil is poured, an assistant should turn the steering wheel. At this time, the oil will decrease. It should be added to the system.
- When the oil stops decreasing, start the engine for 10-15 seconds. If the oil decreases during operation, add more.
- Turn off the engine, turn the steering wheel 5-7 times in each direction to the maximum. There should be no air bubbles in the tank.
- Start the engine again and turn the steering wheel. When rotating, there should be no hum or any other difficulties.
Electric booster for VAZ 2107
An easier way to make the 7 easy to drive is to install electric power steering. Structurally, the VAZ 2107 is ready for such a procedure; moreover, due to the absence of oil containers, installation will be easier and faster.
The electric power steering wheel copes well with loads; in terms of operating efficiency, it is practically no different from the effectiveness of hydraulic power steering. At the same time, the electric mechanism does not require maintenance or constant monitoring.
The most affordable version of the EUR for the VAZ 2107 is the “Aviaagregat” mechanism from a domestic manufacturer. The mounting location for this device is the location of the standard steering column. The design of the electric amplifier includes a relatively small number of parts:
- the amplifier itself;
- bracket for its fixation;
- intermediate value cardan;
- casing, wiring and fastening elements.
A device for making it easier to drive a car without the use of hydraulic force.
The cost of the EUR is inferior to that of the power steering, so VAZ 2107 owners often prefer to install “electrics” rather than “hydraulics”.
Video: EUR on a “classic”
The power steering wheel is a completely common element for modern car models. However, the standard equipment of the VAZ 2107 did not provide for such a configuration; the owners have to “fight” this drawback on their own. Due to the high risk of errors in installation and connection, installation work is recommended to be carried out only in a car service center.
Removing the steering gear of a VAZ 2107
Despite its simple and reliable design, the VAZ 2107 steering column is subject to wear, like any car parts and mechanisms. Over time, malfunctions may appear, of which creaking when turning the steering wheel is the most harmless. If problems are not identified and corrected in time, they may get worse. It may all end with the car stopping responding to turning the steering wheel. The probability of an accident in this case is almost 100%. Therefore, you should monitor the condition of the steering column and, if necessary, repair or replace it to ensure the absolute performance of this unit, which is critical for traffic safety.
Power steering for VAZ 2107
The cars of the Volzhsky Automobile Plant of the classic series are not considered comfortable or as convenient as possible for movement. The main goal of the VAZ “classic” is to be an economy class car for home or work, so any options or the latest equipment systems were simply not provided for in domestic models.
A power steering wheel was not installed on the VAZ 2107: this mechanism was difficult to install in the systems of a rear-wheel drive car, and besides, such equipment significantly increased the market value of the car.
The hydraulic device helps make driving easier and more efficient.
Advantages of a car with hydraulic power steering
Why do we even need additional equipment for the “seven” if the car already fully met all the requirements of its time?
The VAZ 2107 power steering device is designed in such a way that even if it fails, the car can be driven, the steering wheel will just turn harder.
Car owners of the “Seven”, whose cars have factory power steering, highlight a number of advantages of such additional equipment:
- increased level of control reliability;
- minimizing fuel consumption;
- convenience and ease of control;
- no need to apply physical force when turning the steering wheel.
When driving in straight directions, the power steering effect is practically not noticeable. However, this system manifests itself to its maximum in the following modes:
- when turning left or right;
- returning the wheelset to the middle position by the steering wheel;
- driving on ruts or extremely uneven roads.
That is, the power steering installed on the VAZ 2107 makes the car suitable for driving even by female drivers, for whom ease of control is the main criterion in operating the car.
Power steering allows you to take turns using just one hand
Checking the play at the steering wheel on a VAZ 2101-VAZ 2107
Welcome! Play in the steering wheel - in fact, this topic interests a lot of people, because everyone should know the exact play in the steering wheel, as it sometimes comes in handy in life (For example, before undergoing maintenance). But not all people know how to calculate steering play, and therefore we have prepared an interesting article especially for such people, after reading which you will learn in more detail the methods for calculating steering play.
Note! To calculate the backlash, you will need to take: A ruler and chalk (Instead of chalk, you can use wire) with which you will make marks!
When should you check the play in the steering wheel? As mentioned above, it makes sense to measure the play before going to the “Technical Inspection”, so that after arriving there you do not have any incidents with large play in the steering wheel.
It is also recommended to check the play when increasing the free play of the steering wheel because in this regard, it becomes very difficult to control the “Vehicle”.
Note! Play in the steering wheel can occur due to wear or loosening of the fastenings: Steering mechanism, lever pendulums or steering rods!
How to check the play, also known as free play at the steering wheel on a VAZ 2101-VAZ 2107?
Note! Free play is checked exclusively on a flat surface that does not have ice, due to which the car’s wheels can slip. And also the backlash should not exceed more than “5°C”!
1) First, park the car so that its wheels are pointing straight ahead.
Note! If the wheels of the car are directed straight, and the steering wheel itself is not positioned as it should be, that is, not level, then this indicates that: The wheel alignment angles are incorrect, or there are defects in the suspension or in the steering itself, as well as incorrect The direction of the steering wheel may indicate that it is not installed correctly! (How to remove the steering wheel and install it properly, see the article: “Replacing the steering wheel on a VAZ”)
2) Now, to measure the free play of the steering wheel, place the ruler you took with you so that its beginning rests against the instrument panel, so that the middle part touches the headlight switch, which at this moment should be on o, and the ruler should also touch the rim of the steering wheel .
3) Next, with the ruler installed properly, turn the steering wheel until the front wheels begin to move. After the wheels start moving, immediately stop rotating the steering wheel and apply a mark to the steering wheel rim with chalk, or wrap the steering wheel rim with wire.
4) Then, without pulling the ruler, carefully turn the steering wheel in the opposite direction and wait until the wheels move. As soon as the wheels move, apply a second mark with chalk or wrap the steering wheel rim with wire.
5) And finally, using the same or a shorter ruler, measure the distance between both marks or wires that wrapped the steering wheel rim.
Note! The distance should not exceed “5°C”, so if your declared free play is greater than the value, then bring it to normal by adjusting the gap of the roller with the worm! (How to adjust the play, see the article: “Adjusting the play of the steering wheel”)
Vaz-Russia.ru
The following two tabs change content below.
- Bio
- Latest Posts
admin1
I am a professional in the field of Auto Electrics and Auto Diagnostics. Work experience more than 10 years. I will identify and eliminate faults of any complexity. (Even with cars that Dealers and services cannot handle, as it were, of the highest class). We carry out all types of work on the installation of additional electrical equipment (xenon, multimedia system, special signals, etc.)
Steering column repair
Due to constant friction in the steering mechanism, elements wear out, which indicates the need not only for adjustment of the unit, but also for possible repairs.
How to remove the gearbox
To dismantle the steering column on the “seven”, you will need the following tools:
- a set of keys;
- knob;
- heads;
- steering rod puller.
After preparing everything you need, perform the following step-by-step actions:
- The car is placed on a lift or inspection hole.
- Clean the steering rod fingers from dirt.
- The rods are disconnected from the gearbox bipod, for which the cotter pins are removed, the nuts are unscrewed and the pin is squeezed out of the steering gear bipod using a puller.
- The steering column is connected to the steering wheel using an intermediate shaft. Unscrew the fastener of the latter from the gearbox shaft.
- The gearbox is fastened to the body with three bolts. Unscrew the 3 fastening nuts, remove the fasteners and dismantle the steering mechanism from the car. To make it easier to remove the assembly, it is better to turn the bipod all the way into the column body.
Video: replacing the steering column using the example of a VAZ 2106
How to disassemble the gearbox
When the mechanism is removed from the vehicle, you can begin to disassemble it.
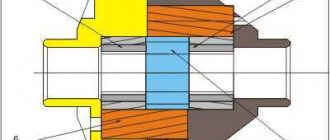
Parts of the steering gear housing: 1 - housing; 2 - bipod; 3 — lower crankcase cover; 4 — adjusting shims; 5 — outer ring of the worm shaft bearing; 6 — separator with balls; 7 — bipod shaft; 8 - adjusting screw; 9 — adjusting plate; 10 — lock washer; 11 - worm shaft; 12 — upper crankcase cover; 13 - sealing gasket; 14 — bipod shaft sleeve; 15 — worm shaft seal; 16 — bipod shaft seal
Tools you need to prepare:
- standard set of keys;
- head at 30;
- bipod puller;
- vice.
The work is carried out in the following order:
- Unscrew the bipod nut and use a puller to press the rod off the shaft.
- Unscrew the oil filler plug, drain the lubricant from the crankcase, then unscrew the adjusting nut and remove the lock washer.
- The top cover is secured with 4 bolts - unscrew them.
- Remove the adjustment screw from the engagement of the bipod shaft, then remove the cover.
- Remove the thrust shaft with the roller from the gearbox.
- Unscrew the fasteners of the worm mechanism cover and dismantle it along with the adjusting shims.
- Use a hammer to lightly strike the worm shaft and knock it and the bearing out of the steering column housing. The end surface of the worm shaft has special grooves for the bearing.
- Remove the worm shaft oil seal by prying it off with a screwdriver. In the same way, remove the bipod shaft seal.
- Using the adapter, knock out the outer race of the second bearing.
After disassembling the steering gear, it is troubleshooting. All elements are pre-cleaned by washing in diesel fuel. Each part is carefully inspected for damage, scuffing, and wear.
Particular attention is paid to the rubbing surfaces of the worm shaft and roller. The bearings must rotate without jamming
There should be no damage or signs of wear on the outer races, separators and balls. The gearbox housing itself should not have cracks. All parts that show visible wear must be replaced.
Assembly and installation of the gearbox
When the faulty elements have been replaced, you can begin assembling the unit. The parts that are installed inside the crankcase are lubricated with transmission oil. Assembly is performed in the following order:
- Using a hammer and a socket or other suitable device, press the inner bearing race into the steering assembly housing.
- A separator with balls, as well as a worm shaft, are placed in the cage. The outer bearing separator is placed on it and the outer race is pressed into place.
- Mount the cover with gaskets and press in the oil seals of the worm shaft and bipod. A small amount of lubricant is first applied to the working edges of the cuffs.
- Place the worm shaft in the mechanism body. Using adjusting shims, the rotation torque is set from 2 to 5 kgf*cm.
- Install the short rod shaft.
- At the end of the work, lubricant is poured into the steering column and the plug is screwed in.
Installation of the unit on the machine is carried out in the reverse order.
Removal and installation of the VAZ 2107 steering gear
An assistant will be required to perform the work of removing and installing the VAZ 2107 steering gearbox.
Removing the steering gearbox from a VAZ 2107 car
1. We install the VAZ 2107 car on an inspection hole or overpass (see “Preparation of the VAZ 2107 car for maintenance and repair”). 2. On a VAZ 2107 car with a fuel injection system, remove the adsorber (see “Adsorber of a VAZ 2107 car - checking the purge valve, removal and installation”). 3. Unscrew the nut of the bolt securing the intermediate steering shaft to the steering gear shaft and remove the bolt (see “Steering shaft of a VAZ 2107 car - removal and installation”). 4. Disconnect the steering rods from the bipod of the steering gearbox (see “Steering rods of the VAZ 2107 - replacement”). 5. Using a 19 mm socket wrench, unscrew the three nuts securing the steering gearbox to the left side member of the VAZ 2107, holding the bolts from turning with a wrench of the same size. Holding the steering gear, remove the bolts.
6. Remove the steering gear shaft from the universal joint fork of the intermediate steering shaft. 7. Turn the bipod of the steering gearbox until it stops at eye A of the gearbox housing. This will make it easier to remove the steering gear from the VAZ 2107.
8. Turning, take out the steering gear upwards.
Installation of a steering gearbox on a VAZ 2107 car
1. Having positioned the steering wheel in the direction of linear movement of the VAZ 2107 car, through the hole in the partition of the engine compartment we insert the steering gear shaft into the fork of the universal joint of the intermediate steering shaft, orienting the bipod of the gearbox (see paragraph 4 below). 2. We secure the steering gear with bolts to the side member of the body of the VAZ 2107. 3. If difficulties arise when connecting the steering shafts, then without connecting them, we fix the steering gear on the side member of the VAZ 2107. Having removed the steering wheel (see “Steering wheel of the VAZ 2107 - removal and installation"), remove the steering shaft and install the steering mechanism by putting the eye of the cardan joint of the intermediate shaft onto the splines of the steering gear shaft (see “Steering shaft of a VAZ 2107 - removal and installation”). 4. Orient the steering bipod so that the line drawn through the centers of the bipod holes is at a distance of 27.5 mm from the mounting plane of the steering gear (the middle position of the steering gear roller). We set the steering wheel to the position of linear movement of the VAZ 2107 car.
Removing the outer CV joint of a VAZ 2109
All work can be carried out without an inspection hole or overpass; all you need is a good jack and supports. The disassembly procedure is as follows:
- Place stands under the rear wheels.
- Remove the cap from the front wheel.
- Unlock the nut using a sharp chisel and hammer.
- Using a 30" socket and a long lever, rip off the nut.
- Remove the four bolts securing the wheels to the hub.
- Place a jack under the side to be repaired and lift it up.
- Remove the wheel. It is advisable to install a support under the body.
- Pull the cotter pin out of the tie rod end pin and unscrew the nut.
- Using a puller, pull the pin out of the steering knuckle.
- Unscrew the two ball joint mounting bolts. This will be easier than using a puller to knock the pin out of the hub.
- The hub now “walks” freely on the stand. Personally, I knock out the inner CV joint using a small chisel and hammer. Literally 2-3 sharp and precise blows, as the drive comes out of the box. But be sure to drain 2/3 of the oil from the gearbox, otherwise you will lose it.
- Knock the outer grenade out of the hub.
You don't have to remove the drive completely, but that's not very convenient. It is much more pleasant to work with grenades if they are accessible and can be clamped in a vice, rather than bending over under a machine. Before replacing the external grenade boot, assess the condition of the entire drive for damage or defects. After all, it may turn out that not a partial repair is required, but a complete one.
Installing electric power steering
If a car owner wants to install an electric booster on a VAZ-2107, he should give preference to factory units. Before setting up and upgrading the system, the transmission speed sensor should be adjusted. This will avoid turning the steering wheel too “tight”.
Among other additions, when installing an ESD in your car, the vehicle owner will have to install a new choke cable (you can purchase it as part of the ESD kit for the VAZ-2108), replace the gearbox and install a MUR1100E diode.
Electric power steering on a VAZ-2107, when purchasing a ready-made kit, requires the presence of a speed sensor, various fasteners, a choke cable, an ignition switch, several switches and a casing for the steering column.
When assembling an electric power steering for a VAZ-2107 with your own hands, you need to start with the adapter plate and cardan. After removing the crosspiece, you need to select a cardan of the appropriate length. The welded and assembled crosspiece, or rather its bearings, are equipped with new lubricant. After this, the steering device is installed and the electrical component of the power steering is connected. The red wire should go to the battery, and the brown wire should go to its mounting stud. The blue cable for the ignition switch should go to the orange one. The tachometer wires should go to the dashboard chip, and the connecting elements between the speed sensors should go to the ninth pin of the ECU.
Conclusion
Tuning the VAZ-2107 steering requires time, money, effort and certain knowledge from the car enthusiast. However, competently carried out modifications to the steering system of the vehicle improve the behavior of the car on the road, making the car more maneuverable and controllable by the driver.
Watch how to adjust the steering column on a gazelle video for free
Gazelle Several years ago, Gazelle cars were recognized as the best people's commercial vehicle in Russia. And this is true - it’s hard to imagine today’s roads without busily scurrying minibuses or trucks of a well-known domestic brand. Professional drivers value them for their reliability and ease of use.
Commercial vehicles require intensive use, so the units often work to the limit, which leads to their breakdown. Special loads fall on the controls, including the steering column of the Gazelle car. Most experienced drivers cope with repairs on their own, using the accumulated experience of their colleagues in the workshop.
Gazelle steering column repair
Gazelle steering column repair
Gazelle steering column
Steering play on sable
How to adjust the steering column of a VAZ.
UAZ — Steering column repair (steering gearbox)
Adjusting the steering column of a VAZ or how to remove PLAY ON THE STEERING STEERING
Adjusting the UAZ Patriot steering gear
Adjusting the steering gear
Adjusting the steering column (gearbox) of the VAZ 2106-classic.
Steering repair
My Sable: Steering (with and without power steering)
Power steering gazelle
gur 4331 assembly, adjustment, stand
Allowable play in the steering wheel on a Gazelle? Or a traffic police scam?
Steering cardan Gazelle Next
SOBOL without power steering 1999
Dismantling the steering gear assembly of VAZ.
Replacing the power steering gear oil seal
Gazelle replacement of steering pin on short rod
WORLD Blog: Repair of the steering column GAZ Sobol (Barguzin, Gazelle...)
No. 20. W124 repair. Steering gear alignment.
Analysis of the steering gear Moskvich 412(2140)
Changing the oil in the steering gear for a VAZ 2107-2101 from Auto overhaul
Steering column knock (steering gear).
The same play in the steering wheel (steering shaft)…
Repair Gazelle. Modernization of a sliding door for a gazelle. DIY repair
How to eliminate the movement of the steering wheel (steering shaft).
Knock in the steering wheel. How to fix
Adjusting the steering gear on VAZ 2107-2101
EURU electric power steering for GAZ 3302
Converting a Gazelle to power steering with your own hands.
Pendant GAZelle, Sable. Repair, removing knocks.
Knock of steering gear Delphi UAZ Patriot 2014
Patriot steering column (little trick with left-hand thread)
Troubleshooting steering part 1
Steering wheel GAZ 33081 tuning
Replacing the steering column boot on sable
GAZelle steering cardan
How to adjust the clutch drive.
How to properly inject the kingpin of a gazelle, Volga, etc.
Steering gear play.
Play when adjusting the steering wheel. Let's arrange it.
Do-it-yourself wheel alignment
Repair of the VAZ 2107 steering gear part 1
Diagnostics of steering rods.
UAZ/GAZ/GAZELLE - Axle repair - Part 2 - Adjustment and assembly
Bumpy steering column VAZ 2101-07.mp4
Read more: Installing speakers in the front doors on a Lada Granta
Adjusting the VAZ 2101 gearbox
Adjusting the VAZ 2101 gearbox consists of one thing - reducing the steering play. This is done quite simply; you do not need to know the structure of the steering gearbox from the inside. Just look at it from the outside and see that on top there is one large screw (adjusting) and one small one (for filling oil and controlling its level).
When adjusting the VAZ 2101, the help of a second person will be required. However, you can do everything alone, because even replacing a column on a penny turned out to be within your power. Completely unscrew the nut that is located on the screw and is necessary to secure it.
You try to tighten the screw with a screwdriver, when it refuses to go any further, your partner should pull the steering wheel in different directions. And the bolt will go easier. The steering gearbox on the VAZ 2101 is adjusted until the play is acceptable. At the end, the nut is tightened and the car is ready for further use.
Adjusting the VAZ gearbox
Adjustment of the steering gear is carried out to get rid of play in the steering wheel, as well as all kinds of discrepancies when it rotates with the position of the wheels. The car wheels must first be aligned.
To adjust the steering gear, you need to unscrew the lock nut on its cover from above and loosen the special adjusting screw. Ask your partner to sit behind the wheel and rotate the steering wheel in different directions with energetic, but not wide movements, while you gradually tighten the adjusting screw. As soon as the steering wheel begins to rotate tightly and the wheels move with the slightest movement, the locknut is tightened.
This completes the adjustment of the steering gear. As you can see, this procedure is not long at all and can be performed with just a 19-mm wrench and a regular flat-head screwdriver.