The idea came to mind to tinker with the door locks. Somehow they didn’t close very well.
Having looked at the design of the locks, I realized that the design is very simple and there is really nothing to modify in it, except for one spring. The fact is that the respected and beloved AvtoVAZ decided to make these locks reliable, so the spring acts as an insurance policy in case the springs on the door handles fail or jam. If the return springs in these elements jam or fail, the lock spring will save the situation and the lock will not jam in the open position (in the closed position, due to design features, it has extremely little chance of jamming).
Having made sure that I had complete order with the handles and that the mechanisms worked easily and properly, I began to bend the spring in order to reduce its force as much as possible so that it would still perform its function (fixing the lock in the closed position). I tinkered with them quite a bit, and at the same time adjusted the lock latches (initially they were not very accurately configured). The spring is fragile and I broke it on the driver's door and had to buy a new lock.
Note: I didn’t close the back door in the video the first time. I think after soundproofing they will be even better, since the doors will be heavier.
Types of installed silent locks
Adjusting and lubricating standard VAZ 2107 door locks does not completely eliminate the problem, making the locks quiet and silent, “like on a foreign car.” Here it is necessary to replace the locks with fundamentally different ones. There are two options to get out of the situation:
- installation of locks from VAZ 2108 or foreign cars;
- installation of silent locks VAZ 2107.
In the first case, you have to do a lot of work to fit the “non-original” locks to the doors of the “Seven”. The second option is simpler in terms of installation, but such locks are more expensive and slightly less reliable due to the use of plastic parts in the locks. The advantage of this solution is the almost silent operation of the new lock.
Adjusting the lock
To do this, you should loosen the screws, move the lock slightly and see how this affects its operation. After this, we proceed to installing the device drives and connecting handles to it.
When an alarm activator was installed on the old lock, we connect it too. To do this, you need to remove the rubberized bushing from the old device. It should be mounted on a new lock and the rod from the activator itself should be inserted into it.
To connect the inner handle you will need a cable with clamps. To do this, drill a pin in the inside of the device and insert the cable into the resulting hole.
We use a cable to adjust
Then using clamps we make a loop. To connect the cable to the inner handle, it is best to make a clamp with a bolt (so that the handle can be replaced in the future).
So you have learned how to install advanced locks on cars. What locks are installed on your “iron horse”?
Video: installing silent locks
Installation process 1.Removed the old lock. 2.Removed the glass guide. 3. I pulled out the rubber locking rod clamp from the old lock. (It is used in the new lock according to the new one) 4. I tried the new lock on the holes and began to bore it with a file so that it became. 5.I tried on the chocolate bar...and started connecting the rods!
Pull external handle
...A corner was made (the required one was selected the 3rd time) A hole was drilled in the handle and in the corner on each side.
Then screwed to the handle. The thrust itself was picked up 7 times! (The problem was that it constantly turned in the corner and thus did not press the rod down! I was about to put the old lock back, but I decided to try one last try. I used the interior locking rod as a basis. There is a ball on the lever of the lock mechanism, but it is very thick and plastic the retainer did not fit on it. I ground it down with a file to a smaller diameter, after which I put the retainer on the ball without any problems! Then I put the lock and handle on the door. I measured the bend by eye and sawed off the rod... I sawed it off, bent the end of the rod into an L shape, and cut the thread( I don’t remember how much... I tightened the nut, put the washer in, then inserted the rod into the corner on the handle. And again the washer and nut... and tightened it! You’ll see in the photo That’s it! The outer handle opens simply elegantly and clearly. The pull of the inner handle
There were no special changes... The rod remains original and becomes without problems, it just bends anywhere in order to increase its stroke, as long as the lock opens from the passenger compartment. (While I was doing it, I pulled the handle hard out of anger and broke it)) It’s good that there was a spare one)
Drive rod cylinder turnkey lock
Here we also leave the original rod, but using the fitting method we bend it and make it the correct shape for the new lock. Since the distance between the drive on the mechanism and the cylinder on the 09 lock is smaller and we need to shorten it. I did this using the “S” method bending. Well, with subsequent bending along the edge until the lock can be easily closed from the street.
Cabin locking rod
And we still have this original rod... But it again becomes too long... I cut it off about 3 cm from the bend (where it is inserted into the rubber crap. Next, I bent it and made a similar ball with a file) I put everything in place and checked the functionality.)
I unscrewed the volute that closed the old lock, inserted a small piece of pencil, previously wrapped with electrical tape to the thickness of the silent bolt. He inserted it into the chocolate bar, the lock worked, closed the door and shook it. I got a mark on the counter and marked it! Then I drilled a hole with a thin drill. Then I drilled it out with an 8.5 drill and cut a thread for a bolt with a thread pitch of 1.25! I screwed in the bolt and closed the door)…I closed and opened it 200 times) I couldn’t be happier)
Now with subsequent doors I will no longer waste time on the mistakes that I made with the first door and lost a lot of time. Now in 2 days the remaining 3 doors will be ready)
Installation of silent locks or locks VAZ 2108 on VAZ 2107
To replace the locks you will need:
- door locks VAZ 2108;
- long mounting bolts for locks;
- bolt (rod installed on the rack) from VAZ 2108;
- drill;
- round file;
- drill for 10;
- pliers;
- screwdriver;
- set of keys.
To replace the lock, you need to do the following:
- Unscrew the door handle mounting bolts.
- Unclip the window handle.
- Remove the window lifter handle.
- Unclip and remove the door trim.
- Dismantle the old lock.
- Remove the fixing element from the stand.
- Drill out the bottom hole for the lock.
- Attach the VAZ 2108 lock and mark the location of the hole in the upper bushing of the lock.
- Use a round file to bore the hole in the door to the size of the lock being installed.
- Install the inside of the lock.
- Screw on the outer part of the lock.
- Check if the door closes.
- If necessary, adjust the position of the lock.
- Use pliers to bend the old lock rods so that they fit the new one.
- Rotate the rod fasteners on the lock cylinder 180 degrees.
- Bend and install the remaining rods.
- Check the functionality of the lock and rods.
- Mark the position of the bolt on the strut.
- Drill a hole for the bolt and cut the thread to 10.
- Screw the bolt into the rack.
- Install the trim.
- Screw the door handle.
- Latch the window handle.
Door handles
Door handles (external and internal) of the VAZ 2107 are designed to unlock the door. Over time, these parts may fail, which means they need to be replaced.
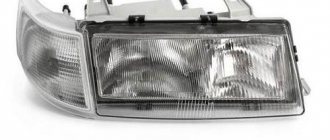
External door handle
External door handles of the VAZ 2107 are left and right, which must be taken into account when purchasing and replacing. In addition, the part can be made of metal or plastic. A metal handle, although more expensive, is much more reliable, which is especially important in winter: you can apply pressure without fear of breaking it if it suddenly freezes.
Which ones can be supplied?
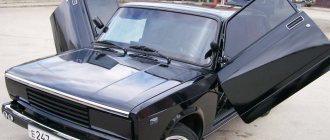
On the “seven”, in addition to the factory external door handles, you can install European handles. This procedure refers to car tuning, which allows you to change the appearance of the car, giving it an attractive and modern look. The essence of the process is to dismantle the standard handle and install a new part in its place, which fits without any modifications.
To change the appearance of your car, you can install Euro handles instead of standard door handles
More about tuning the VAZ-2107: https://bumper.guru/klassicheskie-modeli-vaz/tyuning/tyuning-salona-vaz-2107.html
How to remove a door handle
To replace the external door handle, you will need to prepare the following set of tools:
- socket wrench 8;
- flat screwdriver.
The dismantling procedure consists of the following steps:
- Raise the door glass all the way.
You will need to lift the glass to get to the door handle mount. - We dismantle the door trim.
- Disconnect the outer handle drive rod from the locking mechanism lever.
Disconnect the outer handle drive rod from the locking mechanism lever - Using a socket wrench, unscrew the handle fastening, which consists of two 8-mm nuts.
The outer handle is secured with two 8-mm nuts. - We dismantle the outer handle, removing the part from the hole in the door along with the rod and seal.
After unscrewing the fasteners, remove your hand from the door along with the seal and rod
How to install a door handle
After removing the old handle, you can begin installing the new part:
- Lubricate the rubbing areas with lubricant, for example, Litol-24.
- We install all dismantled parts in the reverse order.
Interior door handle
In most cases, the internal door unlocking handle on a VAZ 2107 has to be removed when dismantling the lock or when replacing the handle itself if it breaks, which happens extremely rarely.
How to remove the handle
To remove the inner handle you will need a flathead and Phillips screwdriver. Dismantling is carried out in this way:
- Remove the door trim.
- Unscrew the 2 screws securing the handle.
The inner handle is secured with two Phillips screws - unscrew them - We take the part inside the door.
To remove the inside handle, pull it inside the door. - To remove the handle from the inner cavity of the door, remove the rod.
Find out more about window lift repair: https://bumper.guru/klassicheskie-modeli-vaz/stekla/steklopodemniki-na-vaz-2107.html
How to install
After dismantling the old product, we begin installing the new part:
- We put the rod back on the handle, for which there is a fixing rubber insert.
- We fasten the handle and reassemble the dismantled elements in the reverse order.
Video: replacing the inside door handle on a VAZ “classic”
Adjusting silent locks VAZ 2107
Problems with door locking are usually caused by a lack of clearance between the lock and the post, or the lock and bolt being incorrectly positioned relative to each other on the post.
You need to start by checking the condition of the door hinges. Over time they wear out and the door sag. If this is the case, then you should replace them with new ones. Repair by replacing axles (pins) no dates
The gap between the lock and the stand can be adjusted in two ways:
- remove the lock, disassemble and slightly grind off the parts of the lock so that it sticks out less from the door;
- Gently dislodge the lock by tapping it with a hammer through a wooden block.
To correctly mark the hole for the bolt and install it, you must perform the following steps:
- snap the “chocolate” into place two clicks and, using chalk or stylus, press it against the seal;
- Determine the optimal bolt location using the stylus mark;
- Drill a hole first with a thin drill, then with an M10 thread drill.
- Cut the thread.
- Tighten the bolt so that it does not rub against the door and does not interfere with its closing.
- Check the functionality of the door lock.
- Secure the bolt with epoxy glue so that it cannot unscrew spontaneously.
In the future, when the door moves during operation of the car, the VAZ 2107 silent locks are adjusted by changing the position of the lock in the door. To do this, you need to loosen the fastening bolts and unscrew the lock.
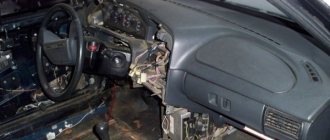
Dismantling the front doors of the VAZ-2101
Dismantling the front doors of the VAZ-2101
Repair and operation manual - VAZ-2101 body - VAZ-2107 - Dismantling the front doors of the VAZ-2101
Dismantling the front doors of the VAZ-2101
Front right door lock of the VAZ-2101
1 – lock retainer body; 2 – rotor; 3 – retainer block; 4 – cracker spring; 5 – lock switch; 6 – external handle of the lock; 7 – lock button; 8 – locking rod; 9 – spring of the locking lever; 10 – lever of the internal drive of the lock; 11 – internal drive rod; 12 – locking lever; 13 – central roller; 15 – lock switch rod; 16 – ratchet; 17 – lever of the external lock drive.
Fastening the internal handle of the VAZ-2101 door lock drive
1 – handle fastening screw; 2 – internal handle; 3 – nut securing the tension roller axis of the window lift cable.
When replacing parts and door mechanisms, it must be disassembled.
EXECUTION ORDER
1. Unscrew the screws securing the armrest and remove it. Using a screwdriver, remove the trim 1 from the inside door handle 2.
2. Remove handle 2 of the window lifter by pressing out the socket of the handle and using tool 1 A.78034 to remove the locking spring.
3. Overcoming the force of the spring plastic holders, remove the door trim.
4. With the sliding window in the upper position, unscrew the screws 1 securing the rear groove and the nut securing the front groove, remove the grooves and lower the glass down (2 – window lift cable; 3 – nuts securing the window lift mechanism; 4 – internal handle of the lock drive; 5 – tension roller; 6 – sliding window stop).
5. Having loosened the nut of the tension roller 5 of the window lifter, disconnect the cable 2 from the sliding glass holder, remove it from the rollers, lower the glass down and, tilting its lower edge towards you, remove it from the door through the lower opening.
6. Unscrew the 3 fastening nuts and remove the window lift mechanism.
7. Remove the sliding glass seal, unscrew the screws securing the sliding glass frame and remove it complete with the frame.
8. Unscrew button 7 (see Fig. Front right door lock) locking the lock and screws 1 (see Fig. Fastening the internal handle of the door lock drive) securing the bracket for the internal handle 2 of the lock drive; unscrew screws 3 (1 – lock lock button; 2 – lock lock rod) and remove the lock together with the drive rods, having previously disconnected rod 15 (see Fig. Front right door lock) from the lock switch arm.
9. Remove the handle of the external door lock drive by unscrewing the fastening nuts.
10. Unscrew the bolts and remove the door stop.
11. Remove the lower sliding glass seals along with the holders.
Quote
Disadvantages of silent locks VAZ 2107
Special “silent” locks, unlike standard locks on VAZ 2108 or foreign cars that can be installed on “classics”, include plastic parts instead of metal ones. Plastic does not knock when the mechanism operates, but its strength and wear resistance are much lower than that of metal.
Some silent VAZ 2107 locks, made in a homemade way, have design flaws, for example, reduced thickness of the latch or other elements of the locking mechanism.
Using low-quality locks is dangerous - a weakened mechanism may not hold the door under load, for example, if a passenger leans on it during a sharp turn. Therefore, when choosing locks, you need to realistically evaluate their quality and, in the absence of special skills, install standard “eight” locks, which make little noise but have a fair margin of safety.
If you decide to install silent locks with plastic elements, you should understand the consequences of a possible malfunction.
Cleaning and lubricating standard locks gives an acceptable result, making the operation of the doors not completely silent, but quite comfortable.
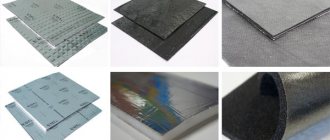
Interior soundproofing
This part of the work is the most labor-intensive and requires the dismantling of interior parts and interior upholstery. To disassemble the interior of a VAZ 2107, you will need metalworking tools and it is advisable to have an assistant. The procedure for installing sound-absorbing coatings inside a car body with your own hands is as follows:
- The front seats, rear sofa and carpeting from the floor are removed from the interior.
- We remove upholstery from the surfaces of doors and ceilings taking precautions.
- Sound insulation is glued to the floor, ceiling and door cavities after preliminary degreasing.
- Assembling the car interior with your own hands is done in the reverse order of disassembly.
Practice shows that measures to apply noise-absorbing materials to the surfaces of the body inside and outside can significantly reduce the level of extraneous sounds. This set of works is indicated if it is planned to install high-level acoustic systems.
It will be useful: Lada Priora heater resistor with and without air conditioning: replacement
Is it possible to do it yourself
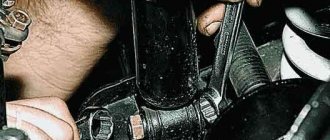
It is quite possible to make silent locks for a VAZ 2107, you just need to figure out how to cover the pins of the locks on the car. The noise when closing occurs when the latch passes through the fingers, which act as a loop for the latch. You will need a special heat-shrinkable tube (no more than 50 cm), which you can find in a specialized store.
Heat shrink tubing is used to insulate live wires. Among its main qualities are a high shrinkage rate and resistance to aggressive environments.
Video about silent car locks
Step-by-step production of silent locks
- Remove the fingers from the upgradeable latches.
- Cut the heat shrink tubing to the required size so that the threaded area remains free.
- Having put the cut tube on your finger, heat it up with a regular lighter (you can use a hair dryer).
- Wait a few minutes for the tube to cool and stick to your finger.
- Place another pipe on top and repeat the procedure with a lighter.
- After cooling, trim off any uneven parts.
- Reinstall the finger into the lock.
The silent loop is now complete. Sometimes when installing the hinges, the doors may not close tightly. This is due to the installation of a finger that has a non-standard thickness. There is a solution - adjusting the locks. The procedure is simple, but it requires special skills.
- Slightly loosen the fastenings of the lock clamp installed on the car body.
- Move the lock in the desired direction for normal operation of the door. When the door comes into contact with the body (it rests), the latch needs to be lowered slightly. When the door sag, on the contrary, the latch needs to be slightly raised.