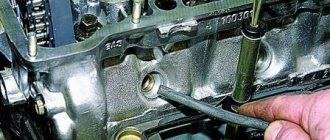
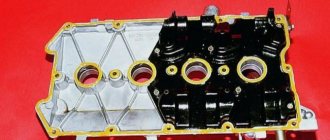
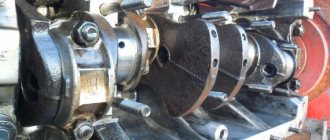
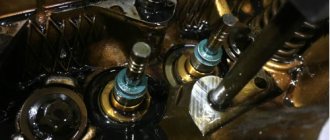
Oil seals are necessary to prevent oil from entering the combustion chamber and are located between the timing valves and guide bushings.
The gas distribution system uses intake and exhaust valves. The upper part of the valve is always exposed to the oily mist generated by the rotation of the camshaft, and the lower part is in the middle of a suspension of gasoline vapor (intake valves) or heated exhaust (exhaust valves).
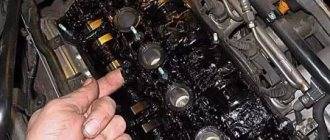
Normal operation of the camshaft is ensured by lubrication, but its entry into the combustion chamber must be prevented, otherwise the burnt oil will form carbon deposits on the working surface of the valve, cylinder and piston. As a result, the engine will be coked: its performance will deteriorate, and wear will accelerate many times over.
Oil seals prevent the formation of carbon deposits
: They skim the oil off the rod so it doesn't end up in the middle of the flammable mixture. The design of the seal is quite simple: it consists of a rubber cap, inside of which there is a reinforced steel bushing and an expander spring, which ensures high-quality adhesion between the cap and the rod. The material of the seal is of no small importance: modern manufacturers use acrylate rubber or secondary rubber - these materials provide good clamping quality.
When to change valve stem seals?
When the engine is running, the seals are subject to a very high load. In addition to purely mechanical impact, valve stem seals also have to withstand the aggressive effects of oil mixed with exhaust gases. Long-term use of oil seals leads to the fact that the rubber begins to harden, resulting in abrasion of the working surface.
Of course, we can always say that valve stem seals are a consumable item, and wear is normal. This is true, but there is one inconvenient circumstance - changing oil seals is quite difficult. To get to them, you will need to perform a lot of unnecessary steps.
However, replacing oil seals is not required very often: on average, one set of valve stem seals “travels” about 100 thousand kilometers.
Valve seals: signs of wear
You can tell that it’s time to change the valve stem seals by the following signs:
1. Excessive oil consumption. This sign in most cases indicates wear of the seals. An increase in oil consumption is also noted when the piston rings wear out, but in this case, oil leaks can be found in the breather pipe.
2. Exhaust that has a clearly visible shade of blue. This symptom manifests itself due to the fact that immediately after starting the engine, oil enters the cylinder and begins to burn, appearing in the form of blue smoke coming from the exhaust pipe.
3. Uniform oil consumption regardless of operating conditions. If oil does not flow into the breather pipe, and the flow rate is high and constant, the seals are clearly not in order and need to be changed.
4. Formation of carbon deposits on spark plugs. Increased wear of the valve stem seals leads to the spark plugs being flooded with oil, leading to the engine stalling.
The detection of one or more signs usually indicates that the seals are worn out. If the symptoms described above have been observed for a long time, then in the near future it is necessary to attend to replacing the oil seals, otherwise further driving can lead to disastrous consequences
Signs of wear on valve stem seals
If you recognize the wear of oil seals at an early stage and replace them in time, you will be able to avoid serious engine problems. The primary signs of oil seal failure are as follows:
- Thick blue or white smoke comes out of the car exhaust;
- Oil consumption increases significantly;
- Carbon deposits appear on the spark plugs.
When the signs of wear on the valve stem seals described above occur, you need to urgently inspect them, as well as check the gas distribution mechanism and valves. If there are signs of severe wear on the valve stem seals, they need to be replaced, otherwise:
- Engine power will begin to decrease;
- The car will stall at idle, or the speed will begin to “float”;
- Compression in the engine will decrease;
- Carbon deposits will form on the pistons and cylinders, and the valves will no longer provide a tight seal due to poor closure.
Carbon deposits on engine components are a direct path to a quick overhaul. Timely replacement of valve stem seals with new ones will help avoid this.
Replacing valve stem seals without removing the head
The decision to replace oil seals when signs of malfunction are detected is a very correct step
. Sometimes drivers try to solve the problem without “surgical” intervention, using various additives and additives that supposedly soften the rubber and extend the life of the valve stem seals. This decision should not be made: additives either do not have any effect on the seal material, or soften them too much, as a result of which rubber wear only increases.
Replacing oil seals without removing the head is a complex process, so you should devote a lot of time to it, and perform all actions very carefully. How to change valve stem seals? The work algorithm is quite cumbersome, but all these operations must be carried out sequentially and very scrupulously:
1. First of all, you need to wait until the engine cools down and all its elements go into “standby mode”. After this you can start working.
2. The first step is to remove the timing cover. You need to act carefully so as not to damage the gasket (you definitely shouldn’t pick at the cover with a screwdriver).
3. Next, you need to align both shafts (crankshaft and camshaft) according to the marks. Parts should be marked so as not to be confused when assembling the engine, and even better, write down all your actions. When removing the camshaft, you need to loosen its drive. It is advisable to inspect the removed camshaft for the degree of wear - this will help save time and effort during further operation of the car.
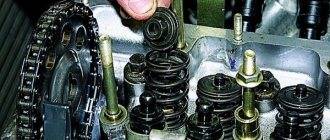
4. The next stage is desiccation of the valves. To do this, you should use a special device. The desiccant bracket must be fixed to the bed fastening stud, and its other end is installed with a ring directly on the valve spring plate. While pressing the lever, you must at the same time use tweezers to pull the crackers out of the plate. After this, the valve tappets can be removed.
5. Considering the fact that pistons 1 and 4 are at the top point, it is better to start replacing the oil seals with them. This is due to the need for support for valve expansion - the pistons will provide it.
6. Having finished desiccation, you need to remove the springs and plate. Next you need to take a collet puller and secure it to the cap. By moving the weight up the puller rod, you need to strike the upper stop, thus removing the cap securely and without loss. It is worth refraining from performing this operation using pliers - the fact is that the landing pad for the cap breaks very easily, and even a slight compressive force can cause irreparable damage to it, the elimination of which will cost much more than purchasing a tool with a collet clamp.
7. After removing the seals, it is worth checking the rod and its guide at the same time. The motivation for these actions is the same as when checking the camshaft - taking the opportunity to get the maximum benefit out of the repair.
8. Now that all the previous steps have been completed, you can install new oil seals. To do this, you need to remove the springs from them and insert the seals into the mandrel, after dripping oil onto the rod.
10. The next stage is the reverse sequence of actions to that used during disassembly: all elements are installed and dried. Having completed these operations the required number of times, replacing the valve stem seals can be considered complete. All that remains is to install all the elements in their places and adjust each system.
Video: replacing valve stem seals
Replacing valve stem seals without removing the head can be done independently without any problems. It is only important to carefully monitor your actions and follow the correct sequence, but quality work done is worth it - an engine with updated oil seals will function normally without causing the slightest inconvenience to its owner.
Replacing valve stem seals begins with allowing time for the engine to cool and for the oil to drain into the sump. Once the engine has cooled down, you can begin removing the valve covers. When removing the timing cover, be careful not to damage the gasket. To do this, do not pry it with a screwdriver if it is not removable, but rather hit it with your palm from the side. Replacing oil seals on a diesel engine is no different from the same operation on a gasoline engine.
Purpose of valve stem seals
Since the lubrication of the gas distribution mechanism is combined (the camshaft journals are lubricated under pressure, and the remaining components and parts are lubricated by splashing), a lot of oil accumulates in the upper part of the head while the engine is running, which even covers the upper edge of the valve guides. Therefore, through the gap between the valves and the guides, oil, if there were no valve stem seals, would flow in large quantities into the combustion chamber along the valve stems. Due to the high temperature of the head, the rubber of the oil seals becomes hard, and their working edges over time cease to tightly cover the valve stems and begin to leak oil.
When the engine is running, the exhaust valve is at high temperature. Therefore, the oil that gets on its working chamfer burns, and the carbon deposits from it create conditions for the valve to burn out (when a slag particle breaks off, hot exhaust gases rush into the resulting leak between the valve and the seat and the valve sometimes burns out along with the seat). The intake valve has a lower operating temperature; the oil does not burn on it, but flows from it into the cylinder. Therefore, the intake valve never burns out.
What are valve stem seals used for?
In internal combustion engines, lubrication is combined, that is, oil enters the camshaft journals under pressure, and the remaining parts of this design are lubricated by splashing.
When the engine is running, so much engine oil collects in the top of the cylinder head that it even coats the top of the valve guides.
The function of valve stem seals is that they prevent the oil accumulated at the top of the head from flowing down the valve stems. If the caps are worn, then the oil flows through the valves directly into the working combustion chambers of the cylinders, hence the thick smoke from the muffler. The wear of the caps occurs gradually. Due to the high temperature of the engine, over time the rubber caps do not fit tightly to the walls of the valve rods and the oil begins to flow down.
Which valves burn out?
The exhaust valve operates at a higher temperature. Therefore, when the valve stem cap is worn out, oil flows onto the facet of the valve cap and at high temperatures it burns, forming carbon deposits on the valve cap. Then this carbon deposits fly off and sometimes the valve cap breaks off or breaks off at the edges. As for the intake valves, even if the caps do not hold the oil, it simply flows into the cylinder without any consequences for the valves. The operating temperature of the intake valves is not so high, so the intake valves do not burn out.
Replacement
Replacing valve stem seals with your own hands:
- Remove the timing cover.
- Align the crankshaft and camshaft to the marks. Place the appropriate markings on the parts so that there are no difficulties with their placement after repair. Write down the location of the pipes and connectors to be removed.
- When removing the camshaft, loosen its drive tensioner.
- Unscrew the camshaft bed fastening and remove it from the head. Determine the size of the keys yourself. While the camshaft is removed, check it for wear on the journals and cams.
- Remove the valve pushers: depending on the design, remove the rocker arms or remove the cups with hydraulic compensators.
- Since the pistons of cylinders I and IV are already at TDC, it is better to start replacing from the edges. Because in order for the valve to dry out, it needs to rest against something; in our case, it will be the bottom of the piston.
- On some models, the intake manifold interferes so much that the desiccant has to be shortened. Because it's easier than removing the manifold.
- Place the desiccant aside, remove both springs and the plate from the rod.
- Attach the puller collet to the cap. Moving the weight up along the puller rod, hit the upper stop with it - the removal of the unusable cap is completed.
- If you have a mandrel, it's worth using it. If it is missing, for caps on valves with a stem diameter of 8 mm, it can be replaced with a 10mm socket wrench. If the diameter of the rods is 6 mm, then a 8mm wrench will do. Valve seals must be made of fluoride rubber (so called sucking FRM).
Device for desiccation of valves. The photo shows the process of removing crackers
If the drive is chain, unscrew the drive gear and remove it from the camshaft. To avoid losing it, it is better to remove the key from the shaft groove and tidy it up. If the drive is belt driven, it is easier to remove the belt from the gear.
The correct tool for removing caps
Take a desiccant. Fix its bracket, which is attached closer to the edge of the lever, to the bed fastening stud, and attach it closer to the middle with a ring on the plate covering the valve springs. With one hand, press the desiccant lever so that the valve springs are compressed and the plate moves down the rod, and with the other hand, take tweezers and use them to remove the crackers from the plate.
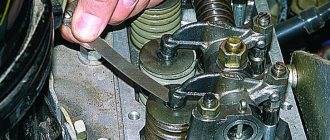
While the valve is free, check the valve stem and guide for wear. To do this, grab the top of the rod with your fingers and try to rock it. If the wear is insignificant, then there will be no play and you will not succeed.
Installation process
Now you know how to change valve stem seals with your own hands. No matter how many times you perform all the procedures before, be very careful.
The main sign of an installed plug is that water does not drain from the bathroom or kitchen sink, and the washing machine does not drain at the same time
. That is, in the case of a normal blockage, part of the sewer is blocked, and the rest works. however, different plugs are installed, for example, maybe meshes - in this case, the water still leaves, but the feces do not, gradually completely blocking the sewer.
If you put a plug on the sewer, you need to do something!
Removing a sewer plug installed (by) the management company or utility companies for non-payment is not as simple as it seems at first glance. The war with defaulters has long turned into a guerrilla war; every month more advanced plugs installed in the sewer riser appear. From the experience of our master plumbers, I can assure you that most often after installing the plug, you will have to disassemble the riser for removal. The easiest way is to remove the inflatable plug, pierce this ball and you're done, you can enjoy the benefits of a working sewer system.
Replacing Lanos valve stem seals without removing the cylinder head
Replacing the valve stem seals begins with removing all unnecessary parts from the door, which is necessary to cool the engine and drain the oil into the pan. Once the engine has cooled, you can begin to remove the valve cover. When removing the timing cover, do not destroy the gasket. To do this, do not press the screwdriver until it is removed, and it is better to tap it with your palm. Replacing a valve stem seal on a diesel engine is no different than replacing a valve stem seal on a gas engine.
Because the timing gear lubrication is aligned (the camshaft journal is lubricated under pressure and other components and parts are sprayed), a lot of oil accumulates at the top of the head, like in an office engine, when the engine is running, which even covers the top edge of the valve guides. Consequently, through the gap between the valves and the guides, if there were no valve stem seals, it would enter the combustion chamber in large quantities along the valve stem. When exposed to the highest temperature of the head, the rubber of the oil seals becomes hard, and after a while their working edges stop wrapping tightly around the valve stems and oil begins to leak out.
When the engine is running, the exhaust valve is at a higher temperature. Therefore, the oil falling on its working edge burns out, and carbon deposits in it cause the valve to burn out (when the slag ruptures, the exhaust gases and the valve are released as a result of a leak between the valve and the seat, it burns out along with the seat). The intake valve has the lowest operating temperature; oil does not burn, but flows out of it into the cylinder. Because the intake valve never burns out.
Wear marks on valve seals, called valve seals
- Excessive oil consumption. Wear of the rings also causes oil consumption, but then the oil will definitely get into the breathing tube.
- Blue smoke from the exhaust pipe after starting the engine. This happens because when the car is stationary, oil seeps into the combustion chambers, burning after the engine starts.
Spare valve seals for Daewoo Nexia
- The greatest oil consumption is the same when driving to the right place or on the freeway (if there is no oil in the breathing tube). At the same time, it is important to diagnose how much oil the engine consumes in different operating modes. Higher oil consumption in the suburbs indicates a full spool of rings.
- Burning candle oil. If the caps are worn, the spark plugs can leak so much that the engine shuts down.
If your vehicle is showing signs of cap wear, it is unlikely that additives will prevent you from doing this task. It's worth thinking about renovation.
Unless you believe in supplements that claim miracle effects and have been renovated, you will need the right equipment. To change lids on handmade products you need:
- Desiccants.
- Tweezers.
- Mandrel for pressing caps.
- Hammer.
- Heads with extensions and handle.
- Set of wrenches and ring wrenches.
- Rings for removing caps.
- Silicone sealant or better yet, a new timing cover gasket.
Replacing valve seals in craft conditions:
- Remove the time cover.
- Align the crankshaft and camshaft. Place appropriate markings on the parts so that they will not have problems displaying them after repair. Make a note of the location of the removable attachments and connectors.
- When removing the camshaft, release the tensioner on its drive.
Valve drying device. The photo shows the process of removing breadcrumbs
If the drive is a chain drive, unscrew the drive and remove it from the camshaft. To maintain it, it is better to remove the key from the shaft socket and clean it. If it is a belt drive, it is easier to remove the belt from the gearbox.
Replacing valve seals (without removing the cylinder head)
The correct tool to remove the cover
Take decoupage. Secure the bracket that attaches toward the end of the lever onto the stud, and place the ring toward the middle on the plate that covers the valve springs. With one hand, press the dryer lever until the valve springs are compressed and the plate falls down the stem, and with the other hand, remove the tweezers and pull the breadcrumbs out of the plate.
While the valve is free, check the valve stem and guide for wear. To do this, you hold the top of the rod with your finger and try to shake it. If the wear is low, there will be no free play and it will not help you.
- If you have a mandrel, you should use it. If there is no passage, for caps on valves with a diameter of 8 mm, it is more for you how to replace with a 10 mm socket wrench. When the stem diameter is 6 mm, the wrench fits at 8. The valve seals are made of fluorine rubber (the so-called suction valve).
- Remove the springs from the seals.
- Insert the oil seal into the mandrel and place a drop of oil on the valve stem.
- Slide the seal along with the mandrel on the valve stem and insert it all the way into the guide seat. Carefully place a hammer on the panel and press into place.
- Don't forget to place the springs on the installed plugs before installation.
- Then install the fittings and dry the method used to remove the breadcrumbs.
- Repeat this sequence as many times as necessary and the covers will be replaced in bush conditions.
- Reassemble the disassembled units in reverse order for removal. If your engine does not use hydraulic motors, adjust the valves.
Now you understand how to replace valve stem seals at home. No matter how much you do with our client, the procedure remains the same, be careful.
Signs of wear on valve seals
Source
How to prevent the installation of a plug in the sewer?
Blocking the sewerage system makes the apartment uninhabitable and does not comply with sanitary and epidemiological safety standards; accordingly, the actions of public utilities to limit or suspend water disposal may be considered illegal. If the court determines the illegality of the actions, you can demand compensation for moral damage. Before installing a sewer plug, the management company or housing and communal services must notify you, without fail, of the “restriction of sewerage services.” When such a notification arrives, it’s time to take preventive measures. A through pin or bolt a few centimeters above the tee will prevent the plug from being installed. Of course, the riser refers to house communications and this is NOT LEGAL, but as you know - “in war, as in war...” We survived.
How to remove a plug from a sewer
If the plug is already installed, you will have to first look at it or try to pierce it. In this case, the apartment is located on the top floor, i.e., if you disassemble the riser, nothing will flow from above. The plug is installed firmly, but can be easily removed from above after disassembling the riser. As a precaution, I screwed in a through pin, so now neither I nor the neighbors below will be able to install a plug.
This is what the installed steel plug looks like from above.
Removed sewer plug, note the bracket. Such a plug cannot be squeezed out or pushed through. To push it down or up the riser, you must first tear off the bracket.
A broken tee in the common riser in which there was a plug. Subsequently replaced with a new one.
Egor Trubetskoy - experienced plumber
How to remove a plug in a sewer with your own hands
Egor Trubetskoy - foreman:
Before removing the debt plug installed by the housing and communal services or management company yourself, you must clearly understand that your sewer system is a pipe from a common sewer riser, a tee and the riser itself are the responsibility of the housing and communal services, if something goes wrong and the case goes to court, you It will be difficult to explain what you did there. However, it will be difficult for housing and communal services to prove anything in court, unless of course you give them access to your apartment to conduct an examination. A judge may request such an examination, but from an independent organization. In short, you have to poop, you can’t run into your neighbors - what can you do?
- 1) You can try to remove it yourself if you are sure you can handle it.
- 2) Call a plumber to replace the sewer pipes and agree with him to remove the plug. Plumbers are reluctant to take such actions, but in this case, responsibility for the work falls on you, because you are the owner. Even if the master refuses to remove it, you can remove it yourself, after dismantling the old pipes and before installing new ones.
Even experienced car enthusiasts are interested in how to remove wheel covers from a vehicle. This is especially true if a force majeure situation arises on the road and there is a need to change a tire. At first glance, the task seems elementary and easy to accomplish.
How to remove wheel covers without damaging them? Most beginners are afraid of this. Of course - they are so beautiful, and even made of plastic. That’s why they try their best to demonstrate incredible steps and pirouettes near the wheels. But scratches and cracks still appear if you don’t know the secrets of removing hubcaps.
Installation looks really easy. It is necessary to insert the cap and apply a little force until it clicks. When it comes to removal, car enthusiasts use a variety of tools: from a regular screwdriver and knife to a jack handle and even pliers.
And yet, how to carefully remove the caps? Right now you will learn several proven methods for removing hubcaps. Promise that you will tell your friends and colleagues about them. There will be much fewer damaged hubcaps in this world.
Let's use the jack
Use a jack - this is the easiest and most proven method of removal. To avoid scratches, use a piece of cloth between the hubcap and the car wheel. We carry out the work carefully, avoiding sudden body movements. Try to pry off the cap itself. With normal fastening, you will hear a faint click, after which the cap will begin to unscrew. Then you can twist more boldly to bring the matter to an end.
In rare cases, the cap may simply “stick” to the disc. This happens if the wheel has been removed for a long time or has never been removed at all. The second cause of problems is clay getting into the openings and its subsequent drying. Do not rush to use force - nothing good will come of it. To avoid breaking the cap, use the universal product VD-40. Spray the diameter of the cap 2-3 times and wait 15 minutes. A “stuck” part will literally go smoothly!
Remove the cap with a screwdriver
Experienced car enthusiasts will definitely tell you about another method of removal - using a regular screwdriver. A cross is not suitable, we are only looking for a tool with a flat end. The larger the better - a screwdriver that is too small will fit into the gap, but may bend. Once a suitable screwdriver has been found, insert it into the gap. We try to get the screwdriver to where the protrusion is. After this, we begin to gently pull towards the center. The task is simplified if the cap has slots. At this time we are pulling him towards ourselves.
Mounting, such mounting...
Mounting is not only a means of self-defense. After all, it’s not just lying in your trunk; it can be useful for more peaceful tasks. For example, to remove the cap. The driver performs the same actions as with a screwdriver, only he takes a pry bar instead. At some “basement” service stations, the caps are removed – or rather, they are torn off just like that. Sometimes the procedure ends successfully if the master’s hands grow from the right place. This method is only suitable if you are 100% confident in the professionalism of the master. We advise you not to take risks and refrain from such extreme activities.
The cap of the cap sees from afar
Not only the fastening, but also the design itself may differ significantly. Most often, service station specialists have to deal with ordinary “China”, presented in abundance. The quality of the plastic is extremely low, but the price is reasonable. Chinese hubcaps are universal, so they are suitable for European, American, and Russian cars.
However, you must understand that a quality product cannot be cheap. This is why Chinese caps crack in the cold due to budget plastic, and sometimes fall apart after an unsuccessful touch. So there is no need to despair about the unsuccessful removal of the cap. It is possible that you did everything right - disposable and disposable in Africa. To break the cycle of “buy-throw-away-bought”, it is enough to purchase a certified product from the car manufacturer. At least you will insure yourself against numerous shortcomings of caps from China.
What about domestic cars?
Some drivers still drive Soviet-made cars. On domestic roads you can see anything, even Moskvich. On some models, not plastic, but metal caps were installed. It’s unlikely to be possible to open such “canned food” without dancing with a tambourine. But here, too, the old, life-saving VD-40 comes to the rescue. Again we spray along the diameter of the cap, sometimes you can even knock with a hammer, but not too hard!
Vladimir Petrovich from the next apartment may not know how to remove the hubcaps from the wheels of a car. If you already know and can do it, add another useful skill to your collection!
In order for a car engine to work properly for as long as possible, and also to avoid increased oil and gasoline consumption, it requires timely maintenance or repair. Such mandatory procedures also include valve stem seals. Next we will talk in detail about valve seals and look at what these parts are. In this article we will answer questions about what signs you can use to determine the need to replace the valve stem seals and how to change the valve stem seals yourself.
Read in this article
Replacing oil seals (valve seals)
In order for a car engine to work properly for as long as possible, and also to avoid increased oil and gasoline consumption, it requires timely maintenance or repair. Such mandatory procedures include replacing piston rings and valve stem seals. Next we will talk in detail about valve seals and look at what these parts are. In this article we will answer questions about what signs you can use to determine the need to replace the valve stem seals and how to change the valve stem seals yourself.
Read in this article
General information about valve stem seals
Oil seals (oil seals) are part of the oil distribution mechanism in the engine. The presence of oil is the most important condition for work. But it doesn’t have to be everywhere. For example, during its rotation it is always in an oil mist. But there should be no lubricant in the combustion chambers. There is only a fuel-air mixture, which burns. If you add oil to it, combustion will worsen, which will affect the increase in gasoline consumption.
Removing coke deposits and carbon deposits in the engine: available methods. Self-flushing of the engine without opening, mechanical cleaning of the engine.
