Heater device
First of all, let's carefully study the structure of the object in question. On the rear window of a car there are conductive threads that heat up due to the fact that current passes through them. They create heating. Its voltage is maintained by elements such as relays, wiring and fuse. This elementary circuit ends, of course, with a power button.
The diagram below describes in detail the structure of the heater of the VAZ 2107 car:
- mounting block or so-called “block”;
- on/off relay;
- egnition lock;
- on/off button;
- warning light on the dashboard;
- heating filaments on the rear window.
Causes of problems
- If the power button does not light up and the glass does not fog up, then most likely the control for turning on the heating relay has failed. In this case, you should check whether there is voltage on it.
- If the glass also does not defrost and the button does not light up, then, presumably, the control for turning on the heating relay is not working. The diagram will help you diagnose control voltage and ground, indicated on the relay as 85 and 86 and wires numbered 1, 2, 4, 9, fuse F7, power button.
- If the rear window heating does not work and the control light on the dashboard is on, then it is worth checking the power to the wires numbered 5, 19, 30, fuse F4 and whether the heating element is in working condition.
- If, when this function is turned on, the glass clears unevenly, it means that some of the threads carrying current have been damaged. In this case, the circuit is no longer needed. Below we will tell you how to solve this problem.
detailed instructions
Strand breaks most often occur when the driver is too diligent in scraping snow and ice from the rear window. But it is very easy to fix this problem: you need to purchase a special kit for repairing contacts of the VAZ 2107 rear window heater at a spare parts store. Its cost is approximately 400 rubles.
Before work, be sure to degrease the glass with alcohol, apply conductive paste exactly according to the supplied stencil and leave to dry. Most often, you can turn on the heated rear window within a day after the repair. Despite the fact that the algorithm of actions is always approximately the same, read the instructions carefully and strictly follow the sequence of work steps.
Windshield improvement
As you know, in VAZ 2107 cars the manufacturer did not provide such a function as a heated windshield. There is only its airflow, which allows you to remove the effect of “foggy glass”. If you want to improve your car, then you can become the owner of a heated windshield. This athermal glass can be installed independently without any problems, since all the necessary components are included with it.
This type of glass is ideal for the VAZ 2107, so a snowy, frosty morning will no longer be able to ruin your mood. Of course, heated glass is quite expensive compared to its simple counterpart. But you definitely won’t regret this windshield improvement.
Improved windshield
As you know, in VAZ 2107 cars the manufacturer did not provide such a function as heating
windshield. There is only its air flow, which allows you to remove the “foggy glass” effect. If you want to improve your car, you can become the owner of a heated windshield. This athermal glass is easily delivered on its own as all the necessary components are attached to it.
This type of glass is ideal for the VAZ 2107, so a snowy, frosty morning can no longer ruin your mood. Of course, heated glass is quite expensive compared to its simple counterpart. But you probably won't regret this windshield upgrade.
Source
General diagram of the electrical equipment of the VAZ 21074 injector
1. Electrical diagram of the harness for assembling the instrument panel LADA 21074
- — ignition switch unloading relay;
- — turn signal relay;
- — windshield wiper relay;
- — brake light switch;
- — headlight switch and direction indicators;
- — windshield wiper and washer switch;
- — Ignition switch;
- - alarm;
- - set of tools;
- — rear window heating switch;
- — rear fog lamp switch;
- — external light switch;
- — heater motor switch;
- — additional heater motor resistor;
- — electric heater motor;
- — indicator lamp for heated rear window;
- — brake fluid level indicator;
- — device lighting switch;
- - lighter;
- - Watch;
- — backlight switch;
- — hand brake sensor;
- — fog lamp relay;
- — instrument panel harness panel to ignition harness;
- - light with gloves;
- — mounting block.
READ How much antifreeze in Niva 21213
A1, A2. Wiring harness grounding points on the instrument panel. A3. Heater motor grounding points.
2. Connection diagram for ECM injector LADA 21074
1 - controller; 2 — diagnostic oxygen concentration sensor; 3 — ignition system stick block to the right mudguard braid; 4 — blocking the level of the fuel harness to the ignition system wiring harness; 5 and 7 — fuel pump braid gaskets; 6 — oxygen concentration control sensor; 8 - electric fuel pump; 9 — diagnostic unit; 10 — speed sensor; 11 — idle speed regulator; 12 — throttle position sensor; 13 — coolant temperature sensor; 14 — mass air flow sensor; 15 — crankshaft position sensor; 16 — solenoid valve purge adsorber; 17 — ignition coil; 18 — spark plugs; 19 — nozzles; 20 — ignition system harness to the dashboard harness; 21 - fuse for the controller power circuit; 22 — ignition relay; 23 - ignition relay fuse; 24 - fuse for powering the fuel pump; 25 - electric fuel pump relay; 26 — braid block of the ignition system to the nozzle nozzle; 27 — block the injectors of the harness to the ignition system harness; A - to the positive terminal of the battery; B1 - grounding point of the fuel level sensor harness; B2, VZ - grounding point of the ignition system wiring harness; 21074-3724026 — Ignition wiring harness
The rear window heater on a VAZ 2107 stopped working
As the temperature drops, it becomes necessary to frequently use devices for heating the interior and heating the rear window on a VAZ 2107. Although the rear window is not the main one, reduced visibility through the rear view mirror can cause an emergency. In order to increase the visibility of the rear window, a heater is installed on its inner surface. If the rear window heating does not work, then you can begin to solve this problem yourself.
Video: Connecting the Rear Window Heating VAZ 2107
3. Connection diagram for assembling the right harness of LADA 21074.
- — mounting block;
- — block of sticks of the right haze to the braid of the left mudguard;
- — side turn signal to the right;
- — right headlight;
- — additional relays are activated;
- — windshield washer pump;
- — correct harness gaskets and starter connecting wires;
- — starter;
- — battery;
- — generator.
A1. Right harness grounding point. A2, A3. Grounding points for the wire connecting the motor to the battery and housing.
4. Connection diagram of the wiring harness for the left design of the LADA 21074 mudguard.
- — mounting block;
- — the block of the stick of the left haze to the braid of the right mudguard;
- — headlight on the left;
- — side left turn signal;
- — oil pressure warning lamp sensor;
- — coolant temperature sensor;
- — brake fluid level sensor;
- — windshield wiper motor;
- - sound signal;
- — electric motor fan.
READ What Oil to Fill in Opel Zafira
A1, A2. Grounding point for the left mud harness.
5. Connection diagram for flat rear cable harnesses of LADA 21074.
- — mounting block;
- — braid block with a flat back to the ignition system braid;
- — light switch on the front right door;
- — light switch on the right rear door;
- — light switch on the front left door;
- — light switch on the left rear door;
- — correct interior lighting;
- — interior light on the left;
- — fuel pump with fuel level sensor;
- — rear window heating element;
- — additional brake signal;
- - direct lamp;
- — left lamp;
- — number of the lantern on the left;
- — license plate light, right.
A1. Rear window heating element grounding point. A2. License plate light wiring harness grounding point. A3. A8. Grounding points for the flat back of the seat belt
Source
When the temperature drops, you often need to use devices for heating the interior and heating the rear window on the VAZ 2107. Although the rear window is not the main one, reduced visibility through the rear view mirror can cause an emergency. To increase visibility of the rear window, a heater is installed on its inner surface. If heating does not work, then you can solve this problem yourself.
Heater design and circuit
Structurally, the rear window heater is presented in the form of conductive strips through which current flows. This current causes these strips to heat up, resulting in heating of the entire glass, which means defrosting the ice and eliminating fogging.
The heating circuit includes not only conductive strips, but also relays, wiring and a fuse. To turn on the device, a button is installed in the interior of the VAZ 2107 car. To understand how the design of this device works, below is a diagram that shows in detail all the components.
In the diagram, each element has its own purpose:
- A mounting block or relay and fuse block is a device that houses a relay with two fuses inside.
- Relay - helps to reduce the current in the circuit, thereby eliminating overheating of the wiring and failure of the power button.
- Ignition switch - a positive contact comes from the lock, which eliminates the possibility of turning on the rear window heater when the engine is not running.
- The button is dual-mode - turns the device on and off.
- The warning light is an indicator indicating the operation of the system and is located on the dashboard.
- Heater - has the form of conductive strips or threads that are glued to the glass on the inside.
Knowing the circuit diagram of the device, it will not be difficult to eliminate various malfunctions. We will consider below what types of malfunctions most often occur in the rear window heating system of the VAZ 2107.
For what reasons does the heating not work?
Owners of sevens know all the “sores” of this domestic vehicle, so when a malfunction occurs with the rear window heater, you don’t have to look for a breakdown for long. However, beginners and those who have not yet encountered such a malfunction are wondering how to check the system to find the cause and the faulty part.
The following reasons are identified for the inoperability of the heated rear window of the VAZ 2107:
- The fuse is faulty - if, when you turn on the rear window heating button, you find that it does not light up, then the first thing you need to check is the serviceability of fuse F7. It is he who most often burns out, which leads to the inoperability of the system. The reasons for its burnout are known - the passage of a large amount of current.
- Malfunction of the rear window heating relay - the relay, the main purpose of which is to reduce the current supplied to the power button, can also fail. If it malfunctions, it will need to be replaced.
- Malfunction of the power button - the reason for its failure is oxidation or carbon deposits on the contacts that occur when turned on. After all, it is known that when the rear window heating is turned on, a current is generated whose value is ten times the nominal value. This phenomenon contributes to the formation of carbon deposits on the button contacts.
- Damage to conductive threads. The cause of their malfunction is a broken contact. However, any breakdown in the system can be eliminated if the cause and location of the damage are correctly identified.
So, if a fuse, relay or button fails, then these parts cannot be repaired and must be replaced. Damage to wiring is extremely rare, so it can only be called when all of the above elements have been checked.
Heating restoration
The reasons for the rear window heater not working on the VAZ 2107 are known, but many do not know why the conductive strip may break. The reason is somewhat trivial - too zealous washing of the glass surface or incorrect application of the tint film. Even if this happens, you should not despair, because you can always repair the heated rear window of a VAZ 2107.
First you need to find the location of the damage, as sometimes this is very difficult to do. If the location of the damage is visually traced, then such damage can be eliminated using a special “Kontaktol” repair kit from Keller or analogues. Its cost is about 400-600 rubles, and you can find it in any auto store.
Diagram of the device and heater
Structurally, the rear window heater is presented in the form of conductive strips through which current flows. This current causes these strips to heat up, causing the entire glass to heat up, which means the ice will melt and the fog will disappear.
The heating circuit includes not only conductive strips, but also relays, wiring and a fuse. To turn on the device in the VAZ 2107 car there is a button. To understand the design of this device, the diagram below shows all the components in detail.
In the diagram, each element has its own purpose:
- A mounting block or relay and fuse block is a device that houses a relay with two fuses inside.
- Relay - helps reduce the current in the circuit, thereby eliminating overheating of the wiring and failure of the power button.
- Ignition switch - the positive contact comes from the lock, which eliminates the possibility of turning on the rear window defroster when the engine is not running.
- Dual mode button - turns the device on and off.
- The warning light is an indicator that indicates the operation of the system and is located on the instrument panel.
- Insulation - takes the form of conductive strips or threads that are glued to the inside of the glass.
Knowing the circuit diagram of the device, eliminating various malfunctions will not be difficult. We will consider below what types of faults are most common in the rear window heating system of the VAZ 2107.
For what reasons does the heating not work?
Owners of the Seven know all the “sores” of this domestic car, so when a problem arises with the heated rear window, you don’t have to look for a break. However, beginners and those who have not encountered such a problem before are wondering how to check the system to find the cause and part of the problem.
READ Why the Starter Takes Charge of the VAZ 2106
There are the following reasons for the inoperability of the heated rear window of the VAZ 2107:
- The fuse is faulty - if, when you turn on the heated rear window button, you find that it does not light, then first of all you need to check fuse F7. It is he who most often burns out, which entails the inoperability of the system. The reasons for its burnout are known - the passage of a large amount of current.
- Faulty rear window defroster relay - The relay whose main purpose is to reduce the current supplied to the power button may also fail. If it is faulty, you need to replace it.
- A faulty power button - the reason for its failure is oxidation or carbon deposits on the contacts, which occurs when turned on. After all, it is known that when the rear window heating is turned on, a current is generated whose value is ten times higher than the nominal value. This phenomenon contributes to the formation of soot on the contact buttons.
- Damage to conductive threads. The reason for their refusal is broken contact. However, any damage to the system can be repaired if the cause and location of the damage are correctly identified.
Therefore, if a fuse, relay or button fails, these parts cannot be repaired and must be replaced. Damage to electrical wiring is extremely rare, so it can only be caused by checking all of the above items.
Scheme for heating the rear window of a VAZ 2107 car
“Seven” is still popular, they are bought, then sold, then bought again. This is the most advanced model of the classic Lada.
The heating circuits for each car brand are different, but for models of the same family they are approximately the same. The VAZ 2107 heater circuit is simple. You should look for the reason for the intermittent or completely non-functioning glass heater in the electrical circuit diagram. Heated glass does an excellent job of preventing fogging, but it happens that the heater is working, the heating is working, but the glass in the car still sweats.
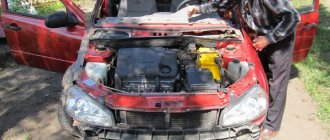
How to fix the heating of a VAZ2107 with your own hands
To eliminate the causes of malfunctions, you will need the following devices:
- multimeter or voltmeter;
- foil.
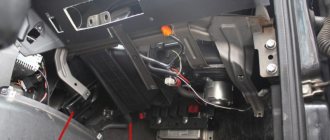
Identifying the cause throughout the entire circuit
The most common failure of a defroster is a blown fuse. Until some kind of breakdown occurs, for example, failure due to a blown cigarette lighter fuse, the location of the unit and the fuses themselves are not known.
- Step No. 1 - in VAZ 2107 cars, the fuse that is responsible for heating the rear window is located in the fuse block under the designation F5.
- Step No. 2 - if the fuse is working, then the next step is to check the heater terminals on the glass and for ground.
- Step No. 3 - check the control unit connector (relay and toggle switch (on/off button)).
- Step No. 4 - checking the heating filaments with a tester.
- If the above steps do not reveal the cause, then Step #5 is to check the ignition switch contacts or fuse block board.
Step-by-step guide to diagnosing defroster filaments:
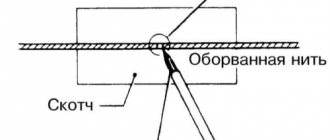
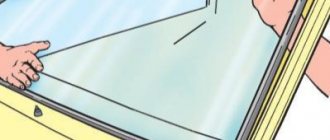
- To ensure that the heating filaments are not damaged by the sharp tips of the probes, it is necessary to wrap pieces of foil around the probes of the measuring device (voltmeter or multimeter in position “B”).
- Turn the ignition key and turn on the heating switch.
- One probe of the measuring device must be connected to the positive wire, the second - to the middle of the wire (see figure).
- The value in volts should be 6. If it shows 6 V, then the heater filaments are working.
- If the value on the device displays 12 V, then the thread is broken between these two points.
- If 10 V is visible on the screen, then the thread is broken from the midpoint to the negative point.
- Next, you need to move the probes to the right, from the middle point to the right vertical stripe (minus), from the “plus” to the middle. If in this section the meter shows from 0 to 5 V, then this section of the circuit has a break.
Heated rear window does not work
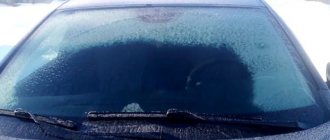
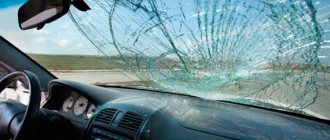
Good visibility in a car is a guarantee of safety, which is why it is so important to monitor the cleanliness of the glass and the functionality of devices that affect the driver’s visibility (windshield wiper, washer, heated glass, etc.). In rainy weather, the windows may fog up, and in winter they may even become covered with a crust of ice. What to do in such weather conditions?
To view the traffic situation in the rearview mirror, as well as to ensure proper visibility when reversing, engineers came up with a “means” that solves the problem of visibility in bad weather - a rear window with threads (elements) that heat the surface of the glass.
If the rear window heating does not work , visibility deteriorates, the glass fogs up and becomes covered with raindrops. In winter, after heavy snowfalls, with such a breakdown, sometimes you even have to come to terms with “zero” visibility of the road situation in the rear of the car. In such “neglected” cases, only a good stove and a small fan on the rear shelf can save...
Wiring diagram of a VAZ 2107 car with explanations
Download link: Close-up diagram
Explanations for the VAZ 2107 electrical diagram (click to expand!):
- block headlights
- side direction indicators
- accumulator battery
- starter relay
- carburetor electro-pneumatic valve
- carburetor microswitch
- generator 37.3701
- gearmotors for headlight cleaners *
- Fan motor switch sensor
- engine cooling fan motor
- sound signals
- distributor
- spark plug
- starter
- coolant temperature gauge sensor
- engine compartment lamp
- low oil pressure warning sensor
- low brake fluid level indicator sensor
- windshield wiper motor
- carburetor electro-pneumatic valve control unit
- ignition coil
- headlight washer pump motor *
- windshield washer pump motor
- mounting block
- windshield wiper relay
- hazard warning and direction indicator relay
- brake light switch
- reverse light switch
- ignition relay
- ignition switch
- three lever switch
- hazard switch
- socket for portable lamp**
- heater fan switch
- additional resistor for the electric motor of the heater (stove)
- rear window heating indicator lamp
- low brake fluid level warning lamp
- signaling unit
- heater fan electric motor
- glove compartment lamp
- light switches on the front door pillars
- switches for warning lights of open front doors ***
- front door open warning lights ***
- connection block
- cigarette lighter
- watch
- instrument light switch
- diode for checking the serviceability of the low brake fluid level indicator lamp
- fuel level indicator
- fuel reserve indicator lamp
- speedometer
- turn signal indicator lamp
- carburetor choke indicator lamp
- battery charge indicator lamp
- carburetor choke warning switch
- instrument cluster
- econometrician
- light switches on the rear door pillars
- coolant temperature gauge
- tachometer
- parking brake indicator lamp ("handbrake")
- low oil pressure warning lamp
- high beam indicator lamp
- indicator lamp for turning on external lighting
- voltmeter
- parking brake indicator switch ("handbrake")
- outdoor light switch
- rear window heating switch with backlight
- rear fog light switch with on/off indicator *
- fog light circuit fuse
- lampshade ****
- tail lights
- level indicator and fuel reserve sensor
- connectors for connecting to the rear window heating element *
- license plate lights
Further on this page we have collected all the schemes we found on the Internet. All diagrams are clickable, click on them to enlarge.
If you want to add something, you can post it in the comments and we will add to the article.
Mounting block
G222 generator connections
Generator connections 37.3701
Starter connections
Classic ignition system connections
Contactless Ignition System Connections
Carburetor air valve control connections
Outdoor lighting connections
Headlight and fog light connections
Hazard and turn signal connections
Windshield washer and wiper connections
Audio Connections
Heater motor connection
Heated rear window connections
Interior lighting connections and front door open alarm
Handbrake warning light connections
Connections between the fuel level indicator and the reserve indicator lamp
Connections for coolant temperature indicator and oil pressure warning lamp
Connections for lighting the glove box, cigarette lighter and portable lamp socket
Wiring diagram of the car VAZ 21074i
Electrical connection diagram January 7.2 LADA 2107, ECM EURO-2 M7.9.7, 21074 with engines 2104, 2104-1411020-10, 21067, 21067-1411020-11, 12
Dashboard
Right mudguard wiring harness connections
Left mudguard wiring harness connections
Interactive wiring diagrams
If you use a mobile device on the Android platform, you can install the "interactive diagram" application. Link: https://play.google.com/store/apps/details?id=ru.mdss.repairvaz2107
There is also a good interactive program for PC. Link: https://yadi.sk/d/FPbVEA6Xqxxxqg
If you don't know how to use diagrams, watch a detailed video tutorial. It will help you understand how to read car wiring diagrams.
7-vaz.ru
Rear window heating repair
To troubleshoot the heated rear window, you should start by determining the cause of its failure. If the individual threads of the heating element do not heat up, the threads have broken somewhere.
Note: to check the operation of the heating filaments (elements), you can use a regular tester, measure the resistance at the ends of each strip with an ohmmeter, or switch the multimeter to the “ringing” mode and determine where the break occurred.
Repair in this situation consists of restoring the electrical circuit. To do this, you can try to restore the heating circuit using a special conductive glue, or solder the disconnection point. At the gluing site, the glass will heat up more due to the greater resistance in this section of the circuit, which can lead to the glass breaking.
We recommend not doing these “things” for the sake of saving, but simply replacing the rear window with a heating element. Believe me, you will spend much more time and money, worry about soldering, and in the end, you will still come to the conclusion - buy new glass.
Option 2 - not a single heating thread (strip) heats up
Connection diagram for heated rear window of VAZ 2106
- faulty button (switch), relay, rear window heating fuse
- wires are damaged
- tips are oxidized or poorly connected
- The contact from the glass heating element has become disconnected.
Replace faulty switch, relay, fuse, wires with new ones. Clean and crimp the terminals. If the terminal is unsoldered from the heating element, replace the glass with the heating element.
Troubleshooting the heated rear window of a VAZ
Almost all VAZ models have heated rear windows, which makes driving the car much easier in special conditions.
Most often, heating is needed in bad, cloudy weather, when the rear window fogs up from the condensation that forms, as well as in winter, when the glass becomes covered with ice. The operating principle of the heater is quite simple:
- a conductive thread of a certain resistance is applied to the rear window, which heats up when current passes through it;
- supply voltage is provided by the following components: wiring, relay, fuse and power button;
This scheme is used on all VAZ cars (as well as on most foreign cars), from the “classics” to the latest models.
Rear window heating malfunctions and solutions Diagram:
1 - mounting block;
2 – switching relay;
3 – ignition switch;
4 – power button (backlit);
5 – warning light on the instrument panel;
6 – heating thread (element) of the rear window;
The inoperability of the rear window heater is detected immediately; when the heating is working, the fogged glass begins to clear up literally in the first minutes after switching on. If the heating is not working, this does not happen and the glass remains foggy.
Heating may not work for the following reasons:
- the glass does not thaw at all, the signal light (power button) does not light up: most likely, the control for turning on the heating relay does not work. It is necessary to check: control voltage and ground (85 and 86 on the relay, 1 and 9; and 2 and 4 on the block), fuse F7, button 4.
- the heating does not work, the indicator lamp on the instrument panel (or on the power button) lights up: there is probably no supply voltage. It is necessary to check: supply voltage (pin 5, 30 on the relay, 19 on the block), fuse F4, voltage and ground on the heating element, integrity of the element itself;
- the glass becomes partially clear (in stripes). Some heating threads have failed. Restoration is possible: it is necessary to find the damage (open circuit) and restore it using conductive varnish (glue) or using a special repair kit.
- everything works, but the glass does not thaw. This is possible in winter, or during the cold season, when the glass is heavily icy. The heating element of the heater is not enough and the glass cannot thaw. To avoid this, you need to clear the glass of ice.
If you find an error, please select a piece of text and press Ctrl+Enter.