Lada Kalina glass replacement
During vehicle operation, optical instruments and glass elements may become damaged, crack or burst. Therefore, the damaged element will need to be replaced. Individual users can contact a service station, where specialists will perform the procedure and receive a large reward. But a certain category of drivers prefer to repair their cars themselves.
After the work
- After carrying out work to replace the windshield, it is forbidden to drive a car and sharply slam or open doors for the first 6-8 hours . Please note that the side windows on the front doors must be open so that when opening they do not create unnecessary pressure on the windshield.
- Any work related to impact on the windshield (fixing the rear view mirror, sensors and instruments - approx.) can be carried out only after 14 hours. The optimal strength of the adhesive layer is achieved only 3-5 days after the work (Given that during this entire period the temperature regime is maintained and the weather conditions are ideal - approx.), by that time the sealant crystallizes and becomes fully suitable for external factors .
- Checking the glass for leaks should be done at a car wash using a high-pressure apparatus, since a “spill” from the hose may not show a leak.
Everything seems so simple while you read the article, but when it comes down to it, it turns out that your hands grew from the wrong place. If you don’t feel strong enough, then there’s no point in fooling around - it’s better to immediately turn to specially trained people.
As for me, you need to do everything yourself - slowly, carefully and efficiently. Two months ago, I had my glass replaced at a service station; to put it mildly, it’s “terrible” - it’s leaking in two places, I’ll fix it myself.
It’s approximately clear how to replace the windshield, and a new molding is not the biggest problem; nevertheless, if necessary, I will have the replacement done by a specialist, so that I have someone to ask if something goes wrong.
Read also: Alert siren police
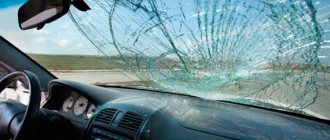
During the operation of the car, any part of the body element, including the windshield, receives damage of varying strength and nature. Cracks, chips, scratches resulting from careless actions, when colliding with road debris and rubble, from hitting tree branches, as a result of an accident cause discomfort to the driver.
All these factors negatively affect the quality of the review. Over time, restoration procedures for car windshields become a half-measure, and the question of replacing it seriously arises. The car enthusiast is faced with a choice: install a new part himself or contact a service station. Let's look at the repair process using the example of replacing a Kalina windshield.
Changing the lobovukha
Replacing the windshield on a Lada Kalina requires some preparation. To do this, you need tools and consumables:
- set of Phillips and flat head screwdrivers;
- set of wrenches, heads No. 8, 10, 13;
- stationery knife for removing sealant;
- a thin drill for making a hole in the old sealant for pulling the saw through - if necessary;
- special cord saw for cutting glass;
- directly sealing composition (you can buy glass sealant from your favorite manufacturer);
- instead of glue, saws and degreasers, you can also buy a kit for gluing glass - everything is already there;
- suction cup handles for lifting the window from the groove (if not, you can do without them);
- a bottle of solvent for cleaning the seat;
- rags.
Window replacement procedure.
- The first step is to thoroughly wash the car and set it to handbrake/gear. Naturally, it is better to perform the procedure in a closed garage, where there is no debris and dust.
- To increase the comfort of the operation and prevent glass chips from getting into the interior, wipers, frills, dashboard and trim (ceiling, door pillar upholstery) should be removed. In principle, repairs can be carried out without dismantling - this will take more time. It is also recommended to cover the front part of the cabin with rags or polyethylene - glass dust can cause a lot of inconvenience in the future.
- Using a special tool, cut off the old glass. You don’t have to be careful here - the part, after its removal, is only suitable for disposal.
- Next, you will need to remove the remaining sealant - for a high-quality effect, it is recommended to remove the glue completely. In this case, take a stationery knife or a thin blade and remove the sealant with smooth movements. You can also heat the remaining mixture with a household hairdryer. When heated, the polymer becomes plastic and pliable.
- After treating the surface with a degreaser, apply an even bead of sealant around the entire perimeter of the window. Then everything depends on the composition itself; it is recommended to initially read the instructions on the sealant and then apply it. The waiting time before the glass is glued in and the mixture dries completely can vary significantly. The main recommendation is to apply the sealant in a continuous, even layer. If the roller is thinner in any place, the area may not stick, which will cause the window to fog up or water to get inside the car.
- Installing a new window is easier with an assistant. After lowering the glass onto the glue, it should be pressed down slightly.
- It is strictly forbidden to touch the car until the sealant has completely dried. It is prohibited to open and close doors, create excessive air pressure and vibration.
After replacement, the car will need to be carefully closed in the garage (avoiding excess air pressure) and left for at least a day.
After polymerization, you can assemble the interior, and replacing the Lada Kalina windshield with your own hands is completed.
Instructions for replacing the windshield on Kalina
How to remove glass correctly
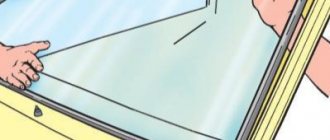
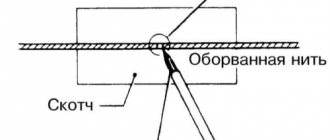
- We take the string in our hands and pierce it with glue-sealant. One side of the string is inserted into the interior of the car, its ends are put on special handles, which are usually included in the kit. To make it easier to hold, the string can be wound around a screwdriver. Using a string or knife, cut off the old sealant over the entire area of the glass. An assistant is needed for this operation. The string needs to be worked inside and out. Carefully remove the glass.
- Using a construction knife, we get rid of the old sealant. Don't leave any pieces behind, clean everything out, even small particles. This way we prepare a place for new glass. The old molding is already damaged and will not be useful, so we install a new one.
- We try on the new windshield at the installation site. You can make the necessary notes using a marker or felt-tip pen, this will allow you to achieve maximum accuracy when installing the glass. Many car models already have marks for installing glass, which greatly facilitates the work.
- We degrease the glass groove with a special liquid. Be sure to read how to use it. Improper use can affect both health and future work. It should be noted that the liquid should not contain silicone. If there is corrosion where the glass is installed, it must be removed with an anti-corrosion agent until it is completely shiny.
- Prime the surface. Prime the area where the windshield is glued in and where it contacts the groove with a brush once. Remove excess sealant. You can use an activator to treat dried sealant.
- We take the sealant and an air gun and very carefully apply the glue in a uniform, continuous strip. This is the most important process in replacing glass.
- Attach the windshield. This should be done no later than 5 minutes after applying the glue. We monitor the coincidence with the marker marks. Very carefully, but firmly press the glass along the entire perimeter. The sealant is evenly distributed, ensuring contact between the glass and the groove. If some of the sealant comes out, do not rush to remove it, let it dry. Once dry, you can easily clean it off.
- Now you need to fix the glass. To do this you will need masking or stationery tape. Painting is better because it is easier to remove later. You can additionally use special attachments on the outside of the window opening for better glass fastening. We first glue the tape onto the glass, then tighten it a little and glue it to the body.
After completion of the work, the car must stand for at least 6 hours, this is necessary for polymerization. At first it is better to reduce your driving speed. You also need to remember that the sealant will not harden at an air temperature of about 0° and below, so it is important to ensure the appropriate temperature conditions in the room.
The windshield on any car has the same functions and purpose. The question of replacing it can always arise when chips or cracks make it impossible to operate the car, as well as when it has traces of deformation of a mechanical or natural nature.
Read also: Technical characteristics of the Volkswagen Polo sedan
The video shows the installation of a new windshield on a Lada Kalina:
We offer you a manual, after studying which you will be able to discover another new page on how to independently maintain your car.
How to change a rear window
On Lada Kalina, replacing the rear window is carried out in the same way as the front part. There is no fundamental difference in the sequence of actions and the required tools. The only caveat is that you need to remember to turn off the rear brake light and the contact of the heating element. If this is not done, during removal you can tear off the heater line from the fasteners on the car body.
It is noteworthy that some motorists use brake cables from a bicycle or motorcycle as a saw. Users insist that such a “string” does not break and cuts glue better. The only negative is that if the window being replaced is planned to be used further, the edges of the glass may be severely deformed.
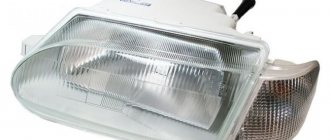
How to repair headlights
Replacing the headlight glass of a Lada Kalina will force the technician to work more. For high-quality repairs, you will need to remove the unit itself. Actually there is no problem here, but to gain access you will need to disassemble half of the front fascia of the vehicle.
- Set the car to the handbrake. For the convenience of the master, you can drive the car onto a viewing hole or a special lift - this will make it convenient to work.
- Remove the positive terminal from the battery.
- Unscrew the front fastenings of the crankcase compartment protection. In principle, it can be dismantled entirely. If the panel is not in the way, you can simply move it away.
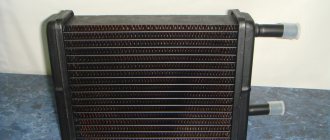
- Remove the license plate and radiator trim. All fastening elements are not durable. Use a screwdriver and wrenches carefully.
- Unscrew the bumper and its amplifiers. In this case, you will need to apply force - the bolts often stick.
- Next, use key No. 10 to unscrew the headlight from its mount and pull the module out of the socket.
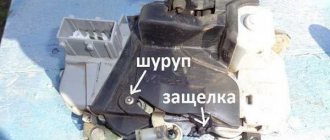
- The glass in the block is attached to 8 plastic clips. The latches are pryed off with a flat screwdriver or similar tool and the part is completely released.
- Next, you will have to use a stationery knife, a special blade - the glass is seated on the sealant, it needs to be cut off.
- Installation is carried out in reverse order.
As a recommendation, some experts use a household hair dryer when cutting the sealant. The heated composition is easier to remove and the procedure is completed faster. Also, during repairs, you must act carefully - the parts around the headlight are tightly fitted to each other. Therefore, it must be pulled out carefully.
Replacing glass on Kalina-2
Replacing Lada Kalina glass of the 2nd generation and the first type on the doors is performed in approximately the same way.
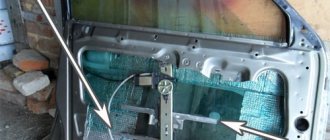
- It is recommended to lower the window completely to avoid it falling out.
- Next, the door itself is disassembled. The panels are unscrewed and the armrest is removed.
- Unscrew the door guides. Typically the screws are located inside the glass slides. Depending on the modification and year of manufacture, the location of the elements may differ.
- Next, unscrew the inner guide lock on the side of the door. To do this you will need a #8 head. Due to the poor location, the bolts often become stuck due to moisture ingress. Before unscrewing, it is recommended to treat them with proppant type VD40.
- After the window is freed from the slats, you will need to unscrew its fastenings to the window regulator. To do this, the position regulator is moved to the middle or upper position. Next you need to use a No. 8 wrench to loosen the fastening screws.
- Pull out the old glass through the top of the door and install new glass in its place. Dismantling is carried out with extreme caution - there are a large number of sharp elements inside the door that can damage the part.
- The assembly procedure is performed in reverse order. The last thing to install is the seal.
Windshield replacement
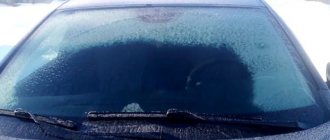
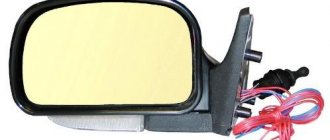
It is not uncommon to replace a standard windshield with a similar one with heating
The work of replacing the windshield is similar to the replacement on most VAZ family cars (the only difference is in the adhesive base - approx.), so the question of whether to change the glass yourself or contact a car service center will have to be answered based on your own experience, or after a detailed study of the instructions.
Tool for the job
Before starting work, we need to prepare a workplace and all the necessary tools; they can be purchased either as a set or separately:
- New windshield.
- Liquid for degreasing surfaces.
- String.
- Knife for removing residual sealant.
- New windshield molding.
- Sealant for gluing glass.
- Masking tape for fixing the windshield.
Work should be carried out in a well-heated and ventilated room with an air temperature of 23-25 °C and a humidity of at least 50%. These recommendations must be followed so that the sealant dries quickly and its vapors disappear.
Preparation
Once all the tools are collected, some preparatory work needs to be done.
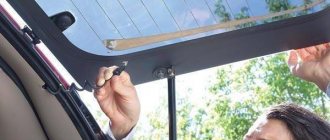
- We remove the wiper arms.
- We dismantle the air duct grille.
- We also remove the rear view mirror located in the cabin.
- If there is an alarm antenna or similar devices, they must also be removed.
- We snap off the trim on the front pillars in the cabin and the trim on the instrument panel.
- We remove the seal from the outer edge of the glass.
- We also remove the edging on the glass.
Thus, with very little effort, you can easily prepare a workplace for replacing the windshield.
Step-by-step procedure for replacing glass on Kalina
- By running a string along the very edge of the glass, we cut off part of the sealant.
Read also: Battery for Nexia 8 cells
With the help of an assistant, we cut the old sealant
We try to remove every last drop.
The activator can be applied with a cotton swab or brush.
Please note that if there are traces of corrosion on the surface being treated, it must first be removed and treated with a rust converter. Only after this continue all work.
- We check the new windshield in place, making all the necessary marks for the best visual fixation in the future.
- We take a gun with sealant and apply it to the glass, moving no more than 7-10 mm from its edge. The height and width of the adhesive layer should be about 8 mm. (Please note that the sealant layer must be continuous, excluding break points - approx.).
The sealant layer must be both thick and continuous.
The glass is secured with masking tape.
We first glue the tape onto the glass, and then gradually stretch it onto the body, the length of each segment should be at least 30 centimeters.