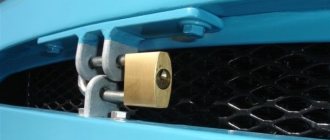
Removal, installation and adjustment of VAZ 2106 doors
Due to the fact that the removal principle is the same for all doors on a car, we are dismantling only the front door of the VAZ 2106. For this purpose, you will need pliers, an impact screwdriver and a 10mm wrench.
As you know, the door is attached to the body using hinges. The hinges, in turn, are attached to the body with five screws: the top hinge with three screws, and the bottom with two. If you intend to dismantle the door not for replacement, we recommend that you outline the contours of the hinges - this will help to carry out further installation of the door without any problems.
Adjusting VAZ doors
If your doors do not close well on a “classic”, then adjusting the latch into which the door lock fits will probably help you.
This procedure will help solve the following closing problems:
- The door closes too tightly
- When closing, the door rests against the latch and then rises and enters it. (You will need to adjust the clamp by moving forward and changing the height of the clamp)
- The door does not close tightly. It can open while moving, or with the slightest effort. (It is necessary to move the lock inward and also make height adjustments)
We have selected several videos for you that show the procedure for adjusting the lock latch on VAZ cars. You can get acquainted with the materials and try to make adjustments yourself.
Removing and installing the door
- Take an impact driver and loosen the mounting screws. If the screws do not budge, use a drill to drill out the screw heads. The drill should be ten millimeters in diameter, and the hole should be five to six millimeters strictly in the center. Then drill out the screw head with a drill with a diameter of eight millimeters. After removing the door from its hinges, take pliers and remove the remaining screws.
- Using the same pliers, clamp the opening limiter and remove it.
- After this, you can completely unscrew the hinges and dismantle the door.
Now you can repair or replace the door. Don't forget to adjust the gaps. If you are replacing an existing door, install door hinges around the outlined outlines. Set the gaps evenly around the perimeter of the door, and only then can you tighten the hinges.
Installation of general purpose silent locks
Installation of general-purpose silent locks requires adjustments to the door design, and this takes a fairly long period of time. After all, it is necessary not only to carry out preparatory work, dismantle the old product, manufacture the parts necessary for installing a silent lock, and make certain modifications to its design, filing at some points. It is also necessary to drill additional holes in the vehicle door with a drill.
Currently, silent locks VAZ 2106 are produced, the price of which reaches 5 thousand rubles, although you can find them somewhat cheaper. Removal and installation of locks is carried out as follows:
1. We dismantle the previously installed standard “six” product, for which:
- slightly unscrew the fasteners of the part from the top and bottom;
- pull out the lower fastening;
- unscrew the fasteners from the top a little, but not completely, to prevent the locking unit from falling inside the decorative door card and it will have to be dismantled to get the locking mechanism;
- screw in the lower fastener on which the lock will hang;
- dismantle the upper fastener along with the product.
2. We install the VAZ 2106 silent lock using the reverse algorithm to the dismantling of this product. 3. Next, we install the structural elements with latches into their seats. 4. Check the operation of the silent lock. If it works correctly, but you still need to make efforts to close the doors, then you should take care of the door hinges, which may “sag” over many years of operation of the vehicle. This will definitely affect the degree of fit of the car door to the car body.
At this point, the work on replacing the lock elements is completed, and on the Internet you can watch a video of VAZ 2106 silent locks, the video about the installation of which is quite instructive.
Adjusting the lock
It is worth noting that the lock design for the front and rear doors is absolutely identical.
- Outline the outline of the lock retainer.
- Start closing the door slowly, while controlling where the door “pulls”. If the door moves upward when closing, then the latch should be lowered a little lower, and vice versa. If you feel tightness when closing, then slightly push the latch outward, and if the door closes weakly, then vice versa - slightly press the latch inward. Thus, you need to achieve an optimal result in which the door closes without difficulty.
17.31. Door adjustment
The gaps around the perimeter of the door should be the same. To adjust the height, loosen the screws of both hinges and move the door vertically. Holding it in the required position, tighten the screws with a Phillips screwdriver. We close the door and check its position in the opening. If necessary, repeat the adjustment. The outer surface of the door should not be recessed or protrude relative to the adjacent door and wing. If it is necessary to extend or “recess” the upper part of the door, loosen the three screws of the upper hinge and pull it towards us, or recess the upper part of the door. We tighten the screws with a screwdriver, close the door and check that the outer surfaces of the doors and the wing match. In the same way we adjust the lower part of the door. After adjustment, finally tighten the screws with a Phillips impact screwdriver.
If necessary, the door can be removed without disassembling. To do this, we perform the operations indicated in photos 1 and 4.
Preparatory stage
To repair the door lock of a Zhiguli 2106, preliminary work is needed. They begin with checking the position of the hinges; if there is a slight distortion, there are uneven gaps, then it is recommended to adjust the position of the locking latch. This is the easiest way for the knot to begin closing quickly and correctly. Work order step by step:
- Outline the position of the latch with a pencil.
- Loosen the three screws, do not remove them.
- Move the pawl lock and check how the locking mechanism closes.
- Tighten the screws in the new position.
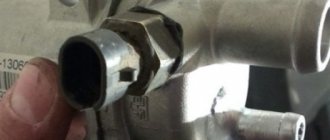
On a VAZ 2106, the retainer is attached to the side of the pillar with hex screws; for the work you will need an open-end wrench or an 8-size wrench.
If, after reinstalling the latch, the locking element of the door does not lock, it is necessary to repair or change the internal part of the mechanism; to do this, dismantle the door trim, the outer and inner handle, and check the rods.
We install silent locks from a VAZ 2114 to a VAZ 2106 with our own hands
Every “happy” owner of a VAZ product had to hear the catchphrase addressed to them: “Don’t slam the door - this is not a Zhiguli” or had to tell their passengers: “Slam it harder, this is a Zhiguli.” Unfortunately, this is a fact, and you have to put up with it, or try once again to correct the shortcomings of VAZ designers with your own hands.
The problem is not only with the doors, the guests of VAZ-Remonta.ru remember how we modernized the stove, as well as how we installed an armrest or foglights. Yes, we did a lot of things, I can’t remember them all. This time we will destroy the existing stereotype that in a Zhiguli you need to slam the door to close it and we will modify the locks of the VAZ 2106. As you guessed, we will install silent locks, or rather quiet locks that are already installed at the factory on the model VAZ 2114-2115. These locks are much better and quieter compared to the “original six” locks; they are not only quiet, but also easy to close.
Before installing a silent lock from a VAZ 2114, you need to buy it. I advise you not to rush and first buy one or two “to try”, you never know, maybe you won’t succeed, or you won’t like the result. I decided to start with myself, that is, I decided to install it on my own driver’s door; if it didn’t work out, then at least I wouldn’t have to explain every time what’s wrong with the door and why it doesn’t close well.
To work you will need:
- Latch lock mechanism.
- Two bolts from the VAZ 2114 lock (those that connect the entire mechanism together). These bolts come in two types: short ones and longer ones, so you need the longer ones.
- Bolt on the rack.
- The cable is approximately 1.5 mm in diameter.
- Tap for thread cutting.
- Clamps and auto-tools: drill, drill bit “8.5, 9, 10”, round file, hammer, screwdrivers, emery or grinder with grinding attachment.
The outer part of the castle (chocolate).
Sequencing
Door locks are controlled by an inside and outside handle. The opening mechanism is directly connected to the locking part by a steel drive. The outer handle has a lock insert. When you turn the key, the safety lock is activated, and pressing the handle again opens the door. On the interior side, the inner handle is connected to the locking part through a flexible cable.
For the rear doors there is a child safety lock in the design. The latch prevents the rear door from opening from the inside. To repair, you need to completely disassemble the door panel: dismantle the trim, pull out the part, make adjustments, repairs or replace the cylinder. The following tools will be required for the work:
- ratchet wrench;
- head at 8;
- Phillips and flat screwdriver;
- wooden, plastic wedge.
Installing central locking on a VAZ 2106
In order to protect your car from theft, as well as to make driving it more convenient, you need to install a central lock. Thanks to this function, all the doors of your car will be closed by pressing a button on the key fob, and also opened.
There are two ways to solve the problem: installing any alarm system that will perform this function, or you simply buy a VAZ 2106 central locking system, later you can connect an alarm system to it if you feel the need for it.
Preparing for installation
Before purchasing the kit we need, it is important to know that they come in two types: mechanical and electronic. In the first case, the system will be activated when you turn the key in the driver's door. The remaining doors will close automatically. In the second option, control occurs thanks to a key fob with buttons. And, of course, the third option, linking the central locking to the alarm system.
We purchase the necessary central locking kit, which should consist of:
- Four engines. Three of them have two terminals, one for plus and the other for minus. And on the fourth there are four conclusions, two pluses, two minuses.
- Control block. With the help of it the entire mechanism will function.
- Circuit breakers.
- Wires and strips.
Central locking kit
For the car model we are considering, it is best to choose a universal central locking kit.
Tools need to be prepared in advance. In this work you will need a screwdriver, wires, electrical tape, drill, drill bits, etc.
Important! Before starting work, disconnect the negative terminal of the battery!
Lock installation
The locks for the VAZ 2106 have been purchased, all the necessary tools are available, now you can proceed directly to work. In order to install everything correctly, it is important to understand the very principle of operation of the device. When you press a button on the key fob, a signal is sent to the control unit, which redirects this impulse to the engines on the doors, and the locks close.
Let's divide our work into several parts. In the first part, we need to dismantle all unnecessary elements: door trim and panels between them.
Removing door trim
At the second stage, it is important to decide where exactly you want to place the control unit. It is recommended to do this in the lower left corner of the driver's door. This way, you will have enough space to install a window lift system if the desire suddenly arises. We also mount the remaining three engines. If there are no necessary holes in the door, they will have to be drilled.
Let's move on to the wiring. From each door it is necessary to stretch wires to the driver's room, where the main unit is located. You should not conduct them from the bottom of the door, this place collects a large amount of moisture. Once everything is connected, you need to check the entire system.
Now the VAZ 2106 locks are controlled from the key fob or by turning the keys in the driver's door. In the future, you can display a special control button on the dashboard. You can also connect the trunk lock to the central locking.
- Lay the wires through corrugated tubes, this way you will protect them from friction and external influences;
- To adjust the position of the central lock, you can bend the rod.
Dismantling the casing
The VAZ skin is a plywood or plastic card with stretched facing material. Before starting repairs, the glass must be raised all the way up. Dismantling the casing step by step:
- Using a flat screwdriver, pry off the decorative plug on the armrest mounting screw.
- Unscrew the three bolts securing the armrest and remove the part.
- Press the base of the window lift handle away from the trim, slide the socket and remove the flat trim.
- Pull out the handle and remove the socket.
- Using a screwdriver, use a screwdriver to pry the cover on the drive handle of the locking part, move it around under the cover, and remove the handle.
- Remove the door card with a screwdriver or a wooden wedge, unfastening the seven holders around the perimeter, and remove the trim.
How to get to the mechanism
For VAZ classics, the design of the locks and mechanisms of the front and rear doors is almost the same. The only difference is that the drive of the locking part for the rear door has additional elements, the correction of which takes longer than when adjusting the front doors.
To dismantle it from the rear door of the VAZ, you will need a Phillips and flat-head screwdriver and a key size 8. The glass must be raised. Removal procedure step by step after removing the door card:
- Unscrew the lock button.
- Unscrew the locking rod bracket fastening nut and remove the washer.
- Unscrew the three fastening screws and remove the bracket.
- The bracket is removed from the door cavity along with the rods. For convenience, it is necessary to slightly bend the metal casing of the front linkage; do not bend the drive at a right angle.
- Remove the locking element from its place, unfasten the inner handle rod holder, remove the handle and drive.
- Using a screwdriver, remove the longitudinal drive hinge from the locking mechanism.
- Remove the retaining ring and disconnect the longitudinal drive from the locking rod bracket.
Installing the lock is carried out in the reverse order.
It is more convenient to adjust the correct position of the mechanisms when the bolts are not fully tightened.
Original patented locks on Zhiguli cannot be lubricated with oil, silicone lubricants, etc. Dirt from the mechanism is removed with technical gasoline. The unit is disassembled, the parts are rinsed and dried. When assembling the mechanism, the cams are lubricated with compounds containing flake graphite.
Step-by-step instructions - how to install locks from a VAZ 2114 to a VAZ 2106
1. So, first of all, take the lock mechanism and carefully saw off the “flag”.
2. Next, you need to remove the old lock along with the rods, everything, as they say, has served its purpose :-). Put all this stuff aside, don’t rush to throw it away, it will be useful to you later.
3. Using a drill with a drill bit, you need to drill out the bottom left one on the door. Attach the lock from the inside, marking the place for the hole in which the upper bushing of the lock will fit, then use a round file to bring the door to shape.
4. Now you can install the mechanism in place.
5. Assemble the castle. Assemble the mechanism and the “chocolate”. Attention! Don’t be alarmed, the door may not close due to the fact that the “chocolate” rests on the counter, this can be solved, but now we won’t do this for now. Now you need to “play around” with the lock.
6. Take a round file and adjust the lower right hole to approximately the same condition as mine, see photo. After this modification, the lock should close and work well. Don't forget to also check the operation of the door locking mechanism.
7. Remove the outer part of the lock and grind off the two metal bushings on the side where the lock presses against the door, into which the screws are inserted. It’s better not to grind off completely, leave a little.
8. After this, grind off the corner of the lock, as in the photo.
9. Next, you need to grind off the heads of the screws that will tighten the lock. They need to be flush. Upon completion, assemble the castle. Looks like you sorted out the door!? Now you need to connect the rods to the handles.
10. Try closing the door. Personally, one of my doors at first didn’t want to close at all; the lock rested against the counter. If you find that the chocolate bar is resting, a fine adjustment is needed, the task is to recess the lock. If everything starts to close, we move on to the second stage - installing the screw on the rack.
11. The most important thing here is to guess the location of the screw; personally, I decided to go the old fashioned way. I took the chalk and snapped the chocolate bar into place two clicks, and inserted the chalk into the location of the screw, having previously aligned it in length and width. Alternatively, you can use a piece of pencil or something else that can leave an imprint. The principle is as follows: close the door, pressing it against the seal; as a result, a trace of chalk or whatever you used instead remains on the counter. Attention! Be careful and don’t rush, you need to double-check everything and estimate it several times and only then start drilling a hole for the screw. Check it a hundred times before you decide on a place for the hole, it’s better than later the whole rack will be full of holes.
12. Use an 8.5 drill to drill the front wall of the rack, then use a tap to cut the thread to “10” (step “1”). In this case, the screw that is screwed in will interfere with the closing of the door, everything is solved as follows - use a socket and a hammer to deepen the hole.
13. Next, you need to drill a hole in the front wall of the rack with a diameter of 10.5-11, and in the second wall with a diameter of 8.5-9, then cut the thread and screw the screw into the rack.
14. Responsible moment. We are trying to close our door. Everything worked out for me, but I couldn't do it without some adjustments. It is difficult to tell what and where to tighten, because everything is individual, the adjustment will be different for everyone, in other words, you will see everything on the spot, it will show you where and what needs to be tightened, turned or removed.
15. Now let's start installing the lock drives and connecting the handles.
It is necessary to remove the external handle and make a plate that will serve as a lever, see photo. The length of the plate should be such that it just barely reaches the side glass; if this point is not taken into account, it will rest against the glass, and as a result the mechanism will not work.
16. I made the plate, assembled the handle and put it in place.
17. Next, you need to take the side handle drive rod from the old lock and cut it to the length we need. On one side, bend the tip at an angle of 90°, and bend the other in the shape of a ring, as shown in the photo. We bent it, we try to install it and check it.
18. If you had an alarm activator installed on your old lock, connect that too. Remove the rubber bushing from the old lock (in which the nail rod stood, the one that sticks out from the trim inside the door right next to the glass). This rubber bushing will come in handy; it needs to be placed in the new lock, and the activator rod will be installed into it, this can be clearly seen in the photo. In this case, the nail itself will no longer be needed, so I took it out. If this scheme doesn’t work for you, come up with something of your own, in any case, I think you can “cheat up” something.
19. Now all that remains is to connect the internal handle; for this purpose we have a cable with clamps. There are two implementation options:
1. Drill out a pin in the lock that opens the door from the inside, then insert a cable into the resulting hole, then use clamps to make a loop. However, in this case you will have to trim the coil spring or remove it altogether. Similar instructions are available online, so I won’t go into too much detail. This must be done tediously so that the lock, God forbid, does not open spontaneously during movement.
2. For myself, I chose the second option. I made a small loop, which I then put on the pin, it has a small groove on it. Make a retainer (I used a thin wire) and install it by placing a washer there, see photo. Next, you need to connect the cable to the inner handle using a loop; I decided to use a fastener with a bolt so that the handle can be easily removed, if necessary, replace it.
Now you can safely say DONE! To be honest, I didn’t even think that it would turn out so well, the silent locks of my VAZ 2106 began to close like in an expensive foreign car, everything is very easy and quiet.
I recommend this type of tuning to everyone who has not yet made such a “beauty” for themselves, believe me, the result will pleasantly please you. And the most important thing is that now you won’t have to constantly repeat to everyone when boarding and disembarking: “Slam hard, it’s a Zhiguli!”, instead, you will have to get used to repeating: “Please don’t slam the door, and don’t look that it’s a Zhiguli!” . Thank you for your attention, good luck!
Front door lock device
Car locks are installed in the door cavity and fixed with two screws; the locking element is connected to the opening mechanism by rods. To reduce noise when opening and closing, high-density plastic coatings are installed on the ratchets, which reduces wear on the contact surface during operation. The design contains:
- retainer body;
- cracker spring, cracker;
- rotor;
- switch;
- traction: blocker, internal drive, switch;
- outside handle;
- levers: internal drive, blocker, external drive;
- lock button;
- ratchet;
- switch roller, central roller.
Cylinder locks or cylinders have become widespread. For the front doors, the locks can be combined with a common ignition key circuit.
Recommendations for selecting and replacing handles
The standard front and rear door handles on VAZs can be replaced with non-original components, which are called Euro handles. After the repair, the doors begin to lock without effort; there is no need to slam or press on the part for the fuses or the main lock to work.
At the same time, drivers reinstall the lock, choosing silent models. Plastic components are used in the design of silent locking devices along with metal parts. During operation, plastic prevents metal joining, ensures silent operation of the mechanism and prevents rapid wear.
Replacing the front door lock
If it is necessary to change the lock on the front door, the trim must first be dismantled and the glass must be raised all the way. Procedure for reinstallation step by step:
- Unscrew the two screws securing the rear gutter from the end.
- Lower the gutter, remove the tongue from the groove, and move the part to the side.
- Using a slotted screwdriver, disconnect the shutdown button rod and unfasten the outer handle rod.
- Using a size 8 wrench, unscrew the nut securing the groove, move away the plastic cover, and remove the part from engagement with the frame post.
- Unscrew the two fastening screws and push the handle inward.
- Remove three self-tapping screws or fastening screws.
- Remove the locking mechanism from the door panel along with the rods and the inside handle.
Installing a new lock is carried out in the reverse order.
When choosing a part, you must take into account that the mechanism for the right door is not suitable for installation on the left one. After reinstalling the parts, it is necessary to set up a clear opening mode and, if necessary, adjust the latch clamps.
Replacing the ignition switch
An unscheduled replacement of the VAZ 2106 ignition switch is carried out when fatal faults are detected, such as dysfunction of the anti-theft complex or defects in the mechanical part of the product. The most convenient option for replacing the ignition switch is a complete reinstallation of this element of the system. However, the contact group must be replaced by removing the spring-loaded hoop-shaped stopper and installing the updated part. Also, regardless of other technological operations, the ignition switch cylinder is replaced, which is dismantled on the removed product.
To remove the ignition switch of a VAZ 2106, you need to prepare a set of locksmith tools, a tool with a thin round tip (awl) and a tester or multimeter. The procedure for dismantling and installing the ignition switch:
- Remove the protective casing of the electrical wiring under the steering wheel, having first removed the mounting bracket.
- Remove the ignition switch and disable the anti-theft function by placing the key in the “0” position.
- Press the fixing element with a thin screwdriver through the technological opening in the fastener.
- Remove the ignition switch from the mounting.
- Mark with a felt-tip pen or, if the car enthusiast relies on his memory, memorize the order of connecting the wires to the outputs and contacts of the locking device.
- Disconnect the wiring from the element.
- Test the correct connection of the contact group at different positions of the ignition key using the ignition switch pinout located below.
- The general circuit of the ignition switch is designed so that the potential difference from the battery and the generator unit is supplied to connectors “30” and “30/1”. The “INT” output is intended for integrating an audio system or other gadgets.
- When checking the functionality of the anti-theft mechanism, the locking console must move to extension if the ignition key is fixed in position “III” (parking position) and be removed from the locking device.
- When the key position is changed to position “0”, the locking console “hides” in the opening of the body part. The ignition key must be removed exclusively in position “III”.
- When replacing ignition switch contacts, it is necessary to lift the retaining ring with an awl or similar device through the technological opening and remove the group of contacts. When installing a contact group, it must be installed so that outputs “15” and “30” occupy a position from the locking console. This will allow the protrusion in the group of contacts to be aligned with the housing groove of the ignition switch, which will ensure their unhindered interaction.
- The group of contacts can be removed without removing the ignition switch, freeing the steering column from the protective cover. True, the installation of this element will be fraught with great difficulties.
- Installation of the ignition switch is carried out in the opposite order.
There are malfunctions of the VAZ 2106 ignition switch that occur in the electrical part of the product. This is, as a rule, a burning of a group of product contacts associated with an unstable electrical wiring connection. If the ignition switch is jammed, this is due to mechanical deformation of the key element.
General practical information about the structure of the larva
In cylindrical designs of the locking mechanism, the cylinder most often fails. The part cannot be repaired; the cylinders are replaced only in pairs, simultaneously for the left and right doors. For the work you will need a flat narrow screwdriver and metal wire. Scheme for replacing the VAZ 2106 door lock cylinder:
- With the lock removed, remove the spring that releases the key in the cylinder by prying it with a screwdriver.
- Use a thin wire to press out the fixing rod.
- Remove the top ring, the cylinder is removed from the back of the lock.
- Replace the part and configure it.
In addition to replacing the cylinders on the front doors, it is recommended to change the locking elements on all elements and in the trunk lock so that it can be opened with one key.
Replacing the door lock cylinder of a VAZ 2106 (classic) and modifying the seat
63900247 9002236759 - for the development of the Sberbank Maestro channel.
The lock can also be removed with a rod by unscrewing the lock release button (see Replacing the door trim).
Disconnect the outer door handle lock switch rod.
Using an “8” wrench, unscrew the nut securing the front groove, move the plastic apron aside and, lowering the groove, remove it from engagement with the pillar of the rotating glass frame.
We remove the front groove from the door.
Using a Phillips screwdriver, unscrew the two screws securing the inner door handle...
...and recess the handle inside the door.
Using a Phillips screwdriver, unscrew the three screws securing the lock...
...and remove it from the door together with the rod and the internal handle.
Having marked the position of the latch on the rack with a felt-tip pen, use a “10” wrench to unscrew the three fastening bolts...
...and remove the door lock from the pillar together with the adjusting shims. (We save them when installing a new clamp).
We lubricate the new lock with Litol-24 grease or technical petroleum jelly, connect a rod with a handle to it and install it on the car in the reverse order of removal. Install the lock. Replacing the door lock cylinder of a VAZ 2109 algorithm of actions. If necessary, loosen the clamp screws and move it along the rack within the boundaries of the slots for the screws. We achieve precise operation of the lock. › Logbook › replacing the ignition lock cylinder, how I replaced the cylinder does not remove the key. If there are no comments on the operation of the lock, we assemble the door.
Setting the front left and right door locks
The adjustment begins with checking and reinstalling the lock latches. In 70% of cases, the doors stop locking and close the first time.
In other cases, the position of the handle is adjusted if the door does not open from the outside. To do this, you need to loosen the fastening screws, move the handle and bracket towards the front pillar. After adjustment, the screws are tightened.
On classic VAZ models, jamming and locking of the lock is often associated with stretched rods. The drives are removed, the tips are checked, and the creases are straightened.
How to replace the outside handle and lock of the front door on a VAZ 2106 - 2103
This is a fairly lengthy but not complicated procedure. You can do it yourself without any problems.
Let's talk about the castle first. It is attached to the front door with three screws, directly to its end. To remove the lock and subsequently replace the outer handle and front door lock, you will need a screwdriver and a 8-mm wrench. The sequence of actions in this case will be as follows:
- We remove the front door trim, similar to how we did it when replacing the side windows. That is, we pry it with a screwdriver at the fastening points and disconnect it;
- We remove the front door lock buttons;
- Disconnect the inner rod of the lock drive. Disconnect the clamp securing the rod on the door; to do this, squeeze the petals and push the clamp inside the door;
- Remove the screws securing the interior door handle. Unscrew the handle to a right angle and then push the handle deep into the door;
- Disconnect the door latch drive rod;
- Unscrew the screws securing the rear sliding window channel. Raise the glass all the way and fix it in this position;
- Unscrew the screws that secure the door lock to the door and press it, thereby pushing it inside the door;
The lock has been removed. All that's left is to get him out. This should be done together with its rod and handle. It is better to disconnect the rod holder from the lock and handle. Examine the condition of the rods; if they are already heavily worn, then replace them with new ones. You may even need to replace the lock completely.
Now let's move on to working with the pen. Remove the outer handle.
- Unscrew the two nuts on the inside of the door;
- Unscrew the fastening nuts and remove the handle from the outside;
We install the lock, outer and inner handles in the appropriate places. We check the functionality of the handles. At this stage, there may be some difficulties with opening and closing the door.
If the inner handle does not work, you can loosen the fastening screws. Move the handle in the oval screw holes to select the optimal position.
If the door does not open with a key or external handle, and also if the lock block button does not function, then do the following. Establish a gap of 1 - 2 mm between the upper end of the lock lever and the shoulder of the outer handle. Since, if the set gap is less than half a millimeter, the lock will not be locked with a button and locked with a key. If the gap is more than two millimeters, the door will not open with the outside handle.
Test everything again. The lock and handle should now work properly.