Replacing steering rods VAZ 2107
During vehicle operation, suspension parts and other systems are subjected to significant loads, which leads to their wear and failure.
On the VAZ 2107 model, wear forms in the tie rod ends, and knocking noises appear when driving on a bad road. Ignoring them is fraught with destruction of the unit and loss of control of the car. The solution to the problem is to replace faulty mechanism parts. To carry out repair work on a VAZ 2107 car, you will need the following spare parts:
- steering rods;
- protective covers;
- nuts with crown and fixing cotter pin.
Replacement of components is carried out on a vehicle installed above the inspection hole. To dismantle parts and install new ones, a special puller, socket wrench and extension are used.
Replacing the VAZ 2101 steering gear
If the steering gear suddenly leaks or noticeable play appears, then sometimes it is useless to carry out a full restoration. Rebuilding the control mechanism will not help either, since the old housing already has wear that will prevent the installation of new elements.
Therefore, a repair kit for the column is not a solution. Replacing the entire unit will be much more promising, and besides, you are interested in this like no one else. Your safety directly depends on its condition, on the form of the steering rod ball pins.
External view of the VAZ 2101 steering gear
To replace the column on a VAZ 2101, you will need:
- Loosen the wheel bolts.
- Remove the wheel.
- Dismantle the protection.
- Use pliers to pull the pins out of the rod ends.
- Unscrew the nuts from the ends.
- Using a rod wrench, which you can buy at any auto store, remove the ends from the cone.
- Unscrew the bolt, thereby loosening the shaft clamp.
- Using 17mm wrenches, unscrew the nuts from the three bolts that secure the steering column to the body.
- Remove the column from the car.
Installation is carried out in strictly reverse order.
At this point, the replacement of the VAZ 2101 steering gear is considered completely completed; the protection and wheel are put back, after which the procedure for adjusting the toe-in of the front wheels is mandatory.
The procedure for performing repair work
Replacement of a faulty part of the steering mechanism is carried out in the following sequence:
- We clean the assembly from dirt using a brush, and apply a penetrating compound to the threaded connections.
- Using pliers, remove the fixing cotter pins and, using a spanner wrench or a “22” socket, unscrew the nut on the pin.
- The steering rods are detached from the steering knuckle using a special puller. The device is put on the assembly from above and using a bolt, the finger is squeezed out of the eye.
Helpful advice: if you first tap the joint using a copper or bronze drift, the dismantling process will be significantly accelerated.
The manufacturer of the VAZ 2107 recommends replacing worn steering rods as a set. The service life of these structural units from one batch installed on a vehicle is usually the same. Replacing only one of them does not fundamentally solve the problem; a little time will pass and the repair process will have to be repeated for the remaining elements of the system.
Installation of parts and adjustments
Installation of steering rods on a car of the classic VAZ 2107 model is not particularly difficult and is performed as follows:
- We measure the length of the old assembly using a steel ruler as accurately as possible.
- We adjust the new unit using a threaded connection to the desired size and lock it with locknuts.
- Installing the part in place is carried out by inserting a finger into the seat and screwing the nut with a certain torque.
Timely replacement of faulty components of the VAZ 2107 steering mechanism will allow you to avoid serious troubles and emergency situations on the road.
Replacing steering rods on VAZ 2101-VAZ 2107
Welcome! Steering rods must always be kept in good condition and, if possible, checked for various types of damage, because they are an integral part of the car and are involved in turning the wheels. How to replace the rods with new ones if the old ones have become unusable?
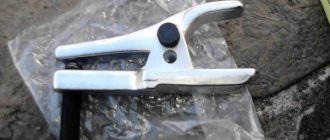
Note! You will need the following tools: pliers, a 22mm wrench, a screwdriver, a hammer and a special ball joint puller (a photo of the puller is shown below).
Location of rods
They are located at the bottom of the car, but you won’t be able to just look at the rods, because... they are covered by the front wheels of the car. Therefore, turn the steering wheel and you will see how one of the steering wheels is connected to the steering knuckle of the car.
Note! For clarity, above is a diagram where the red arrows indicate the central steering rod, and the blue arrow indicates two side rods, which are precisely connected to the steering knuckle arms, indicated by the green arrow!
When should you change rods? In a situation of deformation, the car begins to behave sluggishly on the road, namely: with the steering wheel fully aligned, the front wheels begin to move to one side, this becomes especially noticeable when turning (you turn the car, say, to the left, but it pulls to the right).
Note! The rods are deformed from a strong collision with a bump or other obstacle, so be careful and take care of your car, and if trouble happens, then check the rods and ball joints themselves for serviceability!
(The process is described in detail in the article: “Checking steering rods and ball joints for serviceability”)
How to adjust steering rods on a VAZ 2106
The steering on a VAZ 2106 car consists of a steering mechanism and a steering gear.
The steering mechanism includes a worm gear located in the crankcase, a steering wheel, a steering shaft and mounting parts. The steering wheel is plastic, reinforced with a steel frame. A horn switch is installed on the steering wheel, the contact part of which is covered with a plastic cover.
Malfunctions
| Cause of malfunction | Troubleshooting method |
| Increased free play of the steering wheel | |
| Loosening the steering gear housing bolts Increased clearance in ball joints Increased clearance between the roller and the worm There is too much clearance between the swingarm shaft and the bushings Increased clearance in worm bearings | Tighten the nuts of the steering gear housing bolts Adjust the gap between the roller and the worm Adjust the clearance in the worm bearings |
| Stiff steering wheel rotation | |
| Deformation of steering gear parts Incorrect alignment of front wheel angles The adjusting nut of the pendulum arm axis is overtightened Low pressure in front tires Damage to ball joint parts There is no oil in the steering gear housing Misalignment of the worm shaft with the steering shaft | Replace deformed steering gear parts Check wheel alignment angles and adjust Set the front tire pressure to normal Check and replace damaged ball joint parts Check and add oil in the steering gear housing. If necessary, replace the oil seal Adjust the alignment of the shafts with washers |
| Noise (knocking) in the steering | |
| Increased clearance in front wheel hub bearings Loosening the tie rod ball pin nuts Increased clearance between the pendulum arm axis and the bushings The adjusting nut of the pendulum arm axis is loose The clearance in the engagement of the roller with the worm or in the worm bearings is broken Increased clearance in steering rod ball joints Loose steering housing or swing arm bracket Loosening the swing arm nuts | Adjust the clearance in the front wheel hub bearings Tighten the tie rod ball stud nuts Replace the bushings or swing arm bracket assembly Adjust the tightening of the swing arm axle nut Adjust the clearance in the roller engagement with the worm or in the worm bearings Replace tie rod ends or tie rods Tighten the steering gear housing or swing arm bracket nuts Tighten the swing arm nuts |
| Self-excited angular oscillation of the front wheels | |
| Tire pressure is not correct Increased clearance in front wheel hub bearings Wheel imbalance Loosening the tie rod ball pin nuts The gap in the engagement of the roller with the worm is broken | Check and adjust the front wheel alignment angles Adjust the clearance in the front wheel hub bearings Balance the wheels Adjust the clearance between the roller and the worm |
| Steering a VAZ 2106 car away from straight-line motion in one direction | |
| Uneven tire pressure Front wheel alignment angles are incorrect Different spring settlements of the front suspension Incomplete release of one or more wheels | Check and set tire pressure to normal Check and adjust wheel alignment Replace unusable front suspension springs Check the knuckles and suspension arms, replace unusable parts Check the condition of the brake system, correct the fault |
| Vehicle instability | |
| Front wheel alignment angles are incorrect Increased clearance in front wheel hub bearings Loosening the tie rod ball pin nuts Too much play in the steering rod ball joints Loosening the bolts securing the steering gear housing or the pendulum arm bracket Increased clearance between roller and worm Steering knuckles or suspension arms are deformed | Check and adjust wheel alignment Adjust the clearance in the front wheel hub bearings Check and tighten the tie rod ball stud nuts Replace ball joint ends or tie rods Check and tighten the nuts of the steering gear housing or swing arm bracket bolts Adjust the clearance between the roller and the worm Check the steering knuckles and levers; replace deformed parts |
| Oil leak from steering gear housing | |
| Wear of the bipod or worm shaft seal Loosening the bolts securing the steering housing covers Damage to gaskets | Replace the bipod or worm shaft seal Tighten the bolts securing the steering gear housing covers Replace gaskets |
Tuning
Experts will almost certainly advise you to install a sports steering wheel with a diameter of about 320 mm. This is a good compromise solution for many older VAZ models. With this steering wheel diameter you will be able to park with greater maneuverability. In this case, it is recommended to additionally install a safety glass.
Some will choose sports tuning in the form of a low-number rack. Let us immediately note that this is a rare product and it will cost at least twice as much as classic devices. But with it you will get almost sporty characteristics and will be able to turn the wheels in two steering turns. Plus, installing such a rail is simple, since the grooves for the new fasteners and the slot coincide with the factory ones. But do not forget that you are sacrificing convenience for the sake of sporty sensations, because steering forces increase.
So, we’ve sorted out the rack, what else can be done in terms of tuning? Of course, care should be taken to fully adjust the camber and toe. After all, after improving the steering, it is quite possible that the car will slip laterally. In addition, by adjusting the wheel alignment, you can even change the handling towards neutral. That is, with such changes, the wheels on all axles will be deprived of traction in extreme driving conditions, and the car will slide without losing direction of movement to the outside of the turn. The standard wheel behavior provided at the factory is slightly different. Under normal conditions, such a system is more maneuverable, but lacks convenient turning. Therefore, on a road that is not cleared of ice, you will feel that the wheels are “swaying”, and even the front tires will lose traction with the road before the rear ones.
In general, when adjusting the wheel alignment of VAZ models, experts advise increasing the wheel alignment and negative camber on the front axle. In this case, rear toe-in should be reduced. There are a couple of less popular methods of adjusting wheel alignment, which are similar in characteristics to neutral.
Failure of the steering tip, tie rod and even the entire steering linkage on VAZ-2101, VAZ-2105, VAZ-2106, VAZ-2107, Classic cars is accompanied by a characteristic knocking sound in the suspension (even on small bumps), loss of directional stability when driving ( the car refuses to go straight, pulls to the side and you have to constantly steer) and uneven tire wear. I think this is familiar to many car enthusiasts and, given the quality of our roads, the question of replacing the rod, tip, or all at once has arisen more than once. And naturally, the same questions come to everyone’s mind: How to determine whether the steering tip or rod
?
Is it possible to replace the linkage or steering linkage
yourself?
What tool will you need for this job? Which steering linkage
is best to buy?
Are there any pitfalls in this matter? And is it necessary to do a wheel alignment after repair
?
Where can I find comprehensive information on replacing tie rods
? Right!? Well, it’s not for nothing that you are reading these lines))). And answering the last question, I will say - Here!. At the very least, I will try to keep it that way. I hope that after reading this material, you will know all the answers to your questions... I screwed it up))) Okay, then let’s just get to the point.
And then, let's immediately decide on the place to carry out the work and the tool that we will need to successfully replace the steering linkage on VAZ-2101, VAZ-2105, VAZ-2106, VAZ-2107, Classic cars
. You won’t have to write or read much here, since the work must be carried out on a pit, overpass or lift. Otherwise, you are guaranteed a fun time and injuries too. Regarding the tool, everything is also simple, see photo 1 below.
I think you will have a wrench for 22, 13, 12 (might come in handy), a screwdriver, a hammer and pliers. You are still a serious car enthusiast)). But you will have to buy a puller for steering rods
. Look at photo 2. Two options, on the left is a universal puller, on the right is a veteran puller, in common parlance a “corner”, which was probably invented the next year after the release of the first Classic. Both will help you cope with the task. But, I would advise you to choose a universal puller and it will be more convenient to work, and it will unpress your fingers in one go, and it will still work on other brands of cars. Yes, and don’t forget to prepare a tape measure.
Spare parts... I think that the best option for purchase is steering ends, rods and trapezoids produced by Belebeyevsky. Photo 3. The kit includes: two tie rods, two tie rods, a transverse (middle) rod, six nuts and the same number of cotter pins. Everything seems to be good, but not everything. No, tie rods (adjusting couplings)! Why the manufacturer does not complete their kits with them remains unclear. If I'm not mistaken, only Trek considers it necessary to have steering brackets included in the kit. So, we check everything without leaving the cash register! If there are no squeegees, we will definitely buy them. What they look like and how many of them there are can be seen in photo 4.
And about the main thing. Description with photographs of replacing the steering linkage on VAZ-2101, VAZ-2105, VAZ-2106, VAZ-2107, Classic cars:
1. First of all, getting under the car, we clean the ball stud nuts from dirt. Using pliers, we pull out the cotter pins, wire, nails, in general, everything that was used to secure the nuts from the fingers. Photo 5
3. The nuts are twisted, we put the puller into action. Photos 7 and 8.
4. Since the right and left tie rods
are different, we try not to confuse them. They removed the right tie rod with the tip and placed it on the right side. But it doesn’t matter if you forget where it is. You can easily find out by turning the rod up with your finger and looking in which direction the tilt goes; on that side it was removed (photo 9), do the same before installation. It’s better to check again than to press the finger out again and risk damaging the boot.
5. After the rods are removed, you can take measurements from them. Using a tape measure, measure the distance between the centering holes of the steering rods. And set the same size on new rods (photo 10). The rods have been twisted, but do not tighten the clamps on the bends yet.
6. If the rods are twisted to the required size, they can be installed on the car. Let me remind you once again, do not confuse the left and right sides. And we install the transverse (middle) rod with a bend towards the engine crankcase
, that is, the cross member seems to go around the gearbox casing. Photo 11.
7. When all the pins are tightened and cottered, you can also tighten the clamps. Photo 12. And we are preparing for the trip to the wheel alignment.
Somehow, yes! And also, if you change one tip or a pair (rod and tip)
and set the size correctly, you can avoid a trip to
the wheel alignment
. But, if you change the steering linkage completely, then you will not be able to avoid this procedure. Since the new transverse link will not allow you to maintain the required size. This has been verified.
When using an article or photographs, an active direct hyperlink to the website www.!
If the check reveals a fault with the steering rods (see “Inspection and testing of the steering on a VAZ 2106”), replace them, since the rod joints are non-separable. To replace steering rods on a VAZ 2106 car you will need: pliers, a 22mm wrench, a screwdriver, a hammer and... ...a ball joint remover.
NOTE It is possible to replace both the steering linkage as a whole (by disconnecting the ball joint pins from the swing arms, bipod and pendulum arm) and individual steering rods. The replacement is shown using the example of the right tie rod with the front wheel removed from the VAZ 2106 (for clarity). The remaining tie rods are replaced in the same way.
1. Remove the front wheels from the car (for ease of operation), unscrew the nut of the outer steering tip.
2. Unscrew the tie rod end nut.
3. Install the puller. While tightening the puller nut, press the tie rod end out of the swing arm eye.
HELPFUL ADVICE
If there is no puller, apply several sharp blows with a hammer along the axis of the lever until the tie rod end comes out of its eye. 4. Remove your finger from the lever ear. 5. Disconnect the steering rod inner joint pin in the same way. 6. Install a new steering rod on the VAZ 2106 car in the reverse order of removal.
HELPFUL ADVICE To make subsequent wheel alignment adjustment easier, set the length of the new right or left tie rod equal to the length of the rod being replaced.
WARNING Do not forget to adjust the wheel alignment on your VAZ 2106 car after installing new steering rods.
To check the steering rods of a VAZ 2106 car, we need a mounting spatula, a light crowbar, a metal brush, a caliper or ruler, as well as a rag and a piece of pipe about a meter long. We check the steering linkage ball joints on a car with a loaded suspension, so we drive our car into an inspection pit, take the necessary tool and go down into the pit.
- First of all, use a metal brush and a rag to clean all the hinges and their protective caps from dirt.
- We carry out an external inspection of the anthers (caps), they must be intact, without cracks or tears. When pressing on the boot, no lubricant should appear. Check the condition of all caps and, if defective, replace them.
- Now let's check the axial movement of the tie rod ends. To do this, put marks on all ball joint plugs with a marker exactly in those places where it will be convenient for you to take measurements and use a caliper to measure the height of the thrust in a free state, write down the result so as not to forget on a piece of paper. Next, we take a light crowbar in our hands and resting one end of it on the lower arm, we begin to press on the steering rod from below, thereby, as if squeezing it and without reducing the force of pressure on the rod, we measure with a caliper, in the place where we put a mark and made the measurement without load , we will write the resulting result again on a piece of paper. The difference between the two obtained values will be the axial movement of the tip, which should range from 1-1.5mm. Those hinges that either have no axial movement at all, or with axial movement greater than the specified limits, must be replaced with new ones.
- Now let's check for free play (play) in the ball joints. We will need the help of an assistant who should rock the steering wheel in both directions. While the assistant is shaking the steering wheel, you need to grab the joint body with your hand so that your thumb rests on the bipod (pendulum arm). If there is play, then when you rock the steering wheel you will certainly feel it. If there is noticeable play, the hinges must be replaced with new ones.
- Next, we check the condition of the pendulum lever; to do this, you need to intensively shake the lever up and down from the bottom of the car. The presence of play is not allowed. Ask your assistant to shake the steering wheel, while you open the hood and put your hand on the body of the pendulum lever while simultaneously touching the large diameter upper washer. When you rock the steering wheel, if there is any play, you will certainly feel it. If there is still play, you can try to eliminate it by simply tightening the axle nut by one to one and a half turns. If tightening does not help, it is necessary to replace the pendulum arm bushing or the entire arm assembly.
That's it, now we have checked the condition, if necessary, carry out the necessary repair work to replace faulty anthers and hinges. Do not forget that after replacing the steering rods, you need to contact a car service and adjust the wheel alignment.
Steering gear
On VAZ-2107 cars and other models of the “classic” series, a worm gear is used - it allows you to convert the rotation of the steering wheel into the translational movement of rods. If you suddenly notice that the play on the car has increased, this does not mean that the steering tips on the VAZ-2107 necessarily need to be replaced.
Very often the gearbox elements wear out and the adjusting bolt has to be tightened. To do this you need to perform the following manipulations:
- Place the car on a level surface and have an assistant drive. Without it, it will be difficult to cope with the work.
- Loosen the nut that secures the steering gear adjustment bolt.
- An assistant should rotate the steering wheel left and right by 10-20 degrees, no more. The faster he does this, the easier it will be for you to tighten the bolt.
- Using a wide flathead screwdriver, tighten the bolt until the free play of the steering wheel decreases.
- Hold the bolt with a screwdriver and tighten the nut.
Be sure to check the presence of oil in the gearbox housing: if it is not enough, add more. It is recommended to use TM-4 transmission oil.
Replacing the Tie Rod End of a VAZ 2106 ~ AUTOTEXNIKA.RU
Method for replacing control rods on a VAZ 2106
An operation such as replacing control rods of a VAZ 2106
, is done on the basis of diagnosing the technical condition of the front suspension of the car. Steering rods VAZ, REPLACEMENT OF TIE RODS VAZ 2106 REPLACEMENT OF STEERING LINK END.
VAZ tie rods, how to change the tie rod end and drive the muzzle on a VAZ 2106 part 1.
The unit is responsible based on the safety of the driver and passengers, therefore, if it malfunctions or wears out, you should not hesitate - it is necessary to install new parts.
How to detect a fault
You can check the serviceability of the control rods without the help of others; for this you will only need an inspection ditch or overpass. Do this check on a VAZ car 2106
better every 5 thousand km or after every long trip on bad roads. Such a small interval is justified by the quality of production of the parts in question; on average, they last 15-20 thousand km.
To perform diagnostics, you need to park the car over a ditch or drive onto an overpass and secure the vehicle with the hand brake. Grasping the rod near the tip , you need to sharply push it up and then down. A serviceable tip either has no free play at all, or it is only a couple of mm, you can feel it with your hand.
If the free play is greater, and at the same time the thrust
simply spins in both ball pins, then
replacing
2106
tips is inevitable.
Using this method, you need to check all 6 fingers, and if they are clearly worn out, it is better to replace the entire steering
linkage, which consists of 3 rods.
It happens that there is no free play in the connections, but the protective boots are torn or cracked. Do this check on a VAZ 2106 car. If they are not changed, all VAZ steering rods. If you do not change them, then the dust and dirt that constantly accumulates in the hinge will do their job: the unit will quickly fail. Worn anthers must be replaced without fail. To complete the work you will need a minimum of tools:
The puller is an iron cup with a slot so that it can be put on the bipod of the control mechanism or pendulum. There is one in almost every garage where a VAZ 2106 or another model of the “classic” Zhiguli is parked.
Replacement of steering rods and ends of a classic VAZ
The Auto_Repair channel will help you fix car problems with your own hands.
Replacing steering tips on VAZ 2101, 2103, 2105, 2106 and 2107
description of work on replacing steering tips
VAZ
cars from 2101 to 2107.
Replacement instructions
Replacing the steering linkage is done in an inspection hole or overpass. The task is to repair the steering rack on a VAZ 2110, replace the steering rack and steering rack - video. The disassembly order is as follows.
- Loosen and unscrew the ball pin mounting nut. On some machines you can still find control rods
with pinned nuts. Replacing the Kalina steering rack boot - photo report on how to remove and install the protective cover for the steering mechanism of VAZ 1117, 1118 and 1119. In this case, you will have to remove the cotter pins first, bending their antennae with pliers. - From the side of the rounded end of the steering
bipod, insert the puller in such a way that its support area is under the bipod lever. - Rotate the bolt at the top of the puller with a wrench and press it out of the socket.
- Repeat the operation on all other tips.
From time to time, when unscrewing the nut, due to contamination of the ball thread, the pin begins to rotate together with the nut, turning at the seating location. Then, to unscrew the nut, you need to block it with a mounting blade. Small feature: left and right last pulls
VAZ
2106
are different from each other, so it is better to mark them after removal.
Steering elements
: 1 - lateral thrust;
2 - bipod; 3 - medium thrust; 4 — pendulum lever; 5 - adjusting coupling; 6 — lower ball joint of the front suspension; 7 — right steering knuckle; 8 — upper ball joint of the front suspension; 9 — right steering knuckle lever; 10 — bracket for the pendulum arm; 11 — right side member of the body; 12 — oil filler plug; 13 — steering gear housing; 14 — steering
;
15 — facing casing of the steering shaft ; 16 — steering wheel; 17 — pipe of the upper support of the steering shaft
;
18 — steering shaft ;
19 — left side member of the body; 20 — turnbuckles of the adjusting coupling; 21 — left steering knuckle THIS IS INTERESTING: Replacing the heater motor for a BMW X5 E53
After all 3 pulls
removed, you need to adjust the new parts to the length of the old ones. Holding the rod near the tip with one hand, replacing the VAZ 2106 steering rod. This applies to the two outer steering rods. Using the threads for fastening the tips on them, the toe angle of the front wheels is adjusted. To prevent the wheels from initially pointing in different directions, twist or unscrew the tips on the new parts to adjust their length to the size of the removed elements.
The next stage is the installation of new rods, the ball pins of which are inserted into the seats, after which the nut is screwed on top. Changing the oil in the gearbox and rear axle of a VAZ 2106 Changing the oil in the gearbox in the box etc. It must be tightened with good force. If there is a hole for a cotter pin, then insert the latter and straighten the antennae.
Most often, the tips located at the edges, near the wheels, fail. Self-replacement of the VAZ tie rod end. Then they can be changed one by one. Disassembly can be done according to the same instructions, but press out only one end of the rod
.
Then you need to unscrew the clamp, which fixes the rotation of the part along the thread. Replacing tie rod ends involves unscrewing the old part, and then screwing in the new one to the same length and tightening the clamp.
Then you can insert your finger into the socket and tighten the nut.
All steering rods of VAZ 01-07 models are identical, so when purchasing, do not worry about reading the numbers 2101 on the packaging. The only thing worth paying attention to is the mobility of the ball pin in the rod .
Replacing the tie rod end of the UAZ Patriot: Replacing the transverse rod of silent blocks. Replacement of the steering rack bootPriceReplacement of the steering rack boot of the VAZ Kalina steering rack. In the new product, it should be difficult to turn in the socket due to manual effort.
After successfully replacing even at least one tip
You can’t drive right away; you need to adjust the toe angles of the front wheels at the nearest service station.
Source: https://autotexnika.ru/zamena-nakonechnika-rulevoj-tjagi-vaz-2106/
Other causes of backlash
But if the play has changed insignificantly, it is recommended to check all other suspension and steering components. The reason that the free play of the steering wheel increases may be:
- Destruction of ball joints on suspension arms.
- Excessive wear of the silent blocks, which are located where the levers are attached to the body.
- Wear of VAZ-2107 steering tips. You can do the replacement very quickly with your own hands; it will be more difficult to adjust the camber and toe angles.
- Wheel bearing failure.
- Destruction of the pendulum arm located on the right side of the car.
Mandatory maintenance of system components
The stability of the front wheels is a prerequisite that affects the stability of the car. Any violation of the settings or failure of one part invariably results in a chain reaction leading to an imbalance of the entire system. That's why the manufacturer provides certain maintenance work , which includes:
- cleaning from contaminants;
- wheel alignment;
- worm gear adjustment;
- steering wheel free play control;
- drive check.
Tip malfunctions
Therefore, before sinning on the faulty tips, you need to carefully check the condition of all other suspension elements. Play and extraneous knocking may appear due to the failure of the ball joint, and the tips in this case have nothing to do with it.
Ball joints can make squeaks even when the steering wheel is rotated, so be sure to conduct a full diagnosis before repairing. Sometimes it may only be necessary to replace the boot of the VAZ-2107 steering tip. If the rubber boot is torn or covered with cracks, but the hinge itself is not damaged, it is necessary to disassemble, wash the element and reassemble it with new lubricant.
Removing the tips
All work must be performed with the vehicle parked on a level surface and with wheel chocks under the rear wheels. It is also advisable to turn on first or reverse gear - this eliminates the possibility of rolling away when carrying out repairs. Almost identical manipulations must be performed when replacing the short steering end of the VAZ-2107 and the long rod. The design of the steering linkage has two short rods and one long rod.
The short ones can be adjusted in length - for this there are special crimp clamps into which the elements are screwed. To replace the entire rod assembly you will need to perform the following manipulations:
- Place a jack under the side to be repaired, lift the car and place it on a support.
- Remove the wheel from the side to be repaired.
- Straighten and pull out the cotter pins that are located in the fingers of the tips.
- Apply a generous amount of penetrating lubricant to all threaded connections.
- Using a 19mm wrench, unscrew all the end nuts.
- Install the puller and, by rotating its bolt, remove all the rod pins one by one.
There is nothing complicated, the main thing is to make repairs easier by treating all threaded connections with lubricant. The long rod connecting the pendulum arm to the gearbox bipod is removed in the same way. But its replacement is required extremely rarely.
Assembly of the unit
After removing the old rods, take a tape measure and measure their length. The problem is that you will have to adjust the wheel alignment - you won’t be able to do this yourself, it’s better to go to a service station and do diagnostics on a computer stand. After replacing the steering tips of a VAZ-2107, even if you have achieved the same length with the new elements, it is necessary to carry out diagnostics. Otherwise, when driving, tire wear will occur much faster.
Installation of new tips is carried out in the reverse order. Insert the ball pins into the steering knuckles and holes in the bipod, tighten the nuts and secure their position with cotter pins. It is advisable to purchase new cotter pins, as old ones are usually covered with a layer of dirt and rust.
Steering rods - replacement
1. Place the car on an inspection hole or overpass (see “Preparing the car for maintenance and repair”).
2. Clean the nuts and steering rod covers from dirt.
3. Apply penetrating lubricant to the threads of the ball joints.
4. Using pliers, remove the cotter pin of the nut securing the pin to the steering knuckle lever.
5. 22 mm
Unscrew the nut securing the ball joint pin to the steering knuckle arm.
with a 22 mm socket wrench
Using an extension, unscrew the nuts (after removing the cotter pins) securing the side link pins to the pendulum arm (for the right link) and to the bipod of the steering mechanism (for the left link).
7. Use a puller to press out the fingers of the tips and remove the side rods.
8. Before disassembling the side rod, measure and record its length. This is necessary so that during assembly the correct amount of wheel toe is not disrupted. Loosen the bolts of the coupling clamps and unscrew the ends.
Similarly, we remove and disassemble the other side rod.
22 mm socket wrench
with the extension cord from the engine compartment, unscrew the nuts.
10. If the pins of the side link joints are disconnected from the pendulum arm and the bipod of the steering gearbox, then use a puller to press out the pins of the ball joints of the linkage and remove it.
When performing the following operation (in order not to damage the thread), unscrew the nuts until their ends coincide with the ends of the fingers.
11. If the side links are not disconnected from the eyes of the bipod and the pendulum arm, then the pins of the middle link ball joints can be pressed out by knocking them out using a suitable rod A
.
First, place stop B
under the inner tip of the side rod.
12. After pressing out the fingers, unscrew the nuts and remove the middle steering rod.
1. Install the tie rods in the reverse order. After assembling and adjusting the side rod length, tighten the tie clamps.
2. After installing the steering rods, you must check and, if necessary, adjust the wheel alignment angles yourself (see “Wheel alignment angles - adjustment”) or in a specialized workshop.
labavto.com
Steering rods are responsible for turning the front wheels, so for safety reasons they should always be kept in working order. The VAZ 2107 is equipped with an outdated rod system with hinges, which is called a trapezoid. It has a small resource, so it has to be changed often. Knowing the device and following the instructions for dismantling and reassembling, you can replace the steering rods with your own hands.
Design and principle of operation of a trapezoid
Steering rods turn the wheels in the direction in which the driver turned the steering wheel. It is located at the level of the bottom of the car under the power unit, attached from below to the side members. Consists of three rods: right, middle and left. The middle link has two hinges, the other two are prefabricated parts from a long and short part.
The trapezoid works according to the following scheme. When the driver turns the steering wheel, the gearbox shank and shaft rotate. Using a worm mechanism, the force is transferred to the bipod. It begins to turn in the right direction along with the rods. Thanks to all three rods, the front wheels turn simultaneously. Ball pins located at the ends of the rods allow the steering rods to move only horizontally.
Diagnosis of trapezium faults
During operation, the ball pins constantly rotate, the cracks wear out, and play appears. The following signs indicate tip wear:
- You can hear knocking noises from underneath the car when driving on uneven roads;
- on a flat road, the car spontaneously changes its trajectory;
- vibration is felt on the steering wheel, which is transmitted from the play of the ball pins;
- It's hard to turn the steering wheel, and you can hear a creaking sound from below.
If you need to exert significant effort to turn the steering wheel, this indicates that the ball pin is jammed in the body. In this case, it is urgent to change the part that has become unusable, otherwise the finger may be knocked out of its socket while driving, and the car will lose control. The hinges wear out faster if the boot has become unusable, causing dirt to get into the hinge joint.
Failure of steering rods is possible for the following reasons:
- Natural wear and tear. The service life depends on the conditions in which the car is operated. Usually it is 20-30 thousand kilometers, then knocking and play appear in the nodes.
- Damaged protective caps on hinges. Dirt, sand, and water get under the boot. Corrosive processes and abrasive action reduce the service life of ball pins.
- An insufficient amount of lubricant leads to increased friction and premature wear of contacting parts. Before installation, check the presence of lubricant.
- Deformation of traction as a result of hitting some obstacle on the road or hitting a bump. If the curvature is minor, you can try to equalize the draft by heating it with a gas burner.
