Removing the cardan.
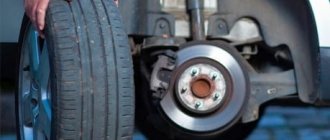
1. We carry out the work on an inspection pit or a lift. Remove the handbrake cable spring.
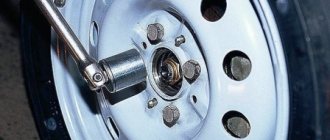
2. Apply marks to the joint between the cardan and the gearbox flange. Using a 13mm wrench, unscrew the four self-locking nuts. At the same time, we hold the cardan from turning with a large screwdriver.
3. Remove one end of the cardan.
4. We note the relative position of the cardan and the centering flange of the elastic coupling...
5. Next, bend the 4 locking tabs on the seal ring near the elastic coupling...
6. ...and move the holder along with the seal towards the cardan.
7. Using a 13mm socket, unscrew the two nuts and remove the safety bar.
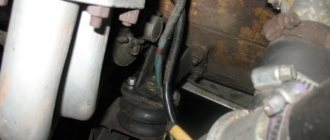
8. Holding the cardan, use a 13mm wrench to unscrew the two nuts and remove the outboard bearing plate from the mounting studs to the body. It is secured to the body through rubber washers.
9. We take out the cardan from the splines of the elastic coupling flange and remove it.
- We first mark the relative positions of the parts (cardan joint forks) so as not to disturb the factory balancing of the cardan shaft during assembly.
- Then we mark the locking rings and their seats in order to install them in their standard places during assembly. Remove the retaining rings (four from each hinge).
- We press the bearings out of the hinge fork using mandrels of a suitable diameter.
- Since the bearings are not pressed in completely (the joint cross rests against its fork), we remove the bearing using pliers
- We disconnect the cardan joint by moving its crosspiece in the direction of the removed bearing, slightly turn the crosspiece and remove it from the hinge fork.
- Press the opposite needle bearing out of the hinge fork.
- We carry out steps 3 and 4 for other needle bearings and remove the cross.
- We do the same with the second cross if necessary.
As you can see, replacing the crosspiece on a VAZ 2106 with your own hands is not particularly difficult.
If necessary, replace the intermediate bearing
- Unlock the nut securing the front shaft fork. We unscrew it and press the fork using a puller from the front shaft.
- Remove the dust deflector from the front shaft.
- Screw the nut onto the threads of the front shaft so that it is flush with the shaft itself
- We compress the intermediate shaft support (we apply force to the inner race of the bearing) and unscrew the nut.
- Remove the support along with the bracket from the propeller shaft
- We unscrew the bolts securing the bracket to the support, remove all the washers and disconnect the bracket from the intermediate shaft support.
Defective parts
- We thoroughly clean the parts with a brush before inspecting them.
- To cull the cardan transmission elements you will need: a bore gauge, a dial indicator.
- Since we have removed the cardan and disassembled it (albeit partially), we check the integrity of the welds. Drive shaft splines so that they do not contain wear marks
- For the rear cardan shaft, we check the presence of balancing weights, the condition of the seams and measure the diameters of the fork holes for the needle bearing. Dents of pipes and misalignment of the holes of the cardan forks are not allowed.
- We check the condition of needle bearings, oil seals, their cages and spider spikes for damage and significant wear.
- At the same time, check (while the cardan is removed) the condition of the rubber coupling of the cardan.
- The presence of cracks, mechanical damage or detachment of rubber from steel liners is not acceptable.
- We check the intermediate support for deformations. Cracks or ruptures of the elastic clip, as well as peeling of the rubber, are not acceptable. Replacing the defective support assembly
- We check the intermediate support bearing, rotate its inner race in two directions, while pressing it against the outer race (the inner race should rotate smoothly). We check the bearing seals for mechanical damage.
- We replace all defective parts.
We assemble the cardan in the reverse order, taking into account the features given below:
- Before installing the front shaft fork, lubricate the splines of the fork and shaft with grease.
- When installing the front shaft fork, tighten the nut securing it with a torque wrench 8.1-10 kgf•m (79.4-98 N•m) and tighten the nut with a chisel.
- When installing the oil seal race, the oil seal itself with the flange onto the front driveshaft splines, we fix the oil seal race by bending its three “tendrils”.
- Using an oil syringe, coat the splined part of the front driveshaft. Remove excess grease with a rag. We unscrew the grease nipple and screw in the plug in its place.
- Lubricate the needle bearings and stud surfaces of the universal joint with grease.
- Having installed the bearing races, we determine the gaps between the end part of the bearings and the upper edge of the annular groove located on the hinge fork using a flat feeler gauge. The permissible gap is within 1.5-1.66 millimeters.
- We select the thickness of the locking rings based on the obtained gap values (we measure the rings with a micrometer).
- After installing the rings, we apply a couple of blows with a rubber hammer to the hinge forks from the reverse sides (this ensures the contact of the needle bearing races with the locking rings and the free movement of the cross).
That's all, all that's left to watch is: Replacing the crosspiece on a VAZ 2106 video.
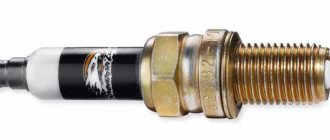
Rules for choosing a cross
This is what the part looks like
On VAZ 2106, auto mechanics advise changing the crosspieces as a set. In some cases, 3 crosses are replaced at the shank. The best parts are made in Germany. Products from the following manufacturers are installed on the VAZ 2106.
- Trialli with oiler. Made of steel and uniformly hardened over the entire surface. Such parts can withstand significant dynamic and statistical loads.
- Kraft. Made from anti-corrosion stainless steel alloy. The manufacturer provides a warranty on the part.
- Weber, GKN and other foreign manufacturers. The disadvantage of such products is the need to adjust the retaining rings.
- Domestic products. Plus - affordable price.
Replacing the crosspiece on a VAZ 2106 car involves dismantling the cardan. To do this you will need an inspection hole or a jack. Removal and installation are carried out using keys “12”, “13”, “27” and a hammer.
The suspension bearing is installed using a tension puller and an old flange. The release spring is disconnected from the bracket using pliers, then it is dismantled. The cardan is jammed with a screwdriver. Unscrew the nuts and remove 1 end of the cardan. The plank and plate of the suspended structure are dismantled. The cardan is removed. The location of each part is noted so that the balancing of the shafts is not disturbed. The retaining rings are dismantled. Using a puller or vice, remove the bearing. If an anvil is used for this, then the cover of the 2nd bearing should not rest against the plane of this device.
The VAZ 2106 cardan is turned over 180°. Similar actions are carried out with the 2nd bearing. If the process is carried out without a puller, then the blows are made on the crosspiece or on the 2nd part of the cardan (with a transverse crosspiece). The bearing is pulled out of the fork. The transverse cross is disengaged. The puller is installed on the 2nd pair of bearings.
How to diagnose wear on crosspieces
Replacing the crosspiece in a VAZ 2106 is carried out after diagnostics:
- When, during rapid acceleration or braking of a car, when changing gears, a knocking sound from the cardan transmission or vibration of the axle is heard, all this indicates wear of the crosspiece and its bearings. There is an urgent need to replace the VAZ 2106 crosspiece, which has become unusable.
- If you don’t pay attention to these signs in time, then the result will be destruction of the bearing and the cardan falling out directly onto the road. The axle gearbox and the underbody of your car can also be damaged.
Removing and installing cardan transmission
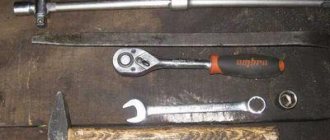
You will need: keys “13”, “19” (two), a screwdriver, a hammer, a mounting blade, a bit, special pliers (pliers) for removing and installing retaining rings.
| HELPFUL ADVICE It is more convenient to carry out the work on a lift or inspection ditch. When working on an inspection ditch, hang one rear wheel so that you can turn the driveline, and place the car on a stand. |
| 1. Lower the parking brake lever all the way and place the gear shift lever in the neutral position. |
| 2. Unscrew the two nuts securing the safety bracket to the body, remove the lock washers and flat washers, and remove the bracket. | 3. Unscrew the three nuts from the bolts securing the flexible coupling to the gearbox flange. |
| 4. Remove the bolts from the flange and coupling one by one by turning the driveshaft. |
| NOTE Bolts can only be removed in one flange position, when the bolt is at the top left of the coupling axis. |
| HELPFUL ADVICE If the bolts are difficult to remove, use a punch. |
| 5. Using a screwdriver, pry the coupling away from the flange and lower it down. | 6. While holding the rear propeller shaft from turning with a mounting blade, unscrew the four nuts of the bolts securing its flange to the flange |
drive gear of the rear axle reducer. Remove the bolts.
| NOTE: To secure the universal joint flange to the drive gear flange, use special bolts with a conical head and a flat on it) and self-locking nuts with a nylon ring. |
| HELPFUL ADVICE If the bolt turns, use a screwdriver to secure it. |
| 7. Use a screwdriver to separate the flanges. |
| 8. Unscrew the two nuts securing the intermediate support cross member to the body. Remove the washers. | 9. Remove the cardan drive by moving it forward as the vehicle moves, with the rear shaft passing over the parking brake cable. |
| 10. Install the new cardan drive in the reverse order of removal. |
| NOTE If you removed the elastic coupling, install it so that the bushings 2 fit into grooves 3 on the flange of the front propeller shaft and 1 on the flange of the secondary shaft of the gearbox. |
| USEFUL ADVICE When free, the elastic coupling increases in outer diameter. New couplings supplied to spare parts are equipped with a clamp. Remove the clamp only after installing the driveshaft on the vehicle. If a clamp is missing, use a punch to align the bolt holes in the coupling and flanges. |
Replacing the suspension bearing for VAZ 2107, 2106.
1. Remove the crosspiece and remove the rear cardan.
2. Using a 27 socket, unscrew, but not completely, the nut of the front cardan fork.
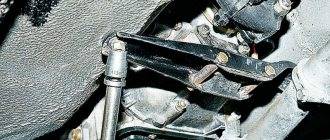
3. Place the puller on the fork, resting it against the nut, and tighten the puller bolt to create a preload. If the fork does not move, we help it with light blows of a hammer. In this way, we gradually press the fork from the splines of the front cardan.
4. Using a 13mm wrench, unscrew the two bolts securing the outboard bearing to the plate.
5. We rest the pendant on the corners and knock it off the shaft through a spacer made of soft metal.
6. The cardan assembly is carried out in the reverse order.
7. Install the cardan in the reverse order, lubricate the splines with Fiol-1 or Fiol-2U or CV joint grease and align the marks made earlier.
8. After installing the splined part of the cardan into the flange of the elastic coupling, we assemble the seal ring. We move the clip forward and use a screwdriver to bend the locking tabs one by one.
How to change the suspension bearing on a VAZ 2107?
As soon as you hear the characteristic sounds of bearing failure, evaluate the appearance of the bearing. To do this, you need to look where it is located. Most often, a failed bearing has minor external damage in the form of a bent protective insert, and traces of lubricant are visible on the housing. After this, you can begin replacing the part.
Replacement procedure:
- The car must be driven into the inspection hole and put into first gear. To be more confident, it is recommended to place wheel chocks on both sides to prevent any accidental movement of the vehicle.
- In all places where the driveshaft is fastened, treat the connecting parts with WD-40 lubricant. It is worth noting that when replacing the outboard bearing, it is also necessary to replace the driveshaft crosspieces. The fact is that these parts have approximately the same service life, which explains their simultaneous failure. While the WD-40 is absorbed, you can visit the nearest store and purchase the necessary components. Don't forget to make notes on the cardan, gearbox and gearbox parts. This is necessary in order to install the driveshaft correctly during assembly and prevent the occurrence of new vibrations.
- Now, using a 13mm wrench, unscrew the propeller shaft fasteners located on the gearbox shank. After this, all fastening parts of the outboard bearing are unscrewed. Next, you need to flare the special locking petals and pull the driveshaft out of the coupling made of elastic material. Now remove the cardan and dismantle the locking rings of the crosspieces. The fixing retaining rings can be unfastened using special pliers.
- Place special spacers under the crosspieces. Next, with gentle blows of a hammer or chisel, knock the parts off their seats.
- Let's move on to the bearing. The driveshaft is clamped in a vice, and the nut is unscrewed at the bearing mounting location. Using a puller, press out the suspension fork and knock the bearing off the cardan using uniform hammer blows along the entire circumference of the part.
- Clean the installation site of the new bearing from dirt with any available means. In all cases, it is recommended to use rags for these purposes. Install the new bearing onto the driveshaft. To assess the correct installation, pay attention to the part stopper, which should lock towards the rear axle of the car. Don't forget to install the protective washer.
- Screw the nut securing the bearing onto the shaft and lock it. To do this, you can use a hammer and chisel.
- New crosspieces and driveshaft are installed in the reverse order. This completes the bearing replacement.
This is how to replace the outboard bearing of a VAZ driveshaft. As you can see, this is not a complicated operation at all and only requires you to have space and the appropriate tools.
How to remove the suspension bearing of a VAZ 2107
In order to replace the suspension bearing of the VAZ 2107, you need to remove the driveshaft assembly. To do this, you do not have to go to a service station, but you can repair the car yourself.
To replace, you will need an inspection hole or overpass, as well as the required minimum of tools, a puller, a workbench and a bench vice.
It is best to purchase a new outboard bearing that is factory-made, since there is a lot of blatant “liver” on sale today, and such a “sweetheart” replacement will only be a waste of your hard-earned money.
Finding a factory part is not so difficult; you just need to contact trusted sellers who sell spare parts from the manufacturer. Before replacing the suspension bearing on a VAZ 2107
it is necessary to ensure the integrity of the cardan shaft crosspieces and the elastic coupling, so that during work you do not face the fact that you will also need to replace these parts, which will not be at hand.
In addition, if you do not have the skill to replace driveshaft crosspieces, then it is best to purchase one crosspiece along with an outboard bearing, since in the process of replacing the “outboard” one of the crosspieces will have to be removed and, most likely, it will be damaged.
Scheme of work for replacing the outboard bearing of a VAZ 2107 - the car in the inspection pit
• The fastening of the cardan flange to the shank flange of the rear axle gearbox is released and the flanges are disconnected • The petals of the protective boot (cuff) at the entrance of the splined part of the cardan into the connection of the elastic coupling flange are bent and the boot is moved • The fastening of the suspension bearing strip is released • The safety bracket of the cardan is released (attached along the edges tunnel under the cardan shaft) • The cardan shaft is removed from the connection with the flange of the elastic coupling • The front part of the cardan is lowered down and the entire cardan assembly is removed
Next, the driveshaft is removed from the inspection hole and you can begin replacing the outboard bearing of the VAZ 2107. To do this, you first need to dismantle the crosspiece to gain access to the bearing. Before removing the crosspiece, it is necessary to mark the relative position of the forks of its fastening, so as not to confuse them during the subsequent installation of the crosspiece. Otherwise, the balancing of the cardan shaft will be lost and vibration will appear during movement.
After removing the crosspiece and disconnecting the driveshaft, the rear part of the driveshaft with the hanging bearing must be clamped in a vice for ease of operation. In this case, you also need to mark the relative position of the fork and the cardan body by applying paint or punching the parts. The suspension bearing is attached through the stop of the crosspiece fork using a nut that must be released. To do this you will need a head and a wrench. The nut is loose from the factory and will require some effort to remove.
After unscrewing the nut, you need to remove the fork, for which it is best to use a puller. If this is not available, you can insert a piece of pipe into the fork eyes and try to carefully knock the fork out of the spline connection with the cardan. This is a necessary measure and is used only as a last resort, since the mounting holes for the cross can be damaged, with subsequent problems.
How to replace the suspension bearing on a VAZ-2107
Every car owner in his life has encountered the fact that some part of the car has become unusable and needs to be replaced. Some people simply went to a service station for this (the price for this type of service is quite low), and some do it themselves.
Let's take a closer look at how to replace the crosspiece and, accordingly, the outboard bearing of the cardan (propeller shaft) on the “classic” automobile industry, namely on the VAZ-2107. But this instruction is also suitable for VAZ 2101-02-03-04-05-06.
How much oil to fill in VAZ 2107
Spare parts
As for parts and spare parts for the VAZ-2107, it is better to buy a new outboard bearing (propeller shaft support) than a factory-made one. All this is because there are a lot of low-quality products on sale now, and buying a factory suspension bearing from a VAZ will help avoid getting a pig in a poke. To get a factory part, you just need to contact the sellers who sell goods from the manufacturer. Finding such a person is not difficult, you just need to try.
In order for the part to function well in the future on your VAZ-2107, when purchasing the selected outboard bearing, you should check its movement, that is, the movement of the outboard bearing must be smooth with elastic adjacent rubber. Rotating the outboard bearing from its hooks is a bad sign, and it is better not to take such a part. Otherwise, the cost of your negligence will result in unpleasant noise in the cabin of the VAZ-2107.
In the case when a replacement is necessary, but you do not have experience in such matters, you should take care of purchasing one cross with an outboard bearing already present. The purchase will be made with the intention that when a replacement is made, one crosspiece will need to be removed and it may be damaged.
- If you don’t have to replace the entire propeller shaft support, for example, because only the outboard bearing was broken, and it’s a pity to throw away the rubber, then only the bearing is bought and replaced.
- To do this you will need:
- ⦁ remove the support ring;
- ⦁ knock out the old bearing;
- ⦁ carefully hammer in a new one.
- How to change ball joints on a VAZ 2107
And it is advisable to purchase retaining rings, since old ones are often deformed or even broken. In addition, it makes sense to buy bolts, nuts, etc., the old ones may already be “licked”. Replacing parts will be much more convenient in a viewing hole or overpass, and for convenience, one of the rear wheels should be jacked up.
- So, to begin with:
- ⦁ it is necessary to unscrew the cardan shaft. Using a 13mm wrench, remove the bearing mount that secures it to the transverse support (a pair of bolts);
- ⦁ now unscrew the nuts with which it is attached to the shank.
To further avoid vibration of the cardan and its beating on your VAZ-2107, it is best to place marks on all joints of the cardan before removal. And assembling according to your marks will save you from such unpleasant moments. A chisel can be useful when placing marks.
- Replacing the cross:
- ⦁ it is more convenient to remove all available retaining rings using round pliers with a bend;
- ⦁ knock out the cup of the cross with a hammer;
- ⦁ turning over the cardan shaft, take out the cup;
- ⦁ knock out the next cup and the remaining ones;
- ⦁ we clean all the recesses and everything else from dirt and rust.
- Installing the cross:
- ⦁ it is necessary to remove two bowls on both sides of the cross;
- ⦁ the crosspiece must be placed in the eyes;
- ⦁ put on the cup, to do this you should move everything to one side;
- ⦁ Next, you should push the cup until a groove for the retaining ring appears;
- ⦁ install the retaining ring;
- ⦁ now, having turned the cardan over, you need to direct the cross towards the cup, put it on, also until the groove appears;
- ⦁ install the retaining ring.
- Assembling the second part may be a little more difficult:
- ⦁ after removing the crosspiece, it is necessary to insert the splined end of the cardan shaft into the flange of the elastic coupling;
- ⦁ using a 27 wrench from the opposite end, unscrew the fastening of the fork to the front shaft;
- ⦁ it is necessary to tighten the hinge fork using a puller;
- ⦁ remove the suspension bearing from the shaft.
- How to change brake pads on a VAZ 2107
- When removing the bearing, you can simply try to knock it down.
- This is where the replacement for the VAZ-2107 ends, but the assembly is done directly in the reverse order.
Elastic coupling for driveshaft VAZ 2107
The driveshaft of the VAZ 2107 consists of two parts (front and rear), connected to each other by a articulated coupling (cross). This design allows you to avoid loads on the shaft while driving, when the body and chassis of the car begin to “play.”
The end of the rear shaft is connected to the axle gearbox, and the end of the front shaft is connected to the gearbox shaft. The connection to the gearbox is made through an elastic coupling, which is a kind of buffer for leveling shock and dynamic loads on the driveshaft and gearbox shaft.
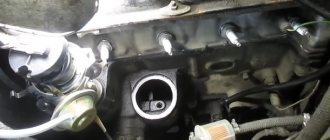
Flexible coupling location
The elastic coupling is located in the lower front part of the car on the rear side of the gearbox. You can see it if you remove the engine protection and climb under the car. The coupling is easily recognizable due to its hexagonal shape.
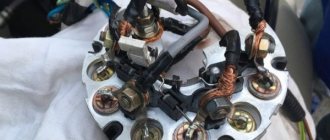
Coupling design
The basis of the coupling is a cushion made of especially durable rubber. Along its circumference there are six steel bushings fused into rubber, through which the bolts connecting the cardan flanges and the gearbox secondary shaft pass. The coupling kit also includes a special tightening clamp, which is put on it during installation or dismantling.
Diagnostics of elastic coupling faults
The coupling may fail as a result of:
- wear of metal bushings;
- body wear;
- rupture of the body.
In each of these cases, the malfunction will manifest itself in the form of body vibration and extraneous sounds coming from the gearbox.
The condition of the coupling can only be checked by inspecting it and assessing the size of the play between the flanges of the gearbox and cardan shafts. This is done as follows.
- The car is driven onto an overpass or inspection hole;
- The engine protection is removed;
- The coupling body is inspected and the condition of the bolted connection is assessed.
- By loosening the cardan, the presence or absence of play is determined.
If signs of wear or mechanical damage are found on the coupling body (the body is partially or completely torn), the part must be replaced. A slight play (provided the body is intact) is eliminated by tightening the nuts of the connecting bolts. If the play is large, the elastic coupling will have to be replaced with a new one.
Criteria for choosing a new coupling
Driveshaft couplings for the VAZ 2107 in Russia are produced under catalog numbers 2101–2202120 and 2101–2202120Р. The retail price of the part, depending on the manufacturer, ranges from 400 to 600 rubles.
Replacing the driveshaft crosspiece of a VAZ 2106
Replacing the driveshaft crosspiece of a VAZ 2106
So, let's start, as always, briefly and without unnecessary, unnecessary information! It is better to take the original VAZ crosspiece. My choice fell on a domestic plant, the cost is about 120 UAH ($5). It is also worth buying 4 locking rings. Old ones, as a rule, break and become deformed during dismantling.
Before starting work and removing the cardan, it is necessary to make marks (.) on all parts and joints of the cardan, otherwise, if it is not assembled correctly, it will knock, vibrate, and generally fail.
The cardan is connected with 4 x 13 bolts to the rear axle shank. We unscrew them
Next, unscrew the mounting of the outboard bearing.
Remove the cardan from the gearbox
Remove the retaining rings from the crosspiece. We didn’t have a special puller, we used ordinary pliers
While the cordan is removed, we get into the car, “accelerate” and take an outrageous photo!))
(don't forget to remove the handbrake)
Next we knock out the cross. If there is a tube of suitable diameter, then this is good. In this case, available materials were used: a socket wrench (for replacing wheels), an adjustable wrench (placed under the crosspiece), and a hammer.
Knock out the old one, insert the new one
We remove the landing cups from the opposite edges of the cross and insert it into the seat. Carefully put the cups back so as not to scatter the needles in them.
We hammer in until you see the groove of the retaining ring.
We put the ring and finish it further.
We perform similar actions with the second part of the cross.
Before planting the crosspiece in the box, we treat the gears with grease. Without sparing, the excess will be squeezed out.
Assembly proceeds in reverse order. Don't forget about the marks on the cardan! Good luck with the repair.
Suspension bearing of the propeller shaft VAZ 2107 (2105, 2106, 2101) - replacement with photos and videos
The VAZ 2107 suspension bearing serves as a support for the driveshaft of rear-wheel drive vehicles, such as the VAZ 2101-2107 (including the injector). The cardan itself is designed to transmit torque from the gearbox to the rear axle gearbox, which in turn transmits torque to the wheels.
The shaft is an important element of the car’s “propulsion”, so replacing the suspension bearing on a VAZ 2107 is required as soon as signs of support failure appear.
If you delay repairs, you risk further consequences, since the cardan will become unbalanced, it will jam, and a faulty cardan will cause damage to adjacent transmission units.
The cardan drive is removed using:
- Key to "13";
- Key for “19” 2 pcs.;
- Mounting blade;
- Screwdriver;
- Beard.;
- Hammer;
- Special pliers for removing retaining rings.
1. Lower the brake lever until the lever stops, set the gear shift control to the neutral position.
2. Unscrew the fastening nuts securing the protective arm to the body, then remove the washers (lock and plane) and remove the arm.
3. Now you need to unscrew the three mounting nuts of the bolts that secure the flexible coupling to the gearbox flange.
4. Remove the bolts from the flange and coupling in turn, gradually rotating the drive shaft.
Important Tip: If the bolts are tight, use a beard.
5. Using a screwdriver, push the coupling away from the flange and then lower it.
6. Using the mounting blade, hold the propeller shaft from turning, and with the other hand, unscrew the four nuts of the propeller flange mounting bolts, with which it is attached to the flange of the drive gearbox of the rear axle of the VAZ 2106.
7. Separate the flanges using a screwdriver.
8. Unscrew the two nuts that secure the transverse elements of the intermediate support to the body of the VAZ 2106, then remove the washers.
9. Next, disassemble the drive, gradually moving it forward along the car, while the rear shaft should pass through the handbrake cable.
10. The next step is to install the VAZ 2106 cardan gearbox, arrange everything in the order of disassembly.
Wrinkles: When the elastic coupling is loose, it increases in outer diameter. New clutch kits always include a clutch coupling. The clamp itself should be removed only after installing the cardan drive on the VAZ 2106. If the clamp is missing, use the beard again to align the holes for the bolts in the flanges and couplings.
Source
Welcome! Cardan shaft. Thanks to this unit, the car drives with the rear wheel. In most cases, the universal joint, as it is called, is installed on cars with rear-wheel drive and all-wheel drive, but today we are not interested in all-wheel drive, because we will only analyze the process of repairing the universal joint on a Classic car.
The note! To repair the drive shaft, you will need to stock up on: a basic set of wrenches, 11 and 27 sockets, as well as a screwdriver, screwdriver, beard, hammer and pliers!
You will also need to stock up on: two mandrels for pressing bearings out of the joints of cardan joints, a marker, as well as a universal puller and a Cobra-type pliers!
And finally, this will come in handy: a wrench, which you will use to take the oil into the oil, as well as a rubber hammer, a micrometer and a small set of feeler gauges!
Result:
When to repair the drive shaft? Basically, it is subject to repair with severe wear of the crosspiece and other parts belonging to the propeller shaft, such as: elastic coupling, intermediate support and other parts.
How to understand the fact that the crosses have become unusable? When braking or accelerating the vehicle, you will hear a knocking sound from the driveshaft or vibration of the axle. These are the first signs of wear.
The note! If you find the first signs of wear on the universal joint, then in this case it is not recommended to hesitate to replace it, otherwise the universal joint shaft may simply fall off!
Signs of a faulty VAZ 2107 suspension bearing and how to check the driveshaft yourself
The first signs of malfunction and wear of the VAZ 2107 (PP) suspension bearing are vibration and knocking of the cardan when the car begins to move. After accelerating the car, the knocking gradually disappears, turning into vibration and noise. If there were no problems with balancing the axle before, but knocking suddenly appeared, then it is necessary to immediately diagnose the PP.
Diagnosis is performed in the following order:
- Place the car on an overpass, lift or pit;
- Locate the driveshaft under the car;
- Check the play of the PP by moving the part by hand in the axial direction - free movement is not allowed;
- Rotate the cardan and listen to how the bearing works - vibration, rolling, grinding, knocking are not allowed;
- Inspect the product body, including the tightness of the bearing seals - lubricant leakage is not allowed;
- Make sure that the outboard bearing and bracket are not loose;
- The presented videos show how the VAZ 2101-2107 suspension bearing (injector) hums, as well as how to determine if the intermediate support is faulty.
Video: “How an outboard bearing hums”
Video: “How to check the universal joint support”
Suspended bearing for the VAZ 2107 propeller shaft: dimensions, prices, how to choose, which one to buy
The design of the intermediate support for the propeller shaft VAZ 2101 - VAZ 2107 consists of a closed-type, lubricated, single-row radial ball bearing, which is located inside a housing made of metal and rubber. The ball bearing is secured with a retaining ring. The PCB body has fasteners in the form of a bracket with holes.
- according to GOST 6-180605;
- according to ISO 62305.2RS;
- Factory (serial or catalog) number of the VAZ 2107 suspension support: 2105-2202078.
The VAZ 2107 suspension bearing for replacement, the prices of which are presented in the table , is selected based on the recommendations of experienced auto mechanics and service station workers.
Below is a list of preferred manufacturers to purchase parts from. To the question “How much does a suspension bearing for a VAZ 2107 cost?” This table will answer in detail. Pay attention to the photographs of the original repair kits presented in the list.
What is needed to repair the driveshaft outboard bearing and spider?
One of the issues faced by motorists who want to learn and perform most car repair work with their own hands is the repair of the driveshaft outboard bearing and crosspiece.
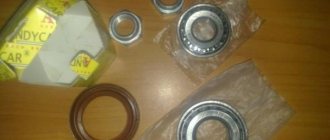
What spare parts will be needed? To begin with, you should buy an outboard bearing and check it first. It is important that it scrolls without a “catch”. Rubber should not be “wooden”, but elastic and quite soft. If the material turns out to be rigid, then when the car moves, vibration will be transmitted to the body from the driveshaft. Buy a “original” crosspiece, not forgetting also about the retaining rings, which often become deformed or even break completely. It is advisable to purchase additional nuts and bolts for securing the propeller shaft.
Tools. To replace the crosspiece and bearing you need: socket wrenches (13, 27), open-end wrenches (12, 13), a hammer, a copper or aluminum attachment, a tension puller, compression pliers, an elastic coupling flange. It is better to carry out work in a pit.