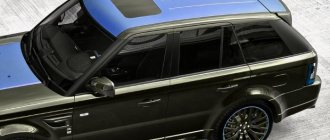
The front-wheel drive sedan of the Volzhsky Automobile Plant was produced from 1995 to 2020; production in the Russian Federation ceased in 2007. The 2110 sedan was built on the basis of the VAZ 2108 hatchback and became the leading model in the Lada 110 family. Replacing the front wing of the VAZ 2110 is not a common type of repair, if after Upon purchase, the part is treated with an anti-corrosion compound and is additionally protected. The car body and hinged panels are made of black steel, 0.8-1 mm thick, the metal is not galvanized.
When the wing of a VAZ 2110 requires replacement
The wings of the VAZ 2110 are among the most vulnerable parts of the body, along with the sills and wheel arches. Parts are in constant contact with flying gravel and precipitation. Spending the night in the open air and aggressive reagents that clog into hidden cavities affect the condition of the metal.
Dismantling of the part and subsequent repairs will be required in the following cases:
- The appearance of corrosion, but before removing the wing of the VAZ 2110, it is necessary to inspect the part for the degree of rust damage. If a small spot is found on the outside of the part and corrosion has occurred at the site of the paint chip, then you can limit yourself to minor repairs, clean, prime and paint the element without removing it from the car.
- If corrosion spreads from a rotten wheel arch, the wing must be removed and the part must be rewelded or completely replaced.
- Electrochemical corrosion can occur in the mounting areas of the left and right amplifier; during repairs, the places must be inspected.
- The element will need to be removed if there is significant deformation after an accident. Straightening and subsequent processing are carried out on a table or a special machine; if the metal is torn, then in 60% of cases a complete replacement is carried out.
The cost of the front wings on a VAZ 2110 from the manufacturer is from 2000 rubles, the price of the rear fenders starts from 7500 rubles. As an option, you can install a plastic wing instead of the original metal one, which is 50-70% cheaper.
The advantage of the plastic element is obvious, since the part is not subject to corrosion. But with such an advantage, plastic also has a drawback: with a medium impact, the element cracks and cannot be repaired.
How to remove the wing
Front right fender VAZ 2110
First, let's find out how to remove the wing from a VAZ 2110 car. Let's get started:
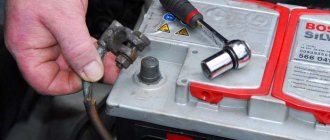
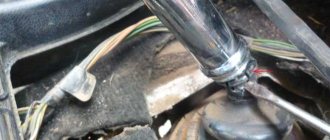
- First of all, you will need to remove the side turn signal, but first disconnect the battery;
Note. Removing the bumper involves removing a special fastening on the right side of the VAZ 2110 car.
- We take out the side turn signal, moving it to the front of the car and removing it from the special hole;
Note. The turn signal housing should also be removed and the lamp socket with the lamp should be moved towards the front.
- We find the bolt at the bottom that secures the buffer on the right side;
- We loosen the nuts that secure the crankcase protection with the bumper of the VAZ 2110 (there should be 5 of them);
- Remove the radiator trim;
- Loosen the front buffer bolts.
Note. The front buffer bolts (there are two of them) are loosened in order to easily move the buffer in the desired direction, thereby gaining access to the nut that secures the front wing mount.
- Unscrew this bolt;
- Then pull out the headlight from this side of the car;
- After this, grab the wheel arch liner and remove it;
- Now you need to unscrew the screws that secure the wing to the body (we are talking about the upper fastenings, which are turned out with a 10 key);
- We do the same with other screws that secure the wing to the body.
Note. During the work, you need to use not only one key, but also a screwdriver with a wide blade, as well as a second key with the same number.
- The wing can be easily removed once there is nothing to hold it in place.
Right front fender VAZ 2110
As for installing a new or repaired wing, the whole process is similar to removal. All stages of work should be done in reverse order.
Note. During installation, the wing should be carefully adjusted to other parts of the body. This is very important and requires special care.
Right wing of VAZ 2110
Required tools and materials
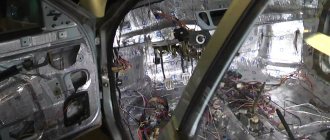
Before removing the front wing on a VAZ 2110, it is necessary to carry out preparatory work and prepare tools. During the factory assembly of the body, the wings were welded to the cross members and struts at points. If a non-original wing is being removed, you should check how the part is installed. If there are welding points, they must be drilled out and then cut out. Tools for work:
- chisel with a sharp and wide edge;
- semi-automatic welding;
- key for 8 and 13;
- Phillips and flat screwdriver;
- grinder and circles for stripping metal;
- sandpaper R-80;
- automotive primer;
- end cutters;
- putty, rubber spatula;
- auto enamel;
- anticorrosive based on bitumen or rubber-bitumen.
Preparation for dismantling and repair
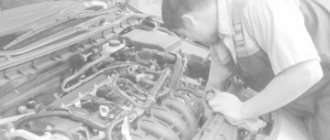
Before starting work, the car must be washed, only after that can you begin to disassemble the parts. We will consider replacing the front wing, and also carry out manual repairs of Renault Logan.
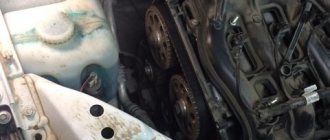
- First you need to remove the front bumper.
- Remove the headlights and remove the wiring.
- Remove the radiator grille and its fastenings, after which it is necessary to remove the transverse structure amplifier.
- Remove the fender liner on the left side, after which you can carry out repairs.
- To correct dents, it is necessary to install a metal block on the back side of the part, and then apply light blows with a hammer in the area of damage from the outside.
- After fixing the dents, it is necessary to apply automotive putty to the repair site and, after drying, sand it thoroughly.
Algorithm for removing the wing
Dismantling the front and rear wings is slightly different, replacing the front wings of a VAZ 2110 in steps:
- Remove the front bumper and remove the hood cover.
- Disconnect the front door power window and remove the door.
- Disconnect and remove the headlights.
- Find the seam connecting the wing with the front strip, headlight trim, cut out the seam, retreating 3-4 mm from the edge towards the wing.
- Cut out the connection of the part with the front side pillar, retreating 3-5 mm from the bend line of the vertical amplifier.
- Drill weld spots where the drain gutter meets the splash guard.
- Detach the wing together with the groove from the splash panel and windshield frame.
- Bend the wing, cut out the horizontal connection.
- Remove the remaining pieces of metal with end cutters and a fine chisel.
The rough dismantling of the wing is completed. It is necessary to straighten the deformed edges of the front panels, A-pillar and mudguard, clean and sand them.
Removal of the rear wing is carried out using a grinder or reciprocating saw. The factory welding spots are drilled out, and the part is cut off with an angle grinder. The cut is cleaned and primed.
In some cases, a partial replacement of the rear wing is performed, depending on the damage. Both whole rear wings and parts of the element are sold on the market.
Right and left wing of Renault Logan
Unfortunately, no car owner is insured against an accident. If the paintwork on the front or rear fender is damaged, these parts must be repaired, and in case of more serious damage, replaced. Renault Logan owners often ask us how to replace the front and rear wings with their own hands, we tried to collect useful information and pass it on to the reader, namely: how to assemble and disassemble these units.
Preparation for dismantling and repair
Before starting work, the car must be washed, only after that can you begin to disassemble the parts. We will consider replacing the front wing, and also carry out manual repairs of Renault Logan.
- First you need to remove the front bumper.
- Remove the headlights and remove the wiring.
- Remove the radiator grille and its fastenings, after which it is necessary to remove the transverse structure amplifier.
- Remove the fender liner on the left side, after which you can carry out repairs.
- To correct dents, it is necessary to install a metal block on the back side of the part, and then apply light blows with a hammer in the area of damage from the outside.
- After fixing the dents, it is necessary to apply automotive putty to the repair site and, after drying, sand it thoroughly.
This method is suitable for removing irregularities of light damage. If the left fender of the car has serious damage, it must be replaced.
Replacing a front body element
You need to perform the above steps and continue with the following:
- In the area of the Renault Logan front door, unscrew two bolts from the inside.
- Along the upper part of the front spar, unscrew several bolts securing the required part.
- Having unscrewed the nose part of the front part, we dismantle the wing.
If you are using a used part, make sure the paint color matches your vehicle's color number.
- Prepare all adjacent edges and straighten them if necessary.
- Make several fittings and make sure the new part fits correctly.
As a rule, using a used part, it is not difficult to install the left and right wing, the main thing is not to damage the color of the Renault Logan paintwork.
- If the fastenings of the body element coincide, treat the hidden seams with an anti-corrosion coating, after which you can fasten the part.
If the color of the new part is slightly different from your car, it may need to be polished.
We carry out the rest of the assembly in reverse order.
Replacing the rear body element
To replace the rear body part on the right and left sides, it is necessary to dismantle many Renault Logan panels. Since this element is considered part of the body structure, it is impossible to dismantle it without the use of special tools.
This work on replacing the right and left parts must be carried out in a specialized service center that has the appropriate equipment called a slipway. The only thing you can do yourself, while maintaining the color of the car, is to carry out manual dent repair. Of course, if the damage is significant, this operation should only be carried out by a service center.
To save money, you can pre-disassemble the rear body elements on the right side.
- Fuel tank.
- Ventilation of the luggage compartment on the right side.
- Rear sofa and right side upholstery
- Bumper.
- Luggage compartment trim and canopy.
By carrying out this work, you will significantly reduce the cost of repairing your Renault Logan.
Conclusion
To remove the front body elements, you need to have a certain set of tools and preferably an assistant. Fortunately, this kind of work is not difficult to do even for an inexperienced user. But with the rear wing things are a little different, but you can still save money by doing the preparatory work. Select the paint color according to the number indicated on the plate under the hood.
Set of front fenders with gills for VAZ 2110 (fiberglass) buy inexpensively with delivery
Set of fiberglass front fenders for VAZ 2110 (with gills)
Main characteristics of fiberglass front wings on the VAZ 2110 with gills:
The fiberglass front wings on the VAZ 2110 with gills are made using composite materials, the geometric parameters and fastenings are similar to the factory ones...
The fiberglass front wings on the VAZ 2110 with gills contain the maximum amount of composite materials, and therefore the front surface has sufficient rigidity.
The weight of the original (metal) front wings on the VAZ 2110 is 5 kg.
The weight of the glass-plastic front wings on the VAZ 2110 with gills is 3-4 kg.
Using coarse sandpaper, the surface of the glass-plastic front wings on the VAZ 2110 can be brought to the state of foil and the weight reduced to 2 kg, in which case the combat load will be up to 3 kg.
General recommendations when installing fiberglass products:
1. The wall thickness of the original metal body part is generally 1 mm, the wall thickness of the fiberglass body part is 3-4 mm, so you may have to remove excess plastic from the inside with coarse sandpaper during the fitting process. 2. We are not a factory and we do not have a stamp, but manual labor, if the part consists of two parts, there may be a deviation during gluing of 1-2 degrees or a shift of 2-3 mm in one direction or another, which leads to additional adjustment work when installation. 3. If the geometry of the metal can be straightened “by hand” or with a hammer, then the geometry of the fiberglass product can be changed (within reasonable limits) using a hair dryer by heating the surface to 60-70 degrees (the main thing is not to overheat the excess...so that the resin does not boil!). When heated, the resin “withers” and the part becomes more elastic, the part is installed on the body and fixed in a new position, after cooling the part takes on the corrected geometry. 4. We kindly ask you to clarify the “competence” of your craftsmen in the installation of fiberglass body parts and coordinate with them possible additional work before placing an order... 5. If you have any questions during installation, call or write immediately and we will try to solve them together!
Recommendations for preparing for painting fiberglass products:
1. First install the unpainted part on the body, align everything according to the gaps and only then go to the paint shop! 2. We apply a small mark to the surface of the fiberglass part with “not rough” sandpaper, so that the primer will better cling to the surface (just without enthusiasm... just a little). The gray surface is not primer, but the first layer of composite materials with silver filler; it cannot be cleaned off; pores and cavities may form. 3. Before applying the primer, thoroughly degrease the surface with white spirit. 4. Apply primer for plastics, a two-component primer (it goes on thicker), then any paint coating.
“by default, sending by KIT - the car is loaded and goes for shipment, if you need to send another transport - it is decided by registering the cargo pickup”
How to remove and install the front wing of a Chevrolet Cruze
you needed a welding machine to remove or install a wing Today, this process does not require welding work, and even the most inexperienced car enthusiast can remove and install the front wing on a Chevrolet Cruze.
Instructions for removing and installing the front wing of a Sherole Cruze
- We place the car on a flat surface and turn the wheels in the opposite direction to the one on which we will remove the wing.
- Using a Torx T15 socket, unscrew the three self-tapping screws securing the fender liner to the car bumper and the two self-tapping screws at the bottom. The required connections are marked in the photo.
- After this, move the fender liner a little and separate the bumper and fender. For connection, a special bracket with latches is used, which are easily separated; you just need to pull the upper part of the bumper towards you.
- Before removing the front fender, we recommend covering the edge of the bumper with tape to avoid accidental scratches.
- Now, slightly pulling the edge of the bumper, unscrew one screw and remove the bumper mounting bracket. It is attached to the wing using rivets that need to be drilled with a 4.2 mm drill. and, pressing the outer latches, pull it towards you and up until it disengages from the wing.
- To attach the bumper mounting bracket during fender installation, you must use rivets with a diameter of 4.8 mm
- After dismantling the bracket, we have access to the two front bumper mounting bolts, which need to be unscrewed.
- Next, open the front door and find another fastening bolt, which we also unscrew.
- On the back of the fender liner, we remove three pistons securing it to the car body, and one piston on its lower part.
- Pulling back the rear part of the fender liner, we see a plastic boot, which is secured with a single piston. We disconnect the piston and pull out the boot, lowering its lower part.
- Now you can unscrew another fastening bolt, which is located behind the boot.
- There is another bolt on the lower part of the wing at the junction with the body sill; unscrew it and use a screwdriver to separate them.
- Using a thin screwdriver, carefully pick up the plastic triangle around the edges and remove it near the side-view mirror. There is another fastening bolt under it, we also unscrew it.
- Now let's move on to the engine compartment. We remove the left wiper, to do this we open the plug at the base and unscrew the fastening nut with a 15mm head, then, shaking it, remove it from the axle.