Replacing the muffler on VAZ 2108, VAZ 2109 and VAZ 21099
The exhaust gas removal system seems to be one of the leading systems of the current vehicle. Timely replacement of the muffler on the VAZ 2108, VAZ 2109 and VAZ 21099 plays an important role in the operation of the car. Not only the correct release of carcinogenic substances into the planet’s atmosphere, but also a reduction in the noise level of a running vehicle depends on it. In addition, when tuning a vehicle, a stylish “glushak” is an indispensable element of the VAZ 2109 exterior.
In the event of a defect in this element of the exhaust system, the car owner has two scenarios for the development of events. These include:
- replacement of VAZ 2109 muffler;
- repair of an old product - muffler corrugations, catalyst or simply replacing gaskets.
If everything is clear with the first one, i.e., we act according to the scheme: go - choose - buy - install, then repairing the VAZ muffler requires the concept of its necessity. If the defect consists of burning through the walls of the muffler, then repairing it is useless and even patches applied by a welder will not give the long-awaited effect. After a short time, next to the “patch” applied by the welder, the car owner will have a new location for the exhaust gases to break through.
It’s a different matter if the defect is a burnout of the muffler pipe in the area of the resonator. This happens, here the walls of the product are quite strong, and if a small affected area is identified, a “patch” applied by the welder can lead to a positive result, and the product can be used for a long time.
Replacing the VAZ 2109 muffler with your own hands
We return to another scenario when a decision is made to replace the product. Replacing a VAZ 2109 muffler with your own hands is absolutely possible, even if the car enthusiast does not have confident plumbing skills.
In this situation, an important point is to purchase a new spare part from a car store. This product is not one of the scarce goods, but a car enthusiast may unknowingly sacrifice quality for the sake of the beautiful exterior of the product. Based on personal experience, we recommend purchasing the so-called. “standard” or original parts, especially since their price is quite affordable. You should not buy beautifully decorated spare parts, because the quality of the product is always sacrificed to beauty; the same light weight of the part indicates a violation of its manufacturing technology: either it is empty, or the material used is of the wrong characteristics.
Having selected the required part, we begin preparing for its installation on the car.
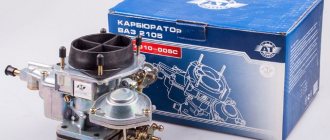
Repair of the exhaust manifold on a VAZ 2109 (carburetor)
- Preparation stages
- Dismantling of collectors
The exhaust manifold is a component of the exhaust system that carries out the process of removing exhaust gases from the cylinders of the power unit into the exhaust pipe.
If the collector malfunctions, the culprit may be either the element itself or its gasket. Replacing the exhaust manifold (exhaust manifold) gasket is a common procedure when repairing a VAZ 2109.
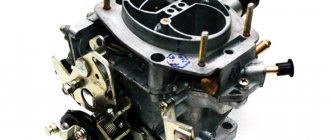
Appearance of the unit
Preparation stages
To replace the manifold or its gasket, in any case you will have to dismantle the VK. But before you get to the element you are looking for, you will first need to go through some preparatory steps. Namely, tighten the fasteners, and then remove the air filter and carburetor if the first stage does not help.
| Stage of work | Your actions |
| Tightening the fastenings | Often, loose manifold fastenings caused the entry of contaminants, which disrupted the performance of the exhaust system. If the tightening did not give any result, then the gasket is definitely burned out or the collector itself is damaged, which is less likely |
| Removing the air filter |
|
| Removing the carburetor | Removing the carburetor is carried out in the following sequence:
|
Dismantling the unit
All dismantling work must be carried out only on a cold engine. To make it easy to unscrew all fasteners, you can pre-treat them with WD40, several hours or even a day before the repair begins.
Dismantling of collectors
Now comes the turn to remove the intake and exhaust manifolds. Having dismantled them, you can understand whether it is possible to get by with replacing the gasket, or whether the collectors themselves will need to be completely replaced.
https://www.youtube.com/watch?v=m0PdEXqhP0M
The gasket is a consumable item, the purchase of which will literally cost you 50-250 rubles, depending on the manufacturer and region. Services for replacing the gasket at a service station cost more than 1,500 rubles. Add to this the cost of a high-quality gasket and you will get quite a lot of money. Such costs can be avoided if you do everything yourself.
Dismantled unit
Intake manifold
By removing the air filter and carburetor, you will gain access to the intake manifold.
To dismantle it you will need a certain set of tools:
- Ratchet with 10mm head;
- Collar;
- Ratchet;
- Deep head 13;
- Regular head 13;
- Open-end wrench 13.
When everything is ready, you can start working.
- Unscrew a couple of mounting nuts to bend back the platform located under the carburetor.
- Disconnect the hoses that are connected to the intake manifold.
- Remove the six mounting nuts located on the intake manifold.
- Remove the manifold itself from the studs. To do this, simply rock the knot to the sides. It often sticks to the gasket, which causes problems with removal.
- Inspect the condition of the unit. If there is damage, the collector must be replaced.
- If the problem is only with the gasket, put the intake manifold aside for now and start removing the outlet.
An exhaust manifold
To dismantle a graduate you will need:
- Ratchet;
- Open-end wrench 13;
- Socket wrench 13;
- Deep head for 13.
All is ready? Then let's get started.
- Unscrew the four exhaust pipe mounting nuts from our exhaust manifold.
- Pull the so-called pants off the heels and take them to the side. Now you can unscrew three more fastening nuts securing the VK.
- Carefully, without sudden movements or jerks, pull the graduate off the stiletto heels.
- It is not uncommon that during the process of dismantling this unit, the manifold or its mounting nuts become stuck to the seats. To prevent this, treat the assembly with WD40 in advance, let it react, after which there will be no problems with dismantling work.
- If the studs break off during removal, you will need to drill out the old element, make a new thread and install a fresh stud.
Pad
Well, the check showed that the burnt gasket was to blame. Therefore, only it will have to be changed.
Pad
Alas, to get to a simple gasket, it was necessary to remove the air filter, carburetor, exhaust, and intake manifolds. But there is no way without this.
To replace an old, used gasket, you will need:
- Remove the old gasket. Here you may face certain difficulties, since most likely the gasket has become properly stuck and burned to the cylinder head;
- Arm yourself with a thin screwdriver, sharp knives, aerosol solvents;
- Spray the surfaces first, then let it react. It’s better to take your time in order to make your work easier;
- When the product takes effect, begin to gradually remove the old gasket from the surface of the block;
- Do not forget to remove carbon deposits from the mating surface of the cylinder block. Here you will no longer need an aerosol, but full-fledged sandpaper. Do not use coarse-grain sheets;
- Install a new gasket for the exhaust and intake manifolds of your VAZ 2109;
- Assembly of the unit is performed in reverse order. That is, first, both manifolds are installed in place, then the carburetor and air filter are returned to their homeland, the fastenings are tightened properly and the result of the work done is checked in practice;
- Of course, don’t forget about the coolant that was drained in the first stages. By the way, this is a great reason to change it to a fresh one.
Installing a new gasket
It is up to you to ensure that the new gasket has a long service life. To do this, before installation, treat the gaskets on both sides with graphite lubricant. This way you will increase the product’s resistance to temperature changes that it regularly encounters. Similarly, coat the cylinder head studs with graphite lubricant for the same purpose.
Loading …
Close Window
Assembly of a double muffler for a VAZ 2109
Before describing the process of assembling a double muffler, I would like to note that in order to successfully carry out such an assembly, the driver must be able to work with a welding machine. If you don’t have such skills, it will be much easier to buy a ready-made double muffler for the VAZ 2109 in a specialized store.
Double muffler assembly sequence
To install the muffler, follow the sequence of operations:
- The muffler is removed from the car in accordance with the instructions presented above.
- A hole for a pipe with a diameter of 5 cm is carefully cut out on the side of the muffler body. Then the upper part of the muffler body is carefully cut off, and all resonator partitions are removed. In their place is installed a perforated metal mesh, twisted into a tube.
- The pipe is inserted into the body and welded to it. Its end is inserted into a twisted perforated mesh, in which a hole is previously cut. This end is welded to the mesh.
- A pair of L-shaped pipes are welded to the standard muffler pipes.
- For heat and sound insulation, the entire structure is filled with glass wool.
- The previously cut off upper part of the muffler housing is put in place and welded. The resulting design is shown in the photo below.
- Now the double muffler is installed on the car.
Replacing a muffler is not a particular problem even for a novice driver. All you need is a viewing hole, a couple of keys and a little patience. But the repair of this device almost always involves welding work. And if the car owner does not have such a skill, then it will not be possible to do without the help of qualified auto mechanics.
The most common problem with the VAZ 2109-2108 exhaust system is muffler burnout, and this often happens even after 50,000 km. Here, first of all, everything depends on the quality of the steel from which it is made. The factory one, as a rule, lasts much longer than the ones installed afterward, since the quality of the original parts is somewhat higher. If your car's muffler is burnt out, it needs to be replaced.
Of course, there are some owners who try to repair the burnt areas, but such “patches” obviously won’t last long, and sooner or later you will still have to replace the part with a new one. For this job you will need the following tool:
- head deep 13
- ratchet handle
- open-end or socket wrench 12 or 13 (depending on the installed mounting bolt)
So, the first step is to disconnect the muffler from the resonator, for which you need to unscrew the clamp. Use one key to hold the bolt from turning, and use the second to unscrew the nut:
Now you can disconnect the clamp and thereby disconnect the muffler from the resonator:
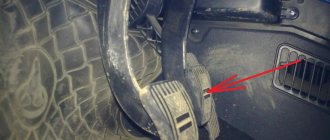
Next, you need to remove the muffler from the suspension in the front part, as clearly shown in the photo below:
And from the back, where you need to remove it from several rubber hangers:
Now the muffler does not hold anything and can be removed from under the car:
If necessary, we buy a new muffler, the price of which for a VAZ 2109-2108 ranges from 500 to 1000 rubles, depending on the manufacturer, and replace it. Installation is carried out in the reverse order of removal.
To replace the muffler on a VAZ 2108, you must:
- Drive the car onto a viewing hole or overpass.
- Unscrew the nut of the bolt securing the clamp connecting the muffler pipe to the resonator pipe. Remove the clamp.
- Separate the pipes and remove the O-ring.
- Lift the muffler body up a little and, holding it in this position, remove the rubber cushions from the brackets.
- We remove the muffler.
Replacing the exhaust system resonator on a VAZ 2108 car is carried out identically.
- We unscrew the nuts of the bolts of the clamps securing the resonator pipe with the muffler pipe and the exhaust pipe. Remove the clamps and O-rings.
- Lift the resonator up a little and remove the rubber pads from the brackets that hold it suspended.
At this point, the repair work to remove the muffler and resonator of the VAZ 2108 is completed. Make necessary repairs or replacements. Reassemble in reverse order.
Sources
- https://vazweb.ru/desyatka/vyhlop/zamena-glushitelya-vaz-2109.html
- https://remont-vaz2109.ru/zamena-glushitelya-svoimi-silami/
- https://zubilovaz.ru/zamena-glushitelya-i-rezonatora-vaz-2108
How to remove the intake manifold of a VAZ 2109
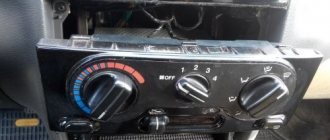
If you have difficulty lifting the cover, disconnect the mass air flow sensor and remove the filter device.
- If you have a carburetor under the hood, then the filter and housing will be held in place by three latches. There is a screw in the center of the metal cover, which is often unscrewed by hand. Once you remove it, you can lift the lid. There is a filter underneath, which should be removed carefully. Pay attention to its condition. If the filter has been in use for quite a long time, it is recommended to replace it during reassembly.
Removing the carburetor
Removing the carburetor is carried out in the following sequence:
- Disconnect the coolant supply hose to the engine starting device from the fitting.
How to remove the intake manifold of a VAZ 2109 injector
Therefore, only it will have to be changed.
VAZ 21099 trembles and growls
As annoying as it may sound, in order to get to the usual gasket, it was necessary to remove the air filter, carburetor, exhaust, and intake manifolds. but without this there is no way.
To change an old, worn-out gasket, you will need:
- remove the old gasket. here you can expect certain difficulties, since most likely the gasket has stuck properly, burned to the cylinder head;
- arm yourself with a narrow screwdriver, sharpened knives, aerosol solvents;
- Spray the surfaces first, then let it react.
In addition to them, we will also need a 13, 10 head and a knob. To change the VAZ 2109 manifold, you will also need to remove the battery, as well as the reservoir in which the glass washer is stored. In this case, it is not necessary to disconnect the wire tips from the electric pump terminals. there is also no need to remove the hose from the pump nozzle.
In addition, you will need to remove the receiver and fuel rail. this will not be difficult to do; for most drivers everything will be clear even purely intuitively. after this, it is already necessary to carry out actions aimed at removing the collector itself.
- Unscrew the bolt that secures the pipe to the front bracket. This can be done with the key 13.
how to remove the intake manifold of a VAZ 21099 injector
Do not immerse the manifold in liquid cleaning solution. Be careful when removing the manifold to avoid damaging the injector connectors and spray heads.
Do not allow contaminants to enter open pipelines and passages.
Fittings should be capped and plugs should be blocked with plugs during maintenance.
7. Remove the fuel manifold with the injectors installed on it.
8. Remove the fuel injector mounting clamps.
9. Remove the fuel injectors by pushing them down.
10. Remove the injector O-rings.
Installation Caution: Injectors are marked for flow rate. When ordering a fuel injector, be sure to order the part with the same number on it as the old injector.
1.
Remove the intake manifold VAZ 21099
You may also need a wrench;
— remove the fastening nuts that secure the base located under the carburetor and bend it back;
— discard all hoses that are connected to the intake manifold;
- Unscrew the six fastening nuts;
- remove the intake manifold.
- Now you can begin dismantling the exhaust manifold itself. Here is the algorithm of actions:
— prepare a tool (the same as when dismantling the intake manifold);
— Unscrew the four fastening nuts that secure the exhaust manifold and the receiving pipe. If you can’t immediately tighten the rusted nuts, use the life-saving WD-40;
— move the discarded “pants” a little to the side.
In fact, this is more than a myth. However, the real problems of two or more are serious, so repairs should not be put off.
Replacement of cylinder head gasket VAZ 2114 8 valves
Cracks in the exhaust manifold or a worn gasket usually cause the engine to run dirty.
1) A lambda probe is installed in the exhaust manifold, which affects the operation of the accounting (software) injection. Strong air suction disrupts the oxygen mass content in the exhaust; the lambda incorrectly adjusts the quality of the mixture, causing tripping, uneven idling, loss of power, and “black” spark plugs.
5) Additional function – crankcase ventilation.
How to remove the intake manifold of a VAZ 21099
Add to this the price of a high-quality gasket and you get quite a lot of money. You will avoid such costs if our client can do it on his own.
By removing the air filter and carburetor, you gain access to the intake manifold.
To dismantle it you will need a certain set of tools:
- Ratchet with 10mm head;
- Collar;
- Ratchet;
- Deepest head at 13;
- Row head for 13;
- Open-end wrench 13.
When our client is ready, we get to work.
- Unscrew a couple of mounting nuts to bend back the platform located under the carburetor.
- Disconnect the hoses that are connected to the intake manifold.
- Remove the 6 mounting nuts that are located on the intake manifold.
- Remove the manifold itself from the studs.
To do this, simply swing the knot to the sides. Often it sticks to the gasket, which causes problems with removal.
- Inspect the condition of the unit. If there is damage, the collector is replaced.
- If the problem lies solely in the gasket, put the intake manifold aside for now and start removing the outlet.
To remove a graduate, you will need:
- Ratchet;
- Open-end wrench 13;
- Socket wrench 13;
- The deepest head is 13.
Is our client still ready? Then let's get started.
- Unscrew the four exhaust pipe mounting nuts from our exhaust manifold.
- Pull the so-called trousers off their heels and take them to the side.
As a result, we get the following result, as in the photo below: After this, you can begin replacing the gasket by carefully putting it on the studs and installing the manifold in the reverse order of removal. If you are interested in the price of the exhaust manifold, then for VAZ 2109-2108 cars it is about 1500-1700 rubles.remont-vaz2109.ru
We remove the exhaust manifold on the 8-valve VAZ-2114 for replacement
The exhaust system of a VAZ-2114 car with an injection engine is not particularly complex, however, sometimes you have to spend a lot of time, and maybe money (if the work is done at a service station) to bring it to normal condition.
How to remove the intake manifold of a VAZ 2109 carburetor
Important Do not use coarse sheets;
- Install a new gasket for the exhaust and intake manifolds of your VAZ 2109;
- Assembly of the unit is performed in reverse order. That is, first, both manifolds are installed in place, then the carburetor and air filter are returned to their homeland, the fastenings are tightened properly and the result of the work done is checked in practice;
- Of course, don’t forget about the coolant that was drained in the first stages. By the way, this is a great reason to change it to a fresh one.
Installing a new gasket
It is up to you to ensure that the new gasket has a long service life.
Source: https://potrebiteli34.ru/kak-snyat-vpusknoj-kollektor-vaz-2109
Design Features
All domestic cars have approximately the same exhaust system. This greatly simplifies the issue of self-repair without the involvement of specialists.
The exhaust system (ES) includes several main components.
| System element | Functions |
| Downpipe | A special probe is placed inside this pipe. This device studies the composition of exhaust gases, controls and analyzes the composition of the mixture that goes into the cylinder block |
| Catalyst | This is the very element of the system that allows you to minimize the harmfulness of gases escaping from the aircraft. |
| Additional muffler | It is mounted to the catalyst using a special clamp. The purpose of the additional muffler is to absorb the main noise, so the sound at the exit from the pipe is insignificant |
| Main muffler | The same component that peeks out from under the rear bumper of your car. It connects to the additional muffler with a clamp |
Main components and fasteners
The entire exhaust system of the VAZ 2109 car is in a suspended state and is held in place by the presence of rubber mounting hangers. The hangers, in turn, are screwed to the bottom of the car.
Popular faults
The exhaust system itself, together with the muffler, is quite reliable and durable due to its simple design.
Frankly speaking, there is nothing to break if you compare the aircraft with the engine, fuel, oil system, and so on.
The most common and unpleasant situation that can happen to an aircraft on a VAZ 2109 is a broken muffler. This is due to the quality of our roads, or rather to their absence.
Device
In total, this system includes several elements. This:
- An exhaust manifold. This is the very first part through which gases pass after combustion. People call the collector a spider for its characteristic shape. This element is supplied to each of the four cylinders of the internal combustion engine. Then all these pipes are combined into two, and then into one single pipe. There are also sports manifolds with a 4-2-1 exhaust pattern. They are installed to increase power. As practice shows, gases move more freely along the path, but the driver still will not feel a significant increase in power.
- Reception pipe. It connects to the collector. There is a special probe inside this pipe. This is an oxygen sensor, or lambda probe. If we talk about the VAZ-2109 exhaust system (carburetor), there is no such sensor in the system. But on car injectors, a lambda probe is required. The slightest problems with it may be accompanied by a “Check Engine” lamp on the instrument panel. In fact, the exhaust pipe has the simplest device. There are no sound-reflecting partitions or special fillers. This is an ordinary hollow pipe in which a single sensor can be located.
- Catalyst. As in the previous case, this element is present only on injection versions. There is no catalyst on carburetor engines. What is this element needed for? Its main task is to reduce the concentration of harmful substances in exhaust gases. Passing through the catalyst honeycomb, harmful metals are converted into harmless oxides. Thanks to the use of this element, the machine began to comply with the environmental standard Euro-2 and higher. The catalyst is the most expensive element in the VAZ-2109 exhaust system (injector). Therefore, when it malfunctions, many install flame arresters or simply knock out the core and weld the walls, leaving the catalyst empty inside.
- Resonator. This element is present on both carburetor and injection versions. A resonator is installed behind the catalyst. What is his task? The resonator serves to absorb the main noise from the exhaust gases. Thanks to this element, the sound of gases becomes less. The resonator is designed simply. This is a metal case with a perforated pipe inside. Additionally, there may be a partition inside.
- Main muffler. The resonator can be called an auxiliary muffler, but the main sound energy is absorbed by the last muffler, located under the rear bumper. It enters the resonator and absorbs up to 90 percent of the sound. The structure of this element is somewhat more complicated. The basis here is also taken from perforated tubes, but there are several of them, as well as chambers. Usually these are three or four tubes and two chambers. Passing through this entire labyrinth, the gases lose their energy and exit without unnecessary sound.
Read also: Battery for Prado 150 diesel
How to replace the rear part of the muffler, also known as the main muffler, on VAZ 2108-VAZ 21099 cars?
Removal: 1) First, remove the O-ring and the clamp that holds the resonator together and the rear part of the muffler by unscrewing the two nuts securing the clamp. (You will find how to remove the fastening clamp in the article: “Replacing the resonator”, paragraph “1-2”)
2) Then remove the three suspension cushions from the muffler, to do this:
• First, using a screwdriver, remove the front suspension cushion from the bracket of the rear part of the muffler.
• Next, without removing the screwdrivers from your hands, disconnect the rear suspension cushion from the bracket in the same way.
• And to complete the operation, disconnect the side airbag from the left side of the rear muffler.
Note! Replace all torn pillows, as well as hanging pillows that have lost their elasticity, with new ones!
3) After removing the airbags, remove the rear part of the muffler from the vehicle.
Installation: 1) First install the new rear muffler onto the front suspension mount.
2) Then onto the side hanging pillow.
3) And at the end of the operation, install the muffler on the rear suspension cushion.
4) After completing the suspension of the muffler, connect the rear part of the muffler to the resonator by inserting an O-ring between them, and installing a fastening clamp on top of the ring. (For more details, see the article: “Replacing the resonator”, paragraph “2-3”)
The muffler from the VAZ 21099 is replaced if there is a loud roar. In this case, you will have to replace the failed corrugation or the entire main part.
Main malfunctions of VAZ 2109 and 2108 mufflers
There are several typical muffler breakdowns that owners of VAZ 2109 and VAZ 2108 cars encounter:
- Holes appear in the main muffler housing. Due to high temperatures accompanied by strong vibration, the case simply burns out. The cause can be either thermal or chemical corrosion. The problem is solved by applying a patch and subsequent welding of the damaged body;
- The muffler constantly overheats. As a rule, this occurs due to coking of the holes in the resonator partitions. In this case, hot exhaust gases accumulate in the silencer, and engine power rapidly decreases. To eliminate the problem, the muffler body is opened, damaged resonator partitions are replaced with new ones;
- The muffler is ringing. Ringing in a muffler occurs when the resonator partition in its body is completely or partially torn off. The problem is eliminated in the service using spot welding;
- The muffler is knocking. This is observed when one or more mounting hangers are broken. After this, the muffler body begins to dangle under the bottom of the car, periodically hitting it. It is not possible to fix such a breakdown on the road. The only way out is to slow down to a minimum and drive to a car service center with an inspection pit, where mechanics can replace the broken fasteners.
Essential elements
The VAZ 21099 exhaust system diagram includes the following units:
- exhaust manifold;
- gas receiver;
- main muffler;
- additional muffler;
- pipelines;
- connecting and fastening elements;
- elastic rings for hanging.
Exhaust gases pass from the exhaust port through the manifold. It is made of cast iron alloy and secured with a nut connection. Thanks to the high heat capacity of cast iron, it is possible to reduce the parameters of the temperature field in the engine compartment.
The exhaust manifold pipes fit into the gas inlet. This element allows you to implement the system according to a single-pipe scheme. This solution reduces the weight of the structure.
The noise suppressor is a thin-walled pipe of a special shape. Steel alloys are used as materials for the production of such parts.
The main parts of the muffler are:
- frame;
- perforated partitions;
- pipelines supplemented with rolling.
The main and additional mufflers differ in their overall dimensions, and also have a different number of internal partitions for bypassing exhaust gases.
The sealing elements are made of reinforced sheet of heat-resistant material. Specially prepared asbestos gaskets are excellent for such purposes.
The mounting brackets are rigidly connected by welding. All seams undergo special anti-corrosion treatment.
To compensate for deformation changes, elastic suspensions are included in the exhaust system of the VAZ 21099. They are made of high-strength rubber.
Tips for choosing the right muffler for tuning
The main attention should be paid to the weight of the muffler and the quality of the metal from which it is made. The greater the weight of the muffler, the better.
Check the quality of the welds: they should be smooth and not very thin.
You also need to look at the painted areas of the muffler. If you detect even the smallest area of paint chipping, there is no need to take it: this is the first indicator that the muffler is already susceptible to corrosive processes and will not serve you for long
Most of the options on offer are now made from alloys or stainless steel.
Pay attention to the length of the new muffler and its attachment points to the body.
For a VAZ car, you should choose a muffler that completely suits you in terms of design and level of noise absorption, because it is the one that can ensure comfortable movement in the car.
First long-haul car, muffler repair without welding — Lada 2109, 1.5 l., 2001 on DRIVE2
Hi all. In search of the cause of poor traction, I decided to change the mesh in the tank.
It's a pity that I had to cut the body (
Full size
Old/new
We put everything back together and close it.
It is advisable to cover the incision site with something. We cover this case with the original thermal insulation and we’re done. But what a shame it was that the behavior of the car didn’t change one bit, we’ll have to dig some more (The next day, as always, leafing through Avito, I saw an advertisement for the sale of a very nice Corolla of ’86 in Tolyatti, the description said that an exchange for a PP VAZ was possible . I decided to offer my nine, they wrote off VK, exchanged photos, I told him about the rot, about the other jambs. But, nevertheless, he liked the car and he agreed to the exchange. The next day I decided to go to Tolyatti (300 km in one side).
Washed it.
Full size
Full size
I grabbed two friends and, throwing a set of summer wheels and other things into the car, set off
Full size
We arrived without any problems.
Full size
Full size
We arrived, I liked the Toyota, excellent interior, body, engine, everything is good. But imagine my disappointment when the guy felt the rot, which I myself did not notice, and saw some shoals that he did not see in the photographs. And he offered an additional payment of 20k. But because I don’t have that kind of money and there was no additional payment for Kagbe, I had to go back on the nine. Well, at least I paid for gas. After we drove 70 kilometers from Togliatti, the resonator flange fell apart. I had to drive 230 kilometers without a muffler at all, it was a blast!
The next day I had to invent something. Don't waste money buying a new resonator! I bought a new normal clamp, two Zhiguli clamps and a flange with an increased internal diameter, made 4 cuts with a grinder and assembled the whole thing.
Full size
It didn't work out very well. The next day I bought asbestos tape, assembled it + added another clamp. It turned out great, but I didn’t take pictures anymore. Such perversions could have been avoided if normal welding had been at hand, but alas) Also, during these 600 km, the final end of one of the wheels came.
www.drive2.ru
Making your own dual exhaust
If you have the time, materials and necessary technical means, you can make a double exhaust for a VAZ car yourself. You will still have to purchase the main parts of the exhaust system. However, when manufacturing an exhaust system, you can save significantly, at least on the purchase of parts.
Experienced motorists have long developed two main options for manufacturing double exhaust for VAZs.
- The first option involves manufacturing an exhaust with different angles of both exhaust pipes. With this option, the second pipe is simply welded from the side into the pipe that comes from the manifold. When the car is idling, the exhaust gases exit the pipes almost uniformly, but at high engine speeds, most of the exhaust exits from a straight pipe that comes from the manifold.
- A different version of the exhaust system will ensure the same amount of exhaust gases from both pipes. In this case, you need to weld two pipes with the same angles and turns at even angles to the pipe that comes from the collector. This can give the structure a more aesthetic appearance.
After choosing your exhaust system design, you need to move on to the next step of installing your own dual exhaust design. When installing a self-made structure, problems may arise with pipes deviating from the location of the old holders. But this is not a big problem, since they can be made and installed independently.
Remember that before installing your own exhaust, it must be wrapped with asbestos cord, which will provide thermal insulation. It is extremely necessary in order to avoid fire, since the fuel system is located dangerously close.
As for the installation process, it is identical to the one mentioned above.
To become more familiar with all the nuances of manufacturing and installing dual exhaust on VAZ cars, we bring to your attention a video with a more detailed description.
How to determine whether a muffler is faulty
It is not difficult to understand that the muffler of a VAZ 2109 car is faulty:
- the volume of the engine increases sharply, the engine begins to growl;
- In this case, the engine power is reduced by two or even three times;
- the cabin smells of exhaust fumes;
- if the driver does nothing, the growl of the engine is replaced by a deafening roar, which can sometimes be accompanied by pops similar to pistol shots.
All this suggests that a hole has formed in the muffler housing. If you don't do anything about it, then problems are inevitable:
- If the muffler is faulty, carbon dioxide contained in the exhaust gases may end up in the vehicle interior. This gas is colorless and odorless, but causes severe headaches and dizziness. And if exposure to dioxide lasts for a long time, it can lead to the death of the driver;
- Driving with a faulty muffler cannot be called comfortable;
- Driving with a faulty muffler is expensive: there are rules to limit noisy driving. Violation of these rules may result in fines.
Repair methods
Often traveling along our “magnificent” roads, you now and then run over all kinds of bumps, potholes, and holes. If, after passing another similar obstacle, the car begins to make noticeable noise, which was not the case before, then the most likely outcome is a hole in the main muffler. The presence of a hole does not allow you to work calmly, quietly and efficiently as before.
The law of the Russian Federation states that it is prohibited to operate a car with a broken muffler. Therefore, the only correct solution would be to repair the unit.
There are two ways to repair the main muffler:
- Replace with a new one. Practical, easy and fast. You can do this kind of work with your own hands without any problems.
- Fill the hole. This option is suitable only if the hole can be welded given its size, and you also have experience in welding. It is better to entrust welding to professionals.
Replacing the main muffler
To remove the muffler, follow fairly simple step-by-step instructions.
- Arm yourself with a 13mm deep socket socket, a 13mm spanner and a ratchet.
- Drive the car into the inspection hole, or lift it using a lift. Although you are unlikely to have a lift in your garage. But almost all garages in auto cooperatives are equipped with pits.
- Wait until the entire exhaust system has cooled completely, otherwise burns will occur.
- Disconnect the main muffler from the resonator, that is, the additional muffler. To do this, find a tie rod. The fastening nut is grabbed with a spanner to avoid turning. At the same time, the bolt is unscrewed using a ratchet.
- After unscrewing the bolt, remove the fasteners, disconnect the exhaust system elements, remove the clamp and free the main muffler from the resonator.
- Carefully remove the front part of the silencer from the rubberized suspension.
- Remove it from the rear suspensions and pull the damaged element out.
- Then act according to the circumstances. As we noted, a broken muffler can be welded, or a new one can be installed in its place.
- Reassembly is carried out according to the instructions provided, only in the opposite sequence.
When choosing a new main muffler, focus on the characteristics of the factory product. If you want to modify the rear of the car, simply install a decorative nozzle on a regular pipe. You should invent something with the modernization of the aircraft only if work is being carried out on the technical modification of the car - tuning.
Dismantling works
Replacing the resonator
To change the additional muffler, follow the instructions provided:
- By analogy with the previous stage, disconnect the main and additional mufflers;
- Disconnect the element from the catalyst. Here you have to use a spanner wrench to unscrew a pair of mounting bolts;
- Lift the unit a little and disconnect it from the rubber hangers;
- In some cases, this cannot be done manually. In such a situation, use a flathead screwdriver to pry out the hangers;
- The dismantling process is even easier than in the case of the main muffler;
- Installing a new element is performed in the reverse order.
Changing the catalyst
Let’s say right away that failure of the catalyst on a VAZ 2109 is quite a rarity. But it will not be superfluous for anyone to understand the features of replacing this element.
When the engine is running, the catalyst heats up to 600 degrees Celsius, so it takes longer to cool down than a pair of mufflers. Make sure the element is cool before starting work.
To dismantle and replace devices you need:
- Disconnect the additional muffler from the catalyst. To do this, hold the nuts with a spanner wrench, and unscrew the fastening bolts with a second tool;
- Using a similar method, the bolts connecting the catalyst and the receiving pipe are unscrewed from their places;
- Next, the catalyst is carefully removed from the rubber hangers;
- We take a new catalyst and install it in the reverse order.
The exhaust system provided for the VAZ 2109 model is outrageously simple. This pleasantly pleases the owners, since they do not need to spend a lot of effort, time and money on repairs. Most of the work is done independently.
How to replace?
Based on the above, we can conclude that the best muffler repair is to replace it. This statement is also relevant for other parts of the VAZ-2109 exhaust system. The muffler is replaced with an inspection hole, a 13mm spanner and a socket of the same size. All actions are performed step by step:
- The car is driven into the inspection hole and put into gear.
- The main muffler is disconnected from the resonator. To do this you need to find a clamp. Use a spanner to tighten the fastening nut (to prevent twisting). At this time, the bolt is unscrewed with a ratchet.
- Afterwards, the fasteners are removed and the elements of the exhaust system are disconnected. The clamp is reusable, so we will put it back.
- Carefully remove the front part of the muffler from the rubber “cushion”, through which the part is attached to the body. Then the same operation is done with the front “pillows”.
- If the muffler is stuck to the resonator pipe, it can be rotated counterclockwise and back. This makes it easier to remove the muffler.
- The new element is installed in the reverse order.
Please note that rubber pads may be torn. It's better to buy a spare set. On the “nines” they are very flimsy. It is advisable to install pillows made of durable material (for example, polyurethane). This will not affect comfort (there will be no more vibrations), but the resource is at least twice as long.
Read also: Lexus px 350 interior
Design features of the part
- Dissipative. This device has a simple design and effectively dampens noise waves. Among the disadvantages of such a unit, auto mechanics highlight the lack of environmental friendliness.
- Reactive. The operating principle of this device is the addition and mutual elimination of sound waves.
- Combined. The direct-flow unit minimizes power loss, and the labyrinth unit improves sound damping.
Experts include the reasons for dismantling the old and installing a new unit of this type:
Signs by which a car enthusiast can understand that the muffler needs to be replaced:
Before you begin replacing the muffler, you will need to select one of the above-described types of this unit. VAZ 21099 car owners often buy a tuned model.
Next, you need to unscrew the ground nut and remove the wire from the stud. Then remove the nuts that secure the supply pipe of the cooling system. The seal gasket should be replaced and the nuts securing the exhaust manifold should be unscrewed. Then disconnect the last manifold and remove the corresponding gasket.
Dual Exhaust Installation Steps
- First of all, you need to remove the old muffler.
- Afterwards, you should hang the right part of the new muffler on the right side of the car (previously placed on a lift), while using the existing cushions. In this case, the left part does not need to be fastened; you just need to connect the muffler to the resonator using a clamp and seals.
- Next, you need to connect the left part of the muffler to the main part through the pipes. In this case, it is necessary to take into account the location of the fastening rod, and it is also necessary to calculate the place where the holders in the form of brackets will be placed.
- It is necessary to use a drill to make two holes with a diameter of 1.5 mm in the spar. These holes can attach a holder, which is screwed with self-tapping screws.
- The completed operations allow you to move on to attaching the main left part. Fastening is carried out by inserting the muffler cushion directly into the bracket-shaped holder; the exhaust rod is also inserted into the cushion.
- The opposite side of the muffler is secured using O-ring clamps. This fastening should not be too tight.
- All the work done allows us to move on to the process of adjusting and establishing symmetry between the two exhaust pipe tips. Initially, loosely tightening the connections will allow the installation to be fine-tuned.