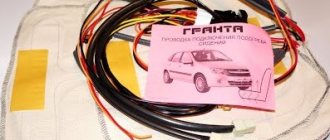
You can reupholster your car seats not only in a specialized salon, but also with your own hands. In this way, you can update worn out seats, as well as give the interior a unique and original style. What do you need to reupholster the seats yourself? You don't have to have any sewing education! All you need is your desire, patience and a sewing machine. The work is not very difficult, but quite painstaking. Therefore, if you are ready, I suggest you get started!
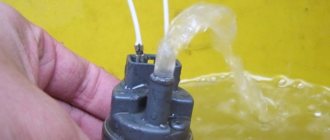
01. MATERIALS. What do we need and how much? Our interior will be combined from two colors – black and beige. You can, of course, choose any other colors you like. For the central parts of the seats, I chose beige perforated eco leather (2.5 m). For the back parts of the back and pockets - beige without perforation (1.5 m). And for all other parts - black leather (3.5 m). Choose special automotive material. It is designed to withstand large temperature changes and is resistant to fading. Ordinary furniture leather is not suitable, as it is designed for comfortable conditions in apartments. You will also need thin foam rubber - 0.5 cm thick. They will need to glue all the leather parts. I have already duplicated the black material. But for beige it took 3 sheets of foam rubber. You will need special furniture glue. It is usually pink in color. It can be purchased in specialized stores.
02. Sewing accessories. • Buy special needles for leather No. 90 or 100. • You will also need threads for sewing leather (regular ones will not work, they simply will not withstand the load). Look for threads labeled Extra Strong or for the shoe industry. You will need at least three coils of 200 meters each. • 3-5 meters of adhesive interlining - according to the amount of foam rubber and perforated material. • Machine oil.
03. Preparation of the material We glue all the foam rubber with non-woven material using an iron. This is necessary so that the foam rubber does not crumble during use. The interlining also makes it easier for the foam to slide under the foot while sewing.
04. Let's get to work Remove all the trim from the seats (the seats have long been removed from the car).
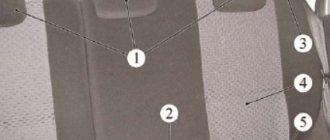
05. Marking Now, looking at the case, everything seems clear and understandable to us. But when we break it down into parts, we can easily get confused about which part comes from where. Therefore, we take a marker and number each element of the case. For convenience, I drew a diagram of each seat and back on separate sheets and also numbered the parts. This way, it will be impossible to get confused.
06. Knitting needles On the wrong side you can find these “pockets” with knitting needles. We will need these wires for new cases. Take them out and set them aside for now. Be sure to remember where these needles are sewn and mark it on your paper diagram.
07. Preparing patterns We rip out the covers. We cut off all seam allowances. This is what we ended up with – patterns for new cases.
08. Cutting We transfer each detail to the leather. In order not to confuse anything and not get the parts in a mirror arrangement, we apply them to the wrong side of the material, wrong side up. As shown in the photo.
09. Seam allowances Add 1 cm seam allowances on all sides (where required). Don't forget to number all the parts.
11. We receive a set of new parts for the covers. In this case, this is the back seat. But we do the backrest and both front seats in the same way.
12. Glue As mentioned earlier, parts made of zama leather must be glued with foam rubber. I only need to work with beige. I have a black leather jacket ready for sewing. Ideally, you need to glue it with a spray gun. But at home this is not always possible, so we apply the glue with a brush or rubber spatula. Practice on scraps of material, whatever suits you best. Please note that we glue the foam rubber to the skin with the side that is without interlining.
Do-it-yourself seat upholstery 09/01/2015 02:48
Dear friends! We very often receive questions about how to independently replace factory seat covers that are already worn out with new ones. That is why we decided to publish a few tips that will make the replacement procedure much easier. In fact, the main part of the questions disappears after removing the old covering, when you get a visual understanding of how to reupholster the seats.
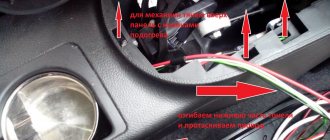
1. If you don’t have a garage or a dry and comfortable room for this type of work, it’s realistic to replace the upholstery in your apartment; you won’t need a lot of space, of course, if you don’t take on the entire interior at once. So, let's start with the front seats. We remove the seat and disassemble them into three parts: the seat, the back and the headrest. To better understand the principle of operation, start with the simplest thing, with the headrests, remove the old trim and put on the new one (see photo No. 1)
2. After you have removed the old covering, you will see that the cover (covering) is fixed with special metal hooks to the seat frames. From the back of the back they are located below. To speed things up and simplify it, instead of hooks you can take plastic clamps or otherwise called nylon ties (see photos No. 2, 3 and 4)
Modification of VAZ 2110 seats
PEACE TO YOU! Many people put up with uncomfortable car seats (especially domestic ones), but I will say, “Stop putting up with it!” )))
Using the example of seats from a VAZ-2110, I show options for modifying the slide. bottom pillow, backrest and headrest. The modifications are simple and easily repeatable.
As a result of repetition, your seats will become no worse (and even better!) than foreign-made ones of the small and middle classes.
Please don’t blame me for typos, the main thing here is the content)
Tenacious lateral support, comfortable lumbar support. clean and well-maintained upholstery, comfortable headrests, a comfortable lower seat cushion - all this can be implemented in the VAZ-2110 seats (as well as in most domestic and inexpensive foreign cars) independently and without any problems, while the appearance will correspond to stock.
No need to change seats when you can improve them!
Comments 7
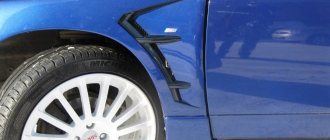
Uncle Seryozha, what’s wrong with Toffee’s wing? there are some bugs there.)
Friend, didn’t you recognize the unerased anticorrosive?)
at this distance - no)
The title is “World Tuning” Guys, make a decent background for filming An abandoned Volga and a barn for chickens are not the best background view, I’m looking forward to posts about fighting rust when implementing various tasks (not only when painting and in an accessible way) I think this is the most necessary for your target audience (those who like to preserve old cars)))
Boy. I actually work here alone, and live for one thing, this is the private sector. And I shoot videos in addition to my main work to teach useful things. Personally, the lack of European-quality renovation on my territory does not bother me much; this is not the main priority in my life.
You need a beautiful picture and the content doesn’t matter - look for other channels.
You need content - then there’s nothing to complain about)
Why this tuning when there is a choice of foreign-made seats?
Why exchange an awl for soap?
The modification will make the seats no worse than those of the small and middle class; these are the ones that are usually replaced for financial reasons. 1) find and buy foreign-made seats 2) Wash and clean the “fat” upholstery, make local repairs if necessary 3) Install non-original seats in their original places (a difficult point if done well and in the original places
Seat reupholstery
To replace the seat upholstery yourself, you will need the following tools:
In addition to the tool, you will need space. You can start replacing the seat upholstery of the “tenth family” at home. This work is clean, there will be no debris left after reupholstering. The seats will have to be removed. But you don’t need to remove the entire interior at once. Start replacing the upholstery on the front passenger seat. Next - with the driver's license. Finish with the back sofa.
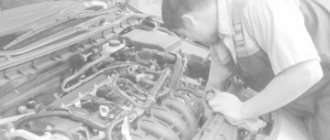
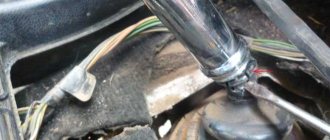
In order to remove the front seats, you will have to push them forward as much as possible and remove the torsion bars. Then, move it as far back as possible and unscrew the fastenings of the seats to the floor of the car. Next, raise the seats and unscrew the fastening of the guides. That's it, the seats are removed. You can start re-upholstering.
It is worth carefully inspecting the fastening of the old seat upholstery. Using a screwdriver and pliers, bend the hooks securing the seat upholstery of a VAZ 2110, 2111 or 2112. You need to pull a new upholstery in its place. In this case, you can do without separating the backrest from the “seat”. Don't forget the headrests. It's easy to pull them over. That's it, the front row of seats is covered with new covers. Can be installed back into the car.
The rear sofa has a different upholstery fastening. Along the perimeter of the case there is a edging into which a special cord is inserted. The new cover is put on according to the principle of the old one. The seat is put in place.
Another option for replacing the seat upholstery of the Lada 110 is to install an anatomical kit on the car seats. To do this, you will have to disassemble the seats down to the frame. Remove the standard foam molding. Install the anatomical kit in place of the old one. Installing new covers is accompanied by useful steps. This could be lubricating the skids, cleaning the interior and internal parts of the car seats, replacing broken parts, and the like.
Tuning the dashboard of VAZ 2110
So, the seats and side panels are modernized and the eye falls on the standard dashboard of your “ten”. The old design doesn't look very good and needs updating. Fortunately, you have many options for tuning a VAZ 2110 torpedo with your own hands. Let's take a closer look at what can be done here.
Craftsmen have repeatedly come to the conclusion through trial and error that the best option, and most importantly simple, would be to install a tidy unit from Priora . The only thing that will need to be done is to change the mounting of the electronic control unit, and also install “Prior” sound insulation.
Dashboard from Priora on VAZ 2110
If such tuning is not enough for you, then you can go much further and replace the entire shield. “Ten” allows you to implement this without unnecessary problems. The thing is that there are three options for instrument panels for this modification of the car.
- Similar to a standard panel, but without a shelf;
Euro 1 instrument panel VAZ 2110
Euro 2 instrument panel VAZ 2110
Euro 3 instrument panel VAZ 2110
Once you have decided on the type of dashboard, you need to carry out a number of dismantling works. Let's give some advice:
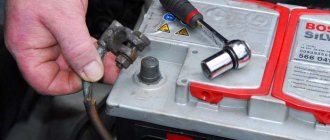
- Disconnect the battery terminals and lower the steering wheel to the lower position if provided;
- With little effort, unscrew the screws on which the panel is attached;
- Disconnect all connectors;
- We carefully unbend the instrument bracket, for example, with pliers;
- We remove the panel.
When the new VAZ 2110 dashboard is installed, you should carry out these manipulations in the reverse order. Be careful and try not to forget to turn on any block.
Replacing the instrument panel backlight
You can also change the lighting of the PP to a more interesting and harmonious one. Most often, LED strip or neon glow is used. Of course, such ready-made torpedoes are already on sale, but their prices are incredibly high. However, you can do everything yourself.
Tuning the instrument lighting of the VAZ 2110
First of all, you need to remove the glass, which serves as protection for the devices. Then we place a sheet of cardboard under the arrows and carefully remove them with a screwdriver. The backing of the devices is attached to the sealant, which must be removed. The easiest way to do this is to use a knife. We are now holding a number of events:
- The light filter should be removed with the same knife, and the remaining paint should be removed with acetone;
- We replace the odometer backlight lamp with a multi-color LED;
- We carry out the same actions with the remaining lamps;
- The hands can be decolorized with solvent and painted in any color you like.
The whole process on video:
Illuminated control buttons
In addition to instruments with arrows, various types of backlighting are also installed on control buttons. As an example, we will show how to design a button that turns on the rear fog light. First of all, we dismantle the switch. To do this, remove the moving part of the button from the housing. Then use a screwdriver to pry up the latches and remove the inner part of the switch.
We find a black bracket and, taking it out, disassemble the entire button mechanism. Using tweezers, take out the backlight lamp. Let's move on to removing the filter. We just drill it out.
After this, you need to install an LED of a certain color instead of the standard factory lamp. It is important here not to confuse the polarity, otherwise this will lead to certain problems. As soon as the button is connected, you must check its functionality, and only then assemble the entire structure. Using this approach, you can replace all other buttons with more beautiful and tuned ones.
Removing the rear seat on a VAZ-2110
To start doing the work, you will need to loosen the upholstery on the back row.
- It is attached using buttons located in the trunk.
Unfasten the upholstery from the back of the seat.
Then you will need to move the cushion lock handle and raise the seat.
Unsnap the back latch by pulling the loop.
Such procedures should be carried out on the right and left.
To remove the backrest, you need to remove the hooks from the body brackets.
Then you will need to remove the pillow and pull it forward.
The pillow is held on by clamps, press them and lift the pillow.
Unscrew the three screws securing the frame.
Using a 10mm socket, unscrew the two bolts.
Remove the armrest along with the frame.
Removing the backrest separately
Experts say that the backrests can be removed separately by pulling the latch located behind the seat.
If you press on this hook from the trunk, the backrest should recline.
But at the same time, there are many complaints that the clamps are made of low-quality material , and therefore can often break. Therefore, to avoid such troubles, it is recommended to remove the backrests only with a pillow. This increases the service life of the chairs.
Tuning headlights VAZ 2110
Now let's look at options and ways to improve the headlight design of our top ten. The optics of a car are a fairly important element and must be treated with due respect, especially since the headlights are the first thing that catches your eye and give a special charm to your tuning.
How to remove headlights on a VAZ 2110
First of all, you need to know the technique and features of removing optics from the “ten”. It is this point that we will now consider. The tenth VAZ family is equipped with two headlight designs:
1. “Kirzhach” is optics produced on the territory of the Russian Federation. 2. “Bosch” - these headlights are manufactured abroad.
Removing VAZ 2110 headlights
First, before removing the optics, you need to disconnect the wire connectors and remove the upper part of the radiator grille. These operations are performed if there is a key at “10” . Afterwards, you need to remove the wire blocks that are connected to the direction lamps, and also dismantle the headlight range control, which is attached to a latch. This latch should be rotated 90 degrees . Now you can unscrew the bolts securing the standard optics. First of all, we remove the edge of the headlight closest to the fender, and only then unscrew the last mounting bolt. Now you can remove the headlight.
Disassembly work for headlights of the “Kirzhach” type is carried out using a flat-head screwdriver. It is inserted into the corner of the optics, and a utility knife with a thin blade is used to cut off the protective sealant. Many people say that an industrial hair dryer is useful for cutting. With its help, you can heat the sealant and then it is removed much faster.
How to remove the rear seats on a VAZ 2110? Valuable information about tuning VAZ seats
A detailed guide on how to remove the rear seats on a VAZ 2110 allows you to complete all repair work without outside help. For example, you decide to repair the seats, install new ones instead of old ones, or reupholster them with leather. But how to remove this element without damaging the mount and other parts? The “Ten” is the progenitor of the “Priora”, but differs from it in certain components. It was once considered a powerful, modern car, equipped with a carburetor with automatic choke. How to remove the rear seats on a VAZ 2110 when you need to go pick up goods, transport bulky cargo, and so on? You can do all the work yourself. We will tell you step by step what nuances you should pay attention to, what tool to arm yourself with and what actions to perform. Removing the seats in 9 minutes The driver will need exactly 9 minutes to remove the “tens” seats. Don't believe me? Try it! Disassembly begins with slightly loosening the upholstery. Just press the buttons located near the trunk. Then move the lock handle on the right to the side and lift the seat. The procedure on the left side will be similar. The seat cushion can be easily moved forward and removed. You have already done half the work, and further actions are performed in the following sequence:
- Removing head restraints. Press the fastening buttons and pull the headrest up. We perform similar actions with the other section. Make sure that the buttons are not lost anywhere. They will also be useful to you during reassembly.
- Remove the upholstery completely so that there is nothing obstructing the removal of the seats. When you see a loop, pull it. This will allow you to pull out the locking lock located at the back of the backrest.
- Slightly lift the right side of the backrest and remove the fastening loops from each hook. They are right on the floor. By analogy with the right part, remove the left one.
- All that’s left is to remove the armrests, and if necessary, the seat belts. Armed with a 10 mm socket wrench, unscrew the 2 nuts. This will allow you to remove the armrest.
So you have completed the task. And it took you no more than 9 minutes. Installing the seats is done in reverse order. We hope you remember everything? What to do with the seats of VAZ 2111 and 2112? VAZ 2111, 2112 cars are far from random “guests” of the article. All three cars, including the “ten” described above, belong to the same class of cars. But the problem is that their seats are removed in completely different ways. Therefore, the removal instructions for the VAZ 2110 are not suitable for car enthusiasts who drive 2111, 2112 models. Let's figure out what the dismantling process will look like on “younger” models.
- The back and seat are divided into two halves. Therefore, you can also remove them separately. For additional safety of the driver and passengers, the seats are equipped with head restraints. And you will agree that driving with them is much more convenient.
- Let's start disassembling. Pull the loop to raise the seat on the left. Tip it forward. Then unscrew the nuts with a 10 mm spanner. Pull the seat out of the passenger compartment. Repeat the operation with another element.
- Take a socket wrench - now 13 mm. Unscrew the nuts that are located under the seat mounting hinges on the left. There are two nuts - you can do it in a couple of minutes. Lift the fastener upward to fold the backrest forward. All that remains is to unscrew the last nut and bolt. They are located above the hinges. By analogy with the left side, the right side is also removed.
- The backrest latches may break. It's okay - you can easily install new ones. The plastic bushing of the lock may also fail. Plastic is plastic, no comment needed. We just buy a new bushing and install it in place of the old one. You won't have any more problems with VAZ seats.
Working with ready-made kits
Do-it-yourself upholstery is good, cheap, and the interior will be a source of pride for you, since you decorated it with your own hands.
But still, not every car owner is well versed in fabrics, knows how to sew, or has mastered all the nuances of a pattern. So the result does not always live up to expectations.
Therefore, we advise you to pay attention to ready-made kits. Factory VAZ Lux 2 panels are in great demand; they create an excellent appearance for the interior.
An important advantage of Lux 2 type kits is the presence of an additional sound insulation effect, which is very important and useful for the VAZ 2110.
It is not necessary to contact specialists, since the installation can be done by yourself.
- The kit often includes only panels - 4 units. But the grids for the speakers, pistons and other elements will have to be purchased separately.
- You should not trust sellers who claim that Lux 2 fits perfectly on the doors of the domestic top ten. Some of the pistons probably won’t want to be installed where they are supposed to be. This is because they slightly do not match the car model.
- Fastening from below must be done using long self-tapping screws.
- If your doors do not have power windows, then you will have to slightly change the configuration of the panels yourself by cutting holes in them for the “oars”.
- The problem of the gap that is formed as a result of installing Euro panels on a model with manual windows can be solved by masking it with some object. Although the best solution is to re-equip the car by installing electric windows.
Removing the rear seat on a VAZ-2110
To start doing the work, you will need to loosen the upholstery on the back row.
- It is attached using buttons located in the trunk.
Unfasten the upholstery from the back of the seat.
Then you will need to move the cushion lock handle and raise the seat.
Unsnap the back latch by pulling the loop.
Such procedures should be carried out on the right and left.
To remove the backrest, you need to remove the hooks from the body brackets.
Then you will need to remove the pillow and pull it forward.
The pillow is held on by clamps, press them and lift the pillow.
What can be improved
In a special table we will tell you which elements can be replaced in the interior of the VAZ 2110, and what their features and advantages are.
Salon element
Peculiarities
Replacing it has a positive effect on the appearance of the interior; the level of sound insulation increases if the appropriate work is carried out. Plus you can install more impressive acoustic equipment
Here you can go different ways - use covers, alter the standard interior, or purchase the entire interior from another car. The choice depends largely on your budget
Modifies the appearance of the interior and provides better information content. You can either modify the standard panel or use panels from other cars
It is not necessary to completely change the pedals, since there are special pads. They look good and provide a more comfortable press
Installing a new audio system will have little effect on the appearance, but it will seriously affect the sound quality
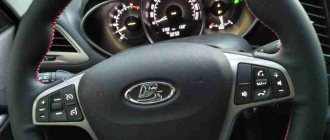
The factory steering wheel is not particularly original or beautiful. It is often replaced with new ones, from more recent Lada models or imported cars
There are many accessories with which you can completely or selectively change the appearance of the interior, increase the level of ergonomics and comfort
If your VAZ 2110 is not designed for the long term, there is no point in investing a lot of money in upgrading the interior. If the car stays with you for several years, it is quite possible to improve the ergonomics and comfort for yourself.
Now let's talk about some aspects of interior refinement in more detail.
Door trim
To change the door trim on your car, you first need to get rid of the old one. For this:
- Unscrew the mounting screws holding the factory trim;
- Remove the latch to access the window lowering handle;
- Remove the panel where the handle for opening the door is held;
- Unscrew the lock button;
- Use a screwdriver to pry up the trim and remove it. It is held on by plastic pistons. If you break them, it's okay. Buying new ones is not a problem.
Changing the upholstery
Then proceed at your own discretion. You can purchase a completely ready-made kit, or do everything yourself, choose the material you like.
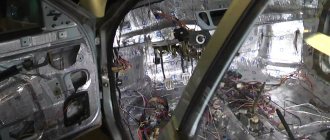
Since you are removing the door trim and planning to install new acoustics, it would be a good idea to improve the standard sound insulation by gluing 1-3 layers of sound insulators.
Seats
Now let's talk about the upholstery, armchairs, and seats. Let's say right away that if you remove the seats to replace the upholstery or install a completely new interior from another car, it is better to take care of the issue of sound insulation. Alas, the factory noise level of the dozen is ineffective, which is why it becomes very noisy inside the car even when driving at low speeds.
Having finished with sound insulation, we decide what to do with the interior.
- T-shirts, covers. The most budget option that allows you to significantly transform the appearance of the interior. Installation is easy and does not require special knowledge or skills. But the changes will only be external. The level of seating comfort for the driver and passengers will not change.
- New casing. Not everyone can reupholster the interior with their own hands. But this does not make the procedure impossible. The idea is to remove the old sheathing material and sew on a new one in its place. At the same time, you can replace the foam rubber in places and slightly modify the design. The option is quite heavy in execution, but allows you to create, in fact, a completely new interior.
- The interior is from another car. The level of ergonomics of standard seats leaves much to be desired. Even if you replace the covering and add several pieces of new foam rubber, you will not be able to significantly change the seating comfort. It’s a completely different matter to install a completely new interior with comfortable armchairs and a sofa. The downside is the high cost and the search for a foreign car interior suitable for dozens. But there is a serious plus - you can transform not only the appearance of the car, but also seriously improve convenience and comfort. It's worth it if the car stays with you for the next 5 years.
Stylish, modern armchairs
Dashboard
Does it make sense to replace the original dashboard with something else? Here opinions differ. But many note that such a modification is relevant if it is planned to install additional equipment, indicators, and sensors on the car. That is, we are talking about fans of not only external, but also technical tuning.
New dashboard
There are several ways to customize your dashboard.
- Modify the panel with your own hands, using luminescent paints for arrows, notches, and markings on instruments. You can also install LEDs, a tachometer, other “chips,” cover it with a carbon fiber film, and so on.
- Another option is to purchase ready-made inserts that you simply need to install. Today, for dozens of them, their range is quite extensive.
- Remove the old instrument panel and put in its place a new, more modern one with arrows or an electronic type.
- Use a dashboard from another car.
When replacing the dashboard with equipment from another car, you will have to modify, adjust everything, solve the issue of wiring, connecting sensors, etc. This is not an easy task; it is better to do it at specialized car services.
Accessories
Using all kinds of accessories and tuning elements, you can modify your standard interior without major investments and make it stand out from the other dozens.
Let's talk about some accessory options.
- Pads on the pedals. They are not expensive, but they significantly transform standard, far from beautiful pedals.
- Stickers imitating carbon, metal, wood. They are usually stuck on the glove compartment, center console, and doors. Such films are cheap, but they seriously change the appearance of the car's interior.
- Steering wheel. By using a new steering wheel to replace the old one, you will increase the level of comfort and ensure easier driving. You can either completely replace the steering wheel, or remake the old one, or make the upholstery made of leather or leatherette. The main thing is that the material does not slip in your hands.
- LEDs. Lighting elements that can be mounted anywhere. They consume a minimum of electricity, so there is no need to worry about a quickly discharging battery. LEDs are used to illuminate the interior, pedals, glove compartment, etc.
- Rugs. The simplest accessory that performs two functions - collecting dirt so that it does not accumulate on the floor, and external decoration.
- Electronics. Although the VAZ 2110 is a budget car, no one bothers to modify the interior by installing high-quality navigation equipment, a useful video recorder, a monitor on the ceiling, modern acoustics, etc.