How to remove a torpedo on a VAZ 2109 and 2110? Step-by-step instructions
As a rule, this is done to modernize the dashboard.
Tuning a torpedo involves various nuances. But replacing a panel always improves the interior design, although it requires additional modifications. Removing the torpedo is easy to do on your own. The article describes in detail how and what to do. How to remove a torpedo on a VAZ 2109 and 2110 without spending a lot of time and effort? This is easy to do if you have a figured (phillips) screwdriver, a head and a key at hand. No additional tools are needed.
Algorithm for removing the dashboard
To begin with, we note that in VAZ 2109 and 2110 cars the dashboard can be assembled in different ways. Accordingly, the process of removing the panel will be different.
How to remove the old-style dashboard? To do this, we arm ourselves with the tools that we provided above and begin:
- Remove the battery terminals (one is possible);
- Next, you need to remove the elements (there are 3 of them) that are responsible for controlling the speed of the stove;
- We also dismantle the handle of the stove itself;
- The cover is held in place by screws on the sides that need to be unscrewed. It moves towards itself;
- We find the wiring harness from the rear headlight switch and disconnect it;
- We do the same with the pads from the rear window heater and emergency lights. The car's exterior light control, which is located on the left, must also be disconnected from the connector;
- The cigarette lighter wiring harness is disconnected;
- Now you need to remove the screws securing the dashboard visor (where the instrument scales are located);
- We remove it, and then bend the clamps and remove the entire instrument cluster housing;
- The speedometer cable is disconnected. To do this, you just need to unscrew the corresponding nut;
- We find an element with white wires and disconnect it;
- We dismantle the hose from the econometer;
- We take out the cotter pin, and then disconnect the meter reset cable from the speedometer;
- We find the red wire element
and dismantle it too; - The headlight and lighting control knobs are removed. It will be enough to pull them towards you;
- Here we find nuts that will also need to be unscrewed using a socket;
- We dismantle the steering wheel and steering column switches. Don’t forget to set the key in the ignition switch to the zero position, and only then disconnect the block with wires;
- Find the steering column pipe clamp and unscrew its bolts;
- The steering column pipe is dismantled. The ignition switch also comes out with it;
- The choke handle is pulled towards itself until the thrust becomes visible. After this, you need to remove the handle from the rod;
- Unscrew the torpedo screws located near the air damper;
- On the left, unscrew the screw that secures the panel on the side;
- Also unscrew the screw from below;
- We do the same on the right side;
- We unscrew the screw that is located inside the glove compartment;
- Unscrew the remaining screws and remove the torpedo.
- De-energize the power source;
- Lower the car steering wheel to the lowest position;
- The screws securing the dashboard must be unscrewed. First, unscrew 2 screws on the right and left on the central tunnel;
- Remove the plug near the parking brake lever;
- We unbend it with pliers or another tool for fastening devices;
- Carefully remove the torpedo.
- Some elements of the dashboard can be secured with M5 bolts.
- Disconnect all connectors.
Now we’ll find out how to remove the new model torpedo:
An alternative replacement for the instrument panel on these cars can be various torpedoes. Here are two of them for comparison:
- AMC
- instrument panel from VAZ 2115 and Chevy Niva. There are obvious differences from the VAZ 2109 and 2110 torpedoes. In particular, this is an integrated oil pressure indicator. In addition, the dashboard looks much more interesting than the standard one; - Pro-Sport
. Sports instrument panel. Among the features include a beautiful blue backlight with the ability to adjust the intensity.
Using the instructions above, removing the instrument panel will not be difficult. Knowing how to remove a torpedo on a VAZ 2109 and 2110, you can independently replace it with a more integrated one.
VAZ-2114: how to remove the panel?
VAZ-2114: how to remove the panel? To repair and replace many car parts, preliminary dismantling of the dashboard is required. Fortunately, for most models this is an easy task. Let's figure out how to remove the dashboard of a VAZ-2114.
Preparation
To remove the front panel, you will need, firstly, a lot of time and patience (as we have already said, this task is not difficult, but you will have to remove a lot of elements and unscrew a bunch of fasteners); secondly, tools - you need to prepare a Phillips and flathead screwdriver and a marker.
Removing the panel
You see, as we promised, the procedure is quite lengthy. In addition, it is quite painstaking; it is important to carefully follow the instructions so as not to miss a single fastening. If, when taking the last step, namely directly removing the panel, you feel that something is in the way, don’t rush, perhaps you forgot to unfasten some element, go through the instructions again and try again. We hope you succeed! But if you feel that you cannot cope with the task on your own, turn to professionals.
Removal and installation of the “high” instrument panel for VAZ 2108, VAZ 2109, VAZ 21099
Before removing the “high” instrument panel from a VAZ 2108, VAZ 2109, VAZ 21099 car, disconnect the wire from the “-” terminal of the battery. Set the car's wheels to the straight-ahead position. Disconnect the rod from the carburetor choke lever and the speedometer cable from the gearbox. 1. Remove the steering wheel (see section 7 “Steering”, subsection “Steering column”) and steering column switches (see “Checking and replacing steering column switches” in section 9 “Electrical equipment”).
2. Pull the carburetor choke handle towards you until a draft appears, and remove the handle from it.
3. Remove the two screws securing the instrument panel console trim.
4. Remove the trim from the instrument panel console.
5. Remove the cigarette lighter socket from the socket.
6. Remove the ashtray from its slot by pressing the cigarette extinguishing plate.
7. Remove the interior heater fan switch handle.
8. Remove the three interior heater control knobs by prying the knobs with a screwdriver.
9. Disconnect the connector with wires from the interior heater fan switch under the heater control panel.
10. Disconnect the two wires from the contacts of the interior heater control panel backlight lamp.
11. Remove the headlight hydraulic adjustment handle by pulling the handle towards you.
We remove the VAZ 2110 torpedo and install the trim: detailed instructions with photos
In the interior of the VAZ 2110, the dashboard is the most noticeable part. Every driver wants to sit in a stylish and well-maintained interior. But the standard panel looks angular and gray. This is especially noticeable after long-term use, when abrasions, scratches and cracks appear on the panel. Motorists solve this problem in different ways - some install another standard dashboard from a VAZ 2110, other drivers prefer to install a Europanel - this is the name of the trim from a third-party manufacturer. The trim allows you to transform the interior and turn the “ten” into a foreign car, at least on the inside. Whatever you choose, removing the panel is a must. In this material we will tell you how to properly dismantle the standard panel and install the Euro version.
Alternative torpedo
The alternative dashboard is softer than the standard “tens” dashboard, but the main advantage is the absence of unpleasant grinding and squeaking. Motorists decide to get rid of the standard one precisely because of the squeaking. For the VAZ 2110 car there are several types of panels that differ in design.
The panel is sold as a set:
- The panel itself, which is an alternative to standard plastic.
- Buttons, brackets and inserts for blowers and instrument panels.
- A set of wires and a block for a double switch.
- Buttons for low beam, heating, dimensions and fog lights.
- Plugs for buttons are installed in places where keys are not needed.
The experience of the owners of the “Ten” shows that proper removal and installation of the Europanel improves sound insulation, increases airflow and changes the appearance of the VAZ 2110 interior for the better.
We remove the torpedo
Removing and installing a new torpedo on a VAZ 2110 takes a lot of time, we also advise you to be patient, since there are dozens of connections and wires in this part of the interior. Each action must be careful, since the VAZ 2110 mounts are very fragile and can be easily broken. After this, the panel will no longer fit properly, and the car will noticeably increase in squeaking while driving.
In some cases, it is not necessary to completely dismantle the standard panel. Our article provides a description of a complete analysis.
Necessary tool
To remove the case, you should have in your arsenal:
- Labels with adhesive backing.
- Marker or pencil.
- Set of screwdrivers and keys.
The main assistants in this work will be a 10 mm wrench and a Phillips screwdriver. We need a pencil or a washable marker in order to mark the removed elements. This also applies to self-adhesive labels. There are too many wires and parts, after disassembling you will already forget where each component is located. Markings and stickers will remind you of the location of wires and parts.
Dismantling
Removing the dashboard takes a lot of time, since there are a huge number of wires under it, through which electricity is distributed throughout the cabin. The fastenings on the dashboard of the VAZ-2110 car are fragile, so every action during dismantling must be careful. If the fastenings are damaged, it will be impossible to firmly install the panel in its original place, and squeaks and noise during movement will increase significantly. In most cases, to improve the design there is no need to completely remove the panel; it is enough to dismantle only the upper part, but there are non-standard situations, so the article offers a description of a complete analysis.
Replacing the torpedo lining of a VAZ 2110
Replacing the torpedo lining of a VAZ 2110
.
Europanel-2 VAZ 2110 How to remove the euro trim|Diary of a VAZ 2110
Enjoy watching everyone, I hope my video helped someone with their choice or technical issues) Spare parts…
Installing the dashboard trim
The cover will be installed after complete disassembly - it’s easier and more convenient. The instructions say that the trim must be cut around the perimeter. Now you can assemble the case: we place in it the accessories and instrument connectors that came in the kit. Carefully lay out the wiring from the base of the cover. All joints of the new VAZ 2110 panel must be glued with anti-creak.
We attach additional harnesses to the standard wires and tighten them with zip ties. Please note that there are additional buttons on the cover - standard connectors must be connected to them. The cover is attached to the original panel using self-tapping screws. Now you can carry out the installation in reverse order.
Withdrawal procedure
- Remove the negative cable from the battery.
- Unscrew the left trim of the instrument panel console.
- Remove the cover. To do this, you need to remove the lower protrusion from the bracket.
- Unscrew the right panel of the instrument panel console.
- Disconnect the wires from the cigarette lighter.
- Disconnect the wires from the cigarette lighter light bulb.
- We push from the inside and take out a niche for small items.
- Unscrew the 2 screws and push the diagnostic connector block inside.
- Remove the heater fan switch handle.
- Using a narrow screwdriver, remove the handle from the lever.
- Unscrew the 2 screws above the instrument panel.
- Unscrew the two screws under the instrument panel.
- Remove the plug and unscrew the screw of the upper fastening of the lining.
- Unscrew the 2 screws of the lower fastening of the lining.
- We move the cover to the side.
- Mark the order in which the blocks are connected to the switches.
- Disconnect the wires from the switches.
- Remove the instrument panel.
- Unscrew the bolts securing the steering column and lower it down.
- Unscrew the 2 screws securing the panel to the bracket.
- Unscrew the 2 screws securing the bracket to the right cross member.
- Unscrew the 2 screws of the lower bracket fastening.
- We move the bracket to the side.
- Unscrew and remove the light guide from the instrument panel.
- We unscrew the 4 screws securing the stove control unit and recess it inside.
- Remove the lamp socket for the heater fan switch handle.
- Press the right lock and remove the air duct from the panel.
- Pull out and remove the headlight hydraulic adjustment handle.
- Remove the instrument lighting control knob
- Remove the decorative insert of the instrument panel.
- Unscrew the light guide.
- Unscrew the nut securing the hydraulic corrector and recess it inside the panel.
- Unscrew the nut securing the instrument lighting control.
- We take out the hydraulic corrector illumination lamp.
- Disconnect the wires from the instrument lighting control.
- Disconnect the wires from the immobilizer sensor.
- Disconnect the wires from the immobilizer unit.
- Disconnect the wires from the glove compartment light bulb.
- Disconnect the wires from the socket of the portable lamp.
- Unscrew the 2 screws of the top panel fastening
- Unscrew the 2 screws on the bottom fastening of the panel.
- Unscrew the self-tapping screw securing the panel to the left cross member.
- Remove the instrument panel.
- Installation of the instrument panel on the VAZ 2114 is carried out in the reverse order.
Video about removing the panel from a VAZ 2114 engine soundproofing panel:
Similar on the site:
0 Comments
6 Pingbacks
- How to remove and install the heater radiator on a VAZ 2114 | Repair 2114
- What to do if the heater fan does not work on a VAZ 2114 | Repair 2114
- How to remove and install the heater on a VAZ 2114 | Repair 2114
- How to remove and install the electronic control unit of a VAZ 2114 - Repair 2114
- How to remove and install a heater on a VAZ 2114
- How to remove and install the electronic control unit of a VAZ 2114
Leave a Reply Cancel reply
Similar articles
How to remove and install the headlight unit on a VAZ 2113, 14, 15.
How to remove and install the front turn signal on a VAZ 13, 14, 15.
How to remove and install the brake light switch on a VAZ 13, 14, 15
How to remove and install the reverse light switch.
Replacing switches on the instrument panel of a VAZ 13-15.
How to disassemble the dashboard of a VAZ 2114
Before embarking on this complex process, the driver must carefully familiarize himself with the design and arrangement of the instrument panel on his car. When disassembled down to the cogs, it looks like this:
If you carefully study this diagram, it becomes clear how to remove the panel on a VAZ 2114. Having determined the order for yourself, you can begin the process.
- Using a Phillips screwdriver, you need to unscrew the three screws holding the left console screen. For convenience, when doing this work, it is better to use a screwdriver with a short handle and blade.
- When removing the screen, carefully remove the lower edge of the trim from the body bracket.
- The right console screen is secured with five self-tapping screws. Using a Phillips screwdriver, carefully unscrew all the screws while holding the trim with your hand.
- Remove the screen without allowing it to get caught in the wiring harnesses that are hidden behind it.
- Disconnect the ground from the battery by disconnecting the connectors. If your car has a radio, disconnect it from the main bundle of wires by pulling out the connecting connector. If there is no radio installed on the car, then simply pull the wires out of the panel; they should be closed with a plug. Be sure to turn off the cigarette lighter and remove the socket with the ashtray light bulb.
- Remove the handles from the heater damper control levers. To make the process easier, pry them off with a flat-head screwdriver.
- Despite the apparent simplicity of this item, removing the handles from the levers can take a lot of time. To do this, a clear example is given of how this should be done on a removed unit.
- Remove the electric heater fan handle by simply pulling it towards you.
- Unscrew the cross-head screws securing the instrument panel to the brackets on the right and left with a screwdriver
- In the window on the instrument panel, where the instrument unit is located, there are two self-tapping screws at the top and two at the bottom - under the window. It is necessary to turn them out, loosening the cover (2) and the shield (8).
- Pull out the plug and unscrew the screw located behind it
- Remove the two screws from the bottom that hold the trim and remove it.
- Having marked the wires suitable for the switches, disconnect them.
- Remove the bolts from the steering wheel bracket
- Using the “8” key, unscrew the screws of the lower bracket fastening.
- Unscrew the self-tapping screw and remove the light guide.
- Remove the fasteners from the heating control unit and remove the cartridges from the back of the unit.
- remove the decorative insert, removing all external parts.
- Unscrew the nuts with a key set to “21”.
- Remove the hydraulic corrector illumination.
- Unscrew the upper and lower fastenings of the panel, and remove the fastening to the cross member on the left side.
- Now you can remove the VAZ 2114 torpedo.
- Installation is in the reverse order.
In order to clearly see the whole process in motion, you can watch a video on how to remove the dashboard on a VAZ 2114.
Removing and installing a torpedo on a VAZ 2110 with your own hands
The need to remove and replace the dashboard on a VAZ 2110 car may arise when repairing devices and parts located under its surface. In particular, it is with the removal of the dashboard that the car’s air intakes are inspected. Sometimes they can become clogged and prevent your heating or air conditioning systems from working properly. The process of removing and replacing the dashboard on a VAZ 2110 is not particularly simple. To carry it out, you will need to be patient and master the skills of masterly working with instruments.
How to easily and quickly remove the dashboard on a VAZ 2110 with your own hands?
Without a doubt, the dashboard is the most noticeable interior detail in a car, because it is located right in front of the eyes of passengers and drivers. The need to remove the dashboard on a VAZ 2110 may arise for car owners for a variety of reasons.
So, by removing this part, you can get full access to all the electrical components of your vehicle, replace the burnt-out wiring with a new one, connect additional devices or lighting, install a Euro trim or sound insulation.
Options for replacing the standard VAZ 2110 panel:
If desired, you can cover the dashboard with various materials of your choice, thereby making the desired changes to the interior of the cabin.
I would like to say right away that removing and replacing a torpedo on a VAZ 2110 will require a lot of time and patience from you. In addition, all repair work must be carried out extremely carefully and carefully so as not to accidentally break the fastening, since the dashboard will not fit back as it should and will creak when driving.
What should be considered when replacing a torpedo on a VAZ 2110
Replacing the torpedo on a VAZ 2110 will not only add some charm to the car, but can greatly improve the ride comfort not only for the passenger, but also for the driver. After all, you can replace the dashboard with a torpedo. When replacing it, the following points should be taken into account:
- What exactly does the car owner want to achieve with a replacement? This could be an increase in space in the cabin in front of the front seat.
- Just to give, so to speak, an expensive look to the car.
- Organize a place to install additional devices - radios, screens, and so on.
In any case, you can get the most beneficial effect from such an undertaking.
The first thing to consider when selecting a torpedo for a VAZ 2110 is its size and the shape of the car’s interior.
It is also worth considering the category of people, passengers, who will be in the car. This will sometimes improve the safety of the vehicle.
Once the type of torpedo is determined, it is worth thinking about what additional functions it should perform. This could be the installation of additional equipment, space for mobile phones, space for a car audio system - speakers, or a radio.
The next stage is choosing a coating. It is best to get it as universal as possible and try to install torpedoes with the following coatings:
- Plastic. The torpedo is made entirely of plastic without unnecessary inserts.
- Plastic with wooden or leather inserts.
These are the two most popular types of torpedoes for the VAZ 2110, which are the most practical to use and will best suit almost any type of interior.
Removing and replacing the dashboard (front panel) on a VAZ 2110, 2111, 2112
Next, using a screwdriver, pry up and remove the plugs at the upper corners of the instrument panel mounting. In reality it looks like this.
On the other side, we do the same, after which, using a socket and an extension, we unscrew the nuts securing the instrument panel in the upper part.
Now let's move on to the remaining attachment points. At the bottom, in the left and right parts of the panel - in the corners, there is also one screw that needs to be unscrewed. The first one is shown below.
Of course, the mounting block will also have to be removed so that it remains intact with the sub-panel wiring.
Many owners who have owned a VAZ 2110 for a long time would like to change the boring panel to a more modern one. In this case, you can install a new type of panel from cars manufactured after 2006. or from the “Bogdan” versions, which are analogues of the tenth family, except perhaps of the Ukrainian assembly.
With such alterations, basically you won’t have to change anything, but it’s worth considering that in this case you need to buy a complete Europanel:
- instrument panel frame assembly with trim
- instrument panel (combination)
- buttons and switches
- heater deflectors
- New heater control unit
- sub-panel wiring
- steering wheel, cover and switches
Only in this case everything becomes without any problems with minimal labor costs.
There is another method of modifying and tuning the instrument panel, which consists of replacing the dashboard from the Priora - VAZ 2170. Of course, the appearance will be much more interesting than even the Europanel, but connection and installation require a lot of investments, both financial and physical. The main problem with this modification is that the connectors for the under-panel wiring of the Priora and the under-hood of the VAZ 2110, which of course need to be connected, are different, and the connectors simply do not fit together.
In this case, there are two ways:
- Completely take all the wiring from the Priora, including the engine compartment harness, interior harness, power window control unit, comfort unit, etc.
- Join completely two different types of wiring manually, cutting off the connectors and insulating almost every wire.
How to remove the dashboard on a VAZ 2110 with your own hands - step-by-step instructions + photo report
In order to remove a torpedo on a VAZ 2110, you must perform the following procedure:
- Unscrew 2 screws on the right and 2 on the left on the central tunnel.
- Next, remove the covers on both sides.
- Remove the plug near the handbrake.
- Unscrew the screws on the left and right of the central tunnel.
- Unscrew the screws at the back of the central tunnel.
- Removing the plastic of the central tunnel.
- Disconnecting the cigarette lighter wires. Mark so as not to get confused when connecting to the assembly.
- Remove the gearshift knob cover.
- Using a wrench, unscrew the interior heating air duct.
- Removing the air duct.
- Unscrew the fastenings of the central panel from the front.
- Unscrew the fastenings of the central panel at the back.
- We finally remove the panel.
- We unscrew the screws of the glove compartment.
- We remove the glove compartment.
- Disconnect the glove box light wires.
- We unscrew the screws inside the space in place of the glove compartment.
- Unscrew the remaining screws on the sides of the torpedo.
- Unscrew the torpedo bolts as follows as in the photo.
- Removing the air duct.
- Unscrew the nut on the dashboard under the air duct.
- We lower the torpedo from the pins.
- We disconnect the wires from the front panel and mark them so as not to get confused during assembly.
As you noticed, if you follow our instructions, the process becomes much easier. You can remove the VAZ 2110, 2111, 2112 torpedo with your own hands, but it is better to do it with an assistant.
Step-by-step instructions for removing the VAZ 2110 dashboard
If you decide to start working on removing the torpedo with your own hands, then first read the step-by-step photo guide; if you have any questions, below there is a description of the steps in text.
- Work that involves tampering with the vehicle's electrical wiring (disconnecting connectors, devices) begins with disconnecting the negative terminal of the battery.
- Remove the steering column trim, disconnect the steering switch plug, remove the switch, ignition switch, block with wires.
- Disassemble the floor tunnel:
- On the left and right of the tunnel, facing panels with slots are secured with four self-tapping screws (through them warm air is supplied to the feet of the driver and front passenger). Use a Phillips screwdriver to remove the cladding elements.
- There is a rectangular plastic plug between the handbrake and gearshift levers. Using a flat blade screwdriver, carefully pry and remove the tunnel cover part.
- Remove four self-tapping screws securing the tunnel lining, in pairs, two on the right, 2 on the left.
- Lift the facing box from the rear edge and move it back a little.
- Disconnect the cigarette lighter and window controls (if the car is equipped with an electric window system) from the on-board power supply (plastic connectors), and mark them.
- Turn the cover to one side and, from the inside, disconnect the fastener holding the gearshift lever housing. Place the lid aside.
- Using a wrench, unscrew the nut securing the metal air duct to the floor on the passenger side. Remove the heat pipe.
- The base of the tunnel is held in place by four nuts: two in the middle, the rest in the rear. A 10mm socket wrench will help remove the fastening. Remove the box from the car.
- Remove the glove box.
- Unscrew the self-threaded fasteners on the hinge brackets with a screwdriver.
- Disconnect the backlight wires, hold the structure from below, and remove the box.
- Remove the mounting block.
- Press the latch button and easily fold the fuse box down.
- Unscrew the self-tapping screw and remove the latch.
- Lift, turn the block over, disconnect the wires, take it out. Don't forget about labeling.
- Detach the compartment door.
- Removing the torpedo.
- In the depths of the opened niches, screws are visible that secure the instrument panel. Remove them with a screwdriver with a cross on the end. Do the same with the lower side screws.
- The instrument panel is screwed to the controller bracket with two screws. While holding the head from turning with a screwdriver, unscrew the nuts with an 8-mm open-end wrench.
- Pry and remove the grilles of the side air exchange nozzles in the cabin.
- Two nuts secure the panel at the top. Using a ratchet wrench and a 10mm socket, remove the fasteners.
- Using both hands, remove the structure from the studs and bring it into the salon.
- Arm yourself with marking material, sequentially disconnect and mark the pads.
- Unhook the headlight hydraulic adjustment.
- Remove the dashboard.
- Use a tool to separate the air duct from the air distributor.
- Carry out the necessary work. Assembly occurs in reverse order. Plastic latches require careful handling. Tighten the screws gently. Lubricate threaded connections.
If you still have questions about removing the torpedo on a VAZ 2110, I recommend watching this video:
Installing a torpedo on a VAZ 2110 - step-by-step instructions
In order to install the instrument panel of a VAZ 2110 (torpedo), you must perform the following steps:
- Install the instrument panel so that the guide pins fit into the holes on the instrument panel.
- At the same time, move the steering column adjustment knob into the hole on the instrument panel.
- Using a screwdriver, drive the threaded rods into the holes on both sides of the panel.
- Install the foot warmer air duct so that the air duct fits into the hole in the air distributor housing.
- Connect all terminals to wires in reverse order. Secure the panel and reinstall all components that were removed during disassembly. After completing the work, check the operation of all devices.
Do-it-yourself torpedo tuning VAZ 2110 photo, video
Prerequisites for revision
Not all owners of dozens are satisfied with the stock interior, and it is much more pleasant for every person to sit in a beautiful car and therefore you can do the tuning of the VAZ 2110 torpedo with your own hands
This point needs to be given sufficient attention
Tuning a VAZ 2110 torpedo with your own hands
Panel
Tuning a car's dashboard means its modification, improvement, and in a certain sense, modernization.
The VAZ 2110 torpedo can be reupholstered with whatever material the owner likes; there are no limits to your imagination; for example, Alcantara. The process itself is quite labor-intensive and time-consuming, because the dashboard has many different bends and the material has to be sewn together in some places. The biggest difficulty in tuning a tight-fitting torpedo is made by the buttons located on the sides.
Before starting work, the torpedo panel must be removed in order to make a pattern using it, accurately determine the places where the fabric will be sewn, and add approximately one centimeter on each side to sew the parts together. To make a pattern, it is better to use thick Whatman paper.
If sewing a pattern for a torpedo with your own hands turns out poorly, then it is best to contact an experienced tailor.
Dashboard
Each driver arranges the interior of the car according to his own taste preferences, which reflects the character and disposition of the driver, surprising with its versatility.
You can change the appearance of the VAZ 2110 dashboard as follows:
- Using overlays. It is better to use top or side covers, which additionally come with air ducts. For originals, it is acceptable to use wood-look overlays. They will give the VAZ 2110 car more respectability. This pad has a fastening mechanism, air ducts, parts for connecting sensors;
- Removing the panel. Removing the old panel is somewhat difficult, because unscrewing 7 screws is not difficult, but the remaining 2 need to either be broken out or the panel lifted and carefully cut off. However, there is no need to worry, because the new panel will cover everything. After the old instrument panel trim has been removed, it is necessary to prepare it for installation. The remains of the factory material are carefully cut off, and the sides are adjusted during installation. When installing it, you need to use sound insulation so that there are no creaks in the future;
- Working hours. Replacing the instrument panel of a VAZ 2110 involves its complete dismantling. If this process occurs for the first time, it will take about 6 hours, and when this happens for the second time, it will take much less time;
- Change of some elements. Very often, when tuning, only some functional parts are changed, such as the speed and speed sensor console.
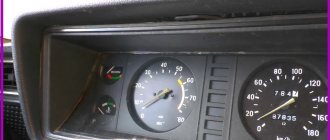
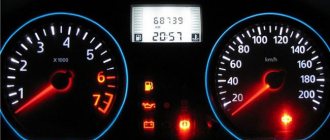
Instrument cluster
Removal of the model instrument cluster occurs in the following steps:
- Disconnecting the negative cable terminal from the battery;
- The next step is to use a screwdriver to unscrew the lower screws, as well as the two upper ones on which the cover is attached;
- The switch for external lighting is removed, the wiring harness block is disconnected;
- Next, the wires are disconnected, which turn off the fog light behind the VAZ 2110, as well as the heated rear window;
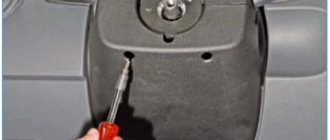
- Using a screwdriver, unscrew several screws that hold the instrument cluster of the panel;
- The combination is carefully pulled out completely and the wiring harness blocks are disconnected.
After the VAZ 2110 instrument panel combination is carefully removed, you can make a complete change of scales (tuning) and install an LED backlight, then it is installed back in the reverse order.
Improvement and tuning of the dashboard on the VAZ 2110
One of the most popular ways to improve the dashboard on a VAZ 2110 is its sound insulation. In order to do this, you must perform the following steps:
- We remove the tidy, I already told you how to do this earlier
- Next we foam, but under no circumstances should you pile up a huge pile of foam at once, it won’t dry out in a week.
- Don’t forget to try it on so that later it doesn’t turn out that your steering wheel touches it, or it’s just too high.
- In principle, all the work consists of two things, you cut, foam, cut again and so on many times.
- Next, we apply the cheapest putty we could find.
- Next we cover the dashboard with Shumka.
- We install the torpedo back.
You can modify the dashboard of a VAZ 2110 in different ways, someone covers it with leather, someone inserts an LCD monitor into it, in tuning a car it all depends on you and your fantasies and desires.