How to replace the ignition module on a VAZ 2113-VAZ 2115?
Removal: 1) First disconnect the “-” terminal from the battery, thereby de-energizing it. (How to remove the minus terminal in order to de-energize the battery, see the article: “Replacing the battery”).
2) Then find the location of the ignition module in the engine, and after finding it, disconnect the four high-voltage wires that are connected to it.
3) Next, disconnect the wire block by squeezing the retaining clip that secures it to the module.
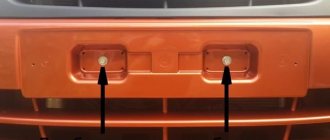
4) Next, remove the three nuts that secure this module to the bracket.
Note! To make it easier for you to visually determine, look at the photo below, which shows the places where three nuts secure the module to the bracket!
5) Then remove the module from the three long pins that are present on the bracket.
Installation: The ignition module is installed in the reverse order of removal, but when installing it back, you must know two things:
1. After the ignition module is installed, look at its surface, you see the numbers shown there: 1, 2, 3, 4. So, these numbers indicate the numbers of the corresponding cylinders.
2. Have you noticed that the same numbers are present at the tips of the high-voltage wires: 1, 2, 3, 4. All this was done to make it easier for you to determine which of the high-voltage wires should be connected to the module where.
Note! When reinstalling the module, connect all high-voltage wires strictly by numbers, for example: “the first wire - to the first terminal”, “the second wire - to the second terminal”, etc.
Checking the ignition module for functionality:
To check the module, you will need a “ high-voltage arrester ”, which can be purchased at a car store for a price in the region of 900-1500 rubles. Using this spark gap, you can check for serviceability: the ignition module, the ignition coil, and the high-voltage wires themselves for the presence of sparking.
Note! The video clearly shows that the ignition module is working properly, because when all the wires are connected to it one by one, a spark constantly appears on the spark gap, but the last check shows that the spark breaks off a little, but still the module performs well and does not need to be replaced !
Important! When working with the ignition module, be careful, and under no circumstances do anything with it without de-energizing the battery!
Source: vaz-russia.com
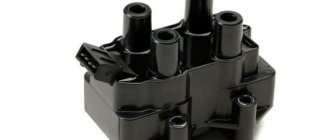
Design of the VAZ 2115 ignition module
This module consists of two high-voltage transformers and two control units (electronic), enclosed in a durable plastic case with four outputs of high-voltage wires. Electronic control units are also commonly called ignition coils, and one of them - “working” - is connected to the spark plugs of the first and fourth cylinders of the power unit, the other - “idle” - with the spark plugs of the second and third.
This type of connection, made using high-voltage wires, ensures synchronous “slippage” of the spark pulse in the cylinders of the power plant.
Thus, we can formulate the functional purpose of the ignition module - generating high-voltage spark pulses on the spark plugs of the vehicle’s power unit.
The VAZ 2115 ignition module is controlled by a controller whose operating functions include processing data received from vehicle system sensors: coolant temperature, rotation speed and position of the crankshaft, air flow, presence of detonation, etc.
Device and purpose
So, what device and what functions does the ignition distributor perform, what is its location and what is the order of the wires on the VAZ 2109 distributor? The VAZ 2109 distributor is one of the components of the ignition systems. Its purpose is to regulate and supply an electrical impulse to the switch of the coil itself. It also distributes the spark to the spark plugs, taking into account a certain sequence.
In domestic "nines" two types of VAZ ignition systems can be used - contact and contactless. Accordingly, two types of distributors can be used. These devices may differ from each other only in design, but not in function. In particular, we are talking about the presence of contacts and sensors. In the contact system, a breaker is used directly, and in the non-contact version, a special sensor is used. As for the main technical characteristics, they are generally identical.
Distributor device for "nine"
If we talk about the device, the VAZ 2109 uses a special distribution element equipped with a Hall sensor. This unit itself is designed for four sparks, it also has built-in centrifugal and vacuum advance controllers.
In accordance with the diagram below, the main components of the design are as follows:
- Sealing ring. Thanks to it, the tightness of the structure as a whole is ensured.
- Device coupling.
- Washers for adjustment.
- A roller with a centrifugal device installed on it.
- Base plate.
- A disk, the so-called screen, designed to protect the structure from dust.
- Runner. In practice, the distributor slider is a fairly reliable element, but it can also fail.
- Directly Hall sensor.
- Lock washer.
- Thrust washer.
- The body itself, inside which the structure is located.
- Vacuum corrector.
Device connection diagram
Ignition module diagram 2115
The circuit diagram and connection diagram of this electronic device is presented below.
The ignition module installed on the Lada Samara is extremely resistant to both low and high temperatures. Operating temperature range: -400/+1300C.
The only negative point in the operation of this electronic device is its complete inability to repair. However, even a novice car enthusiast can replace it on his own.
Experts consider the most common malfunctions of the Samara ignition module to be:
Unstable operation of the power plant when accelerating the vehicle.
Decrease in engine power.
“Intermittent” idle speed.
Malfunction of paired (1/4 – 2/3) engine cylinders.
Attention! The detection of the above malfunctions is not final evidence of failure of the ignition module, since similar symptoms are possible due to malfunctions of the spark plugs and unreliable connection of high-voltage wires.
Ignition module repair
The ignition module is an electrical device that generates a high voltage electrical pulse. In other words, at the command of the ECU, a current of 12 V is supplied from the battery to the ignition module, where it is generated at 25-30 thousand volts and gives an impulse to the high-voltage wires, and then to the spark plugs.
Unfortunately, the ignition module is not associated with reliability. It often breaks on its own, or fails after an accident. The faulty module needs to be replaced, but before replacing it, you can try to repair it, because... The problem may lie in the usual poor contact.
The module consists of a plastic housing, two switches, two ignition coils and four high-voltage terminals.
The most obvious cause of a malfunctioning ignition module is engine ghosting. And then come the rest: failures during acceleration, unstable idle. A faulty module may generate errors 0352 0351 0300 (0301-0304), but it may also not indicate its death in any way and the “engine malfunction” lamp will not light up.
To repair the ignition module yourself, you don’t need to be a super electrician. Basic knowledge of working with a multimeter is enough. Also, before starting to repair the module, you need to make sure that the cause of the malfunction lies in the module and not in any other part of the engine. It is also recommended to check the ignition module before repair: How to check the ignition module?
Ignition module malfunctions
The most common malfunction of the ignition module is poor contact, unreliable connection. Also often there is a torn mass, the contacts are dirty. In this situation, even dust can affect the quality of impulse transmission, which affects the correct operation of the cylinder.
Checking the Lada Samara ignition module
The correct functioning of the ignition module not only has a significant impact on the start of the vehicle’s power plant, but also ensures the stability of its operation in all modes. To carry out a complete diagnosis of this electronic device, you need quite complex equipment, available only in large specialized workshops. However, you can check the functionality of the ignition module yourself in an amateur garage. The only logistical support for this test will be a multimeter, or tester.
Ignition module VAZ 2115 - check, malfunctions and replacement
To begin with, I would like to note that the ignition module on the VAZ 2115 is a fundamentally new device that is more reliable than what was installed on earlier models of VAZ cars. The essence of the operation of this device is that it produces a high voltage electric current, which is subsequently transmitted to the spark plugs of the vehicle's ignition system.
Operating principle of the ignition module
As mentioned earlier, the main task of the ignition module is that it generates a high level of voltage, which is subsequently transmitted to the spark plugs. The generated current undergoes a compression procedure, as a result of which a working spark is supplied to one of the spark plugs of the ignition system, and an “idle” spark is supplied to the second. To be more correct in statements, the working spark is supplied to the first and fourth spark plugs of the vehicle’s ignition system, and the “idle” spark is supplied to the second and third. Thanks to this high-voltage electric current supply system, the spark appears at the right stroke and on the right cylinder, which ensures stable operation of the system.
Video. Checking the ignition module of the VAZ 2115
Power to the VAZ 2115 ignition module is supplied directly from the vehicle’s on-board electrical network. The voltage supplied to the ignition module is twelve volts. At the same time, you should know that the negative wire of the ignition module is attached directly to the vehicle body. Design of the VAZ 2115 ignition module
The vehicle ignition module consists of a housing made of plastic, a pair of electronic control units, a pair of high-voltage current transformers, and four outputs for BB-type wires. Dimensions of the VAZ 2115 ignition module: one hundred ten by one hundred seventeen by seventy. The weight of the ignition module is one kilogram, three hundred and twenty grams.
Operating principle of the ignition module
The supply of electric current is carried out using wires of the BB type; the supply of electric current is controlled using a special controller, which makes decisions based on information that comes to it from various sensors of the vehicle. Also, the controller’s tasks include setting the sequence in which the ignition coil operates.
The ignition module can carry out its uninterrupted operation at temperatures from minus forty degrees to plus one hundred and thirty degrees Celsius.
What are the signs that indicate a faulty ignition module?
There are several typical signs that directly indicate problems with the ignition module:
1. The engine idle is floating. 2. Engine thrust periodically disappears for no reason. 3. The car picks up engine speed very slowly when accelerating. 4. The cylinders stop working in pairs.
Note that the same signs indicate a malfunction of the BB wires and spark plugs of the vehicle’s ignition system, so in the beginning, you should check them, and if everything is fine with them, then replace the ignition module.
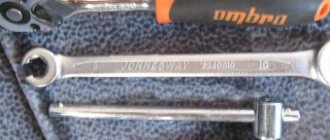
Tools you will need:
To replace the ignition module on a VAZ 2115 car, you will need very few tools:
1. Open-end wrenches for seventeen and thirteen. 2. Ten socket wrench. 3. Hexagon.
Replacing the ignition module on a VAZ 2115 with your own hands
To independently replace the ignition module on a VAZ 2115, you should strictly adhere to a certain sequence of actions, which you can find below:
1. First, you must find the ignition module itself in the engine compartment. This can be done by following the high-voltage wires that come from the spark plugs of the ignition system.
Ignition switch and features of its replacement
ZZ plays an important role in the vehicle's SZ, both for an 8-cl and 16-cl engine. It is activated when the starter is working, thanks to it the lighting, turn signals, and power windows work.
Scheme ZZ VAZ 2115
Replacement or repair of the VAZ 2115 ignition switch may be required if:
- lost or broken keys;
- the lock was damaged during an attempted theft;
- the 3Z cylinder is faulty;
- The contact group does not work.
Ignition switch VAZ 2115
To replace you will need: a set of keys, a hammer, screwdrivers, a thin chisel.
The replacement procedure consists of the following steps:
- The car's power is turned off by disconnecting the negative terminal from the battery.
- We remove the steering wheel.
- Next you need to remove the steering column switches.
- Then you need to loosen the bolts securing the clamp that holds the ZZ on the steering column. If the heads are cut off, the bolts should be carefully knocked out using a hammer and a thin chisel.
- Now you need to disconnect the wiring harness.
- Next, you need to completely unscrew the bolts from the 3Z housing and you can remove it.
- A new device is installed in place of the old one.
- Assembly is carried out in reverse order.
After assembly, you should start the engine and check the operation of the switch (the author of the video is the MY LADA channel).
Pinout, connection diagram and check of the VAZ ignition coil
Today we will look at the design and diagrams of ignition systems for VAZ cars of all major models. Since carburetor versions of VAZ are practically history, we will dwell in detail on the ignition systems of injection cars. Their ignition system is based on an electronic ignition module. We also recommend that you carefully consider the choice of spark plugs and the quality of high-voltage wires, because the quality of the spark and, accordingly, the operation of the ignition system as a whole will depend on them. The information is intended as a reference guide for self-repairing a car.
Pinout and diagram of the VAZ ignition coil
Pinout of ignition coil modules for various car models of the VAZ family:
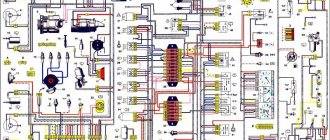
Ignition VAZ 2101
1 – generator; 2 – ignition switch; 3 – ignition distributor; 4 – breaker cam; 5 – spark plugs; 6 – ignition coil; 7 – battery.
Ignition VAZ 2106
1 – ignition switch; 2 – fuse and relay block; 3 – EPHH control unit; 4 – generator; 5 – solenoid valve; 6 – microswitch; 7 – spark plugs; 8 – ignition distributor; 9 – ignition coil; 10 – battery.
Ignition VAZ 2108, 2109
Ignition VAZ 2110
Ignition VAZ 2111
Ignition VAZ 2112
Ignition VAZ 2114
Diagram of a non-contact ignition system: 1 – non-contact sensor; 2 – ignition distributor sensor; 3 – spark plugs; 4 – switch; 5 – ignition coil; 6 – mounting block; 7 – ignition relay; 8 – ignition switch.
Ignition module - description
The ignition module is an electronic unit that distributes electricity to the spark plugs.
diagnostic card online buy Moscow
The ignition module is installed on engines with an injector. On carburetor cars a distributor is installed. The operating principle of the ignition module and distributor is the same.
Ignition modules have 4 outputs to high-voltage wires that are connected to the spark plugs - and 1 input that supplies the ignition module with electricity.
Prices for ignition modules - VAZ 2110, 2112, 2114
The table describes the prices for ignition modules of VAZ brands - 2110, 2114, 2112, 2115, 2109, 2107, 2106, 21099, 2111. Prices for modules are as of the end of 2020.
| VAZ model | Module price, rub. | Module brand, manufacturer |
| Ignition module VAZ brands 2108-2115 | 1.800 | Avto-Trade, 21.12370-5010, Russia, Chelyabinsk |
| Ignition module VAZ 2110 | 1.700 | Pekar, Russia |
| Ignition module VAZ 2110 | 2.000 | Omega, original, Russia |
| Ignition module VAZ 2110, 16 valve | 9001.600 | Pramo, Russia Omega K 101, Russia |
| Ignition module VAZ 2114 | 1.700 | Pekar, Russia |
| Ignition module VAZ 2112 | 1.500 | Original, Russia |
| Ignition module VAZ 2112 | 6.500 | GM K-101, on order |
| Ignition module VAZ 2112 | 1.700 | Pekar, Russia, for 1500 cm 3 |
| Ignition module VAZ 2112 | 2.000 | January 5.1, Russia |
| Ignition module VAZ 2115 | 1.700 | Pekar, Russia |
| Ignition module VAZ 21099 | 1.700 | Pekar, Ru |
| Ignition module VAZ 2111 | 2.000 | January 5.1, Russia |
| Ignition module VAZ 2109 | 1.700 | Pekar, Russia |
| Ignition coil - bobbin VAZ 2109, 21099 | 650 | K-100, Ru |
| Ignition module VAZ 2107 | 2.0001000 | BoshOriginal |
| Ignition distributor VAZ 2101 - 06, 07 carburetors | 9001.200 | SOATE, standardSOATE, non-contact |
The Chelyabinsk manufacturer module 21.12370-5010 fits most VAZ brands - 2108, 2109, 21099, 2110, 2111, 2112, 2113, 2114, 2115.
Read for everyone
Back to the ignition system
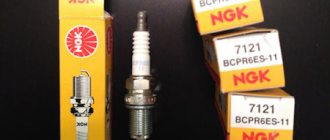
Spark plugs VAZ
Armored wires VAZ
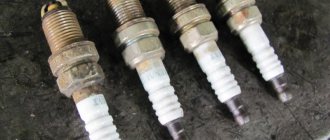
Spark plug carbon
Textile slings
Source: https://pro-avto.su/zagiganie/modul_zagiganiya_VAZ.html
How to check the ignition coil of a VAZ
If the ignition coil is faulty, the engine will not start. A characteristic sign of a faulty coil is its increased temperature when the ignition is turned off. This is easy to determine by touch.
Signs of a faulty ignition module may include the following:
- hesitant engine starting or failure to start;
- failures during sudden changes in speed;
- high fuel consumption;
- two cylinders do not work, the engine is feverish;
- lack of dynamics;
- a sharp drop in power;
- drop in power and thrust after warming up.
These symptoms may not only be caused by the ignition module. To determine the malfunction, it is enough to spend a few minutes diagnosing spark plugs, high-voltage wires and caps. This will eliminate the remaining elements of the ignition system and make sure that it is the ignition module that is faulty.
Checking the ignition coil is performed in one of 2 ways. The simplest one is to remove the central wire from the breaker-distributor, bring it to the motor housing and turn it with the starter, and a running spark should appear. After this, we check the energy supply to a separate spark plug, for which we unscrew the working spark plug, bring its contact to ground and attempt to start the engine. In this case, the spark should come from the wire to ground. If it is absent, the reason will be a malfunction of a system element such as the ignition coil.
To check the module in the second way, we only need a multimeter, then follow the step-by-step instructions:
- We check the power supply and the presence of pulses supplied from the ECU. We check the power between the central terminal (15) of the wire block connected to the module and the engine ground. When the ignition is on, the voltage should not be less than 12 V. Otherwise, either the battery is dead or the ECU does not work.
- We check the pulses from the ECU on the wiring block. We install one tester probe on connector 15, the second on the far right, then on the far left. The assistant cranks the engine with the starter, and at this time we record short-term voltage surges with a tester. If there are no impulses from the ECU, it is he who is to blame.
- We check the resistance on the secondary windings of the coils. We put the tester in resistance measurement mode and measure it at the high-voltage terminals of the module cover. Between pins 1 and 4 and pins 2-3, the resistance should be 5.4 kOhm. Otherwise, the module must be replaced.
- We check the resistance of the primary windings between contacts 15 and the rightmost, then the leftmost terminals. Nominal - 0.5 Ohm. Deviation is not allowed.
- Check the module for a short circuit. In ohmmeter mode, install one multimeter probe on the central terminal, the second on the metal body. There shouldn't be any resistance. If the device detects at least some resistance (other than unity or infinity), the module must be replaced.
How to check?
Checking the VAZ 2114 ignition module begins with preparing the equipment. And the best diagnostician in this case would be a device for checking the ignition module such as an oscilloscope. Unfortunately, not every Russian driver has an idea of what it is, not to mention the ability to use it. Therefore, we focus on the end consumer and use available means:
- 12-volt light bulb or control in common parlance
- Tester, it can be purchased for pennies at any spare parts store
Control Before touching the module itself, pay attention to its accompanying parts. We start with the wire block, it’s worth disconnecting it and checking the voltage
To do this, we fix the tester terminal on contact A, and throw the other one onto the ground of the sliders. Normal voltage is 12 V. If it is not there, then the problem is clearly in the fuse. It's a different story with him. Next, along the wires: we throw the tester terminal onto contacts both A and B. We start, the starter starts, the control indicator should ideally blink. If this does not happen, then the problem is a break in the contact circuit A.
We recommend: How to check the idle air control on a VAZ 2114 Now directly to the ignition module. There are several options for diagnosis:
- One of the simplest types of diagnostics is to replace a non-working unit with a working one. Of course, for this you need a “donor”. We replaced it, looked at it, and drew conclusions. The only thing that can be an obstacle is that you need an identical unit, that is, a friend with the same car of the same year as yours. Because for 1.5 engines it is the module that is used, and for 1.6 engines only a coil is used. And remember about the working explosive wires, if they fly, then the module is bent because of them. Again, checking BB contacts is a different story.
- You can do it differently - move the ignition unit. What does this mean: you need to shake the block with contacts, then hit the module and shake it. At this time, the engine itself must be running, because all these actions are necessary in order to see whether its operation will remain flawless when staggering. If not, then again take a closer look at the wiring.
- Another way: put the tester in the operating state of the ohmmeter. We measure the resistance on the explosive wires that go to cylinders 1 and 4. And then - to 2 and 3. The normal resistance is considered to be from 5.2 to 5.5 Ohms.
You can buy an ignition module for a VAZ 2114 anywhere and anytime, the price is not that steep - from 2,000 to 4,000 thousand rubles, depending on the region and the quality of the unit (manufacturer, new or used). But, if you decide to get confused, then be sure to look at the information on how to check the serviceability of the ignition module.
We recommend: Phase sensor errors on VAZ 2114 If you still doubt your own abilities, the service doors are always open for you. Moreover, the ignition module itself can be of both domestic and foreign production. But, no matter how strange it may sound, a qualified mechanic will most likely use all of the above techniques for the process, because he knows how to check the ignition module on a VAZ 2114. With rare exceptions, you can find someone in the service who will use an oscilloscope. Therefore, ride it once and see how and what is being done. At least some benefit from the time and money spent is a clear example for independent garage diagnostics.
- avtozam.com
- ladaautos.ru
- nadomkrat.ru
Connecting and replacing VAZ short circuit
The procedure for removing and installing the ignition coil on old VAZ models:
- First, disconnect the central high-voltage wire leading to the distributor (ignition distributor).
- Disconnect all power wires from the coil contacts. Since they are fastened with nuts, you will need an 8 wrench for this.
- If you don’t know which wires to connect to which connector later, it’s better to immediately remember or mark them somehow, so that later during installation you can connect them correctly.
- Unscrew the coil housing. It is attached to a clamp (clamp), which is pressed to the car body with two nuts.
- After the work has been done, you can remove the ignition coil and replace it if necessary.
Do-it-yourself distributor repair
Before you repair a faulty distributor, you will need a VAZ distributor repair kit. You can find it at any auto store. The dismantling and installation procedure is described below (the author of the video is Dmitry Slesarenko).
Removal and installation
If the distributor fails, it can either be repaired or replaced with a new one. Here everything depends on the specific breakdown.
The sequence of removal and installation steps is as follows:
- First you need to de-energize the car's electrical circuit; to do this, disconnect the battery.
- After this, you need to disconnect the wires from the distribution unit. Having done this, also disconnect the vacuum pipe that goes to the corrector.
- Next you need to find the cable holder that goes to the throttle actuator. This cable must be removed.
- Dismantle the bracket that secures the wires, along with them and the studs. To do this you will need to unscrew the nut. Be careful - there is a washer under the nut, you cannot lose it.
- Having done this, you need to install marks on the housing of the distribution unit and the drive of the auxiliary elements. If you do not put the marks, then after further installation of the mechanism in place you will have to set and adjust the ignition again.
- On the distributor body you can see the connector to which the harness with high-voltage wires is connected. You need to press out the fastening, use a screwdriver for this, and remove the wires. Then remove the rubber plug, which is located in the clutch housing itself.
- Rotate the crankshaft with your own hands until the piston of cylinder 1 reaches TDC. The mark on the flywheel in the hole must coincide with the middle mark located on the housing scale.
- After this, you can unscrew the nuts that secure the distributor and dismantle it.
- As for further installation, it is carried out in the reverse order. When installing the device in place, you must make sure that the distributor shaft is turned so that the outer contact of the runner is located against the terminal that corresponds to 1 cylinder of the internal combustion engine. The terminal itself is located on the cover.
- When installing, combine the risks as we reported above. If you have difficulty installing the ignition, use this article.
Sorry, there are no surveys available at this time.
VAZ models 8 and 16 valves
Despite the similarity in engine design, the ignition system of the 1.5-liter injection 16-valve engine differs from the 1.6 16-valve engine. The 1.6 liter engine uses an electronic contactless ignition system with individual coils on each spark plug. Therefore, there was no need for an ignition module. Such a system is more reliable and cheaper to operate, since if one coil fails, there is no need to replace the entire module.
The 16-valve 1.5-liter VAZ 2112 injection engine used the same non-contact ignition system as the 8-valve engine, but a different ignition module was installed. Its catalog number is 2112-3705010. The design of the module remains the same - two ignition coils (for cylinders 1-4 and 2-3) plus switch keys in a single block. The spark is supplied to the cylinders in pairs using the idle spark method. This means that sparking occurs in two cylinders simultaneously - in one on the compression stroke (working spark), in the second on the exhaust stroke (idle spark).
Ignition module VAZ 2115, VAZ 2114 description and malfunctions
Welcome, friends, to the DIY car repair website. If you try to explain in simple words, the ignition module of the VAZ 2115, VAZ 2114, and other VAZ 2109 and 2110 models is an improved device for microprocessor systems that generate high voltage current and subsequently transmit it to the spark plugs.
Its power comes from the vehicle's electrical system with a nominal voltage of 12 volts, the negative pole of which is attached directly to the body.
How to check the malfunction of the VAZ 2114 ignition module on your own?
The easiest way to check the device without removing it is to diagnose it at the moment the power unit is tripped. When the motor begins to operate unstably, it is necessary to disconnect the connector elements from each component of the module one by one. If the connector is disconnected from a functioning device, the operation of the engine will change.
Dips will appear, and the unstable operation of the unit will increase. When the non-working element of the MH is disconnected, the motor will operate in the same way.
There is another simple diagnostic method, its principle is as follows:
- You will need an assistant to check. The spark plug is removed from the seat. The high-voltage cable is disconnected from the device.
- Then the disconnected wire is connected to a spark plug, which is applied to the body of the power unit.
- The machine motor is starting, you need to make sure that a spark hits the spark plug. If it passes, a blue light will appear between the device and the surface of the power unit, its formation is accompanied by a crackling sound. If there is no spark, then the spark plugs, high-voltage cable and module must be diagnosed.
In the absence of special equipment, diagnostics of the MH can be performed using a control light indicator designed for 12 volts. One conductor from the lamp is connected to the pin of connector A, and the second is connected to ground for grounding. An assistant must start the power unit or rotate the starter mechanism.
If the light flickers when performing these steps, then the device is working. Similar actions must be done with another contact.
The channel “Diary of an Auto Electrician” spoke about self-diagnosis of ignition modules, as well as other elements of the system.