Quality of transmission lubricants
Dynamic viscosity - at low temperatures, in winter, the thickened oil resists shearing, which is a bad indicator in the operation of transmission units. Pour point is an indicator of the hardness of the oil in cold weather. But even when the lubricant hardens, there is a possibility that the gears can turn without applying torque to them. Viscosity index is a parameter characterizing the change in viscosity of transmission oil relative to temperature. If a car enthusiast wants his car to feel good on the road, he must constantly monitor the gearbox. Its regular inspection and maintenance of technical condition plays a big role in the operation of machine components.
To properly maintain the level, the oil in the gearbox is periodically topped up using a funnel and a hose attached to it.
Mechanics
Mechanically, the clutch operation process is extremely simple. Let's analyze it from the moment the movement begins. After starting the engine, the car is in neutral gear (starting the engine in gear is bad manners). The clutch is depressed all the way - this means that it is turned off, the driven and pressure plates have separated, that is, a moment is created to change gear. The gearshift lever is moved to position 1, and first gear is engaged.
The pedal is smoothly released (the clutch is engaged), at this moment the most important thing happens: the distance between the pressure plate and the driven one is constantly decreasing, and the force transmitted by the engine has already set one disk in motion, which makes the moment of “collision” of the two disks become difficult. If the pedal is released abruptly, they will quickly touch, which means that the disc will stop (imagine that you are walking and tripping on a stone - much the same thing happens to the engine)
The engine may stall, or in the best case, the car will simply “bite.” At such moments, the “petals” on the driven disk suffer greatly - the more “flattened” they become, the closer the time for replacing the “hitch” is. If the discs come into contact smoothly and the driven disc is slowly set in motion, the car starts from a standstill.
Characteristics of the Lada Priora gearbox
The base of the gearbox is represented by the following units:
- Clutch housing;
- Transmission housing;
- Rear transmission starter flap.
All elements are connected to each other with fixing nuts and sealant. The design is protected from contamination by means of a magnet that retains waste metal products. The main shaft is a set of gears that, when rotated, are connected to additional gears of all speed modes. The additional shaft is designed to regulate and distribute the oil emulsion.
There are two types of bearings installed on the gearbox shafts: ball bearings in front, roller bearings in the rear. In order to connect with the outside atmosphere, a breather is provided. It is located at the top of the node.
Manual transmission (remanufactured) for sale:
| car brand | With installation | No installation |
| Lada Priora until 2011 starter mount 2 bolts secondary shaft - 16 teeth | 14000 | 12000 |
| Lada Priora after 2011, starter mounting 3 bolts, secondary shaft - 17 teeth | 14000 | 12000 |
Warranty 6 months or 60,000 km. mileage
| Phone number of the repairman: | Artem 8 /965/ 126 13 83 Vadim 8 /925/ 675 78 75 |
| Tow truck assistance /24/7/, dispatcher: | 8 /926/ 167 15 40 8 /985/ 888 68 14 |
New gearbox Lada Priora
Prices for additional work when repairing a Priora manual gearbox:
Job title
Comprehensive troubleshooting (disassembly)
Changing the oil as a separate job
Replacing the clutch (as a separate job)
Removing and installing a manual gearbox as a separate job - without repair
Replacing the clutch with the gearbox removed
Lada Priora gearbox diagram:
gearbox shafts
gearbox gears
gearbox differential
gear selection
Technical features of LADA PRIORA gearbox repair / Lada Priora /
All motorists consider the gearbox to be an important component in the design of a modern car, since it helps to increase or decrease torque during power transmission.
The manual transmission is rightfully called the oldest, most reliable and proven way to control power. That is why such a modern and practical car as the Lada Priora is equipped with this type of gearbox.
Despite the fact that a manual gearbox has a low efficiency, it allows motorists to directly control the process of transferring power to the wheels. This box also has the following advantages:
- simplicity of design and maintenance;
- high service life - the sale of manual transmissions is very popular due to the high acceleration dynamics with reduced fuel consumption. Compared to an automatic transmission, a car with a manual transmission consumes 15% less gasoline;
- rapid increase in engine speed;
- possibility of manual towing of the car.
Despite the fact that some auto experts do not recommend cars with a manual transmission to novice drivers, this gearbox is the most reliable, proven, simple and durable. Manual transmission repair is considered so simplified and cheap that even a non-professional can handle it.
A small video from the www.youtube.com channel to allow you to take your mind off the problem of car repair:
Design features of the Lada Priora gearbox
The Lada Priora car is characterized by a two-shaft manual transmission, which has five forward gears. Structurally, the manual transmission is combined in one housing with the main gear and a two-satellite differential.
The gearbox housing of the Lada Priora has:
- clutch housing;
- gearbox housing;
- rear cover of the gearbox housing.
During factory assembly, a gasket is installed between all components of the gearbox in the form of a sealant that is resistant to oil and gasoline. Manufacturers have placed a magnet in the core of the clutch housing, which helps retain mechanical wear products.
It is worth buying a gearbox taking into account its structure. The input shaft is a block of drive gears that are engaged with the driven parts of all five forward gears of the vehicle. The secondary shaft is hollow; it supplies oil under the driven parts directly to the main drive removable gear. It is the secondary shaft that houses the synchronizers, driven gears and forward gears.
Rebuilding a manual transmission is a simple process, since all components of the box are structurally interconnected. The gearbox has the following technical characteristics:
- Filling volume – 3.1 l.
- The presence of a reverse gear lock solenoid so that an inexperienced motorist does not accidentally activate reverse gear.
- During factory assembly, the gearbox is provided with transmission oil, which would be enough for 75,000 km.
The gearbox in a Lada Priora car has its own strengths and weaknesses. Like most other Lada car models, Lada Priora 2 has a five-speed manual transmission.
Repair of gearboxes: typical faults
During active use of a Lada Priora car, motorists may encounter the following typical gearbox malfunctions:
- incomplete engagement of the clutch;
- spontaneous disengagement of the clutch;
- gearbox jerks;
- extraneous noise in the gearbox;
- oil leakage, etc.
All of these failures force car owners to urgently contact an auto center and have their manual gearboxes repaired.
The occurrence of extraneous noise in the gearbox can result from the following negative factors:
- Poor quality or incorrect choice of transmission oil - low-quality oil often causes rapid wear of synchronizers, which becomes the source of extraneous sounds during travel and gear shifting. To select the optimal class of gear oil, you should pay attention to the factory recommendations.
- Insufficient or excessive viscosity of the transmission oil. Thick oil covers the gears with a thin film, as a result of which, on the one hand, the parts are protected from wear, and on the other, some elements of the gearbox may languish from oil starvation.
- Gear wear.
Lada Priora gearboxes are sold more often than gearboxes of other models. This is due to the fact that the manufacturer has modernized the box thanks to:
- strengthening the secondary shaft with closed needle bearings;
- new type of gears;
- more efficient synchronizers;
- strengthening the gear selection mechanism;
- increased adhesion;
- introduction of an automatic compensation mechanism for cable traction.
When to change?
First, let's look at when it is necessary to change synthetic or semi-synthetic oil in the transmission system of a Priora car. According to the official regulations, the procedure for changing the lubricant is carried out after a mileage of 75 thousand kilometers. Or five years after the substance is poured, this is its service life. Taking into account the harsh conditions of vehicle use, experts recommend changing the lubricant every 50 thousand kilometers.
What signs may indicate the need for an urgent lubricant change:
- There are deposits in the oil. Their formation indicates that the substance has lost its properties.
- Burnt smell from gearbox. You can feel it in the cabin, but it will be more audible when you open the transmission inspection hole.
- The appearance of difficulties with shifting the gearshift lever. Sometimes the selector is knocked out of its set position, this is due to malfunctions caused by the use of low-quality fluid.
- Noisier operation of the unit.
- Vibrations in the area of the gear shift lever.
Replacing the clutch yourself
Replacing the Lada Priora clutch
When there is an urgent need to repair the clutch, you often have to do this work yourself. To do this, you need to prepare the tools, buy a sensor and carefully study the instructions for removing the gearbox. Replacement of any part or the clutch as a whole is carried out only after removing the gearbox.
Preparatory stage
To carry out repair work, it is necessary to install the car on a lift, overpass or inspection pit. In this case, be sure to install wheel chocks under the wheels. Then you need to disconnect and remove the battery. Be sure to drain the oil from the gearbox. Remove the air cleaning filter. Then you need to remove the starter. This operation requires care. The speedometer cable and the block with the reverse switch also need to be removed. Then move on to the next stage.
Dismantling the gearbox
The work of removing the gearbox must be done very carefully. One person cannot cope with this task - an assistant is definitely needed. The main thing is not to touch or deform the petals on the clutch basket. The box is moved away from the engine using a powerful lever. As a rule, a crowbar is used for this. At the same time, you need to hold it, otherwise it may fall. And then a more significant replacement will be required. After the box is removed, you can remove the clutch basket. Adjustment will be required after assembly, and at this stage you need to assess the degree of wear of the parts. Experts recommend replacing the mechanism completely. Even if it seems that the sensor can still serve, it is better not to save money. After, you can start assembling. The final adjustment is made after the car is assembled and there are no unnecessary parts left.
How much oil should be in the gearbox and checking the level
To purchase the required amount of oil, you need to understand how much fluid should be poured into the unit. The volume of lubricant that will enter the transmission is 3-3.3 liters.
The level checking procedure is carried out after placing the car on a horizontal surface:
- Locate the volume dipstick; it is installed at the rear, at the top of the transmission housing. To gain access to the meter, you will need to remove the air cleaner housing and air duct.
- Remove the dipstick from the inspection hole. Wipe it with a cloth and reinstall it completely again.
- Pull out the meter and check the volume. Ideally, it should be located near the MAX mark.
Lada Priora gearbox malfunctions and ways to eliminate them
Like any car component, the gearbox is subject to the negative effects of external destructive factors. The Lada Priora gearbox can also break down. The nature and frequency of breakdowns is influenced by management style, operating conditions, timeliness of maintenance, and quality of care. The manufacturer recommends changing the lubricant every 60,000 - 70,000 kilometers. The quality and correct choice of substance also affect the service life. Conventionally, all problems with a node are usually divided into two large categories: problems with the node itself or its mechanism.
The main types of faults are shown in the table:
| Problems with the node itself | Mechanism problems |
| Gear wear | Drive rod malfunction |
| Failure of synchronizer clutches | The rod does not function, there is play |
| Spline message | Damage to the locking device |
| Reduced oil level | Roller wear |
| Liquid leak | |
| Bearing wear | |
| Deformation of oil seals | |
| Wear of the gearbox cushion |
There are a number of main reasons contributing to the breakdown.
Disadvantages, breakdowns and problems of the Lada Priora box
Most often, owners complain about howling transmissions and rattling manual transmission knobs.
Drivers are also annoyed by unclear shifting and poor lever locking
Many oil seals begin to leak oil even at low mileage of the car.
The gearbox control drive and clutch require periodic adjustment
Synchronizers, bearings and gears wear out quite quickly here
You can contact the site administrator by email: [email protected]
All texts were written by me, are authored by Google, included in the original Yandex texts and notarized. For any borrowing, we immediately write an official letter on company letterhead in support of search networks, your hosting and domain registrar.
Next we go to court. Don’t try your luck, we have more than thirty successful Internet projects and have already won a dozen lawsuits.
The Lada Priora car attracts many potential buyers with its sophisticated appearance. The car can be equipped with a 16-valve power unit (1.6 liters). Initially, a 5-speed manual transmission was installed; since 2014, automatic transmission has become available. This car has front-wheel drive. In basic configurations there is an 8-valve 1.6-liter power unit (VAZ 21114). The car produces 87 horsepower. Fuel consumption is optimal in all cycles.
Subsequence:
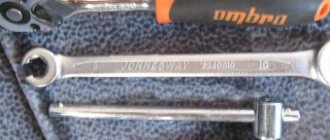
- Using a size 8 wrench, unscrew the nut of the drive housing. Disconnect the cable from the clutch pedal retainer.
- Remove the compensation system box and ring from the pedal. To avoid damage, carefully pick out the box with a knife.
- Remove the plastic sleeve from the pin. If there are signs of damage, replace with a new one. Lithol treatment is required before installation.
- Remove the drive seal from the hole in the front of the shield.
- Remove the tip, first dragging it in the direction of movement of the car.
- Unscrew the cable end fixing nut. It is screwed onto a bracket, which is attached to the transmission with a 17-point head.
- After removing the tip, pull out the cable.
- Unfasten the latch and remove the speed sensor chip.
- Unscrew the fixing screws of the pallet flap and remove it.
- Secure the engine with a reliable support.
- Unscrew the fixing bolt of the rear engine mount to the bracket.
- Remove the limiter on the rear surface of the motor.
- Unscrew the bolts that secure the motor to the body surface.
- Remove the support from the rear side.
- Remove the limit rollers from below.
- Unscrew the motor bracket clamps on the rear surface of the transmission housing.
- Using a size 8 wrench, unscrew the top screw and remove the bracket.
- Unscrew the screw and remove the speed sensor chip.
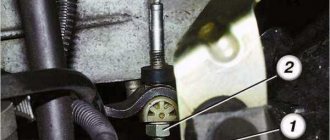
- We unscrew the bolt securing the gearbox hinge box.
- Remove the click rod from the hinge base.
- Loosen the torque clamps.
- Remove the designer hubcaps from the front wheelbase.
- Using a knife to pick up the edge, remove the hub protective lining.
- Align the hub nuts.
- Loosen the screws securing the wheelbase. Using a 30mm socket, unscrew the hub bolt.
- When you unscrew the screws that secure the wheelbase, the car is positioned on the platform with all wheels.
- To prevent the vehicle from moving, tighten the handbrake and install supports under the rear wheels.
- Unscrew the ball joint clamps and remove the maneuvering knuckles.
- Remove the shank from the hub.
- After removing the left drive, put a plug in its place.
- Press out the drive on the right side. Remove it.
- Place a support under the transmission.
- Remove the screws securing the transmission to the engine.
- Move the gearbox as far back as possible, remove the support, holding it.
The transmission of AvtoVAZ models has the advantage of simplicity of design and the ability to install it yourself if you have the necessary skills.
All the details of the box - what's inside
The five-speed gearbox of the Lada Priora is connected to the central gear and differential. The Priora gearbox consists of shafts: the input shaft is made as a block of central gears. The gears of the forward speed modes have oblique teeth, the reverse gears have straight teeth. They contact the gears of the secondary shaft. There is an oil sump at the bottom of the secondary shaft in the bearing area. It is responsible for distributing the oil emulsion and supplying it to the secondary shaft, and then to the driven gears of all gears. The design of the gearbox includes a gear synchronizer. Synchronizers for 3rd, 4th, 5th gears have a similar design. The only difference is the blocking circles. The parts of 1st and 2nd gears have a different design. They have two cone-shaped friction areas installed, which relieve the load, distributing it evenly among themselves.
There is a magnet in the core of the clutch housing. It attracts metal waste and shavings and prevents its penetration into the system. A mandatory element of the box is the drive. It should be treated with special care. In addition to the listed parts of the box, it contains a jet rod, which is fixed at one end to the motor. Thanks to this, independent gear changes while driving are excluded.
The process of changing the oil in a Priora box
Since the gearbox is located near the engine, when the engine is running, both units heat up, including the oil. It is better to change the oil when the engine is warm, since in this case the liquid becomes more fluid and drains better from the most secluded corners, and all contaminants come out with it. Thus, if your car is cold, take the time to start it and take a short drive for 10-15 minutes. Idling does not count, since in this case the gears of the gearbox do not work, and the gearbox will remain cold even after the engine warms up to operating temperature.
Drain the oil
When starting work on replacing the fluid, you need to find out the required volume of oil in the Priora gearbox and buy lubricant in the store. Next, crawl under the bottom of the car and unscrew the drain plug, first replacing the prepared container. The used liquid will begin to drain. If necessary, you can dismantle the protection if you have one.
When unscrewing the plug, tear it with a key, and then continue to unscrew it by hand and carefully remove it without staining anything around it.
The oil will pour out quickly at first, and then the process will slow down. To speed up the process, pull the dipstick out of the upper hole, which will create a vacuum and the oil will completely drain.
Filling with new fluid
Before pouring new oil into the gearbox, do not tighten the drain plug and pour literally 50-100 g of lubricant into the filler neck so that it pours out from below, washing out the remaining old oil. Screw the drain bolt into place and thoroughly wipe everything with a rag, removing any smudges. Clamp it with a key and start pouring lubricant, but do not overdo it, otherwise you will have to drain it again or suck out the excess with a syringe. Pour out the lubricant gradually, checking the level with a dipstick.
What is the danger of overfilling the gearbox?
You need to figure out what the consequences of overfilling the oil in the Priora gearbox can be? First of all, the lubricant will begin to foam, the pressure in the system will increase and the oil seals and rubber seals will be damaged. Oil may also begin to escape through the dipstick hole.
To avoid oil overflow, do not rush to fill the box with the entire volume of lubricant recommended by the manufacturer. Fill most of it and leave the car for 10 minutes until the oil drains completely down, and then check the level again. If necessary, add fluid to the maximum mark.
