The wheel bearing is an important part that is present in every car. The domestic car VAZ 2107 is also equipped with both front and rear wheel bearings. Failure of the front wheel bearing can lead to the most unpredictable consequences: from rapid tire wear to problems with the braking system. There is one way to avoid such consequences - timely diagnostics of the car, adjustment and replacement of worn-out wheel bearings. We will find out what it is to replace the front wheel bearing of a VAZ 2107 in this material.
Bearing Failure Determination
Some recommendations will help you make sure that you need to replace the wheel bearing on your VAZ 2107:
- The easiest way to determine the need to replace the hub unit is to grab the front wheel and wiggle it in different planes. If you feel the presence of play, then it’s time for a more detailed diagnosis and most likely replacing the bearings.
- The front wheels of the car should be hung on a jack, while being sure to take precautions: pull the handbrake, install shoes and additional stands under the car. Grasp the top and bottom of the front wheel with your hands and then make movements. It is important to wobble the wheel, and not the car as a whole. Thus, you can accurately determine whether the product in question needs to be replaced.
- Another way to determine the need for replacement is to listen for humming, knocking, and grinding noises in the wheel as it rotates.
Having decided that you really need to replace the VAZ 2107 wheel bearing, you need to purchase new products and begin the replacement workflow.
Replacement features
The front hub of the VAZ 2107 car has a pair of roller bearings, one of which is called internal, and the second external. The manufacturer recommends replacing these products in pairs, on both front wheels of the car. We will find out further what the replacement of the parts in question is.
Initially, it is necessary to tear off the nuts securing the front wheel of the VAZ 2107 car. After this, install the jack and jack up the front part of the car. At the same time, do not forget to install shoes under the wheels, as well as a special safety stop to prevent the jack from falling.
- Removing the caliper. Changing the front wheel bearing is much more difficult than replacing the rear one, but it can be done even with no experience. First of all, the 2 bolts that secure the caliper are uncoiled, after which they are unscrewed. It is not necessary to disconnect the brake hose; it is enough to tie up the removed caliper so that it does not interfere with further work.
- Removing the outer product. The cap is removed using a screwdriver, behind which there is a hub nut. The nut must be unscrewed, for which you will need to use a chisel and a hammer. Behind the nut there is a lock washer that must be removed. Now you can pull out the outer bearing.
- Removing the hub. To remove the hub, you need to pull it towards you. It is removed along with the brake disc. To disconnect the disk itself after removal, unscrew the two “12” bolts. The brake disc is removed to make replacement easier, but it is not necessary to disconnect it.
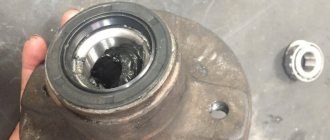
- Removing the inner bearing. Using a screwdriver, you need to pry off the oil seal located on the inside and covering the inner bearing, then pick it out and pull out the split spacer ring. The ring may not stand, so we focus on the situation. After this, the inner bearing can be removed.
- Next, the old clips are removed using a special puller or an ordinary steel tube of suitable diameter. The next stage of replacement involves cleaning the inside of the hub from old grease, after which you can begin assembly.
Pressing of new clips is carried out either in a vice or by using a steel mandrel and a hammer. After pressing and before installing the bearings themselves, do not forget to add new grease to them. After this, it is necessary to assemble the hub with the brake disc in the reverse order of removal. The nut must be tightened until it stops, then loosened 0.5 turns and try to spin the wheel. Afterwards, you need to tighten the nut to achieve a torque at which barely noticeable play remains and the wheel does not rotate under load. We tighten the nut in this position, after which we install the protective cap and wheel. Several tens of kilometers after repair, it is recommended to check and adjust the play again. The bearings on the other side of the car are replaced in the same way. This completes the work, if you have any questions, you can always leave them in the comments.
It’s worth saying right away that the suspension on domestically produced cars initially took into account all the road conditions in which the driver would have to operate his car. Therefore, all suspension elements on a VAZ are considered reliable and durable, but one of the most “long-lasting” suspension components is the steering knuckle. This unit in the VAZ 2107 design rarely fails.
How can I disassemble the hub and check the condition of the bearing?
- The hub cap is removed, then using a 27mm (socket) wrench, the hub nut is unscrewed, the washer with the outer roller bearing separator and the inner ring are removed, then to remove the hub, you need to pull it towards you and remove it from the steering knuckle axle, along with the brake disc :
- Now, using variable size pliers or a slotted screwdriver, remove the oil seal from the hub, then you can remove the inner roller bearing cage, without the outer ring.
- After this, we carefully clean the old grease from the hub cavity, wipe it, it is better to moisten a rag with white spirit.
- Then, using the same straight-slotted screwdriver, you need to pry the slotted sleeve and remove it. Then we take a socket wrench with a head of sufficient depth - 7 mm, and turn out the guide pins.
- Now you can remove the brake disc and spacer. After this, firmly install the hub in a bench vise and, using light and precise blows with a hammer on a drift, “punch” the outer ring of the inner bearing around the perimeter and press it out.
After this, having turned the hub, we also press it out, but the outer bearing ring:
Thus, you can make sure whether the bearings or hub housing need to be replaced, and evaluate the quality of the lubricant.
When assembling the hub, all seats are washed, new lubricant is applied, and the bearing rings are also pressed in, clamped in a vice. After all bearings are properly installed, the clearances in the bearings should be adjusted.
Steering knuckle on the VAZ 2107: what is it for?
Even the uninitiated can answer what a steering knuckle is: obviously, it is a mechanism that ensures the wheels turn while driving. The steering knuckle secures the hub elements of the front row of wheels on the VAZ 2107 and is mounted on the upper and lower suspension arms.
As soon as the driver begins to turn the steering wheel in the cabin, the gear lever acts on the steering rods, which, in turn, pull the steering knuckle to the left or right. This ensures that the front wheels turn in one direction or another.
The main purpose of the steering knuckle in the design of the VAZ 2107 is to quickly and without failure ensure that the front pair of wheels turns in the direction desired by the driver.
Steering knuckle device
The mechanism itself is made of high-strength cast iron, and therefore has a long service life. According to the designers, this unit should withstand serious loads and not “wedge” at the most crucial moment. It is worth emphasizing that on the VAZ 2107 the steering knuckle is indeed one of the most reliable elements: most drivers never change it throughout the entire period of operation of the car.
Replacing the steering knuckle in St. Petersburg at affordable prices for all car brands
- home
- Car repair
- Chassis repair
- Fist
»
»
»
Full or partial replacement of the steering knuckle refers to repair work with the steering, since this very element - the “knuckle” - is the final executive part of this system, which, through the hub and front axle, ensures the rotation of the corresponding wheel, following the turn of the steering wheel.
In car services, the knuckle is replaced on the most favorable and comfortable terms for the car owner:
- In record time;
- With a guarantee of impeccable quality of work performed and spare parts used;
- At affordable prices that provide an optimal balance with the quality of services provided.
Knuckle replacement prices
| Name of works | Price |
| Replacing the fist | from 1000 rub. |
Replacing the steering knuckle - signs of its inexorable approach
Characteristic signs of malfunction (most often, deformation) of the steering knuckle are two phenomena:
- The so-called “zhor” of rubber, that is, premature wear of tires for no apparent reason.
- The car noticeably pulls to the side when driving.
Replacing the steering knuckle on a UAZ Patriot (brief algorithm of actions)
- Raise the front of the machine and secure it (on jacks or stands).
- Remove the front wheels.
- Unscrew the nut securing the drive shaft hub (you will first need to remove the cotter pin and remove the cap that protects the nut from being loosened arbitrarily).
- Secure the hub from turning and unscrew the nut securing the drive shaft to the front wheel hub.
- Unscrew the bolt and remove the ABS sensor from the steering knuckle.
- Remove the front brake caliper and secure it so that it does not hang on the hose.
- Remove the brake disc.
- Remove the nut securing the knuckle axle to the lower wishbone.
- Remove the knuckle ball joint pin from the lower control arm.
- Separate the lower arm from the ball joint.
- Remove the ball joint from the knuckle.
- Remove the bolts securing the lower part of the shock absorber to the steering knuckle.
- Remove the drive shaft from the hub and secure it to the car body using soft wire.
- Carefully remove the steering knuckle, being careful not to remove the drive shaft from the differential housings.
- Reinstallation of the steering knuckle after replacing it should be carried out in a mirror order.
Despite the apparent ease and consistency of operations for replacing a fist in a car, this procedure should be performed by qualified craftsmen and, preferably, in a well-equipped car service center.
In our service centers in St. Petersburg, we replace the steering knuckle (as well as replacing the steering knuckle oil seal) on UAZ, VAZ 2106, VAZ 2107 and cars of all possible brands, models and years of manufacture!
Symptoms of a problem
As all owners of the VAZ 2107 note, the most common malfunction of the steering knuckle is its deformation - during long years of driving or after an accident. The driver can quickly identify this problem by the following “symptoms”
- the car “pulls” to the left or right when driving;
- The tires on the front pair of wheels wear out very quickly;
- hub bearing play as a result of wear on the entire axle.
However, the car leaving the given trajectory and rapid wear of the tires may also indicate an imbalance in the wheel alignment. Therefore, you will need to turn to specialists to find out for sure the root of all evil: is the steering knuckle deformed or is it simply an imbalance in the alignment angle.
Signs of a malfunction of the VAZ 2107 swing arm
The most common malfunction of the swing arm is deformation. It can be caused by a strong blow to the suspension when driving over bumps in the road or physical impact as a result of an accident. You can notice a malfunction based on three main signs:
- pulling the car off the trajectory when driving (“seven” is pulled to the left or right on a flat road);
- rapid wear of rubber on the front wheels;
- wheel bearing play as a result of axle wear.
The first two signs may be an indicator that the wheel alignment angles do not comply with the standard ones. Therefore, in order to make sure that it is the steering knuckle that is faulty, it is necessary to diagnose the front suspension. Sometimes the reason lies in incorrect adjustment of wheel alignment angles or wear of steering rods or silent blocks. Otherwise, it is necessary to replace the steering knuckle on the VAZ 2107.
What is needed to replace the steering knuckle of a VAZ 2107
Before changing the steering knuckle on a VAZ 2107, you need to stock up on the following tools and fluids:
To replace the steering knuckle you will need:
- set of wrenches;
- jack;
- wheel wrench;
- wheel chocks;
- puller for ball joints and steering rods;
- WD-40 liquid.
After replacing the steering knuckle, you will have to bleed the brake system. Therefore, you will also need brake fluid and a container for it, as well as a flexible hose.
Steering knuckle repair
Repair of the steering knuckle is possible with minor wear or minor damage. As a rule, if a unit is seriously damaged after an accident, car enthusiasts simply replace it with a new one.
Repair work is only possible after the steering knuckle has been completely removed from the vehicle. The repair schedule looks like this:
- Clean the surfaces of the fist from dirt and dust, wipe it with a clean cloth, and blow with compressed air.
- Clean the grooves for the retaining rings.
- Inspect the steering knuckle after dismantling for signs of deformation and wear.
- Install a new retaining ring and press the new bearing in until it stops.
- If it is necessary to replace the trunnion, replace it. If the axle and kingpin are severely worn, it is recommended to replace the steering knuckle assembly.
Repairing the steering knuckle involves replacing the retaining rings and bearing. In case of extensive damage, only replacement is recommended.
Steering knuckle VAZ 2107 drawing
Everything described below was done over 10 years ago and still works great! So I present my old article that I wrote for vaz.ee.
Now it’s time to modernize the brake system of my seven. Ventilated brake discs Brembo MAX 14, calipers from VAZ-2112 and ATE pads were prepared for the installation, and adapter faceplates were made. But the wheel bearings gave me no rest. In one of the old magazines “Behind the wheel” I read about installing front wheel bearings from Moskvich-2141 in classics. Unfortunately (or fortunately) it was not possible to find the magazine. I started looking for information, asking questions. In the end I settled on bearings from the figure eight and IZH-Oda hubs. I don’t claim to be a pioneer—it’s been done before me. But there was still very little information, so we had to invent something invented. And the logic is simple to replace two angular contact roller bearings with one double-row angular contact ball bearing. As a result, we get rid of the need to adjust the clearance in the bearings. In addition, the figure-eight bearing is designed for higher loads and is more durable (I do not take into account products from underground manufacturers).
It was decided not to deprive the car of the ability to move by disassembling the original steering knuckles, but to assemble everything new. In this regard, a completely new set was purchased, consisting of the knuckles themselves, steering bipods and a set of fasteners (bolts with groovers and nuts, locking plates), in addition, I purchased IZH-Oda hubs, SKF eight-wheel wheel bearings, retaining rings and thrust washers from same, as well as classic thrust washers and hub nuts. Unfortunately, I don’t remember the exact prices. Too much time passed from the moment of purchase to installation. In addition, I purchased a steering knuckle from Oda as a sample. Figure 1 shows classic and Odov fists for comparison.
I won’t give details here of how I did it all and then redid it, but I ruined one set of faceplates. The main thing is the end result. So, Figure 2 shows a sketch of the modernized hub assembly.
Now let's start remaking the fist itself, sketch in Figure 3.
Figure 4 shows a simplified route technical process for regrinding a fist. Well, I can’t do this profession without technology.
By regrinding... We base it on alignments in the centers. First of all, we form the fits for the bushings. Diameter 26 is simply dusted to obtain alignment, and diameter 21 is sharpened as close as possible to the nominal size. Because Everything is done individually, then we sharpen our own bushing for each fist. We measure the actual size of the fits and sharpen the bushings with a tightness of 6-8 hundred parts. When working on a lathe with a bore gauge, it’s quite possible to catch a couple of hundred. I say this as a person who has experience working on a lathe. When pressing the bushings, they must be heated to a crimson color, approximately 500°C. I did this in a forge. After this heating, the bushings should sit freely.
Next you need to grind the bearing seat. Finding the diametrical size is not difficult for a normal grinder, but maintaining a linear size of 26.5 mm is not realistic. It is impossible to make a groove on the bushing for the exit of the grinding wheel, so as not to create a stress concentrator, but it is necessary to touch the end for the bearing to rest. Therefore, after grinding, we measure the actual size from the end of the bearing stop collar to the mating plane of the faceplate (size 26.5). Next, lathe again. After the fist is ready, it is advisable to make a center hole at the end, so that if it is necessary to press out the hub, there is somewhere for the puller to rest. Maintaining alignment is not necessary, and it is not realistic.
Replacing the steering knuckle
Replacing the steering knuckle can be done by the driver himself. Before starting work, you will need to prepare the following tools and devices:
- standard set of wrenches;
- jack;
- wheel wrench;
- wheel chocks (or any other reliable wheel supports);
- puller for ball joints;
- WD-40 lubricant.
As soon as the steering knuckle is replaced, you will need to add brake fluid to the system, as it will inevitably spill out during operation. Therefore, you need to worry about brake fluid and a flexible hose for bleeding the system in advance.
Operating procedure
Replacing the steering knuckle on a VAZ 2107 is carried out in two stages: dismantling the old unit and installing a new one. The operating algorithm is as follows:
- Securely secure the car on a flat surface using wheel chocks, bars or bricks.
- Raise the handbrake all the way.
- Loosen the front wheel mounting bolts (left or right, depending on which knuckle needs to be changed).
- Jack up the edge of the car so that the wheel can be removed.
Video: replacing the steering knuckle
Immediately after dismantling, it is necessary to inspect the condition of the remaining suspension parts, including the brake caliper and the bearing on the hub. If they have no visible damage, you can use them in the work of the new fist. If signs of wear and deformation are visible, and the bearing is leaking, it is necessary to replace both the caliper and the bearing along with the steering knuckle.
Installation of a new fist is carried out in the reverse order. It is important to bleed the brake system after replacement to get rid of air that gets into the brake circuit during dismantling work.
Video: bleeding the brakes
Thus, if the steering knuckle on a VAZ 2107 fails, it will need to be completely replaced. Repair is advisable only in cases of minor damage and bearing play. Replacement work is not considered labor-intensive, but the driver must be able to work with pullers and know all the safety rules when using this device.
How to replace a wheel bearing on a VAZ 2106, 2107?
We determined that it was the wheel bearing that was faulty, bought a new one and are preparing the tools for the job:
- Hammer
- Pliers
- Socket wrench set
- Impact screwdriver (that you can hit without breaking)
- Mandrel for pressing in new bearing races
- Head 27 with a large collar (for the hub nut)
Removing the wheel bearing.
First of all, remove the cap covering the hub nut. Next, we align the rolled edges of the hub nut and unscrew it.
We hang the wheel and unscrew the brake caliper.
You can remove the hub along with the brake disc.
We take out the ring separating the seporators.
We take out the internal and external separators and knock out their clips.
We clean the hub from old grease and dirt.
Installing a new wheel bearing.
Installation occurs in the reverse order of removal.
Carefully through the mandrel (an old clip as a last resort), we press in new clips, having previously lubricated their walls with motor oil or lithol.
Install the separating ring.
We generously lubricate the internal separator with lithol, put it in place and close it with an oil seal. We fill the hub a little less than halfway with lithol and place it on the steering knuckle.
Lubricate the outer separator and put it in place.
Now tighten the hub nut, but not all the way. We install the brake caliper and screw the wheel.
When all the old parts have been replaced with new ones, you need to adjust
FRONT SUSPENSION VAZ 2107: DEVICE, FAULTS AND MODERNIZATION
The most loaded element of the VAZ 2107 car is the front suspension. Indeed, it takes on almost all mechanical loads that arise during movement. For this reason, it is important to pay careful attention to this unit, carry out timely repairs and modify it, whenever possible installing more durable and functional elements.
PURPOSE AND DEVICE OF THE FRONT SUSPENSION
Suspension is usually called a system of mechanisms that provide an elastic connection between the chassis and wheels of a car. The main purpose of the unit is to reduce the intensity of vibrations, shocks and jolts that occur during movement. The vehicle constantly experiences dynamic loads, especially when traveling on poor quality roads and when transporting cargo, i.e. in extreme conditions.
It is at the front that the suspension most often takes impacts and shocks. It is rightfully the most loaded part of the entire car. On the “seven” the front suspension is made better and more reliable than the rear - the manufacturer, of course, took into account the high load on the unit, but this is not the only reason. On rear-wheel drive cars, the front suspension has fewer parts than the rear, so its design is less expensive.
The front suspension diagram of the VAZ 2107 includes important parts, without which the smooth movement of the car would be impossible.
- Stabilizer or lateral stability beam.
When cornering, the anti-roll bar redistributes the load on the wheels and keeps the car parallel to the road.
- Double wishbone suspension is the main chassis unit at the front, consisting of an upper and lower independent link. One of them is fixed with a long bolt through the mudguard strut, the other is bolted to the suspension cross member.
The upper arm (item 1) is attached to the mudguard strut, and the lower arm is attached to the suspension cross member
- Ball joints are connected to the wheel hubs through axle-mounted knuckle systems.
- Wheel hubs.
- Silent blocks or bushings - designed for free movement of levers. They have an elastic polyurethane (rubber) liner that significantly softens the shock of the suspension.
Steering knuckle (right or left) for VAZ Classic
Dear customers, in order to avoid mistakes when sending the steering knuckle VAZ 2101-07, in the “Comment” line indicate which side is needed (driver or passenger), your car model, year of manufacture.
The front suspension on the VAZ 2101-2107 is independent with double wishbones.
The right and left sides always look IN the direction of the car (moving forward) and in no other way, the driver’s side is on the left, and the passenger’s is on the right.
The steering knuckle is designed to change the direction of movement of the car by increasing pressure on the steering arms, which ensures a change in the angle of the wheels. This part of the vehicle is one of the most significant. The rotary one is the base for the hub and is attached to other parts using ball joints.
1 — steering knuckle (2101-3001014/15) ; 2 — upper ball joint (2101-2904192-01); 3 — compression stroke buffer (2101-2904230); 4 — upper lever (2101-2904100/01); 5 — anti-roll bar (2101-2906010); 6 — front suspension cross member (2101-2904200); 7 — lower lever (2101-2904020-01/21-01); 8 — shock absorber (2101-2905402-05); 9 — spring (2101-2902712); 10 — lower ball joint (2101-2904082); 11 — hub with bearings (2101-3103002); 12 — hub cap (2101-3101065).
The front wheel is connected by four bolts to a hub mounted on two tapered roller bearings. The bearings are installed in the hub and secured with a nut. The right wheel hub nut has a left-hand thread and is marked with three dots. The steering knuckle is connected to the lower and upper suspension arms using two spherical joints (ball joints). Both levers are stamped from sheet steel, the upper lever is hinged to the body of the VAZ 2101-2107 car, and the lower lever is to the front suspension cross member - a welded power element attached to the side members of the VAZ 2101-2107 car body with bolts. The hinges of both levers are rubber-metal (silent blocks) and do not require lubrication. The ball joints are equipped with plastic liners and filled with lubricant.
The elastic element of the suspension of the VAZ 2107 car is a cylindrical spring passing through the forked upper arm. With its lower end, the front suspension spring rests on a cup welded to the lower arm. The upper end of the front suspension spring, through an insulating rubber gasket, rests against the cup of the body of the VAZ 2101-2107 car. A rubber compression stroke buffer is installed above the upper arm on the body, and the upper arm rests against it at maximum travel of the front suspension.
Vibrations of the front suspension on a VAZ 2101 - 2107 car are damped by a hydraulic telescopic two-tube shock absorber located inside the spring. With its lower end (reservoir), the shock absorber is attached to the lower arm through a rubber-metal hinge. The upper end (rod) of the shock absorber is connected with the help of two rubber pads to the shock absorber support cup, welded to the body of the VAZ 2101-2107 car. On the rod inside the shock absorber reservoir there is a rubber bushing - the suspension rebound buffer.
To reduce the roll of the VAZ 2101-2107 car when turning, the lower arms are connected to each other by an anti-roll bar - a curved elastic steel rod attached to the lower arms and the body through rubber pads.
The camber angle of the front wheels on a VAZ 2101 - 2107 car is regulated by changing the number of adjusting washers placed between the axis of the lower arm and the cross member.
Wheel toe-in on a VAZ 2101 - 2107 car is adjusted by changing the length of the side tie rods.
Maintenance of the front suspension of a VAZ 2101 - 2107 car comes down to monitoring the condition of its parts, adjusting and replacing the lubrication of wheel hub bearings, as well as monitoring and adjusting wheel alignment angles.
Other article numbers of the product and its analogues in the catalogs: 21010300101400, 21010300101500.
VAZ 2101-21078.
Any breakdown is not the end of the world, but a completely solvable problem!
How to independently replace the steering knuckle on a car of the VAZ 2101 - 2107 family.
AvtoAzbuka online store, repair costs will be minimal.
Just COMPARE and BE SURE!!!
Don't forget to share the information you find with your friends and acquaintances, because they may also need it - just click one of the social networking buttons located above.
