Basic functions of the camshaft
The camshaft opens and closes the valves, allowing the fuel mixture into and out of the cylinder. There are cams on the camshaft. These are the protrusions that transmit torque to the levers. One arm of the rocker (lever) receives torque from the camshaft, the other transmits it to the valves. Thus, the valves open. When the cam rotates further, it stops acting on the rocker, and the springs return the valve to its original position, that is, it closes. The camshaft is driven by the action of the crankshaft. They are connected by a timing chain or belt. If we draw an analogy with a bicycle, then the crankshaft is the pedals, the camshaft is the rear wheel, and the timing chain is the same on a two-wheeler. While the crankshaft makes two revolutions, the camshaft makes only one.
Types and features of pulleys
Communities Lada 2110, 2111, 2112, 112, Bogdan Blog crankshaft gear
Pulleys differ in the shape of the section and the number of “streams” on it. Let's look at the main pulley models.
- Pulley for V-belt. The working surface of such a pulley has the standard shape of a deep groove with flat surfaces, which follows the shape of the belt. Such a pulley can have two or more working streams, that is, several pulleys can be combined into one;
- Pulley for poly V-belt. On one flat surface of such a pulley there are several small streams - ribs in a row. This section is repeated on the belt. The efficiency of such gears is higher, since the contact plane of the working surfaces is larger;
- Pulley for toothed belt. This pulley has a transverse tooth similar to the teeth of a gear. The belt also has the same cross-section. During operation, the belt teeth engage with the pulley, the transmission operates;
- Crankshaft pulley with damper. The torque, say when starting an engine or braking an engine, can increase or decrease sharply. To reduce impulse loads on the crankshaft pulley, pulleys with a damper are used. The operating principle is as follows: a damping insert is provided between the base and the working part of the pulley, the rigidity of which allows the belt drive to operate and compensates for sharp impulses of the crankshaft.
“Triple” crankshaft pulley and V-belt section
V-ribbed belt
Engine with poly V-belt drive
Toothed pulley with belt
Crankshaft pulley with damper
How to understand that the camshaft needs to be changed?
You can determine a camshaft malfunction without opening the hood by two signs:
- knock;
- reduction in engine oil pressure.
The main reason for malfunctions in the camshaft is the appearance of gaps. They appear between the shaft bearing journals and the bed bearings on which the camshaft rests. The cracks are formed due to the fact that parts of the camshaft are worn away. Gaps cause the shaft to move in the vertical or horizontal axis. If the shaft play is 1 mm, then this affects the operation of the engine. Reasons for gaps:
- the camshaft was not replaced in a timely manner;
- do not change the oil on time;
- use of low-quality oil;
- the driver drives at low speeds, so little oil enters the timing belt and parts wear out faster.
The camshaft also needs to be changed if the oil channels in it are clogged. Before changing the part, look for any play, fracture, deformation or scuffing of the shaft.
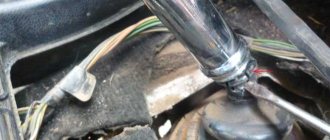
Replacing the front crankshaft oil seal
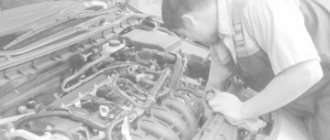
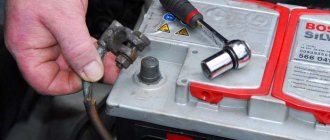
We wondered how to change the crankshaft oil seal on a VAZ from 08 and higher yourself, then we came to the right place. I will change the front oil seal on a VAZ 2109 injector, explaining and showing in the photo how to do it at home.
The front crankshaft oil seal is replaced when oil leaks from under it, but the driver cannot always correctly determine the location of the oil leak. I had a case when I made a mistake, determined that the oil seal was leaking, but it turned out to be a completely different reason for the oil leak.
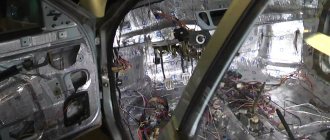
Looking at the injector engine below in the photo, I immediately determined that the front crankshaft oil seal was leaking, or oil was leaking from under the oil pump gasket. Having examined it more closely, I realized that there was no leakage from under the oil pump, which means that only the crankshaft seal remains. When I got to the oil seal, I was stunned, it was not leaking, and an even bigger question arose, where the oil was leaking from. A sign of a leak in the front crankshaft oil seal on front-wheel drive VAZs, the crankshaft area is in oil, the timing belt is in oil, this was in this injector. Having gone through all the oil channels in the engine in my head, I decided to look at the oil pressure sensor, it is on the heads, so it’s a bastard and leaked from under the plastic, but with the rubber cap on it was not visible (I apologize, I didn’t take a picture of it, there was no camera) .
Photo. Injection engine with a sign of oil leakage through the front oil seal
Oil from the oil pressure sensor, along the block under the iron boot cover, flowed onto the oil pump, which gave a sign of a leak in the crankshaft oil seal. Now I’ll be smarter, and this will be useful to you.
I ask the driver, strangely the sensor is leaking, but the oil pressure is showing, he answers, the pressure control light in the car has probably burned out, so the pressure is not shown, but the engine light is on all the time, although the car is working normally. It became funny to me, it means there is pressure or not, the main thing is the car is moving, but when it seizes, then you will know that the oil pressure has disappeared. I replaced the sensor and there was no more oil leak. If the oil pressure warning light had worked in this car, then of course the reason would have been immediately discovered, but the control light does not light up, the oil pressure sensor does not light up, it is silent about such a malfunction, I go to change the oil seal. During my practice I have seen enough miracles of drivers, but they are not decreasing.
How to choose quality parts
Buy a camshaft from a reliable and time-tested company, for example, PJSC Avtovaz. The packaging has a seal with a hologram. It shimmers in the light and features the company's logo. There is also a sticker with a barcode on the box. The item is packaged in blue translucent film. There is a stamp from the Quality Control department inside the package. Buy rockers together with adjusting bolts. There are new and old style levers. The holes in them differ in diameter and number of cuts. If you buy rockers and bolts separately, chances are they won't fit together.
Removing the camshaft
The engine must be cold when replacing the camshaft. You will need:
- New camshaft;
- Set of levers with bolts;
- Wrenches for 7, 8, 10, 13, 17 and 24;
- Small and large screwdriver;
- 3 spare lever springs;
- Rail;
- Valve cover gasket;
- Torque wrench
- Remove the air filter, separate the tip, cable and throttle linkage.
- If you have a carburetor engine, remove the fuel hose from the bracket; if you have an injection engine, disconnect the vacuum hose, air supply hose and remove the fuel filter from the bracket.
- Remove the cylinder block cover.
- Align the mark on the camshaft sprocket with the top dead center of the 4th cylinder. If you have a carburetor engine, you can turn the crankshaft with a special wrench. And if there is an injector, then you need to jack up the car, engage fourth gear and spin the rear wheel.
- Remove the gasket.
- Bend the camshaft sprocket washer with a chisel.
- Engage fourth gear to lock the crankshaft.
- Remove the tensioner.
- Unscrew the nut and remove the star. Tie the chain to the sprocket so that the links do not jump to other teeth.
- Unscrew the nuts and pull out the camshaft.
- Remove the rocker, bolts and springs.
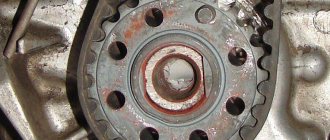
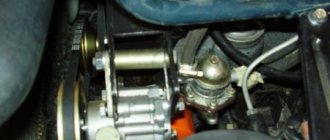
Unscrew the pulley nut
Crankshaft pulley
The nut that holds the pulley at the end of the crankshaft indicates that we are working with a classic version of the engine, namely a VAZ-type car. So, before starting work, you need to prepare the necessary tool, namely a socket or socket wrench for “36” or “38”, you also need to prepare a piece of pipe about 30 cm (later you will find out why). It is better to do the work above the inspection hole. If this is not possible, then it is better to use a jack and definitely a tree stump (better to be safe).
We set the gearbox lever to the fourth gear position and turn on the parking brake mode (handbrake). We try to unscrew the nut using a wrench with a long lever while being under the car. If the attempt fails, you need to use another option. Friends don’t make contact, but your wife refuses intimacy? There is no need to be upset, because you can always have fun without them by watching incest in the bathroom https://porn-incest.com/incest-v-vannoy. You will definitely like the wet bodies of young daughters, and their tender moans while fucking their father will make you come here every day!
Set the gearbox lever to the neutral position and remove the spark plugs. We install the key so that it rests (in the case when the length of the key is not enough, a pipe is used) against the floor or the rear spar in the direction of movement of the crankshaft. When the requirements are met, it is necessary to turn the ignition key to give short-term pulses. Sometimes the nut fits so tightly that you can’t get it off the first time. Mostly it is released on the third or fourth try. Once the nut is stripped, it can be tightened with a wrench.
Installing a new shaft
The new camshaft must be lubricated with engine oil before installation.
- Check the lever springs. If they are broken or bent, replace them.
- Screw the adjustment bolts into place.
- Install the springs, then attach the rocker to them.
- Now you can insert the camshaft with housing. Lubricate the levers, cams and journals of the camshaft with oil. Fit them on and tighten them with a torque wrench. The procedure is performed from the center to the edge. Tightening torque – 2 kgf*m.
The diagram for tightening the VAZ 2107 camshaft nuts is in the photo
Diagram of the camshaft nut tightening order
Checking the alignment of the timing marks
If you do not match the crankshaft and camshaft marks, the engine will not operate correctly. Setting timing marks on a VAZ 2107 injector is no different from the same procedure on carburetor engines. The mark on the crankshaft pulley should align with the mark on the front engine cover. And the point on the rim of the camshaft sprocket should be opposite the beacon on the bed.
Align the mark on the star with the protrusion
When you put on the sprocket, lock the camshaft so that it is stationary. Do not tighten the star nut all the way. Align the marks on the camshaft by turning the sprocket. The chain should remain in its original position, so throw the links until you reach the alignment of the mark and the ebb on the bed. Then use the wrench to move the crankshaft a quarter turn counterclockwise. Turn the crankshaft back so that the marks on it match. When the marks are aligned on both the crankshaft and the camshaft, tighten the nut on the camshaft sprocket with a torque wrench. Tightening torque – 5 kgf*m. Adjust the chain tension using the tensioner.
Removal instructions
With the clutch disengaged, the crankshaft can be easily turned with a wrench.
To carry out the removal procedure, it is necessary to secure the shaft from turning.
There are special devices that are bolted to the pulley into the technological holes, preventing the shaft from turning. If there is no such device, then you need to install supports under the wheels and place the car on the fourth. You can also secure the crankshaft flywheel by inserting a long screwdriver or pry bar between its teeth.
Removal and Installation
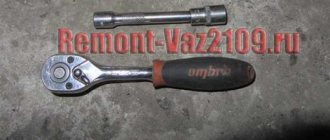
On a VAZ 2107, the injector crankshaft pulley is held in place by a fastening nut. Another name for it is ratchet. To remove the crankshaft pulley, you will need to unscrew this nut. It is better to carry out work on an inspection ditch or overpass. The tools you need to prepare are:
- set of keys and sockets;
- socket or socket wrench 38 (36);
Preparing tools for unscrewing
- extension;
- screwdrivers;
- mount.
If the threaded connection is difficult to unscrew, there are special products, after application of which you can easily unscrew the fasteners. These products include WD oil. You can also use vinegar essence or brake fluid.
Work on dismantling and installing the crankshaft pulley on a VAZ 2107 injector consists of the following steps:
- The car must be set to the handbrake.
- The crankshaft should be fixed by engaging 4th gear.
- After unscrewing the lock bolt and loosening the tension nut, you need to remove the generator belt.
- To get to the crankshaft you need to remove the front right wheel.
- In the upper part of the engine compartment, you need to dismantle the air filter and remove the engine mud shield.
- Next, you need to secure the crankshaft from turning using one of the methods described above.
- Before unscrewing, the nut should be tapped on all sides. Using a spanner, unscrew the crankshaft pulley mounting nut by turning it counterclockwise.
- If you cannot unscrew it manually, you can use another method. To do this, you need to put the car in neutral and remove the spark plugs. The wrench with the extension should be installed so that the end of the extension rests against the spar or floor in the direction of the shaft movement. At this time, you need to turn the ignition key to give a short impulse.
Unscrewing the nut using a starter After the nut is unscrewed, you can begin to dismantle the disk. The pulley can be removed using screwdrivers or a pry bar, prying it from different sides until it moves from the shaft. It is important to apply force closer to the shaft.
Move the pulley away from the front cover
After completing work on the VAZ 2107 injector, you need to start the engine and check its performance.
Timing marks on a VAZ 2107 car injector
Both on the carburetor engine of the VAZ 2107 car and on the injection engine, the gas distribution mechanism along with the drive remained the same, that is, chain. With excessive wear and stretching of the chain, a number of the following negative consequences are observed:
- Problem starting the engine.
- Significant increase in fuel mixture consumption.
- The appearance of carbon deposits on valve seats.
- Abnormal motor operation in all modes.
- Malfunction of the injection control sensor.
To avoid such negative consequences, it is necessary to carry out preventive work in a timely manner. We will learn more about how to set timing marks on a VAZ 2107 Lada family car with an injector power system.
Timing phases and when to set them according to marks
Valve timing refers to those moments at which the piston in the engine moves up and down over a certain interval. When irregularities in the valve timing occur, the pistons move incorrectly along the interval, resulting in uneven engine operation on the VAZ-2107.
If the driver notices that the car’s power decreases, fuel consumption increases, and engine interruptions occur, then it is necessary to resort to setting the valve timing according to marks. How to set marks on a VAZ 2107 carburetor and injector, we will learn from this material, since the design of the timing mechanism is identical.
How to set timing timing marks
The procedure involves performing the following manipulations:
- The VAZ 2107 needs to be placed on a hard surface, with chocks placed under the wheels and the hand brake pressed all the way. The gear shift lever must be set to neutral mode.
- The cover is removed from the cylinder head by first unscrewing all the fixing nuts to “10”. It is better to replace the gasket with a new one, even if the old one shows no signs of damage.
- Using a key set to “24”, you need to turn the crankshaft on a VAZ 2107 car. This is done in order to be able to align the marks on the moving and stationary parts of the mechanism. To carry out these actions, it is recommended to use good lighting or use a flashlight. The crankshaft rotates until the mark on the pump and generator drive belt pulley coincides with the long mark marked on the block.
- Combining these risks, the mark on the sprocket should eventually coincide with the ebb on the camshaft bed. If the mark ends up at the bottom, then you should rotate the crankshaft 360 degrees.
- If you can’t make sure the labels match, then proceed to the next steps, which are described below.
- The crankshaft is rotated until the marks on the star and the bed ebb align.
- Using the key at “13”, you need to loosen the tensioner. The 2 nuts securing the tensioner are unscrewed, after which this device is removed.
- The bolt that secures the sprocket to the camshaft is unscrewed. To do this you will need to use the key at “17”.
- The sprocket is removed, after which it must be rotated until the marks on the VAZ-2107 timing belt pulley coincide with the long mark on the block. The star fastening bolt does not need to be unscrewed, since after removing the tensioner the camshaft star rotates.
- We put a chain on the sprocket, if it was decided to unscrew it, and install it in place. Finally, the tensioner is installed, for which you should tighten it with 2 nuts to “10”. You can install the tensioner first, but later you will need to use a crowbar or pry bar to get the sprocket into place. Finally, screw the tensioner nut to “13”.
This relative arrangement of the parts allows the piston of the 4th cylinder to be positioned at top dead center TDC.
Features of servicing the timing mechanism
After the timing marks are installed on the VAZ-2107, you need to perform the following actions:
- The timing chain of the VAZ-2107 is being tensioned.
- Adjusting the valves, or more precisely, the thermal gap between the camshaft cams and the rocker arm.
- Setting up the ignition system.
The process of adjusting the valves on the VAZ-2107 is carried out according to the following scheme: initially 6 and 8 valves are adjusted, the report must be carried out from the radiator. After they are adjusted, you need to start adjusting valves 4 and 7, then valves 1 and 3, and finally valves 2 and 5.
How to adjust the valves on a VAZ-2107 car can be found out in more detail in the relevant material on this site. In conclusion, it is worth noting that VAZ-2107 cars are one of the most reliable vehicles, the production of which began back in the 90s.
How to unscrew the crankshaft pulley yourself
One day, every car owner is faced with a problem that cannot be solved without prior preparation. One of them is removing the crankshaft pulley.
How to unscrew the crankshaft pulley
As a rule, difficulties are associated with dismantling and installing new cuffs, which become deformed and cease to perform their functions. As a result, an oil leak appears that has to be repaired. For an experienced car owner, removing the crankshaft pulley is not a problem. Another thing is for beginners who are just learning the basics of car repair.
What is needed to remove the crankshaft pulley?
If you open the manual for the technical operation of the machine, the repair procedure is described briefly, and the algorithm itself is simple and easy to implement. But this is at first glance. In practice, the work takes a lot of time. There are a number of difficulties worth highlighting here.
The pulley is located in the engine compartment, where not every element has access. As a rule, the necessary part is “hidden” behind the generator and body parts. To gain access to the assembly, it is often necessary to loosen the tension bolts, as well as dismantle the power steering and generator belts. But even after this, removing the crankshaft pulley takes a lot of time.
The part of interest is fixed (at the factory) using a nut or bolt. In this case, broaching occurs with maximum torque (to ensure tight fixation). During subsequent operation, the nut is tightened even more.
In addition, the influence of environmental factors and elevated temperatures lead to the appearance of rust and coking of the oil. As a result, the bolt or retaining nut literally “sticks” to the pulley housing. At the same time, it is not always possible to “rip off” a part the first time.
Before unscrewing the crankshaft pulley bolt, it is worth understanding the fixation of the pulley itself on the crankshaft. Otherwise, you will not be able to unscrew the nut. Special devices are used in the service, but in a garage it is enough to put supports under the wheels and move the gearshift lever to the fourth speed position. Another option is to fix the flywheel by resting on its holes or the toothed part of the mount.
How to remove the crankshaft pulley?
Once you have dealt with the potential difficulties of dismantling, you can get to work. As a rule, the pulley is secured using a nut (on rear-wheel drive vehicles) or a bolt. The biggest problems arise with the first fastening option.
The crankshaft pulley is secured with a nut
Mounting nuts often have risers to provide a "ratchet" grip. In service conditions, craftsmen use “thirty-eight” or “thirty-six” socket wrenches. To speed up the twisting process, an elongated handle and a special fixing device are used, which is placed on the pulley. But how to unscrew the crankshaft pulley when there is no access to a special tool?
In such a situation, proceed as follows:
- Drive the car to a suitable place (this could be an overpass or a pit).
- Move the gearshift knob to the fourth speed position (provides fixation of the crankshaft).
- Raise the handbrake to its extreme position (to avoid accidental movement of the car).
- Take a socket wrench (matching the size of the fastening nut), install an additional “elbow” (a metal pipe will do), and then try to tear off the bolt. Many people ask the question in which direction to unscrew the crankshaft pulley bolt. Here the answer is clear - only counterclockwise.
I couldn’t get the crankshaft pulley off, what should I do?
If you succeed in breaking the fastening, unscrewing the nut completely is not difficult. But this doesn't always happen. In case of negative circumstances, use a different technique:
- Put the car in neutral.
- Remove the caps (installed on the spark plugs). This is done to avoid accidental starting of the motor.
- Throw the wrench onto the pulley nut, then press the edge of the lever into the spar (ground). The main goal in this case is to prevent the pulley from spinning.
- Turn the starter briefly to give the required impulse. Typically, one or two turns is enough to remove the nut. Then you can continue working using the key.
As noted above, on many front-wheel drive vehicles, the pulley is secured using a bolt.
In this case, the algorithm should be as follows:
1. Raise the vehicle from the right side, and then place some kind of stand under the body (for reliability). It could be a piece of log.
2. Remove the air filter, housing, and then loosen and remove the drive belt of the electric generator. Remove any components that restrict pulley access.
3. To fix the crankshaft, remove the plug in the clutch housing and install something metal, such as a mounting bracket, into the opening. With the other side, rest the tool against the teeth.
4. Place the head of the wrench on the bolt, and then use the extension to make several jerks to the left. This is necessary to at least rip the bolt from its original position. Most attempts are successful. If this does not help, use the method described a little above (with starting the starter).
To help you unscrew the nut (bolt), treat it with WD-40. In this case, it will be easier to tighten the bolt (nut). After completing the work, all that remains is to remove the pulley using a special puller or pry bar.
Watch the video on how to unscrew the crankshaft pulley bolt.
In the latter case, use support points that are as close as possible to the shaft. When performing this procedure, be careful to avoid deformation of the groove and key. Good luck on the roads and of course no breakdowns.
(1 vote, average: 1.00 out of 5) Loading…
remontavtovaz.ru
Mitos1 › Blog › It's time to start somewhere. Single-row chain for VAZ 2107 injector.
I have long wanted to replace the chain with a single-row one and finally decided to do so. It was scary to climb into the timing belt, but as they say: hunt is better than captivity.
Pros of the single-row: It rustles a little quieter compared to the double-row. Longer service life due to the roller chain. It is easier for the engine to turn the timing belt due to the reduction in the weight of the entire system and the tension principle. My injector, accordingly, the star of the auxiliary mechanisms (pig) is smaller, and the oil pressure is higher.
Cons: Rework of the entire system. Risks of breaking something or not assembling it correctly (straight hands). The chain stretches faster (compensated by the auto-tensioner).
Initially, I’ll say I looked for information in many places, but the most worthy one: www.semerkainfo.ru/odnoryadka
Now to the point: To remake the injection engine you will need:
Chain 21214. Split camshaft star 2123. Crankshaft star 21214. Medium sized auxiliary star 21214. Chain guide 21214. Chain tensioner shoe 21214. 2 lock washers. You can't install old ones! Front cover gasket. Valve cover gasket. The tensioner shoe bolt 2101 in my block has the same thread. (On the old type block, the chain stopper on the crankshaft sprocket has an M8 thread, which corresponds to a bolt from Volga 3102. The pilot chain tensioner is from 2101 or isai (I recommend it). Front engine oil seal.
Disassembly: I removed the battery terminals. I turned off the dpkv and removed it. Removed the belt from the crankshaft pulley. Removed the radiator fan. Removed the valve cover. I installed the pulley according to the mark at TDC! I put the car on the handbrake and in 4th gear! I removed the crankcase protection and anthers. Using a 38 wrench, I unscrewed the crankshaft nut. Removed the crankshaft pulley. I took off the front cover. !I unscrew the crankshaft chain limiter bolt (gas wrench). In general, it should be easy to unscrew, but for some reason at the factory they are tightened tightly, there were cases when the bolt broke (therefore, I decided to start disassembling the entire mechanism with this part)! Without removing the chain and tensioner, flare the lock washers (I used a gas wrench) and loosen the sprockets. We put the car in neutral. I installed the RV and KV pulley according to the mark at TDC! Block and remove the chain tensioner. I'm taking off all the stars. !When removing the crankshaft sprocket, be careful not to lose the key! I compare the position of the camshaft star with the split one (in the middle position) and lo and behold, their marks match one to one! You won’t have to punch :) The marks on the non-cut version from 21214 don’t match!
Unscrew the tensioner shoe bolt 2101. And remove it. Remove the chain guide.
Single-row assembly: Next, install the crankshaft sprocket. We put the car in 4th gear. We install the star of the auxiliary mechanisms. We throw the chain over 2 stars and tighten the bolt of the auxiliary star as much as possible. Let's squeeze her! We install the chain guide 21214. The chain tensioner shoe must be shortened slightly before installation. We install the tensioner shoe in the place where the chain stop is attached to the crankshaft using bolt 2101.
Pull the chain to the top.
We put on the front cover with a new gasket. We put on the crankshaft pulley. And we set it according to the mark. I install the camshaft sprocket with the chain according to the mark by tightening the chain. I tighten the camshaft sprocket and roll it. Again I put everything on the labels. I install the tensioner and unlock it. I tighten the chain. I was lucky all the marks remained in place. If it doesn’t match a little, you can correct the split one. I put the car in gear and tighten the crankshaft pulley. Afterwards, it would be a good idea to check the valves with a rack; this is always advisable to do when re-tensioning the chain.
Next, I assemble the entire construction set and start it up to check whether the valve is bent or not :) I was lucky, everything worked as it should. The car feels easier to turn the engine, especially noticeably uphill with a load.
That's all, good luck and straight hands to everyone. I'll upload photos later.
Replacing the front silent block of the crankshaft on a VAZ 2101-VAZ 2107
Note! Today there are two replacement methods: fast and slow. Although the second method requires more time, it is more accurate. The choice and decision are yours! (The slow method is described in the article, and the fast method is demonstrated in the video at the end of the article).
Removal
1) At the beginning of the operation, remove the camshaft cover from the car engine. (read more about the process in the article: “Replacing the chain tensioner shoe”, in paragraphs “1-8”)
Note! If you have experience in replacing oil seals, then you do not have to remove the cover, but replace the oil seal immediately on the installed cover.
Keep in mind that there will be little space to replace the oil seal; there is a possibility that the oil seal will be pressed into the drive cover at an angle. Then you will need to replace the oil seal again with the cover removed.
2) After removing the cover, carefully remove the silent block using a hammer and bit.
Note! Remove the oil seal only from the inside of the cover, otherwise removal will be problematic!
Installation
1) Using engine oil, lubricate the new part and install it in place on the outside of the cover. When installing the oil seal, be sure to orient its working edge towards the centering protrusions indicated by the letter “a”.
Note! In the photo below you can see that the working edge differs only in the presence of a spring!
2) Next, using a mandrel of a suitable diameter and a hammer, press in the oil seal until it stops.
3) Now pick up the previously removed camshaft cover gasket and assess its condition. If there is severe compression or deformation, replace the old gasket with a new one.
Note! To ensure that leaks through the gasket are eliminated in the future, it is recommended to apply a thin layer of silicone sealant on both sides.
For ease of installation of the lid, we recommend using glue to glue the gasket to the lid itself - it will not fly off.
4) Next, install the cover together with the gasket installed on it. Install the bolts and nuts securing the cover.
5) Then, using a special mandrel, center the drive cover so that it is level with the crankshaft.
Note! If there is no mandrel, use the previously removed crankshaft pulley and center the cover: install the pulley and tighten the fastening nut.
6) Lightly tighten the bolts and nuts securing the cover.
7) Finally, wrap them crosswise.
 Finally, tighten the oil pan to engine bolts.
Note! Install the remaining parts in the reverse order of removal.
Additional video
The video will help you understand in detail the process of replacing the oil seal; detailed instructions are provided here. Enjoy and useful viewing!
How to set marks on a VAZ 2107 Injector
As for the VAZ 2107 carburetor engine, therefore, on the injection engine, the gas distribution mechanism in combination with the drive remained the same, in other words, the chain. If the chain is excessively worn, there are a number of negative consequences:
- Problem starting the engine.
- Significant increase in fuel consumption.
- The appearance of soot on valve seats.
- Abnormal engine operation in all modes.
- Faulty injection control sensor.
Timely preventive work is necessary to avoid such negative consequences. We will learn more about how to set time stamps on the VAZ 2107 Lada family with an injection power system.
Valve timing is when the piston in an engine moves up and down over a period of time. If the valves fail, the pistons move incorrectly for a certain period of time, and as a result, the engine on the VAZ-2107 runs unevenly.
If the driver notices that the car's power is decreasing, fuel consumption is increasing, and interruptions occur when the engine is running, then it is necessary to resort to setting the valve timing. We will learn from this material how to stick markings on the carburetor and injector of a VAZ 2107, since the design of the synchronization mechanism is similar.
The procedure includes the following manipulations:
- The VAZ 2107 must be installed on a hard surface, the wheels are blocked, and the handbrake is fully compressed. The gear shift lever must be set to neutral.
- The cover is removed from the cylinder head, having previously unscrewed our client, the fastening nuts remain at “10”. It is better to replace the gasket with the latest one, even if the old one shows no signs of damage.
- Use the “24” key to turn the crankshaft on the VAZ 2107. This allows you to align the marks on the moving and stationary parts of the mechanism. We recommend using low light or a flashlight to perform these steps. The crankshaft rotates without adjusting the torque quality until the mark on the pump and generator drive belt pulley matches the long-term risk inherent in the unit.
- Combining these dangers, the star rating should match the tide on the camshaft over time. If the mark is finally at the bottom, turn the crankshaft at full speed.
- If this doesn't work for label matching, proceed to the following steps:
- The crankshaft rotates until the marks connect with the sprocket and bed bosses.
- Using the “13” key, the tensioner must be loosened. 2.4 The tensioner nuts are unscrewed, then this device is removed.
- The screw is unscrewed, which secures the sprocket to the camshaft. To do this you will need to use the key at "17".
- The sprocket is removed, then it should be turned without performing high-quality torque adjustment until the marks on the VAZ-2107 timing belt pulley coincide with the long-term risk on the block. It is impossible to unscrew the sprocket mounting bolt because the camshaft sprocket rotates after removing the tensioner.
- The chain is put on the star if you decide to twist it and put it in place. Finally, the tensioner is installed, which must be tightened with 5 nuts to "10". You can install the tensioner first, but later you will need to use a breaker or mount to install the sprocket in this area. Finally, tighten the nut to “13”.
WEAK to set the time to zero? Camshaft, power chain and chain markings
This relative arrangement of the parts allows the piston of the 4th cylinder to be positioned at top dead center TDC.
If the VAZ-2107 is equipped with gas distribution markings, you must perform the following steps:
- The VAZ-2107 timing chain is tensioned.
- Adjusting the valves, or more precisely, the thermal gap between the camshaft cam and the rocker.
- Setting up a set of ignition accounting programs.
The process of adjusting valves on a VAZ-2107 is as follows: valves 6 and 8 are first adjusted, a report should be stored by the radiator. Once they are adjusted, you need to start adjusting 4 and 7 valves, then 1 and 3 valves, and then 2 and 5 valves at the end.
How to adjust the valves on a VAZ-2107 car, read more in the relevant material on this site. Finally, it should be noted that the VAZ-2107 is one of the most reliable cars launched in the 1990s.
Crankshaft sensor for VAZ 2107 - design and principle of operation
The crankshaft position sensor or DPKV on the VAZ 2107 ensures engine operation (not stable, but overall). With its help, the ECU knows what position the crankshaft is in. From this, the control unit knows the location of the pistons in the cylinders, which directly affects fuel injection through the injectors, and the occurrence of a spark to ignite the fuel assembly.
The device in question has a simple design. The sensors installed on the seven work on the principle of inductance. The part consists of a metal cylindrical base with a wire wound on the surface (coil). The top of the coil is covered with a permanent magnet. The operation of the device is associated with a ring gear, which is attached to the crankshaft. It is with the help of this ring gear that the sensor records signals and transmits them to the computer. The principle of operation of the device is as follows: when the crown tooth is located at a level with the steel core of the DPKV, an electromotive force is induced in the winding. A voltage appears at the ends of the winding, which is detected by the ECU.
The gear wheel consists of 58 teeth. Two teeth on the wheel have been removed to determine the starting position of the crankshaft. If the DPKV fails, which is extremely rare, then starting the engine and its operation is simply impossible. The marking of the sensor, which is installed on the VAZ 2107, is as follows - 2112-3847010-03/04.
Signs of sensor failure
The main sign of a DPKV failure is the impossibility of starting the engine. Such a breakdown occurs due to a complete malfunction of the device. If the surface of the DPKV is dirty or the contacts are oxidized, the following malfunctions can be detected:
- Deterioration in car dynamics - poor acceleration, decreased power, jerks when changing gears.
- The revolutions begin to fluctuate, not only at idle, but also when driving.
- Fuel consumption increases. If the ECU receives a distorted signal, this will negatively affect the operation of the injectors.
- The appearance of engine detonation.
If the above symptoms are detected, then DPKV should be checked. To do this, you need to know where the crankshaft sensor is located. On the VAZ 2107, the DPKV is located on the front engine cover, where it is fixed to a bracket. On other car models, this element may be located on the other side of the crankshaft near the flywheel. If you suspect a breakdown of the DPKV, it must be checked.
Methods for checking DPKV
You can check the suitability of the crankshaft sensor on the seven in three different ways. To begin with, it should immediately be noted that the malfunction of the device can be determined visually. To do this, you should inspect the part, and if there is contamination, as well as microcracks on the magnet body, you can judge that it is broken. Contaminants are easily removed, but if there are microcracks, the part must be replaced.
The crankshaft sensor on the VAZ 2107 injector is checked in three ways:
- Checking resistance. Use a multimeter set to resistance measurement mode. We touch the probes to the terminals of the device. If the device shows a value from 550 to 750 Ohms, then the element is suitable for use. If the value is higher or lower than normal, then the part needs to be replaced.
- Inductance check. Connect an LED or multimeter probes to the device terminals. At the same time, set the device to constant voltage measurement mode. Bring a metal object to the end of the part and quickly remove it. In this case, the voltage should increase (the LED will light up). This indicates that the DPKV is working properly.
- Checking with an oscilloscope. The most accurate and reliable way to check with an oscilloscope. To do this, the DPKV is connected to the device, and then you need to bring the metal part to it. The diagram determines the serviceability of the DPKV.
The inductive crankshaft position sensor, which is used on the seven, creates sinusoidal pulses. They arrive at the ECU, where they are rectified into rectangular pulses. Based on these pulses, the control unit makes a decision about sending a pulse to the injectors and spark plugs at the right time. If during the inspection it turns out that the DPKV is faulty, it should be replaced.
How to replace the crankshaft sensor on the seven
Knowing where the DPKV is located on the VAZ 2107, it will not be difficult to dismantle the device. This procedure is not difficult and does not take much time. Detailed instructions on how to replace the crankshaft sensor on a VAZ 2107 look like this:
- The work is carried out under the hood of the car, but it can also be done from below.
- Disconnect the clamp with wires from the DPKV.
- Using a Phillips screwdriver, unscrew the fastening element that secures the sensor.
- Remove the device and install a new one in its place. Assembly is performed in the reverse order of dismantling.
After replacing the device, you can check the performance of the engine. Despite the fact that the part rarely fails, it is recommended to always have a spare sensor in the car. If an element fails, it can always be quickly replaced to continue moving.
As a result, it should be noted that DPKV is the most important sensor. It has a simple design and rarely fails. The estimated cost of the device for the seven is about 1000 rubles. It is recommended to check the part not only when the first signs of a malfunction appear, but also periodically to clean the working surface from contamination.
Crankshaft marks VAZ 2107 injector photo
Both on the carburetor engine of the VAZ 2107 car and on the injection engine, the gas distribution mechanism along with the drive remained the same, that is, chain. With excessive wear and stretching of the chain, a number of the following negative consequences are observed:
- Problem starting the engine.
- Significant increase in fuel mixture consumption.
- The appearance of carbon deposits on valve seats.
- Abnormal motor operation in all modes.
- Malfunction of the injection control sensor.
To avoid such negative consequences, it is necessary to carry out preventive work in a timely manner. We will learn more about how to set timing marks on a VAZ 2107 Lada family car with an injector power system.
Diagnostics and replacement of the crankshaft position sensor VAZ 2107
What is a crankshaft sensor? In order to synchronize the ignition operation and fuel supply to the cylinder blocks on an injection engine, it is necessary to determine the crankshaft speed. This is precisely why you need a crankshaft position sensor, which is installed opposite a special synchronization disk mounted on the crankshaft.
Signs of a malfunction of the VAZ 2107 crankshaft position sensor
- The first thing that may indicate the imminent death of the crankshaft sensor is an arbitrary decrease or increase in engine idle speed.
- Severe reduction in engine power
- Unable to start the engine
Removing the crankshaft position sensor
- Disconnect the contact chip from the sensor by first releasing the latch
- Using a Phillips screwdriver, unscrew the sensor mounting screw.
- After removing the crankshaft position sensor, we check its operation using a multimeterDiagnostics and replacement of the crankshaft position sensor VAZ 2107
Checking the crankshaft position sensor VAZ 2107
- Connect a multimeter to the sensor contacts (in voltmeter mode)
- Using a screwdriver, we quickly move it close to the end of the sensor several times. If a voltage surge occurs when the screwdriver blade is near the sensitive element, then the sensor is working. If the jump does not occur, or it is very weak, in this case the VAZ 2107 crankshaft sensor must be replaced.
Timing phases and when to set them according to marks
Valve timing refers to those moments at which the piston in the engine moves up and down over a certain interval. When irregularities in the valve timing occur, the pistons move incorrectly along the interval, resulting in uneven engine operation on the VAZ-2107.
If the driver notices that the car’s power decreases, fuel consumption increases, and engine interruptions occur, then it is necessary to resort to setting the valve timing according to marks. How to set marks on a VAZ 2107 carburetor and injector, we will learn from this material, since the design of the timing mechanism is identical.
How to set timing timing marks
The procedure involves performing the following manipulations:
- The VAZ 2107 needs to be placed on a hard surface, with chocks placed under the wheels and the hand brake pressed all the way. The gear shift lever must be set to neutral mode.
- The cover is removed from the cylinder head by first unscrewing all the fixing nuts to “10”. It is better to replace the gasket with a new one, even if the old one shows no signs of damage.
- Using a key set to “24”, you need to turn the crankshaft on a VAZ 2107 car. This is done in order to be able to align the marks on the moving and stationary parts of the mechanism. To carry out these actions, it is recommended to use good lighting or use a flashlight. The crankshaft rotates until the mark on the pump and generator drive belt pulley coincides with the long mark marked on the block.
- Combining these risks, the mark on the sprocket should eventually coincide with the ebb on the camshaft bed. If the mark ends up at the bottom, then you should rotate the crankshaft 360 degrees.
- If you can’t make sure the labels match, then proceed to the next steps, which are described below.
- The crankshaft is rotated until the marks on the star and the bed ebb align.
- Using the key at “13”, you need to loosen the tensioner. The 2 nuts securing the tensioner are unscrewed, after which this device is removed.
- The bolt that secures the sprocket to the camshaft is unscrewed. To do this you will need to use the key at “17”.
- The sprocket is removed, after which it must be rotated until the marks on the VAZ-2107 timing belt pulley coincide with the long mark on the block. The star fastening bolt does not need to be unscrewed, since after removing the tensioner the camshaft star rotates.
- We put a chain on the sprocket, if it was decided to unscrew it, and install it in place. Finally, the tensioner is installed, for which you should tighten it with 2 nuts to “10”. You can install the tensioner first, but later you will need to use a crowbar or pry bar to get the sprocket into place. Finally, screw the tensioner nut to “13”.
This relative arrangement of the parts allows the piston of the 4th cylinder to be positioned at top dead center TDC.
Features of servicing the timing mechanism
After the timing marks are installed on the VAZ-2107, you need to perform the following actions:
- The timing chain of the VAZ-2107 is being tensioned.
- Adjusting the valves, or more precisely, the thermal gap between the camshaft cams and the rocker arm.
- Setting up the ignition system.
The process of adjusting the valves on the VAZ-2107 is carried out according to the following scheme: initially 6 and 8 valves are adjusted, the report must be carried out from the radiator. After they are adjusted, you need to start adjusting valves 4 and 7, then valves 1 and 3, and finally valves 2 and 5.
How to adjust the valves on a VAZ-2107 car can be found out in more detail in the relevant material on this site. In conclusion, it is worth noting that VAZ-2107 cars are one of the most reliable vehicles, the production of which began back in the 90s.
The gas distribution mechanism and its drive of the seven engine produced by the Volzhsky Automobile Plant remained the same - chain. Extraction and excessive wear of the timing chain on the VAZ 2107 power unit by the injector-type power supply system leads to:
- difficulty starting the engine;
- unstable operation in all modes, especially at idle;
- a sharp increase in fuel consumption;
- formation of carbon deposits on valve seats;
- Damage to the injection control system sensors and catalytic converter may occur.
In order to avoid the negative consequences of weakening or stretching the chain drive of the VAZ 2107 car engine, it is necessary to carry out routine maintenance in a timely manner. The list of maintenance operations for the power unit with the injector power system is determined by the service book. The condition of the timing chain and the gaps between the camshaft cams and valve levers is monitored every 30 thousand km.
On warranty VAZ 2107 with an injector-type power system, such work is best carried out at an authorized auto repair center. If malfunctions occur due to the fault of the car plant, they will be eliminated at the expense of the manufacturer. At the end of this period, maintenance of the timing belt and other vehicle systems can be performed independently.
Preparation for service operations
Control of the tension of the chain drive of the gas distribution mechanism begins on an engine with a power system such as an injector or carburetor, similar to each other. The operation is performed in the sequence established by the manufacturer:
- We place the car on a flat area with a hard surface and fix its spontaneous movement by installing chocks under the wheels and applying the parking brake. Set the gear shift lever to the neutral position.
- Remove the cover from the cylinder head by unscrewing all the nuts along its contour using a tubular wrench. It is recommended to replace the old gasket; the use of sealants is not allowed.
- Using a key set to “38”, we turn the crankshaft of the VAZ 2107 engine in order to align the marks on the moving parts and the stationary ones. Care must be taken when performing this action, and the locations of the control points should be illuminated with a flashlight or carrying device.
- We combine two marks: the first is on the generator drive belt pulley with a special protrusion on the cover body, the second is on the upper sprocket of the gas distribution mechanism of the VAZ 2107 power unit with an injector power system.
With this relative arrangement of parts, the piston of the fourth cylinder is at the dead center at the top. Now you can begin performing service work on engine systems, in particular, timing belt and some others.
How to remove a crankshaft pulley and not stop loving your car
Every second car enthusiast who tries to repair his favorite four-wheeled friend with his own hands has encountered the problem of how to remove the crankshaft pulley. After reading the instructions in the maintenance and repair manual, at first glance, the procedure does not seem complicated, however, when you first try to unscrew the ill-fated bolt, it turns out that this is not so easy. It is completely unclear how to fix the crankshaft so that it does not rotate. Another problem is where is the best way to get to the treasured bolt. Removing the crankshaft pulley causes a lot of trouble because it is too tight. There is a high probability of damaging many parts of the engine compartment or the paintwork of the body.
The problem is that the crankshaft pulley bolt (or nut, depending on the model) is tightened with great force during installation. This is done so that it does not unwind spontaneously, since if unscrewed, serious damage and expensive repairs cannot be avoided. The degree of tightening gradually increases as the engine operates and is aggravated by sticking, coking, and corrosion.
In reality, the entire dismantling process can take 10-15 minutes, but there are some techniques you need to know and use. Different motor models use either a bolt or a nut to secure the pulley. Each option should be considered.
How to unscrew the crankshaft pulley nut?
Removing the crankshaft pulley
The nut at the end of the crankshaft holding the pulley is a sign of the engine of a classic rear-wheel drive car like VAZ from model 2101 to 2107, Niva and the like. Such a nut is also called a “ratchet”, since it can have ledges for a “crooked starter”.
It is better to do the work above the inspection hole. The crankshaft should be secured by placing the gearbox in 4th gear and applying the parking brake. You should stock up on the following tools in advance:
- socket or socket wrench 36 (or 38);
- lever extension in the form of a piece of pipe.
While under the car, try to unscrew the nut with a wrench with a sufficiently long lever. If the attempt is unsuccessful, put the gearbox in neutral and proceed as follows:
- the candlesticks are removed;
- while in the pit, install the key and extension so that the end rests on the floor or spar as the shaft rotates;
- turning the key in the ignition switch gives a short-term impulse.
As a rule, on the first or second attempt the nut comes off and is then unscrewed with a regular wrench. Don't forget to loosen and remove the alternator belt.
How to unscrew the crankshaft pulley bolt?
Unscrewing the crankshaft pulley
The bolt holding the pulley is prevalent in engines in front-wheel drive cars, when the block is located perpendicular to the axis of the car. In this case, you will have to tinker more, since it is more difficult to get to the bolt. To work you should prepare:
- jack;
- “tragus” (stump);
- a socket to the size of the bolt with an extension and lever;
- set of automotive tools.
In search of an answer to the question of how to remove the crankshaft pulley, many car enthusiasts begin to look for an opportunity to do this without prior preparation. By definition, such attempts cannot be successful.
In order to correctly remove the pulley, you must perform the following manipulations:
- the right front part of the car is lifted, the wheel is removed;
- the car is installed on a “tragus”;
- From the top side of the hood, all parts that impede access are removed: the air filter and the engine mudguard;
- the alternator belt is removed;
- to fix the crankshaft, the plug on the clutch block is opened and a pry bar is inserted into the resulting window to jam the flywheel teeth;
- under the wheel arch, a head with an extension and a lever is put on the pulley bolt;
- the bolt is unscrewed counterclockwise.
In the vast majority of cases, the bolt can be unscrewed. If it does not give in, then you can add the length of the lever. If this does not help, then you should use the help of the starter as described for the pulley nut in the “classic”.
We remove the pulley using folk automotive experience
Any threaded connection, even if tightly tightened. can be untwisted with less effort if you use some folk-automotive tricks. The problem of how to unscrew the crankshaft pulley ceases to be such if you moisten the bolt head or nut in advance with special WD oil, vinegar or brake fluid. Sometimes lightly tapping the edges of the nut helps.
Unscrewing a bolt or nut does not always solve the problem, since the pulley is held quite firmly on the shaft. You can remove the pulley using a regular pry bar, carefully prying it off from different sides. It is important that the force application point is as close to the shaft as possible. For hopeless cases, it is necessary to use a crankshaft pulley puller. This is a special device, which is a pin with a nut on which 2-3 grips are attached. The ends of the grippers are secured to the edges of the pulley, and the end of the pin rests against the center of the shaft. By twisting it clockwise, you can gradually pull the pulley off the shaft.
You should not be sure that in all cars, without exception, the crankshaft rotates clockwise.
For example, in some Honda cars the crankshaft rotates counterclockwise. It follows from this that the thread on the pulley nut (bolt) will be left-handed.
cartore.ru