see also
Comments 15
Soooo, that’s what I’m interested in)))) I need to do it
it’s tedious, inconvenient, but not difficult, preferably one more person, otherwise you need to hold the nuts in the tunnel and turn them from inside the cabin. I don’t remember the details anymore. In the cabin, unscrew the bottom bolts, it seems there were also bolts in the air intake
Yes, there are extra hands, the main thing is to start)
Well then everything is easy, I unscrewed it in one - ass
As I understand it, you need to remove the engine casing and access to the radiator will open. It is without fasteners by itself, remove the pipes and throw it away.
remove the pipes, and then unscrew the ears that secure the stove to the hood
As I understand it, you need to remove the engine casing and access to the radiator will open. It is without fasteners by itself, remove the pipes and throw it away.
It’s clear what it’s holding and where, then you’ll start unscrewing it
Somewhere I have described in pictures how to remove, what to turn and how to improve the operation of the heater
I recently saw a detailed diagram from someone, but I couldn’t find it... neither in my feed nor in my bookmarks) I’ll go take a look now) thanks
Somewhere I have described in pictures how to remove, what to turn and how to improve the operation of the heater
That’s exactly what I saw with you) Thank you) It’s good that the bolts didn’t come loose, otherwise I would have pulled it out with my face))))
Somewhere I have described in pictures how to remove, what to turn and how to improve the operation of the heater
I searched and couldn't find it. It’s a big on-board vehicle, you need to do quick navigation on the main one, it’s hard to find something right away.
To improve the operation of the cabin heater, you need to do the following: 1. Install an additional pump 2. Remove the heater assembly 2.1 check how the blades are positioned relative to the diffuser (Usually, at the factory, they are located outside the diffuser closer to the radiator) 2.2 install the fan blades in one way or another so that the diffuser would be strictly in the middle of the blades. Thus, it reduces parasitic air flows in the heater and increases the air flow through the heater + reduces noise from the heater.
Source: www.drive2.ru
Design:
The heater includes the following elements:
- Radiator.
- Fan.
- Special device for air distribution.
There are two main operating modes:
- When fresh air comes in.
- When recirculating flows.
The second mode implies increased temperature in the cabin. To do this, you need to close the air intake and then open the damper. In the first mode, the actions are performed in the reverse order.
A special unit controls the entire system. A tap is used for adjustment. A new design based on increased flow circulation and the use of fluid in the radiator allows the interior to warm up faster.
It is important to remember about glass blowing . Otherwise, this will lead to icing or fogging. The driver and passengers will feel discomfort.
If moisture gets in, it is removed through the air intake. A docking device is used here.
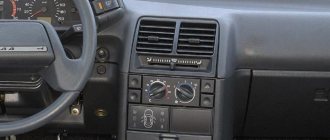
Removing and installing the heater of a UAZ Patriot car
The interior heater is removed after dismantling the instrument panel in the following order:
You will need: 10mm wrench, Phillips screwdriver
We drain the liquid from the engine cooling system (see “Replacing the coolant in the UAZ Patriot”).
Disconnect the wire from the negative terminal of the battery.
We unscrew the two screws securing the right air duct 20 (Fig. 1) to the air intake and the screws 21 fastening the air ducts.
If necessary, remove the additional resistor installed in the right air duct 20.
Disconnect the right air duct from the left air duct 22.
We unscrew the nut securing bracket 16 of the left air duct to the front panel, remove the washer and take out the plastic sleeve, unscrew the two self-tapping screws securing the left air duct to the heater body and separate the left air duct from the heater.
Loosen the hose clamps on heater valve 14 and radiator pipes 2 (Fig. 2) and remove the hoses.
Unscrew two screws 5 with washers, remove cover 4 and seal 3.
Remove radiator 2 from the heater niche.
We unscrew two self-tapping screws 21 (Fig. 3) securing the air duct for blowing the feet of passengers located on the three-seater seat.
We disconnect the front 20 and middle 19 parts of the air duct from the rear part 18, remove the air duct.
If necessary, unscrew the self-tapping screws and separate the front and middle parts.
We unscrew the three nuts securing the heater, two nuts on the brackets 11 (see Fig. 1) and one in the pipe for the air duct for heating the feet of the rear passengers), remove the washers and the plate.
We remove the heater from the bolts of the front panel, take out the plastic bushings.
Unscrew the screw securing the lever 10 of the upper and the screw securing the lever 7 of the lower heater damper.
Remove the heater control levers from the damper axles.
If necessary, remove staples 25.
Separate the left and right heater casings.
Remove the upper and lower dampers from the heater casing.
We loosen the clamps 4 securing nozzles 5 and 24 for heating the driver and passenger feet, remove the nozzles from the guide pipes.
If necessary, unscrew two self-tapping screws 3 and remove pipe 2 for heating the driver’s feet.
We install the heater in the reverse order.
We remove the body heater control mechanisms in the following order:
Remove the handles from the heater control panel 23.
Unscrew the three screws located under the handles and remove the remote control cover.
Unscrew the screws securing the remote control and remove it
We remove brackets 12 for fastening rods 6, 8,9 on the remote control and release their ends from the fastening of the corresponding levers.
Remove the brackets 12 securing the heater damper rods and disconnect the heater damper rods 6 and 9 from the levers.
Remove bracket 12 for fastening the rod from heater valve 14 and disconnect the heater valve control rod.
The recirculation damper control is removed after dismantling the air intake.
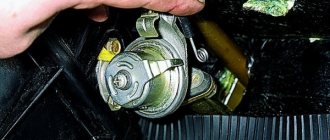
Unscrew screw 11 (Fig. 4), nuts 13 and remove the gearmotor 14 of the recirculation damper drive 1 from the studs.
Install the heater control panel and assemble the recirculation damper control in the reverse order.
Remove the fan in the following order:
Disconnect the battery.
Disconnect the wires from the fan motor.
Remove the manifold cooling hose 3 from the electric motor pipe 5.
Unscrew nuts 6, remove washers 7 and 8.
We remove the electric fan and spacer bushings 9. To avoid imbalance, it is not allowed to remove the fan wheel 4 from the electric motor shaft 5.
Dismantle the recirculation damper in the following order:
Unscrew the nuts securing the air intake to the front panel and remove the air intake.
Remove the neck 16 of the air intake with the water deflector shield and seal.
Remove the six self-tapping screws and remove the top housing.
Separate the upper part of the air intake housing, first disconnecting the mounting brackets.
Assemble the heater air intake and install it in the reverse order.
Pay attention to the correct installation of the fan casing and air intake seals.
Removal and disassembly of air ducts is carried out in the following order:
Remove the instrument panel complete with air ducts. Nuts 7 (see Fig. 3) simultaneously serve to secure the instrument panel and the windshield blower air duct.
Unscrew the bolts 4 and remove the windshield blower air duct.
Remove nozzles 14 by prying them off with a flat-head screwdriver.
Unscrew two nuts 11 and remove one self-tapping screw 8, which secure air ducts 10 (screw on top) and 22 (screw on bottom) to the instrument panel.
While rocking slightly, remove each of the air ducts one by one from the seals and from the body of the central air duct 23.
Unscrew the four nuts 11 securing the central air duct 23 and remove it.
Install the indicated air ducts on the instrument panel in the reverse order, paying special attention to the correct position of the seals.
Let's look at everything in pictures
Remove the instrument panel (see “Dashboard of UAZ Patriot”).
We unscrew the bolts securing the windshield blower air duct (Fig. 5).
The windshield defogger duct is attached to the front panel with two bolts.
Remove the air duct (Fig. 7).
Disconnect the wire blocks from the additional resistance terminals of the heater motor.
We unscrew the three screws securing the air duct to the heater (Fig. 9).
We unscrew the two screws securing the heater air intake (Fig. 10).
We unscrew one nut securing it to the front panel (Fig. 11).
Remove the air duct (Fig. 12).
Loosen the clamps (Fig. 13).
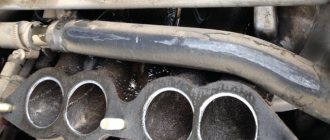
Disconnect the hoses from the heater radiator pipes (Fig. 14).
Remove the cable fastening bracket (Fig. 15).
We disengage the cable from the crane lever (Fig. 16).
We unscrew one nut securing the heater to the front panel on the left side (Fig. 17).
We unscrew one nut securing the heater to the front panel on the right side (Fig. 18).
We unscrew the screw securing the lower air duct to the heater pipe (Fig. 19).
We remove the heater assembly with the control unit.
If the heater radiator does not need to be removed, then the hoses do not need to be disconnected in order to avoid depressurization and air entering the cooling system, just remove the heater by moving the radiator to the side.
We install the heater and all removed parts in the reverse order of removal.
Shall we update?
How to replace a used stove with your own hands? What will you need for this? Everything can be done using the following algorithm.
- We drain all the antifreeze and disconnect all wiring.
- Disconnect the console from the shield. We remove the heating unit, the air intake hatch, remove the seal, and then clean the recesses.
- We try on the air filter, drill holes no more than 3.2 mm in diameter.
- Apply a large layer of sealant to the installation site. We install the housing and fix it. We return the filters from the cabin to their place.
- We install a new heater in the cabin, securing it with studs and M-6 nuts. We fix the node, then install the block console. We fix the entire structure with self-tapping screws.
- Next, we connect the control rod and secure it. We connect the pipes containing the antifreeze to the unit and secure them with special clamps. Then we install blowing channels for the glass.
- Finally, we connect the electrics, fill the system and check how it works. If problems occur, the entire system must be rechecked.
Reworking the front heater of a UAZ
I already told you how I prepared my UAZ for moving from the south to Siberia and promised that I would continue to talk about modifying it with my own hands, so here it is.
Operating the machine in winter revealed a problem. If the temperature outside is below 30 Celsius, then the front heater stops heating and blowing the windows - there are 2 “embrasures” left on the windshield, the side ones are completely covered with ice from the inside, despite the fact that the car is well insulated. An Internet search showed that the problem is not new, there are many solutions (and results). But because I was “made” in the USSR, I have a technical education, a technical mindset and, it seems, not crooked hands, I went my own way. So the problem with the stove is poor heating (quick cooling) and low air flow rate in the stove; a radical decision had to be made.
I “put” this thought in my head and waited until I got my hands on something that would be useful to me. And so a neighbor (who keeps a stall of contract spare parts next to the service station where I work) brought it. It was a stove (more precisely, as it turned out, half of it - a motor housing with a stove motor and with dampers) from Toyota (I don’t know which one) with the inscription ST-215 on it and the work began. The UAZ stove was removed and disassembled, everything was laid out on the floor.
The UAZ stove was disassembled in half (according to the factory connection), the radiator was removed and given to a specially trained person for soldering and inspection))). The new stove fit like the original one instead of the rear (removed half) of the original one, but there was no room left for the radiator. It was decided to move it forward - grinding, peeling, bending, etc. it worked out))). We attach the radiator to used timing belts, naturally everything is through rubber (we put it between metal everywhere).
We assemble everything in a single body, not forgetting to glue everything possible with heat protection and I filled all the cracks with ordinary silicone sealant
We check everything again and put it in place, and again there is an ambush - the front panel is a little in the way. The grinder will solve this))), we also slightly bend the axle and low gear levers. The “summer” ventilation windows from the old stove remained functional.
And again you need to think. I couldn’t find the air ducts - I tried to pick them up. It turned out that the pipes for plumbing were worth 50 – that’s it))). The electrical connection diagram was taken from the Internet - now I have 3 fan rotation speeds thanks to the VAZ 2110 heater resistor.
We fill all the cracks again with sealant, wait about a day, and connect. We install additional on the outlet hose from the head of the cooling unit. electric pump (take only Bosch - ours is not available) and the ceremonial launch. )))
Our hopes were justified - winter had not yet arrived, but “sea trials” showed: at speed 1, the stove blows many times stronger than the old one; at speed 3 - he lifts the cap from his head by the visor))) the radiator is hot - his hand cannot stand it. I left the external aesthetics of the result for later - I’ll just put a narrow shelf on top and block the view of the stove motor from the inside. I will also make new dampers through mechanical traction - I lifted the lever and opened it, lowered it and closed it, nothing interesting. Now about the costs:
The electric pump was in stock, in the store it costs from 2,500 rubles
resistor, wires, 3-position switch – 800 RUR
stove radiator repair, soldering and testing – 500 rub.
sealant, screws, bolts, plastic clamps, etc. – 300r
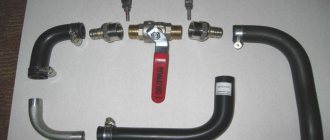
air duct pipe, 2 tees, 4 angles, transition 100 to 50 - 400r
Replacing the heater radiator on a UAZ Patriot with and without air conditioning
In warm weather, any car, including the UAZ Patriot, does not need a heater, except in cases where the engine is “about” to overheat, and it needs to be cooled somehow. But everything changes with the onset of cold weather and during a transition period, such as autumn, for example. In the fall, due to constant rain, the car windows begin to fog up, and in the winter you can’t go far without a properly working stove.
The heater in the UAZ Patriot functions due to the constant circulation of engine coolant. This principle undoubtedly increases the overall efficiency, since energy losses in the form of heat from the engine are used to heat the interior, although some part is still absorbed by the atmosphere, without bringing any benefit. However, for example, an electric heater in a car not only does not use heat from the engine, but also requires additional power.
The purpose of the UAZ Patriot stove
In the UAZ Patriot, as in any other modern car, the heater serves to heat the interior by supplying warm air. It also helps prevent windows from fogging up, which is especially important in cold weather. However, it happens that the stove does not heat well.
Note that UAZ Patriot modifications produced before 2012 were equipped exclusively with front heaters. Then the manufacturer made adjustments and Ulyanovsk SUVs began to be equipped with an auxiliary stove, which increased operating comfort in harsh climatic conditions. The second heater allows you to effectively heat the aft part of the cabin in the passenger area. The rate of heating of the internal space has now become much higher, and passengers in the stern receive equal comfort as those in the front row.
Some modifications of the UAZ Patriot, in addition to the heating system, are equipped with an air conditioning system. It is represented by a conventional air conditioner, which allows you to provide comfort in hot weather, creating a favorable atmosphere in the cabin. This luxury is given to the UAZ Patriot configuration options, called “Comfort” and “Lux”.
Air conditioning first appeared in a Ulyanovsk SUV in 2008. The main negative factor of the presence of an air conditioner in the configuration is increased fuel consumption during operation of the unit.
In the cold season, not only heating of the interior itself is required - as you know, the problem of fogging of car windows becomes most acute with the onset of cold weather. The UAZ Patriot heater is a device that allows you to combine both functions: heat and deliver warm air to the area of the windshield and side mirrors, as well as heat the driver and passengers of the SUV.
The need for such a significant modification of the heating system was due to insufficient heating of the rear of the car, which limited the operation of the SUV in severe frost conditions. The installation of an additional heater made it possible to significantly improve the heating of the rear of the SUV, since previously passengers complained that warm air practically did not reach the rear row of seats.
Design
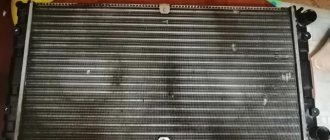
The UAZ Patriot uses a heater in the form of a radiator, but not the same as the main cooling radiator in front of the engine, but smaller. In the UAZ Patriot, the heater radiator is installed in front under the instrument panel (dashboard). Inside it there are numerous aluminum plates, near which hot antifreeze or antifreeze circulates. There is a fan above the radiator that blows air around it. Also, the design includes a special damper that regulates the ratio of hot and cold air supplied to the cabin.
There may be two heater radiators in the UAZ Patriot in some trim levels with air conditioning. Although, in most cases, the design provides only one radiator. The entire set of parts can last a long time, the Patriot can travel more than 100 thousand kilometers, and the heater will quietly perform its function. However, this is true under one condition - timely replacement of the coolant is necessary. Although a breakdown may not necessarily occur because of this, a defective product is no exception.
Symptoms of a problem
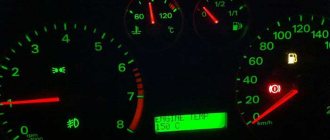
The heater radiator will have to be replaced if a characteristic smell of antifreeze is noticed inside the interior of the UAZ Patriot. It may appear due to coolant leakage from cracks in the radiator. Cracks can occur from impact, careless installation, or over time from the formation of oxides. The leak should be repaired as soon as possible, otherwise a significant part of the coolant may end up on the floor in the cabin.
In addition, there is a risk of not keeping track of the coolant level in the expansion tank, which may result in engine failure. However, there is no need to replace the heater radiator on the Patriot if the heater valve, which regulates the flow of liquid through the heat exchanger (radiator), breaks down. As a result of such a breakdown, coolant may leak in the same way and a characteristic smell will appear in the cabin.
A characteristic sign, in addition to liquid leaks, may be slightly warm or even cold air from the stove. The heat exchanger can easily become clogged with all kinds of deposits and dirt that get inside the cooling system. And counterfeit coolant may be subject to separation into fractions, foaming, and the formation of sediment on the walls of pipes and other parts. You can try to flush such a radiator, but if this does not help, there is only one way out - replacement.
Replacement
Even for a UAZ Patriot with air conditioning, replacing the heater radiator is not too labor-intensive and does not require any special knowledge from the owner. However, before carrying out work, you need to be quite patient, because the process can take a lot of time, especially if the replacement is being done for the first time. So, prepare some container for draining the coolant, turn off the power to the car by removing the negative terminal.
You may also need tools such as: screwdriver, wrench, hammer, TORX wrench. Not necessarily - a little “modelin” or any other cushioning material (anti-creaking). In order to be able to get to the heater, you need to remove the center console along with the glove compartment. It is not necessary to remove the front passenger seat, although this will make the process much easier.
If your UAZ Patriot has a new panel, replacing the heater radiator on it will take less time.
Next, the sequence of actions is as follows:
- As mentioned above, it is advisable to de-energize the car by removing the “—” terminal.
- The coolant is drained into a previously prepared container.
- The front panel (dashboard) is being dismantled. To do this, first unscrew 3 screws on each side of the side trims of the center console. The glove compartment is removed by unscrewing 10 screws, after first disconnecting all the fasteners from it. Then, all the linings are removed, including the lining under the steering column and the side panel linings. The steering cardan bolt is unscrewed, then the bolts securing the panel amplifier to the heater (8 pieces), and then 10 bolts securing the amplifier to the body. All interfering connectors are disconnected from the panel.
- If your UAZ Patriot has a second heater, you need to loosen the clamps and remove the hoses going to it, first replacing the container so as not to spill antifreeze on the carpet.
- At this step, you need to disconnect the power wires from the electric motor of the stove, and then disassemble the air ducts - from the fan to the heater unit.
- Unscrew the heater radiator mount and bend it slightly to the side. This requires TORX T.
- Use a Phillips screwdriver to unscrew the clamp of the aluminum radiator tubes, after which you can move them to the side for convenience.
- Remove the radiator and replace it with a new one; reassemble in the reverse order.
If the UAZ Patriot does not have an air conditioner installed, replacing the heater radiator will be easier compared to models with air conditioning - not only are both radiators in a pair, they are also sealed on top with a plastic casing with rivets.
Before installing the panel back, it is better to immediately check the new radiator for leaks with the engine running, so that you do not have to disassemble everything again. Well, now you know how to remove the stove on a UAZ Patriot with your own hands.
Design Features
The heater radiator is a steel base, inside of which there are aluminum plates. The engine coolant of the UAZ Patriot circulates through these plates. Due to the circulation of antifreeze or antifreeze through the radiator, it is heated and heat is released into the cabin. You cannot do without a fan, which pumps thermal air through the radiator into the car interior. Thus, we can say that the main part of the heater is the aluminum radiator. The photo below shows a view of this device for the UAZ Patriot SUV.
The service life of the heater radiator depends on many factors and is about 100,000 km. But if the stove in the cabin is used almost daily, then the service life of the radiator is reduced accordingly. In addition, it is important to replace the coolant in a timely manner, otherwise this may lead to failure of the entire cooling system. Let's look at what are the main malfunctions of the heater radiator on a UAZ Patriot SUV, and how they can be eliminated.
Disassembling the panel before removing the radiator
Possible faults
Every car owner knows the smell of antifreeze, especially when the vapors of this liquid predominate in the car interior. If you notice the smell of antifreeze in the interior of a UAZ Patriot, you should immediately find the leak and fix it. The most common causes of antifreeze leaks are faulty radiators or faucets. You can learn more about fixing a broken heater tap in the article about replacing the tap.
The malfunction of the radiator is primarily associated with the occurrence of microcracks in the design of the product plates. The microcrack increases over time, which entails an increasing leak of antifreeze from the cooling system. Cracks in the radiator can occur due to impacts, the formation of oxides, and also over time. If the product has leaked liquid, then this problem should be eliminated as soon as possible, otherwise there is a risk of a large amount of coolant leaking out of the system, which will lead to overheating and then jamming of the engine. In addition, all 10 liters of antifreeze will end up in the car, which will require cleaning work.
The stove radiator must be repaired; in particular, if microcracks occur, the damaged areas may be sealed. However, there is no guarantee that the product will last for a long time after this. Often, this kind of repair allows you to extend the life of the product for several months, after which new cracks and, accordingly, problems appear. Therefore, most car owners, having completed such a school, immediately resort to replacing the heater radiator with a new one. Let's take a closer look at how the replacement is carried out.
How to remove the stove on a loaf
You will be able to like, write comments and subscribe to channels.
View Queue
Queue
- delete everything
- Disable
By download date
Duration
Peculiarities
Arrange
- By relevance
- By download date
- By number of views
- By rating
Changing the stove on a loaf to a Zhiguli stove - Duration: 3:25
- 6 months ago
- 9,834 views
Heater motor from VAZ “Classics” to UAZ “Loaf” – Duration: 13:15
- 10 months ago
- 32
Stove repair in UAZ – Duration: 10:35
- 11 months ago
- 7
HOW TO REMOVE UAZ STOVE – Duration: 0:50
- 2 years ago
- 28,733 views
Cabin heater on UAZ 452, Bukhanka – Duration: 1:07
- 5 months ago
Cold air from the UAZ stove (loaf) – Duration: 5:14
- 12 months ago
- 8
Stove for UAZ Bukhanka, 452 and other “assembled” models – Duration: 1:48
- 8 months ago
- 10,252 views
Remaking the UAZ loaf stove using improvised means – Duration: 2:13
- 1 year ago
- 23
repair of the UAZ 469 stove, elimination of water leakage into the interior. – Duration: 18:35
- 8 months ago
- 4,772 views
Modernization of the UAZ 2206 stove – Duration: 1:13
- 2 years ago
- 25
UAZ heater radiator repair – Duration: 5:37
- 2 years ago
- 6
Life hack – Replacing the UAZ Bukhanka stove motor – Duration: 3:02
- 1 year ago
- 3
Right choice
In winter you want comfortable warmth in the cabin
To insulate the interior of the UAZ 469, it is recommended to replace the existing heater with a more powerful analogue. You can buy such a radiator from Zhiguli. This will require some modifications, including the faucet.
Installation of an additional heater in the rear of the cabin of the considered models is allowed. The choice of stove depends on the personal preferences, tastes and finances of the owner of a UAZ 469 or UAZ Hunter. In any case, the heater configuration changes. It can serve as:
- KITB.3221-8110010;
- heater NAMI-4 or NAMI-7,
- stove from Zhiguli.
Auto mechanics recommend installing a NAMI-4 autonomous heater on this model, which will run on gas fuel. It is taken into account that, regardless of the choice made, the stove must have a power of 2-4 kW. The advantage of such a system is autonomous temperature control in the cabin. Disadvantage: complicated installation.
Recommendations based on your search history
A short review of the UAZ 452 – Duration: 10:46
- 3 years ago
- 55,473 views
Niva thermostat on UAZ (loaf) UMZ 421 – Duration: 2:57
- 3 years ago
- 80,602 views
DIY gas stove in UAZ Bukhanka – Duration: 8:45
- 2 years ago
- 94
Flushing the stove and installing an additional pump through a reed switch into the cooling system. – Duration: 7:55
- 5 years ago
- 1 610
UAZ OVEN IS HEATING. – Duration: 14:57
- 5 years ago
- 72
Warm . like in Zhiguli – Duration: 2:34
- 3 years ago
- 280
Modernization of the UAZ stove – Duration: 5:10
- 3 years ago
- 48
- Subtitles
Heater heater electric motor – Duration: 15:30
- 4 years ago
- 300
UAZ Bukhanka installing springs on the rear axle – Duration: 7:40
- 2 years ago
- 184,272 views
The stove does not heat, what to do the main reasons. Simply about the complex – Duration: 17:26
- 3 years ago
- 1,301,741 views
Refinement of the UAZ stove, useful advice. – Duration: 1:48
- 2 years ago
- 65
Queries similar to how to remove a UAZ loaf stove
The Zhiguli stove is installed in the loaf. – Duration: 7:27
- 4 months ago
- 8,284 views
floor UAZ loaf (replacement and modernization) – Duration: 6:50
- 1 year ago
- 30
Heater from a foreign car for UAZ Bukhanka – Duration: 5:45
- 2 years ago
- 64